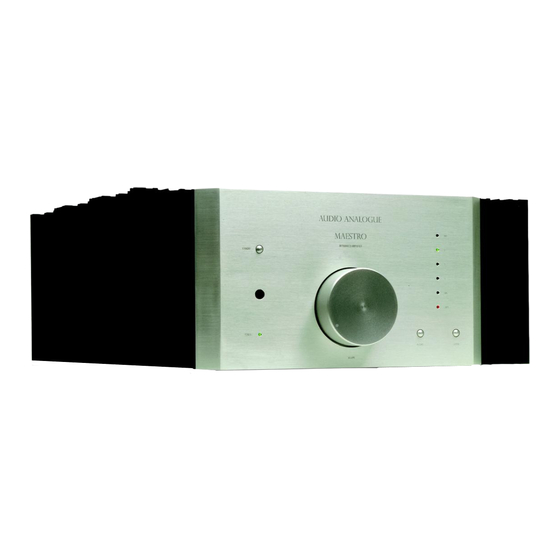
Summary of Contents for Audio Analogue Maestro soundpleasure MAESTRO INTEGRATED AMPLIFIER
- Page 1 AUDIO ANALOGUE soundpleasure MAESTRO INTEGRATED AMPLIFIER OWNER’S MANUAL MANUALE D’ISTRUZIONI...
- Page 2 Dear Audiophile, Congratulations and thank you for choosing the MAESTRO integrated amplifier. You have acquired an exceptionally musical, high-precision audio component, capable of extraordinary performance in any high-end system. Its refined circuit design yelds great sonic purity whereas its inborn elegance will ensure easy integration with the room’s furniture and with the rest of your system.
- Page 3 AUDIO ANALOGUE MAESTRO INTEGRATED AMPLIFIER OWNER’S MANUAL MANUALE D’ISTRUZIONI PAGE/PAGINA INSTALLATION INSTALLAZIONE CONTROL COMANDI CONNECTIONS COLLEGAMENTI REMOTE CONTROL TELECOMANDO OPERATION FUNZIONAMENTO SPECIFICATIONS SPECIFICHE TECNICHE TROUBLESHOOTING RICERCA GUASTI...
-
Page 4: Apertura Dell'imballo
INSTALLATION INSTALLAZIONE UNPACKING The shipping box should contain the following items apart from the amplifier and this APERTURA DELL’IMBALLO owner's manual: Remote control Two AAA size batteries AC power cord A pair of gloves Warranty certificate Please check if all has been included: if not, contact your dealer. After opening the box, carefully extract the amplifier wearing the gloves you will find inside the box and remove its protective plastic bag;... - Page 5 CONTROLS Standby Selector – Selettore di standby Remote IR Sensor – Sensore IR del telecomando COMANDI Aim remote control to this window to remotely operate the amplifier. Puntare il telecomando verso questa finestra per agire da lontano sui comandi dell’amplificatore. Power/Standby/Fault indicator - Spia di Alimentazione/Standby/Malfunzionamento Glows green when unit is powered up and operating.
- Page 6 Right Speaker Positive Output Uscita Positiva del Diffusore Destro Right Speaker Negative Output Uscita Negativa del Diffusore Destro Phono Ground – Massa Giradischi Connect the earth wire from the Turntable to this binding post Collegate il filo di terra del giradischi a questo morsetto Phono Input (PH1) Ingresso Giradischi (PH1) Maestro Integrated Amplifier incorporates an on-board phono preamplifier capable...
- Page 7 CONNECTIONS COLLEGAMENTI INPUT CONNECTIONS COLLEGAMENTI DEGLI INGRESSI TAPE OUT CONNECTION COLLEGAMENTO DELL’USCITA TAPE Audio Analogue fornito con l’amplificatore, per evitare lo scadimento delle prestazioni dinamiche o eventuali danni. Tape Input (6) Ingresso per il Registratore (6) Mains Switch Interruttore di Rete Tape Output Uscita per il Registratore Preamplifier Output...
-
Page 8: Collegamento Dei Diffusori
PRE OUT CONNECTION A “pre” output is available to use the Maestro Integrated Amplifier as preamplifier COLLEGAMENTO together with an external power amplifier, to drive an active subwoofer or to drive a DELL’USCITA PRE second power amp to multi-amp your speakers. Connect the power amplifier or the subwoofer inputs to the PRE OUT outputs. - Page 9 REMOTE CONTROL Press to select next source. Pressing IN+ when source 6 is selected gives source PH1. TELECOMANDO Premere per selezionare la sorgente successiva. Quando è selezionata la sorgente 6, la pressione di IN+ seleziona la sorgente PH1. Press to select previous source. Pressing IN- when source PH1 is selected gives source 6. Premere per selezionare la sorgente precedente.
-
Page 10: Operation
OPERATION Once all connections have been correctly made (please check twice!), make sure the volume control is turned completely anticlockwise then turn the unit on by pressing the FUNZIONAMENTO power switch on the rear panel. On the front panel, the power indicator will glow red to indicate that the unit is in standby. - Page 11 BURN-IN Long and exhaustive listening tests have shown that the best sonic performance is PERIODO DI RODAGGIO obtained after a "burn-in" period of at least 200 hours. Once the unit is fully "burnt-in", best sound quality can be obtained after about 40 minutes warming up. Lunghe e complete prove d'ascolto hanno dimostrato che le migliori prestazioni sonore si otterranno dopo un periodo di "rodaggio"...
-
Page 12: Safety Precautions And Maintenance
SAFETY PRECAUTIONS AND Avoid opening the unit - No further servicing than that described in this manual should MAINTENANCE be attempted by the user. Refer all servicing to authorised Audio Analogue dealers and qualified technicians. Do not expose the unit to heat - Keep it away from heat sources such as direct sun, cookers, radiators, etc.. -
Page 13: Integrated Amplifier
MAESTRO INTEGRATED AMPLIFIER SPECIFICATIONS Maximum Continuous Output Power SPECIFICHE TECNICHE (@ 20-100,000 Hz, both channels driven) Massima Potenza di Uscita (da 20 a 100khz, su entrambi i canali) 150 W (8 load, any phase) 300 W (4 load, any phase) 600 W (2 load, any phase) 150W (carico di 8, qualunque fase) 300W (carico di 4, qualunque fase) - Page 14 Separazione (a 1kHz, ingresso non utilizzato cortocircuitato) RL >100dB; LR >100dB Inputs Ingressi MM/MC Phono (PH1), Line 2/6 (Line 5 balanced) Outputs Uscite Tape Out, Pre Out Nominal voltage supply Tensione nominale di alimentazione 115VAC / 230VAC 50/60Hz (UK only) 240VAC 50/60Hz Max.
-
Page 15: Troubleshooting
TROUBLESHOOTING SYMPTOM Power led off and no sound Power cord incorrectly inserted and/or amplifier switched off CAUSE REMEDY Check that cord is inserted both in the amplifier’s mains socket and in the wall AC outlet and that the switch is in the “ON” position CAUSE Mains fuses burnt out REMEDY... -
Page 16: Ricerca Guasti
RICERCA GUASTI SINTOMO Led “Power” spento, nessun suono CAUSA Cavo di alimentazione non inserito correttamente e/o amplificatore spento RIMEDIO Controllare che il cavo di alimentazione sia collegato all’amplificatore e alla presa di corrente e che l’interruttore di rete dell’amplificatore sia in posizione “ON”... - Page 17 audio analogue Head Office / Ufficio commerciale: srl Via C. Bottai, 88B 51015 Monsummano Terme (PT) Italy tel. (+39) 572 954513 · fax (+39) 572 958099 e-mail: info@audioanalogue.com R&D Laboratory / Laboratorio ricerca e sviluppo: Via XX Settembre, 12 56017 San Giuliano Terme (PI) Italy www.audioanalogue.com info@audioanalogue.com soundpleasure...


Need help?
Do you have a question about the Maestro soundpleasure MAESTRO INTEGRATED AMPLIFIER and is the answer not in the manual?
Questions and answers