Table of Contents
Advertisement
For In Vitro Diagnostic Use
IVD
bdbiosciences.com
Part No. 643271 Rev. A
November 2007
BD Biosciences
San Jose, CA 95131-1807
USA
Tel (877) 232-8995
Fax (800) 325-9637
facservice@bd.com
Asia Pacific
Tel (65) 6-861-0633
Fax (65) 6-860-1593
BD FACSCalibur
Instructions For Use
BENEX Limited
EC
REP
Bay K 1 a/d
Shannon Industrial Estate
Shannon, County Clare
Ireland
Tel (353) 61-472920
Fax (353) 61-472546
Brazil
Tel (55) 11-5185-9995
Fax (55) 11-5185-9895
Canada
Toll Free (888) 259-0187
Tel (905) 542-8028
Fax (888) 229-9918
canada@bd.com
Europe
Tel (32) 2 400 98 95
Fax (32) 2 401 70 94
help.biosciences@europe.bd.com
Japan
Nippon Becton Dickinson
Company, Ltd.
Toll Free 0120-8555-90
Tel 81-24-593-5405
Fax 81-24-593-5761
Mexico
Toll Free 01-800-236-2543
Tel (52) 55 5999 8296
Fax (52) 55-5999-8288
Advertisement
Table of Contents
Troubleshooting

Related Manuals for BD FACSCalibur


Summary of Contents for BD FACSCalibur
- Page 1 BD FACSCalibur Instructions For Use For In Vitro Diagnostic Use bdbiosciences.com Part No. 643271 Rev. A November 2007 BD Biosciences BENEX Limited Canada Japan Nippon Becton Dickinson San Jose, CA 95131-1807 Bay K 1 a/d Toll Free (888) 259-0187 Company, Ltd.
- Page 2 BD Biosciences. The information in this guide is subject to change without notice. BD Biosciences reserves the right to change its products and services at any time to incorporate the latest technological developments. Although this guide has been prepared with every precaution to ensure accuracy, BD Biosciences assumes no liability for any errors or omissions, nor for any damages resulting from the application or use of this information.
- Page 3 History Revision Date Change Made 343931 Rev. A 6/05 Initial release 345967 Rev. A 8/05 Changed translation locations on first page of guide. 643271 Rev. A 11/07 Revised for Intel processor details.
-
Page 5: Table Of Contents
BD Multiset Preferences ........ - Page 6 BD FACS Loader Software ........
- Page 7 Setting Up Assay Settings ........Running BD FACSComp Software ......
- Page 8 HLA-B27 Calibration ........BD Multiset Troubleshooting ........
- Page 9 Appendix B: Technical Specifications Cytometer Specifications ........Environment .
- Page 10 BD FACSCalibur Instructions for Use...
-
Page 11: About These Instructions
BD FACStation™ software. BD Biosciences recommends that first-time users take advantage of operator training offered with the sale of every new instrument. The BD FACSCalibur Instructions for Use assumes you have a working knowledge of the Mac® OS X operating system. Conventions The following conventions are used in these instructions. - Page 12 Print” means to choose Print from the File menu. Command-X Keyboard shortcuts use the Command key ( ) in combination with another indicated keystroke. For example, Command-K means to hold down the Command key while pressing the letter k. BD FACSCalibur Instructions for Use...
-
Page 13: Chapter 1: Introduction
Introduction The BD FACSCalibur flow cytometer identifies and enumerates lymphocyte subsets in human cells in suspension. -
Page 14: System Components And Theory Of Operation
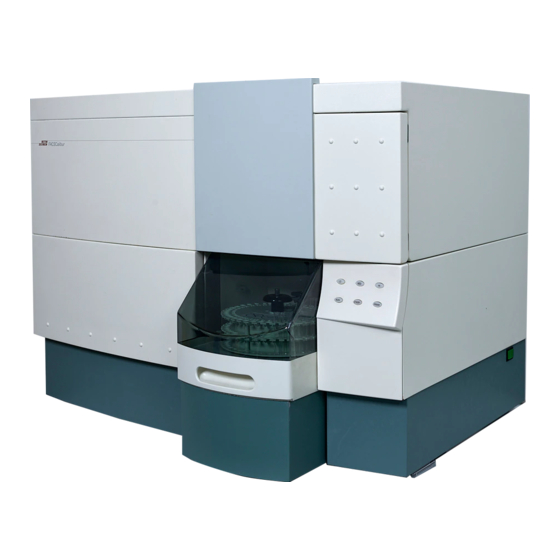
System Components and Theory of Operation The BD FACSCalibur system consists of a flow cytometer and BD FACStation workstation (Figure 1-1). An optional, automated sample loader is also available. Figure 1-1 BD FACSCalibur system with BD FACS Loader option BD FACSCalibur Instructions for Use... -
Page 15: Cytometer Components
Cytometer Components Figure 1-2 BD FACSCalibur sensor unit sample injection port fluidics fluidics control panel drawer power switch Fluidics Components and Theory of Operation You install tubes onto the sample injection port (SIP). Samples are carried to the flow cell through a stainless steel sample injection tube (SIT) surrounded by a droplet containment sleeve. - Page 16 STNDBY (standby) stops sheath flow to conserve fluid and lowers the blue laser power to prolong laser life. • PRIME removes bubbles from the flow cell primarily during troubleshooting. At completion, the instrument goes into standby mode. BD FACSCalibur Instructions for Use...
- Page 17 The fluidics drawer holds the sheath and waste reservoirs. Both reservoirs have level sensors that indicate fluid levels via BD CellQuest™ Pro software. Figure 1-5 Fluidics Drawer vent valve ENT AL E metal bracket PRESSTO RELIE E PRESSURE level sensor connectors...
- Page 18 Optics Components and Theory of Operation The standard BD FACSCalibur system includes a 15-mW, 488-nm, argon-ion laser and detectors for three fluorescent parameters. The FL4 option provides a second 635-nm, red-diode laser and an additional detector. Laser light is focused onto the flow cell by a focusing lens.
- Page 19 Figure 1-7 Optics system with FL4 option 488/10 530/30 585/42 90/10 beam splitter DM 560SP 661/16 DM 640LP half mirror 670LP fluorescence collection lens focusing lens beam 488/10 combiner FSC diode flow cell 488-nm ~635-nm blue laser red diode laser Chapter 1: Introduction...
-
Page 20: Loader (Optional)
Loader (Optional) The BD FACS™ Loader option automates acquisition from tubes. It mounts directly on the flow cytometer. A cover fits over the drawer to protect you from moving parts. Figure 1-8 Tube loader components tube lifter rack spindle optical... - Page 21 Keypad The keypad communicates with the Loader via a SCSI cable. Use the keypad to turn the Loader on and off, and to operate it manually. (Keypad keys are disabled during a Worklist run.) Each time the Loader is turned on and the cover is in place, the Loader performs an initialization scan.
-
Page 22: Power Controls
(Figure 1-11). Figure 1-10 Instrument main power switch (115 VAC) Main power switch Connector for GPIO cable Connector for optional BD FACS Loader cable Figure 1-11 Transformer main power switch (230 VAC) BD FACSCalibur Instructions for Use... -
Page 23: System Requirements
(optional) BD FACS Loader for automated sample acquisition Software • Mac OS X - see the Read Before You Install file on the BD FACStation CD for specific version requirements. • BD FACStation software version 6.0 or later (See Chapter 2 for an... - Page 24 BD FACSCalibur Instructions for Use...
-
Page 25: Chapter 2: Bd Facstation Software
BD FACStation Software The following come with the BD FACStation system: BDPAC software for installing required startup files or BD Inits BD CellQuest Pro software for general data acquisition and analysis BD FACSComp™ software for instrument calibration and quality control (instrument settings can also be generated using BD CellQuest Pro or BD Multiset™) - Page 26 This figure shows the workflow for running samples with BD FACStation software: perform optimize acquire & start up shut down settings analyze data To create a shortcut for launching applications, drag the software icon from the Finder window to the Dock. You can then launch the software by clicking its icon in the Dock.
-
Page 27: Bdpac Software
BDPAC Software BDPAC software installs required startup files, or BD Inits, needed for acquisition. Update BDPAC information: • if you reinstall BD FACStation software • if you connect your BD FACStation computer to a different cytometer • if you upgrade your cytometer with new options Quit BD CellQuest Pro software, if it is running. -
Page 28: Bd Cellquest Pro Software
Shift as you select.) To make an object active, click inside its border: the object’s border turns blue. An active object is the target of any chosen commands. Only one object can be active at a time. BD FACSCalibur Instructions for Use... - Page 29 Text tool—create or edit free text Arrow tool—draw arrows, starting from an empty area of the Experiment document Expression Editor tool—create mathematical expressions using statistical results Calculator tool—recalculate data when Auto Recalculate (Gates menu) is turned off Chapter 2: BD FACStation Software...
-
Page 30: Bd Cellquest Pro Files
BD CellQuest Pro Files File Type Description Default Name Experiment BD CellQuest Pro file containing any subset Untitledn (the software document of user-defined plots, regions, gates, adds a number to each markers, statistics, tube lists in Browser, subsequent file) acquisition settings, calculated expressions,... -
Page 31: Bd Facscomp Software
BD FACSComp Software Use BD FACSComp software to monitor instrument performance, and to automatically set up the instrument for two-, three-, and four-color immunophenotyping of human cells. Figure 2-1 BD FACSComp application window icon bar The icon bar shows where you are in the run—the icon for the current view is highlighted. - Page 32 Observe a Sensitivity Test for each parameter. Observe HLA-B27 calibration, when the assay is selected. View or print the status of samples run and files saved. Check and adjust instrument settings, if necessary, using control samples. BD FACSCalibur Instructions for Use...
-
Page 33: Bd Facscomp Preferences
Use Page Setup to set page size and orientation and Print Setup to set printer-specific options. Use LJ Data to set the number of BD FACSComp runs to save in each Levey-Jennings file. The file is tab- or comma-delimited depending on your Export preference choice. -
Page 34: Bd Facscomp Files
Summary Report file (at the Set Up view), a Levey-Jennings Database file (in preferences), and an Optimization file (at the Optimization view). A calib file is created each time BD FACSComp runs to completion. Calib files are BD instrument settings files with a keyword for overall Sensitivity Test results (TRUE if all parameters pass;... - Page 35 Instrument settings file with Calib File.LNW BD Files > file results from LNW assay Instrument Settings Files Use for BD Multiset and BD CellQuest Pro LNW applications. Instrument settings file with Calib File. BD Files > PerCP-Cy5.5 results from LNW LNWPerCP-Cy5.5...
- Page 36 BD Files > Summary files showing adjusted FL1 and sum, FACSComp Report SSC settings for HLA-B27 DDMMYY.B27 Files >dated testing sum.pdf folder from day assay was run Two files are produced for each HLA-B27 calibration. BD FACSCalibur Instructions for Use...
- Page 37 Optimized instrument settings MultiTEST.opt, BD Files > file TriTEST.opt, Instrument Simultest.opt Settings Files Figure 2-2 Files in BD Applications > FACSComp folder LJ data files Target files and logs Chapter 2: BD FACStation Software...
- Page 38 Figure 2-3 Files in BD Files > FACSComp Files folder dated report folder daily summary reports calibration, optimization files BD FACSCalibur Instructions for Use...
-
Page 39: Bd Multiset Software
BD Multiset Software Use BD Multiset software to identify lymphocytes and lymphocyte subsets in samples stained with BD Tritest and BD Multitest reagents, and to acquire and analyze samples stained with lyse/wash or lyse/no-wash user-defined reagents (1- through 4-color). Figure 2-4 BD Multiset application window icon bar The icon bar shows where you are in the run—the icon for the current view is... - Page 40 View automatic analysis while in process. View or print results for individual sample tubes. View or print averaged results for a sample and reference range values. View or print the status of all samples run and files saved. BD FACSCalibur Instructions for Use...
-
Page 41: Bd Multiset Preferences
Print Setup to set printer- specific options. When the Data Source is From Cytometer, use Panels to choose a default panel (Run Fixed Panel) that will appear at the Samples view for all samples in the run. Chapter 2: BD FACStation Software... - Page 42 Use LJ MSET Data to set the number of BD Multiset runs to save in each Levey- Jennings file. The file is tab- or comma- delimited depending on your Export preference choice.
-
Page 43: Bd Multiset Tools
Use Panel Tools to create custom reagent panels. Nine predefined control panels and 4 non-control panels are provided. Use control panels to run BD Trucount Low, Medium, and High Control beads. You cannot create additional control panels. Chapter 2: BD FACStation Software... - Page 44 (minimum number of events to acquire), and FL Parameter Info (antigen or fluorochrome for each parameter) for BD-defined reagents. Click Revert to BD Defaults... to restore the original values. Default values are the BD- preferred values. Use Reagent Tools to define...
-
Page 45: Bd Multiset Files
BD Multiset Files BD Multiset software creates the following file types. Default Storage File Type Description Default Name Location Schedule BD Multiset file containing DDMMYY.sch BD Applications document entries from Sign In, Set Up, > MultiSET Test Prefs, and Samples views Folder and preferences. - Page 46 Prefix specified in Set Up view, nn = entry number at Samples view. Order set in Set Up view. c. Refer to: Data file standard for flow cytometry. Data File Standards Committee of the International Society for Analytical Cytology. Cytometry. 1990;11(3):323–332. BD FACSCalibur Instructions for Use...
-
Page 47: Bd Hla-B27 Software
BD HLA-B27 Software Use BD HLA-B27 software to classify a sample as BD HLA-B27 negative or positive. This classification is based on the measured mean fluorescence intensity (MFI) compared to a predetermined decision-marker setting encoded in the suffix of the reagent antibody lot number. - Page 48 Launch and run BD FACSComp software. Enter sample-specific information. Observe data collection in dot plots. View automatic analysis while in process. View or print results for individual sample tubes. View or print the status of all samples run and files saved.
-
Page 49: Bd Hla-B27 Preferences
Use Columns to display and name up to 3 custom columns in the Samples view. Column information is shown at the Lab Report and Summary views, is stored in data files, and can be included in exported documents. Chapter 2: BD FACStation Software... -
Page 50: Bd Hla-B27 Files
Refer to: Data file standard for flow cytometry. Data File Standards Committee of the International Society for Analytical Cytology. Cytometry. 1990;11(3):323–332. NOTICE: Only BD HLA-B27 FCS data files can be analyzed by BD HLA-B27 software, including files created by HP HLA-B27 software and translated using BD FACS™ Convert. -
Page 51: Bd Facs Loader Software
BD FACS Loader Software BD Worklist Manager controls BD acquisition and analysis software (BD CellQuest Pro, BD Multiset, or BD HLA-B27). BD Loader Manager controls Loader hardware. Both interact to control the flow cytometer for automated sample handling. Worklist Manager... - Page 52 The icon bar shows where you are in the run—the icon for the current view is highlighted. Do the following at each view. Sign in as the operator. Define run-specific information. Launch and run BD FACSComp software. Identify samples. View or print the status of samples run and files saved. BD FACSCalibur Instructions for Use...
-
Page 53: Worklist Manager Preferences
All entries from the Sign In, Set Up, DDMMYY.wrk and Worklist views, and preference (ie, 150405.wrk) settings Summary Report PDF file containing list of samples DDMMYY.sum run, data files saved, and run status (ie, 150405.sum) Chapter 2: BD FACStation Software... - Page 54 BD FACSCalibur Instructions for Use...
-
Page 55: Chapter 3: Starting Up
Starting Up Turn on the cytometer and the Loader (if applicable). To ensure proper initialization between the cytometer and the computer, always turn on the cytometer before you turn on the computer. Turn on the computer, choose your user ID, and enter your password. Fill the sheath reservoir to 75% capacity (page 56). -
Page 56: Filling The Sheath Reservoir
Slide the metal bracket away from you, and lift up to remove it. Remove the sheath reservoir. Unscrew the cap assembly and remove it. Fill the reservoir to 75% capacity. See page 214 for recommended fluids BD FACSCalibur Instructions for Use... - Page 57 Do not overfill the sheath reservoir. Pressure on an overfull tank can force fluid into the air supply tubing, preventing proper pressurization. Furthermore, because of the additional bleach in the waste reservoir, filling the sheath to maximum capacity can overflow the waste. Replace and tighten the cap assembly.
-
Page 58: Priming The Fluidics
To prevent exposure to biohazardous agents, expose waste container contents to bleach (10% of total volume) before disposal. Dispose of waste in accordance with local regulations. Use proper precaution and wear suitable protective clothing, eyewear, and gloves. BD FACSCalibur Instructions for Use... - Page 59 Figure 3-2 Fluidics drawer ENT AL E PRESSTO RELIE E PRESSURE level sensor line waste tubing SALINE waste air vent tubing FILTER waste reservoir sheath filter sheath filter air vent tubing sheath filter pinchcock Slide out the fluidics drawer. Disconnect the waste tubing (orange) and the waste air vent tubing (white) from the instrument.
- Page 60 BD FACSCalibur Instructions for Use...
-
Page 61: Chapter 4: Instrument Qc
Instrument QC To ensure the flow cytometer provides consistent results, run BD FACSComp software with BD Calibrite beads at the start of each workday. The software adjusts detector voltages to place beads at target channel values and performs a Sensitivity Test to compare signal separation for each parameter to an expected minimum value. -
Page 62: Setting Up For Qc
At the Set Up view under Assay Selection, click the checkbox for each required assay. Running the wrong BD Calibrite beads for the selected assay will result in inaccurate setup results. Make sure the assay corresponds with the FL3 beads to be run. - Page 63 For lyse/wash (LW) or lyse/no-wash (LNW) assays, the software automatically performs 2-, 3-, or 4-color setup based on the BD Calibrite bead lot IDs and the bead populations detected. For consistency, run daily QC using the same assay and the maximum number of colors needed.
- Page 64 Under Lyse/Wash or Lyse/No-Wash settings, if you know your application’s usual threshold value or gain, enter them in the corresponding fields. The values are not used by BD FACSComp software, but are saved in the corresponding calibration file. When the settings are downloaded to the cytometer, these values can help facilitate setup.
-
Page 65: Editing Target Values
Editing Target Values When BD Calibrite bead raw material changes, BD Biosciences will notify you that you need to input new target values in BD FACSComp software. Do not change the values unless notified. Choose FACSComp > Edit Target Values. -
Page 66: Running Bd Facscomp Software
The following section describes how to run with the Loader. To run manually, see page 69. Acquiring with the Loader Choose FACSComp > Preferences and click the Loader icon. Select the Run With The Loader checkbox. BD FACSCalibur Instructions for Use... - Page 67 LW and LNW not containing PerCP-Cy5.5 mixed beads for LW PerCP-Cy5.5 and LNW PerCP-Cy5.5 BD HLA-B27 beads 5–38 optimization samples BD FACS™ Clean solution or 10% bleach solution (3 mL) DI water (3 mL) Chapter 4: Instrument QC...
- Page 68 OK in the software. Do not open the Loader cover when the software is running. To access the rack, first click Open Cover in BD FACSComp software, and open the cover only when the following message appears:...
-
Page 69: Acquiring Manually
On the cytometer, press RUN and HI. At the Set Up view, click Run; at the PMT view, click Start. BD FACSComp software acquires 5,000 events and sets a singlet gate for FSC intensity. After the gate has been set, the software starts automatic PMT voltage adjustments. - Page 70 If PMTs cannot be set automatically, see page 195 for troubleshooting. The software counts down for 5 seconds. Unless you pause, it proceeds to the Compensation view (3-color compensation), or time-delay calibration (4-color setup). BD FACSCalibur Instructions for Use...
- Page 71 If necessary, click Manual to adjust settings manually. Detectors/Amps controls are enabled and Target Values appear in a separate window. Use the controls to set PMTs to ±2 channels of the target values for fluorescence PMTs, or ±5 channels for SSC. •...
- Page 72 Time-Delay Calibration (4-Color Setup) If APC beads were detected, BD FACSComp software performs time-delay calibration after the PMTs are set. Leave the unlabeled and APC beads on the cytometer while it is in progress. If calibration is successful, the following message appears, and the software proceeds to the Compensation view.
- Page 73 If you do not select an option within 5 seconds, the software automatically proceeds to the Compensation view. If you proceed with compensation after a failed time-delay calibration, the compensation values you obtain for FL3–%FL4 and FL4–%FL3 might vary substantially. If compensation appears incorrect during optimization, verify time-delay calibration.
- Page 74 BD FACSComp software adjusts compensation until the target mean difference (or target mean for FL4) is achieved. If APC beads are not detected, 3-color setup is performed. If PerCP beads are not detected, 2-color setup is performed. (You need at least 3 colors to perform PerCP-Cy5.5 assays.)
- Page 75 After manual adjustment: • Click Initial Comp and then Start to revert to the automatic settings, or • Click Next to save settings and proceed. Note the following about compensation settings: • Fluorescence mean channel differences can fluctuate slightly after compensation values are set.
- Page 76 (or PerCP-Cy5.5) is encoded in each bead lot ID suffix for a particular parameter. If a parameter’s channel separation is greater than or equal to the minimum separation, the parameter passes the Sensitivity Test. When complete, calibration files are saved in the BD Files > Instrument Settings Files folder. •...
-
Page 77: Viewing Results
Side Scatter Sensitivity Test The cytometer produces an electronic test pulse in the FSC parameter. BD FACSComp software acquires 10,000 events, locates the upper test pulse peak channel, then acquires data for the side scatter Sensitivity Test. The separation between noise and the side scatter signal of the beads is calculated. - Page 78 If this was the last assay, click Set Up to return to the Set Up view. • Click Optimization (enabled after the last assay) to optimize settings. See page 79. • Click Quit to quit the software. BD FACSCalibur Instructions for Use...
-
Page 79: Optimizing Settings
Optimizing Settings Because leucocytes have different optical properties than BD Calibrite beads, it is important to optimize instrument settings for cell samples. Optimize settings for 2-color setup using a blood sample stained with any combination of reagents that identifies separate non-overlapping cell populations and stains brightly, such as FITC- and PE-labeled monoclonal antibodies. - Page 80 • Click Live Gate. • Move the cursor to the plot and click to set each point. • Click at the original point to close the gate. • To redraw, click Live Gate and repeat. BD FACSCalibur Instructions for Use...
- Page 81 Click Rename to save the file with a new name. • Click Overwrite to use the most recent optimized settings. By default, settings are saved in BD Files > Instrument Settings Files. At the Optimization view, click Quit. Chapter 4: Instrument QC...
-
Page 82: Downloading Instrument Settings
Do the following to download different instrument settings for optimization. Choose Cytometer > Instrument Settings. Click Open. Navigate to the required instrument settings file (BD Files > Instrument Settings Files), and double-click the file icon. Any FCS file can be used as an instrument settings file. -
Page 83: Logging Qc Results
Logging QC Results To maintain a log of QC results: • Print the Summary Report. • Save an electronic file of the Summary Report. • Copy results from the Summary Report to a QC log such as the following example. •... -
Page 85: Chapter 5: Running Samples Manually
Loader, see Chapter 6. Before you begin, start up the cytometer (page 55) and perform instrument QC (page 61). • Running Samples with BD CellQuest Pro Software on page 86 • Running Samples with BD Multiset Software on page 121 •... -
Page 86: Running Samples With Bd Cellquest Pro Software
Running Samples with BD CellQuest Pro Software This section describes how to optimize settings and acquire and analyze data using BD CellQuest Pro software. As an example, data will be acquired and analyzed for a peripheral blood sample stained with 3- or 4-color reagents. For other analysis methods, refer to the information provided by the reagent manufacturer. - Page 87 Choose Acquire > Connect to Cytometer The Acquisition Control dialog and Acquisition Browser appear. When you click the Experiment document window, the Browser window moves to the back. To view a hidden Browser window, choose Windows > Browser:Title X (where Title X is the name of the Experiment document).
- Page 88 These plots change from an acquisition plot to an analysis plot after data acquisition is complete. The data from the file just acquired appear in the plot with any formatting defined during acquisition, for example, regions, markers, or colors. BD FACSCalibur Instructions for Use...
- Page 89 Restoring Calib Settings Use BD FACSComp calibration files as a starting point to optimize settings in BD CellQuest Pro software. Choose Cytometer > Instrument Settings. Click Open. Navigate to BD Files > Instrument Settings Files, and double-click the Calib File icon.
-
Page 90: Optimizing Settings
For example, the following plots show cells before and after optimization of FSC and SSC settings. Usually, Calib File settings need minimal adjustment to place lymphocytes on scale. Figure 5-1 FSC/SSC optimization population of interest unadjusted adjusted BD FACSCalibur Instructions for Use... - Page 91 To quickly update the display during optimization, click Pause and then Restart in Acquisition Controls. Install the isotype control tube on the SIP. Press RUN and the appropriate flow rate button. Use MED to conserve sample. Ensure the Acquisition Control Setup checkbox is checked, and click Acquire.
- Page 92 Adjust the FSC Threshold Value to remove most of the debris without cutting off the lymphocytes. Click Pause, and then Abort in Acquisition Controls. (Optional) Remove the isotype control tube from the SIP. Remove the tube to conserve sample. BD FACSCalibur Instructions for Use...
- Page 93 Gating the Population of Interest Cell populations in a sample can have different light scatter and autofluorescent properties. By gating the population of interest, fluorescence detector settings will account for the autofluorescence and nonspecific binding of these cells. Create a polygon region around the lymphocyte population in the FSC vs SSC plot.
- Page 94 The contents of the Inspector change, depending on the object(s) selected. In this case, the Inspector shows dot plot options. Choose G1 = R1 from the Gate pop-up menu. The plots change to show only events that are in gate G1 (lymphocytes). BD FACSCalibur Instructions for Use...
- Page 95 Adjusting Fluorescence Detector Settings Fluorescence detector settings are adjusted to remove background fluorescence. Background fluorescence can result from nonspecific binding of antibodies in the isotype control and cell autofluorescence. Verify that the Mode is set to Log for FL1, FL2, FL3 and FL4 in the Detectors/Amps window.
- Page 96 Controls. If necessary, adjust FL2–%FL1 to place FITC-positive events in the lower- right quadrant of the FL1 vs FL2 plot. unadjusted adjusted Compare the mean channel of the FL1-positive population with that of the negatives. BD FACSCalibur Instructions for Use...
- Page 97 Remove the FITC tube and place the PE control tube on the SIP; click Pause and then Restart. If necessary, adjust FL1–%FL2 to place PE-positive events in the upper-left quadrant of the FL1 vs FL2 plot. unadjusted adjusted If necessary, adjust FL3–%FL2 to place PE-positive events in the lower- right quadrant of the FL2 vs FL3 plot.
- Page 98 Optimized settings can be saved to an instrument settings file that can be restored to the cytometer when you run lysed whole blood samples again. To restore settings, see page 89. Choose Cytometer > Instrument Settings, and click Save. BD FACSCalibur Instructions for Use...
-
Page 99: Acquiring Data
In the location dialog, enter a name of up to 31 characters, choose a file location, and click Save. Click Done. Acquiring Data Before you save data, specify the file name and storage location, acquisition and storage settings, panel name and parameter labels (if applicable), and tube- specific settings (if applicable). - Page 100 Click the Change button next to Directory; create or choose a data storage folder in the location dialog that appears. BD recommends you do not save files directly to an external storage device such as a zip drive, file server, or remote computer. Save files to the hard drive and move them later.
- Page 101 Specifying Acquisition and Storage Settings Use Global Settings to define the number and type of events to acquire and store. Global settings apply to all tubes in an Experiment document that do not have tube-specific settings (page 108). Global settings are defined in the Acquisition & Storage dialog or Acquisition &...
- Page 102 (Event Count), time, or whichever comes first. • The Storage Gate determines which events are saved in the data file. (Note that the storage gate does not affect which events can be shown in acquisition plots.) BD FACSCalibur Instructions for Use...
- Page 103 For example, make the following selections. • For Acquisition Gate, leave the defaults Accept and All. • For Collection Criteria, enter 2,000 and choose G1 = R1. • For Storage Gate, leave All. • Keep the Resolution at 1024. With these choices, data collection will stop when 2,000 events are counted within the G1 gate, but all data will be saved.
- Page 104 (page 103). Define a panel if you acquire the same reagent combination for multiple experiments or donors. Choose Acquire > Edit Panels. Click Add. Enter a name for the new panel (up to 32 characters). BD FACSCalibur Instructions for Use...
- Page 105 Click the selection icon to select the panel, and click Add above the Tubes list. selection icon Enter a name for the tube (up to 32 characters). Click the selection icon to select the tube, and choose parameter labels. Click the pop-up control next to a parameter name and choose a label from the menu that appears, or enter a custom label.
- Page 106 Load Tubes from Panel; select the panel you just created. The Acquisition Tube List name changes to the name of the selected panel. Click the triangle next to the panel folder to display the tubes. BD FACSCalibur Instructions for Use...
- Page 107 On your Experiment document, create the required number of plots; change all plots to Acquisition -> Analysis. • Press Command-A. • In the Inspector, choose Acq -> Analysis from the Plot Type menu. Select one or more plots in the Experiment document or Acquisition Browser. To display plots in the Browser, click the disclosure triangle next to the Acquisition Plots folder.
- Page 108 Specifying Tube-Specific Settings (Optional) BD CellQuest Pro software allows you to associate custom instrument settings or acquisition and storage settings with any tube in the Browser. When no tube- specific settings exist, the tube will be acquired using global acquisition and storage settings or the current instrument settings for the Experiment document.
- Page 109 Double-click the Acquisition & Storage Settings icon. In the Inspector, make any necessary changes to the current settings. Repeat steps 1 through 3 for other tube-specific settings. Save the Experiment document. Adding Tube-Specific Instrument Settings Create tube-specific instrument settings when you want to specify different settings for certain tubes in a panel.
-
Page 110: Saving Data
Choose Acquire > Counters to display the Counters window, and drag the window to the side. The Counters window has two sizes. Click the zoom button to enlarge the window if you are acquiring gated data. zoom button Deselect the Setup checkbox in Acquisition Controls. BD FACSCalibur Instructions for Use... - Page 111 Verify the following: • The acquisition tube list contains all tubes in the proper order. If not, reorder the tubes or add or delete tubes. • The pointer is indicating the first tube to acquire. • Parameter labels in the upper pane of the Browser are correct. Press RUN, and install the first sample tube on the SIP.
- Page 112 SIP the tube support arm is under the tube the tube is fully pressurized • For Status = READY and no events displayed, see Acquisition Troubleshooting on page 191. BD FACSCalibur Instructions for Use...
-
Page 113: Analyzing Data
The following sections demonstrate analysis features using sample data in the BD Applications > BD CellQuest Pro folder. The Sample Files folder contains 12 data files from 3 samples. Each sample was stained with the following 4-tube... - Page 114 • Click the File pop-up control, and choose Select File. • Navigate to BD Applications > BD CellQuest Pro > Sample Files, and double-click NORM001. The plot shows data from the selected file. •...
- Page 115 Your dot plot and Inspector should look similar to Figure 5-3. Figure 5-3 Analysis dot plot with Snap-To lymphocyte region Create an Analysis FL1 vs FL2 contour plot showing lymphocyte-gated data from NORM001. • Choose Plots > Contour Plot. (This creates a plot the same size as the dot plot.) •...
- Page 116 Drag to set the right edge of the marker; release the mouse to complete it. Draw a second histogram marker from the upper boundary of marker 1 to the end of the histogram plot. Your histogram plot and Inspector should look similar to Figure 5-5. BD FACSCalibur Instructions for Use...
- Page 117 Figure 5-5 Analysis histogram with histogram markers Displaying Statistics Select the contour plot, and choose Stats > Quadrant Stats. The Quadrant Statistics view appears showing data from NORM001. Select the Quadrant Statistics view and choose Stats > Edit Quadrant Stats. Deselect all choices except File Name, Gate, Parameters, Quadrant Label, Percent of Gated, and Percent of Total;...
- Page 118 The changes you made in the Edit Quadrant Statistics dialog also apply to the histogram statistics. Move the statistics view next to the histogram. Save the Analysis document. Print the results for NORM001. Choose File > Print One to print a single copy. BD FACSCalibur Instructions for Use...
- Page 119 Analyzing Groups of Files Use the batch analysis feature to analyze a group of data files in an Analysis Experiment document. Batch analysis allows you to increment files, pause between data sets, print automatically, and export statistics to a spreadsheet file. Choose Batch >...
- Page 120 Click OK in the Batch Setup dialog. Choose Batch > Run. A batch control window appears. To interrupt batch analysis, click stop, pause, or resume anytime during the run. pause stop resume A message appears when the batch run is finished: BD FACSCalibur Instructions for Use...
-
Page 121: Running Samples With Bd Multiset Software
Running Samples with BD Multiset Software This section describes how to launch and run BD FACSComp within BD Multiset software, and how to acquire and analyze data. Setting Up Launch BD Multiset software: At the Sign In view, enter at least the Operator name and click Accept. - Page 122 For Custom, enter a prefix in the box. • To insert the schedule entry number before the prefix (eg, 01JaneDoe.lab), select Add Entry Number as Prefix. When deselected, the entry number appears after the prefix: JaneDoe01.lab. BD FACSCalibur Instructions for Use...
- Page 123 Under View Reports, select how long to view reports. Under Automatic Saving Options, click the checkbox for each file you want to save; click the Location button to change the default name or storage location. A dialog appears where you can enter a new name or different storage location.
- Page 124 Otherwise, click Skip FACSComp to proceed to the Samples view where you can retrieve saved settings and download them to the cytometer (page 128). At the BD FACSComp Set Up view under Assay Selection, select only the Lyse/No-Wash (LNW) assay. Prepare BD Calibrite beads and perform instrument QC.
- Page 125 SSC and FL3 threshold settings. For details on optimizing settings in BD FACSComp software, see page 79. If running both BD Tritest and BD Multitest samples, optimize once with BD Multitest samples. If your BD Tritest panel includes both CD4/CD8/CD3 and CD3/CDX/CD45, optimize using the CD4/CD8/CD3 tube.
- Page 126 Entering Test Preferences At the Test Prefs view, you make analysis and reporting choices. You can also access the Lot IDs dialog to enter BD Trucount bead information. Under Physicians Report Choices, select subsets to show on the Physician Report.
- Page 127 All samples are listed in the Summary Report with the specified ID(s). You must enter information in the specified fields at the Samples view. If you are using BD Trucount tubes, click Lot IDs, and click Absolute Count Beads. Chapter 5: Running Samples Manually...
- Page 128 Enter the Lot ID and Beads/Pellet information from the BD Trucount foil pouch label, and click Save. Make sure the correct information is entered per run. This information is critical for calculating accurate absolute counts. Only one lot ID can be entered per Schedule document.
- Page 129 For accurate calculation of absolute counts when using hematology inputs, CD45 must be used for FL3. NOTICE Do not enter information in the WBC or Lymph fields if one or more reagents in the panel is used with BD Trucount tubes. Chapter 5: Running Samples Manually...
-
Page 130: Acquiring Data
If you run samples requiring different optimized settings, download settings at the Phys Report view between panels. • Navigate to the BD Files > Instrument Settings Files and double-click TriTEST.opt or MultiTEST.opt. (You can also use Calib file.LNW or any saved instrument settings file.) •... - Page 131 (Events Preferences). The software then checks to see if the minimum target population events (Reagent Tools) have been collected. If the target number has been reached, BD Multiset proceeds with analysis. If the target number has not been reached, the software calculates the additional number of events needed.
- Page 132 Install the first sample tube of the next panel on the SIP; repeat steps 4 through 10 until all samples have been run. Review the Summary Report (page 137). Install a tube of DI water on the SIP, and press STNDBY. BD FACSCalibur Instructions for Use...
-
Page 133: Reviewing Lab Reports
If an insufficient number of lymphocytes were collected (ie, less than the BD or user-defined criteria), the sample must be reacquired with a new FL3 threshold to increase the number of collected cells. The new threshold is acceptable as long as it does not cut through the lymphocyte population. - Page 134 Click around the population of interest until the region is complete. • Close the region by double-clicking the last vertex or clicking the first. Click the close box. Select any attractor gate to adjust it. BD FACSCalibur Instructions for Use...
- Page 135 You can move, resize, and reorient attractors, but you cannot delete them or add new ones. • To move an attractor, drag the center point. • To change the orientation and length, drag an endpoint. • To change the size, drag an edge. Click Analyze.
- Page 136 Test Prefs. If more than one reagent in a panel provides a particular subset result, the average subset result is reported. The report also shows multi-tube QC results, and has a field where you can enter comments. BD FACSCalibur Instructions for Use...
-
Page 137: Analyzing Data
Analyzing Data BD Multiset software can analyze FCS 2.0 data files acquired in BD Multiset, BD CellQuest version 3.1 or later, or BD CellQuest Pro software. The files must be 1024 resolution, with 3–6 parameters (FSC, SSC, FL1-H, FL2-H, FL3-H, FL4-H). - Page 138 BD Multiset software. If there is no match, all files are enabled. Select only the first tube’s file in each panel to add all files for the panel.
-
Page 139: Running Samples With Bd Hla-B27 Software
Phys Report view for each panel, and the Summary view for the run. Running Samples with BD HLA-B27 Software This section describes how to launch and run BD FACSComp within BD HLA-B27 software, and how to acquire and analyze data. - Page 140 Under View Reports, select how long to view reports. Under Automatic Saving Options, click the checkbox for each file you want to save; click the Location button to change the default name or storage location. BD FACSCalibur Instructions for Use...
- Page 141 146. • When Data Source = From Cytometer, the FACSComp view appears showing the date, time, and status of the most recent BD FACSComp and HLA-B27 calibration. BD Biosciences recommends rerunning calibration if calibration files are older than 24 hours.
- Page 142 Otherwise, click Skip FACSComp to proceed to the Samples view (page 143). At the BD FACSComp Set Up view under Assay Selection, select the checkboxes for Lyse/Wash and HLA-B27 Calib. Enter BD Calibrite bead lot IDs from the sticker packaged with the BD Calibrite Beads kit.
- Page 143 FITC-, and PE-labeled beads. Run HLA-B27 calibration with BD HLA-B27 beads. When complete, quit BD FACSComp software. • If both calibrations are successful, the BD HLA-B27 Samples view appears. • If either calibration is unsuccessful, the BD HLA-B27 FACSComp view appears.
-
Page 144: Acquiring Data
Make sure the run order corresponds with the Samples view. For acquisition with the Loader, see Chapter 6. Click Run Tests at the Samples view. BD HLA-B27 instrument settings are automatically sent to the cytometer. The Acquisition view appears and events appear in the plots. Click Acquire. - Page 145 Click Analyze or wait for automatic analysis to proceed. The Analyze button is enabled when 15,000 events have been acquired. Review data on the Lab Report. Vortex and then install the next tube on the SIP. Alternatively, click Rerun to repeat the current tube. Verify RUN is on, and click Next.
-
Page 146: Analyzing Data
Install a tube of DI water on the SIP, and press STNDBY. Analyzing Data BD HLA-B27 software can analyze only FCS 2.0 data files acquired in BD HLA-B27 software. Use BD FACS Convert software to translate files created by HP HLA-B27 software to FCS 2.0. - Page 147 From the Samples view, click Add Samples. Choose files for analysis. • Navigate to the required folder. • Double-click an individual file, or select multiple files and click Add. The Samples view appears, listing all selected files. Click Run Tests. The Acquisition view appears briefly while data is read from the file, and the Lab Report view displays.
- Page 148 BD FACSCalibur Instructions for Use...
-
Page 149: Chapter 6: Running Samples With The Loader
(page 61) and optimize settings for samples to be run (page 79). • Preparing an Acquisition Document on page 150 • Setting Up BD Worklist Manager Software on page 151 • Entering Sample Information on page 156 • Running Samples on page 160... -
Page 150: Preparing An Acquisition Document
Customize Preferences. Define a panel. Save the document Select the panel in the where you want. Acquisition Browser. Save the document in BD Applications > Worklist Manager > CellQuest Experiments Folder. BD FACSCalibur Instructions for Use... -
Page 151: Setting Up Bd Worklist Manager Software
Setting Up BD Worklist Manager Software Launch BD Worklist Manager software: NOTICE Worklist Manager will not launch if other BD applications are running, and other BD applications cannot be launched independently while Worklist Manager is running. Along with Worklist Manager, BD Loader Manager software launches and checks that the Loader is connected. - Page 152 Worklist. Click the Location button to change the default name or storage location. For BD Multiset or HLA-B27 assays, select the Schedule Template checkbox. Make sure your Schedule document template is in the indicated location. To change, click Location, and select your template in the dialog that appears.
-
Page 153: Setting Up Assay Settings
Setting Up Assay Settings Use Assay Settings to associate instrument settings with a panel, customize mix settings, and specify whether to print plots in BD CellQuest Pro software. Click Assay Settings in the Set Up view. Select an assay icon (CELLQuest, MultiSET, HLA-B27). - Page 154 • For HLA-B27 assays, one panel is shown. Click the pop-up control next to each panel, and choose the appropriate file. All instrument settings files in BD Files > Instrument Settings Files are shown. Adjust Mix Settings, if needed. •...
-
Page 155: Running Bd Facscomp Software
At the FACSComp view, click Skip FACSComp if you already ran setup for this run, or click Launch FACSComp. • To run BD FACSComp with the Loader, see page 66. Manually quit when setup is complete. • Click Continue to proceed to the Worklist view. -
Page 156: Entering Sample Information
You can manually enter information, scan from a barcode label, or choose File > Import Worklist to import information from a tab-delimited file or a worklist created with BD FACS™ Sample Prep Assistant (SPA) software. BD FACSCalibur Instructions for Use... - Page 157 To change the associated file, go to Assay Settings at the Set Up view. Click Sort by Assay when running multiple assays. BD Biosciences recommends that you group like assays together for multiple assays in the same Worklist. Chapter 6: Running Samples with the Loader...
-
Page 158: Assigning Racks
Select a sample in the Sample list to view tube rack locations. Tubes associated with the sample are highlighted, and the reagents for each tube are shown in a scrollable list (Figure 6-1). If you have more than 40 tubes, insert or move rack breaks. BD FACSCalibur Instructions for Use... - Page 159 NOTICE Different BD CellQuest Pro panels can be associated with different mix settings. BD Biosciences recommends that you consider mix settings when you group samples from different panels on the same rack. Choose a Rack ID. Rack IDs are printed on top of each rack and on a label inside the rack which can be read optically by the Loader.
-
Page 160: Running Samples
To operate the Loader, the cover must be in place on the Loader drawer. Tubes will not be loaded if the cover is off, and currently running tubes will be unloaded if the cover is removed during a run. BD FACSCalibur Instructions for Use... - Page 161 Press RUN and the appropriate flow rate button. Before proceeding with the next step, make sure the printer paper tray has sufficient paper. If the printer runs out of paper in the middle of a run, the run will stop. Click Run Tests.
- Page 162 Review sample status on the Summary Report. For BD Multiset errors, see page 200; for other errors, see page 208. Remove the Loader cover, pull out the Loader drawer, and remove the rack. Install a tube of distilled water on the SIP, and press STNDBY.
-
Page 163: Pausing Acquisition
NOTICE To interrupt the Loader during a BD Multiset assay, pause in the BD Multiset Acquisition or Lab Report view. Do not use Worklist Manager to stop a BD Multiset run; do not stop by removing the Loader cover. After an aborted run, the long clean is not performed automatically. -
Page 164: Rerunning A Sample
Click the Status icon of the sample you want to rerun. Click Rerun to rerun the entire panel. NOTICE You cannot rerun individual tubes. To cancel, click OK. BD FACSCalibur Instructions for Use... -
Page 165: Chapter 7: Shutting Down
Install a tube containing 3 mL of cleaning solution. For cleaning, use BD FACS Clean, a 1:10 dilution of bleach in DI water, or 0.5% sodium hypochlorite. Move the support arm to the side and allow the vacuum to aspirate 2 mL of the solution. -
Page 166: Daily Shutdown With The Loader
Install a 12 x 75-mm tube of 3 mL cleaning solution in position 39, and a tube of 3 mL DI water in position 40. Install the Loader cover; press RUN. Quit Worklist Manager, if running. Launch Loader Manager software: BD FACSCalibur Instructions for Use... - Page 167 Click Maintenance. Verify Long Clean is selected; click Run. At the prompt, click Run again. When cleaning is complete, remove the Loader cover and rack. Install a tube of DI water on the SIP, and press STNDBY. Quit Loader Manager software. Turn off the instrument and the Loader.
- Page 168 BD FACSCalibur Instructions for Use...
-
Page 169: Chapter 8: Maintenance
Wear suitable protective clothing, eyewear, and gloves. Cleaning Solution For cleaning, use one of the following: • BD FACS Clean (For ordering information, see page 215.) • 10% bleach (1:10 dilution of household bleach in DI water) • 0.5% sodium hypochlorite Higher concentrations of sodium hypochlorite and other cleaning agents can damage the instrument. -
Page 170: Scheduled Maintenance
Replacing the sheath Keeps fluids free of particulates Every 3–6 months or when filter increased debris seen in See page 173. FSC vs SSC plots Scheduling preventive — Every 6 months maintenance by a qualified service engineer BD FACSCalibur Instructions for Use... -
Page 171: Decontaminating The Fluidics
Decontaminating the Fluidics Perform overall system fluidics cleaning once a month or more frequently if you are running high volumes of samples stained with propidium iodide (PI), acridine orange, or thiazole orange. You need a spare reservoir for this procedure. See Appendix A, Supplies and Replacement Parts. - Page 172 Replace the DI water reservoir with the original sheath reservoir, and reconnect the sheath filter. Ensure the tube on the SIP has 1 mL of DI water, and press STNDBY. Turn off the instrument if you are finished running samples. BD FACSCalibur Instructions for Use...
-
Page 173: Changing The Sheath Filter
Changing the Sheath Filter The sheath filter traps debris before it reaches the flow cell. Replace the filter every 3–6 months or when you see increased debris in an FSC vs SSC plot. output quick-disconnect vent port filter O-ring base input quick-disconnect Open the fluidics drawer. - Page 174 If you see bubbles, gently tap the filter body to dislodge bubbles and force them to the top. Push the pinchcock roller forward to force the bubbles to waste. Close the pinchcock. Repeat, if necessary. Write the replacement date on the outside of the filter. BD FACSCalibur Instructions for Use...
-
Page 175: Unscheduled Maintenance
Unscheduled Maintenance Maintenance Description When to Perform Procedure Cleaning Keeps surfaces free from salt buildup Whenever needed external Dampen a cloth with cleaning surfaces solution (page 169) and wipe dried sheath fluid from surfaces. Wet a fresh cloth with DI water and wipe surfaces to prevent bleach corrosion. -
Page 176: Changing The Bal Seal
Remove the outer sleeve from the SIT by turning the retainer counterclockwise. Figure 8-2 Removing outer sleeve Bal seal retainer outer sleeve Work carefully since the outer sleeve can fall out as you loosen the retainer. BD FACSCalibur Instructions for Use... - Page 177 Grip the Bal seal between your thumb and index finger and pull it off. Figure 8-3 Removing Bal seal Install the new Bal seal spring-side up, just above the threads for the SIP retainer. Reinstall the retainer and outer sleeve. Tighten the retainer enough to hold it in place, and slide the outer sleeve over the SIT, into the retainer opening.
-
Page 178: Changing The Sample O-Ring
SIT, into the retainer opening. Push the sleeve up as far as it goes as you continue tightening the retainer. Install a sample tube on the SIP. If the sleeve hits the bottom of the tube, loosen the retainer slightly, and push the sleeve up. Retighten the retainer. BD FACSCalibur Instructions for Use... -
Page 179: Loader Maintenance
Loader Maintenance Maintenance Description When to Perform Procedure Running a Long Clean Runs cleaning solution, then DI When Worklist is stopped water for approximately 12 before finished, or for minutes additional optional cleaning See page 166. Checking tube lifter Displays lifter parameters When needed for Loader calibration diagnostics or... -
Page 180: Checking Tube Lifter Calibration
Checking Tube Lifter Calibration Tube lifter parameters are used to adjust the tube lifter to ensure proper sealing with the SIP. You might be asked to locate these settings for BD Biosciences personnel during troubleshooting. Quit Worklist Manager, if running, and launch Loader Manager. -
Page 181: Verifying Connection Ports
Verifying Connection Ports The Loader electronics module connects to the computer via a Keyspan USB-to- serial adapter. If communication problems exist between the Loader and cytometer, check cable connections and ensure the correct port is selected in Loader Manager Preferences. Remove the back access cover from the cytometer;... -
Page 182: Replacing The Loader Seal
Verify Print Port (2) is selected; click Save. If you continue to have connectivity problems after checking all cable connections, contact your BD Biosciences service representative. Replacing the Loader Seal The Loader seal can become worn over time and need replacement. If you have trouble with tube pressurization errors, first see page 208. - Page 183 Figure 8-5 Removing tube guide retainer tube guide retainer tube guide tube stop Remove the outer droplet sleeve from the SIT by turning the SIP retainer counterclockwise. Loader seal SIP retainer outer droplet sleeve Hold the sleeve as you turn the retainer. The outer sleeve might fall out as the retainer is loosened.
-
Page 184: Cleaning The Tube Lifter
Loader. Push in the Loader drawer and replace the cover. Confirm that all software applications are closed. Launch Loader Manager, and click Maintenance. Click Single Commands in the Maintenance and Diagnostics window, and click Run. BD FACSCalibur Instructions for Use... - Page 185 Select the Park lifter command in the left column, and click Send. Ensure the tube number is 1 in the Enter the tube number to load field. Once the lifter is raised, switch off the Loader power on the keypad. Remove the Loader cover.
-
Page 186: Modifying The Cytometer For Non-Loader Use
Wear suitable protective clothing, eyewear, and gloves. Turn off the instrument main power. Remove the tube guide retainer and attached tube guide. Turn the tube guide and tube guide retainer counterclockwise, as shown. tube guide retainer tube guide BD FACSCalibur Instructions for Use... - Page 187 Remove the outer droplet sleeve from the SIT by turning the SIP retainer counterclockwise. Loader seal SIP retainer outer droplet sleeve Hold the sleeve as you turn the retainer. The outer sleeve might fall out as the retainer is loosened. Remove the flat red or white Loader seal.
- Page 188 BD FACSCalibur Instructions for Use...
-
Page 189: Chapter 9: Troubleshooting
Troubleshooting If additional assistance is required, contact BD Biosciences. Have the following information available: product name, catalog number, serial number, error messages, details of recent performance. For instrument support from within the US, call (877) 232-8995, prompt 2, 2. From within Canada, call (888) 259-0187. Outside the US and Canada, contact your local BD representative or distributor. -
Page 190: Instrument Troubleshooting
Vent air from the sheath filter. See than twice usual page 57, step 14. Air bubble in flow cell Prime the fluidics (page 58). Inaccurate timing Perform Time-Delay Calibration between blue and red (page 72). laser BD FACSCalibur Instructions for Use... -
Page 191: Acquisition Troubleshooting
Acquisition Troubleshooting Observation Possible Causes Recommended Solutions No events displayed Insufficient gain for Increase the Amp Gain for the threshold and Status = READY threshold parameter parameter (page 90). Threshold too high Lower the threshold. Threshold set to Set the threshold to the appropriate incorrect parameter parameter for the application (usually FSC). - Page 192 Replace the Bal seal (page 176). Partially blocked SIT • Remove the sample tube to allow backflushing. • If the clog persists, clean the SIT (page 165). Contaminated sample Prep the specimen again, making sure the tube is clean. BD FACSCalibur Instructions for Use...
- Page 193 Acquisition Troubleshooting (continued) Observation Possible Causes Recommended Solutions Scatter parameters Incorrect instrument Rerun BD FACSComp or optimize the distorted settings settings (Chapter 4). Air bubble in flow cell Prime the fluidics (page 58). Air in sheath filter Vent air from the sheath filter. See page 57, step 14.
- Page 194 57, step 14. Sample not diluted in Dilute the sample in the same fluid as same fluid as sheath sheath. If you are running BD Calibrite beads, dilute them in BD FACSFlow solution and use BD FACSFlow for sheath.
-
Page 195: Bd Facscomp Troubleshooting
BD FACSComp Troubleshooting PMT Adjustment Observation Possible Causes Recommended Solutions Unable to set PMT Event rate below 400 • Mix tube. voltages automatically • Set the flow rate to HI. • Add beads to tube for which event rate appears low. - Page 196 Decrease the FL4 PMT voltage. Different PMT voltages Some runs with the Maintain consistency: run with between runs Loader and some without or without the Loader each time. Always run samples using the same acquisition method as BD FACSComp. BD FACSCalibur Instructions for Use...
-
Page 197: Time Delay Setup
FL4 PMT set incorrectly Adjust settings manually for PMTs without checkmarks (page 71, step 4). FSC signal < channel 160 Contact BD Biosciences. FL4 PMT mean channel Rerun the software. changed by >5 channels after time-delay calibration Air in sheath filter Vent air from the sheath filter. -
Page 198: Fluorescence Compensation
Contact BD Biosciences for the latest target values. Red laser misaligned Contact BD Biosciences. Compensation results Wrong beads for assay Rerun the assay with the correct different than expected (ie, PerCP-Cy5.5 beads FL3 beads. for LW assay) BD FACSCalibur Instructions for Use... -
Page 199: Sensitivity Test
(page 171). Incorrect HLA-B27 bead Enter correct bead lot ID and lot suffix suffix. Calibration failure Incorrect HLA-B27 bead Enter correct bead lot ID and lot suffix suffix. Incorrect calibration beads Use only BD HLA-B27 calibration beads. Chapter 9: Troubleshooting... -
Page 200: Bd Multiset Troubleshooting
Physician Reports when acquisition criteria are not met. NOTICE When an error code is generated, BD Multiset software creates a Bad Files folder within the folders for Lab and Physician Reports and data files. The Bad Files folder contains aliases (shortcuts) to files with QC flags. -
Page 201: General Bd Multiset Software
General BD Multiset Software Observation Possible Cause Recommended Solution Disappearing dots on Wrong settings in Print Choose grayscale or color in printouts Setup Print setup, not black and white. Differing CD3 counts Pipetting error Use fully charged, calibrated within panel... - Page 202 Resuspend cells if tubes have been sitting too long. • Adjust mix settings. • Re-stain sample, if necessary. Absolute count bead Adjust bead attractor at attractor missing bead Manual Gate view. population BD FACSCalibur Instructions for Use...
-
Page 203: Bd Multiset Results
BD Multiset Results Observation Possible Cause Recommended Solutions Cell populations outside Donor-specific anomaly • Manually adjust attractors attractor and save as user-defined reagent (page 134). • If all samples show same anomaly, rerun BD FACSComp software and optimize settings for application (all but compensation). - Page 204 BD Multiset Results (continued) Observation Possible Cause Recommended Solutions T-cell counts lower than Absolute count bead attractor Manually adjust attractor. expected capturing cell population BD FACSCalibur Instructions for Use...
- Page 205 BD Multiset Results (continued) Observation Possible Cause Recommended Solutions Low side scatter for Aged blood and/or stained Refer to the information granulocytes in CD45 vs cells provided by the reagent SSC plot; no distinct manufacturer for stability monocyte population limitations.
- Page 206 20 μL reagent. Refer to the preparation information provided by the manufacturer for staining instructions. For custom reagents, titrate antibody to determine sufficient amount. Donor-specific anomaly Wash sample before staining. CD3 FITC CD45 PerCP CD3 FITC CD8 PE BD FACSCalibur Instructions for Use...
- Page 207 BD Multiset Results (continued) Observation Possible Cause Recommended Solutions Subset populations Compensation set incorrectly Rerun BD FACSComp outside attractors for all software, if necessary, and samples optimize settings for application (all except compensation). Rerun sample. Incorrect attractor position Manually adjust attractor and save as user-defined reagent (page 134).
-
Page 208: Loader Troubleshooting
If (Bal seal) tube still does not seal, see Instrument Troubleshooting on page 190. Worn Loader seal Replace the seal (page 182). NOTICE Do this only after checking all other troubleshooting solutions. BD FACSCalibur Instructions for Use... - Page 209 Tube lifter hitting rack during Make sure the rack is properly ascent engaged with the alignment guide pin. If problem persists, contact BD Biosciences. Spillage causing tube lifter to Clean the tube lifter (page 184). bind Invalid tube sequence Incomplete scan due to...
-
Page 210: Worklist Manager Troubleshooting
PanelReagentFile and place Folder or corrupted in BD Applications > ClinApps Info Folder. • Re-install BD Multiset software. Unlisted instrument Instrument settings in Move the file to BD Files > settings file wrong folder Instrument Settings Files. BD FACSCalibur Instructions for Use... -
Page 211: Appendix A: Supplies And Replacement Parts
Appendix A Supplies and Replacement Parts To order supplies and options, contact your local BD Biosciences representative. This information is correct at the time of publication; for up-to-date information refer to our website (bdbiosciences.com). -
Page 212: Instrument Supplies
Sheath cap (1) 344283 Disposable 38/400 white ribbed cap (5) 343533 Cotton-tipped applicator (1) 99-30122-00 DCM neoprene tubing (12 in.) 343585 DCM filter, 3-in. diameter (1) 343540 12 x 75-mm test tubes (bag of 125) 343675 BD FACSCalibur Instructions for Use... -
Page 213: Other Replacement Parts
Item Reorder No. Line declogger (1) 343583 Faucet container for saline (1) 343532 Grommet (1) 88-20158-00 2.5-m cordset for Australian power (10A C13) 335696 2.5-m cordset for European power (10A C13) 335697 2.5-m cordset for UK power (10A C13 R/A) 335698 6-ft cordset for US power (15A, 5–15P/320-C13) 337219... -
Page 214: Consumables
BD Calibrite beads two-color kit 349502 SSC, FL1, FL2 setup and QC BD Calibrite PerCP-Cy5.5 345036 FL3 Setup and QC BD Calibrite PerCP beads 340497 FL3 setup and QC BD Calibrite APC beads 340487 FL4 setup and QC BD FACSCalibur Instructions for Use... -
Page 215: Reagents
Chlorine bleach BD Trucount Absolute Count Tubes 340334 a. Refer to the BD Biosciences catalog or the BD Biosciences website (www.bdbiosciences.com). b. US Patent Nos. 4,654,312; 4,902,613; 5,098,849 c. Clorox® and other brand-name bleaches are preferred because they are filtered to remove particles and contain a known concentration of 5% sodium hypochlorite. - Page 216 BD FACSCalibur Instructions for Use...
-
Page 217: Appendix B: Technical Specifications
Appendix B Technical Specifications • Cytometer Specifications • Loader Specifications... -
Page 218: Cytometer Specifications
109.1 kg (240 lb.)—cytometer only, excluding Loader and computer maximum ≤225 kg (≤490 lb.)—including Loader, printer, and workstation ± ± Power requirements 120 VAC 10% (50–60 2 Hz) (transformer needed outside US) Current: 20A maximum Power consumption 1725 W BD FACSCalibur Instructions for Use... -
Page 219: Environment
Environment Storage temperature 0–49°C (32–120°F) Operating temperature 16–29°C (60–85°F) Operating relative humidity 10–90% relative non-condensing ≤62 dBA Noise level Heat dissipation 5,000 BTU/hr Facilities No special room requirements Performance Fluorescence sensitivity Estimated detection limit: 750 molecules of equivalent soluble fluorescein Fluorescence resolution Coefficient of variation in FL2-Area of <3%, full peak for PI–stained chicken erythrocyte... -
Page 220: Optics
Optics Laser Specifications The following Class 3B lasers are mounted on the BD FACSCalibur instrument. Because the lasers are contained within the instrument, the BD FACSCalibur is a Class 1 (I) laser product. Manufacturer Model Wavelength (nm) Power (mW) JDS Uniphase®... -
Page 221: Fluidics
Fluidics General operation Front panel control with three modes: RUN, STNDBY, and PRIME; standby mode for conserving sheath fluid when no sample tube installed Fluid reservoirs 4-L sheath and waste containers in a pull-out drawer; level detectors for automatic indicating of low levels of sheath or high levels of waste Sheath pressure 4.5 psi... -
Page 222: Signal Processing
Loader carousels, numbers 1–16 Tube compatibility • Carousel Up to 40 uncapped 12 x 75-mm tubes • BD Falcon polystyrene test tubes • BD Trucount tubes • Thickness of accumulated labels ≤5 mils (127 μm) Tube sample volume <1 mL... -
Page 223: Connections
The following schematics show connections between the cytometer, computer, and Loader. Figure B-1 Cytometer only mouse keyboard AC input computer display printer (GPIO) 115VAC 115VAC input input (USA) BD FACSCalibur 230VAC input option step-down transformer power cords Appendix B: Technical Specifications... - Page 224 GPIO keyspan adapter (serial to USB) Loader option Loader controller Loader AC input keypad options GPIO 115VAC 115VAC output 115VAC input (USA) input BD FACSCalibur 230VAC input option step-down transformer power cords BD FACSCalibur Instructions for Use...
-
Page 225: Appendix C: Performance Data
Appendix C Performance Data • Accuracy • Precision • Linearity NOTICE Detailed performance data for this instrument in combination with particular reagents can be found in the respective Instructions For Use provided with the reagent. -
Page 226: Accuracy
Accuracy Lymphocyte subset percentage and absolute count enumerations with BD Multitest CD3/CD16+56/CD45/CD19 in BD Trucount Tubes were compared with results from BD Tritest CD3/CD16+56/CD45 or CD3/CD19/CD45 in BD Trucount Tubes. Whole blood samples from normal and abnormal donors were collected at random at two clinical laboratories and evaluated in both systems. -
Page 227: Precision
Precision Two studies were conducted to assess within-specimen reproducibility: one using BD Multitest CD3/CD8/CD45/CD4 + BD Trucount reagent; the other using BD Multitest CD3/CD16+CD56/CD45/CD19 + BD Trucount reagent. All testing was performed on the BD FACSCalibur instrument. For both studies, estimates of within-sample reproducibility were determined at 3 clinical laboratories from 5 replicates of each sample collected from normal and abnormal donors. - Page 228 Natural killer lymphocytes 10.8 0.73 B lymphocytes 15.6 0.71 T lymphocytes 72.1 0.99 Table C-5 Within-specimen reproducibility of absolute counts (BD Multitest CD3/CD16+CD56/CD45/CD19) Mean Subset % CV (cells/µL) Natural killer lymphocytes B lymphocytes T lymphocytes 1217 BD FACSCalibur Instructions for Use...
-
Page 229: Linearity
Linearity Linearity for the BD FACSCalibur system was assessed using the BD Multiset system and BD Multitest CD3/CD8/CD45/CD4 + BD Trucount reagent. The linear range of the BD Multitest/BD Trucount reagent system was evaluated through independent dilution of concentrated whole blood samples. The study assessed linearity within a WBC concentration of 0.2 x 10... - Page 230 BD FACSCalibur Instructions for Use...
-
Page 231: Index
CellQuest Pro 119 CellQuest Pro 96 HLA-B27 software 146 FACSComp 74 Multiset 137 FSC amp gain 90 BD Inits, installing 27 PMTs BDPAC 25, 27 CellQuest Pro 95 beads FACSComp 71 Calibrite 64, 214 SSC voltage 90, 125... - Page 232 173 customer support 189 cleaning cytometer See instrument. air filter 175 automatic, Loader 67, 68 daily 165 instrument 175 daily cleaning 165 solutions 23, 169 Dock shortcuts 26 tube lifter 184 drawer, fluidics 17, 56 BD FACSCalibur Instructions for Use...
- Page 233 PDFs 30 sheath, changing 173 setting up 86 FL4 option 19 flow rate, sample 16 fluidics about 15, 221 FACSCalibur See instrument. control buttons 16 FACSComp drawer 17, 56 about 25, 31, 61 priming 16, 58 assays 35, 62...
- Page 234 222 troubleshooting 190 starting 55 instrument settings status 151 downloading 82, 89 troubleshooting 208 file 30 tube lifter settings 180 saving 98 tube positions 67, 158 tube specific 109 tube stuck 209 intended use 13 BD FACSCalibur Instructions for Use...
- Page 235 Loader Manager optimization about 25, 51 about 61 status window 151 downloading settings 82, 89 log, QC 83 with CellQuest Pro 90 lot IDs with FACSComp 79 Calibrite 63, 142 with Multiset 125 HLA-B27 calibration 64, 142 O-ring, changing 178 Trucount 127 panels maintenance...
- Page 236 Worklists 155, 158 printing 33, 41, 49 Schedule document Rack Manifest 159 HLA-B27 50, 150 Summary Multiset 45, 150 HLA-B27 146 scheduled maintenance 170 Multiset 137 Selection tool 28 Worklist Manager 162 requirements, system 23 BD FACSCalibur Instructions for Use...
- Page 237 Sensitivity Test supplies, instrument 212 about 76 failure 199 settings Target Value Log file 36, 66 acquisition & storage 101 target values 65 tube-specific 108 technical assistance 189 sheath test preferences, Multiset 126 filter, changing 173 threshold, adjusting 90, 125 refilling 56 time-delay calibration shortcut, software 26...
- Page 238 184, 209 waste, emptying 58 windows, showing hidden 87 Worklist Manager about 25, 51 assay settings 153 files 53 pausing acquisition 163 preferences 53 running samples 160 troubleshooting 210 Worklists importing SPA 156 saving 155, 158 BD FACSCalibur Instructions for Use...
Need help?
Do you have a question about the FACSCalibur and is the answer not in the manual?
Questions and answers