Table of Contents
Advertisement
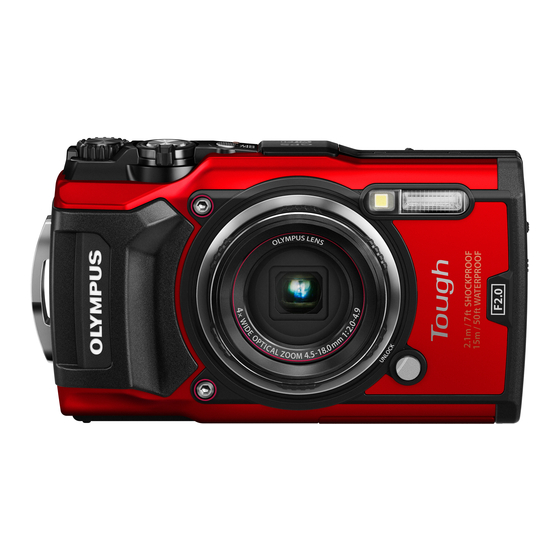
DIGITAL CAMERA
TG-5
Instruction Manual
Thank you for purchasing an Olympus digital camera. Before you start to
use your new camera, please read these instructions carefully to enjoy
optimum performance and a longer service life. Keep this manual in a safe
place for future reference.
We recommend that you take test shots to get accustomed to your camera
before taking important photographs.
The screen and camera illustrations shown in this manual were produced
during the development stages and may differ from the actual product.
If there are additions and/or modifications of functions due to firmware
update for the camera, the contents will differ. For the latest information,
please visit the Olympus website or contact your Olympus Consumer
Support Team in your region.
Model No. : IM005
Advertisement
Table of Contents

Related Manuals for Olympus IM005


Summary of Contents for Olympus IM005
-
Page 1: Digital Camera
Instruction Manual Model No. : IM005 Thank you for purchasing an Olympus digital camera. Before you start to use your new camera, please read these instructions carefully to enjoy optimum performance and a longer service life. Keep this manual in a safe place for future reference. -
Page 2: Unpack The Box Contents
Unpack the box contents The following items are included with the camera. If anything is missing or damaged, contact the dealer from whom you purchased the camera. Lithium Ion Battery Digital camera Strap (LI-92B) USB-AC adapter (F-5AC) USB cable (CB-USB12) Other accessories not shown: Warranty card Contents may vary depending on purchase location. -
Page 3: Names Of Parts
Names of parts 1 Connector cover i INFO (Information display) button j R (Movie)/select button 2 Connector cover lock k Mode dial 3 LOCK knob l q (Playback) button 4 Speaker m A button 5 Strap eyelet n /Wi-Fi button 6 Lens 7 Self-timer lamp/LED Illuminator/ o HDMI micro connector... -
Page 4: Inserting And Removing The Battery And Card
Preparations for shooting Inserting and removing the battery and card Follow Steps 1, 2 and 3 to open the battery/card compartment cover. • Turn off the Battery/card compartment cover lock camera before opening the battery/card compartment cover. Battery/card compartment cover LOCK knob Insert the battery while sliding the battery lock knob in the direction of the arrow. - Page 5 Cards compatible with this camera SD/SDHC/SDXC/Eye-Fi (with Wireless LAN function) card (commercially available) (for compatibility card details, visit the Olympus website.) To remove the card Press the card in until it clicks and comes out slightly, then remove the card.
-
Page 6: Charging The Battery
For charging the battery abroad, see “Using your charger and USB-AC adapter abroad” (P. 100). • Never use any cable other than supplied or Olympus-designated USB cable. This may cause smoking or burning. • The included F-5AC USB-AC adapter (hereafter referred to as USB-AC adapter) differs depending on the region where you purchased the camera. - Page 7 • For details on the battery, see “SAFETY PRECAUTIONS” (P. 120). For details on the USB-AC adapter, see “SAFETY PRECAUTIONS” (P. 120). • If the indicator lamp does not light, reconnect the USB cable and USB-AC adapter to the camera. •...
- Page 8 Turning on the camera and making the initial settings When you turn on the camera for the first time, a screen appears enabling to set the language for the menus and messages displayed in the monitor, and the date and time. To change the selected date and time, see “Setting the clock manually, choosing a time zone, and using GPS to set the clock d [X Settings]”...
- Page 9 Using basic functions Taking photographs ( P mode) Press the n button to turn on the camera. When the camera is turned on, the monitor will turn on. Set the mode dial to P. In mode P, the camera automatically adjusts shutter speed and aperture in response to subject brightness.
-
Page 10: Turn On The Camera
Viewing photographs (Playing back images) Turn on the camera. Press the q button. • Your most recent photograph is displayed. • Press HI (arrow pad) or rotate the control dial to view other pictures. Control dial Displays the Displays the next frame previous frame 20.5°C... -
Page 11: Selecting Multiple Images
Close-up playback • In single-frame playback, you can zoom in or out using the zoom lever: rotate the lever clockwise to zoom in from 2× to 14× and counterclockwise to zoom out. Press the A button to return to single-frame playback. •... -
Page 12: Using The Playback Menu
Using the Playback Menu The playback menu can be displayed by pressing the A button during playback. Highlight the desired option and select it by pressing the A button. The options displayed vary with the type of image selected. Available Options JPEG RAW+JPEG Movies... - Page 13 Movie Edit Edit movies. g [In-Movie Image Capture (Movie Edit)] (P. 59), [Movie Trimming (Movie Edit)] (P. 59) Share Order Select images for later transfer to a smartphone. You can also view the images currently selected for transfer. Press FG (arrow pad) to select images for transfer.
-
Page 14: Recording Movies
Recording movies Press the R (movie) button M-IS ON M-IS ON to start recording. I S O AUTO • The movie is shot in the set shooting mode. Note that the shooting mode effects may not be obtained for some shooting REC 00:01 REC 00:01 0:07:48... -
Page 15: Movie Playback
To stop movie playback Press the button. • We recommend using OLYMPUS Viewer 3 (P. 90) to view movies on a computer. Be sure to use the latest version. Connect the camera to the computer before launching OLYMPUS Viewer 3 for the first time. - Page 16 Erasing images during playback Display the image you want to erase and press . • To erase a movie, select Erase the movie to erase and press . Back Press FG (arrow pad) to select [Yes], and press the A button.
-
Page 17: Monitor Display
Monitor display Shooting screen displays x 1.4 x 1.4 2.0 x 2.0 x 6 7 8 x 1.4 x 1.4 FD-1 FD-1 S-IS ON S-IS ON ISO-A AUTO AUTO Focus Focus 01:02:03 01:02:03 125 F5.6 1023 1023 Name Name 1 Card write indicator g Picture Mode 2 Grid Guide h ISO sensitivity... - Page 18 Name w Custom mode x LOG icon/warning y GPS icon z Metering A o / Y /Pro Capture shooting B Flash Compensation C Flash mode D Image stabilization E Battery check Reading a histogram If the peak fills too much If the peak fills too much of of the frame, the image the frame, the image will...
-
Page 19: Playback Mode Display
Playback mode display Switching the displays Press the INFO button to cycle through the displays as follows: Simplified, Overall, Image Only. • Histogram and highlight/shadow displays can be added to the playback information display. g [G/Info Settings] > [q Info] (P. 62) Simplified display ×10 ×10... - Page 20 Name Name 1 Battery check Recording date – – and time Including GPS – k Aspect border* information Eye-Fi transfer l AF area pointer – – – data/Wi-Fi m Shooting mode – – Print reservation/ n Shutter speed – – –...
-
Page 21: Using The Shooting Modes
Shooting using basic functions Using the shooting modes Selecting shooting mode Turn the mode dial to set the shooting mode to the indicator. • After selecting O , A, ^, or k, select the sub mode. List of shooting mode B (iAUTO mode) ......P. -
Page 22: Scene Mode
A (A mode) When an aperture value is set, the camera automatically sets an appropriate shutter speed. You can change the aperture by rotating the control dial or by pressing F and then FG (arrow pad). C1/C2 (Custom mode) If you store shooting settings in [Reset/Assign Custom Modes] (P. 52), you can call up and shoot using the stored shooting settings. - Page 23 Sub mode 1 Sub mode 2 Application The camera automatically shoots multiple images, takes newly bright areas only, and composites them into a single image. With normal long exposure, an d Live Composite Nightscapes image of light trace such as star trails with bright buildings tends to get too bright.
- Page 24 Rotate the mode dial to O. Sub mode 1 Use FGHI (arrow pad) or the control dial to highlight an option for sub mode 1 and press the A button to select. People People Nightscapes Motion Scenery Indoors Sub mode 2 Use HI (arrow pad) or the control dial Portrait to highlight an option for sub mode 2 and...
- Page 25 s Panorama 1 Press the shutter button to take the first frame. 2 Pan the camera slowly to frame the second shot. • A target mark will be displayed. Target mark 3 Move the camera slowly so that the Pointer pointer and the target mark overlap.
-
Page 26: Underwater Mode
Image Quality You can adjust image quality using live controls. g “Record mode (movies)” (P. 39) ^ (Underwater mode) Only by selecting a sub mode according to the subject or the scene, you can shoot underwater photographs with a proper setting. Sub mode Application Underwater... - Page 27 k (Microscope mode) Images can be taken from up to 1 cm away from the subject. In this mode you can shoot images with a large depth of field, and perform focus bracket shooting of a set number of images. Rotate the mode dial to Use HI (arrow pad) or the control dial Microscope...
-
Page 28: Using The Zoom
Using the zoom Zoom in to photograph distant objects or zoom out to increase the area visible in the frame. Zoom can be adjusted using the zoom lever. W side T side Using shooting options (Set by direct button) Frequently used functions are assigned to IFG (arrow pad). Just by pressing the button, you can select the assigned function directly. -
Page 29: Exposure Compensation
Manual can adjust flash output using FGHI (arrow pad) or the control dial. The dedicated underwater strobe or the Olympus wireless RC flash is used to take # RC Remote Control pictures. For details, see “Taking pictures with the Olympus Wireless RC Flash System”... - Page 30 Single/Sequential Hold the shutter-release button all the way down to take a series of photographs. Press the jY button to display the direct menu. Press HI (arrow pad) or rotate the control dial to highlight an option and then press the A button. Shoots 1 frame at a time when the shutter button Single is pressed (normal shooting mode).
-
Page 31: Self Timer
Pro Capture To eliminate the lag between the shutter button being pressed all the way down and the start of recording, the camera starts shooting a series of pictures using the electronic shutter when the shutter button is pressed halfway, and begins recording the pictures—including those taken when the shutter button was pressed halfway (up to 4)—to the card when the shutter button is pressed the rest of the way down. - Page 32 • To cancel the activated self-timer, press the button. • Self timer is not canceled automatically after shooting. AFL (Focus lock) You can lock the focus position. AF lock mark Press the shutter button halfway to focus. S-IS ON S-IS ON While keeping the position of the camera, press the A button.
- Page 33 AF Tracking The camera tracks the subject movement automatically to focus on it continuously. Before proceeding, select [Tracking] for [AF Area] in Shooting Menu 1 (P. 53). Place the AF target mark over your subject and press the A button, keeping the shutter button pressed halfway. When the camera recognizes the subject, the AF target mark automatically tracks the subject movement to focus on it continuously.
-
Page 34: Table Of Contents
Using shooting options (via live control) Some features may be unavailable depending on the shooting mode and camera settings. g “List of settings available in each shooting mode” (P. 111) Available Options Picture Mode ......P. 35 Image stabilizer (still images)* ..P. -
Page 35: Picture Mode
• The default settings of the function are highlighted in Picture Mode Sets the processing options. Produces more impressive-looking results suited i-Enhance to the scene. Vivid Produces vivid colors. Natural Produces natural colors. Muted Produces flat tones. Portrait Produces beautiful skin tones. Monochrome Produces black and white tone. -
Page 36: Iso Sensitivity
Picture Mode Sets the processing options. Creates an image that emphasizes edges and Key Line adds an illustrative style. Creates a soft, bright image by removing dark Watercolor areas, blending pale colors on a white canvas, and further softening contours. Expresses an everyday shot in a nostalgic, Vintage vintage tone using printed film discoloration and... -
Page 37: Af Mode
Sets an appropriate color scheme for the light of White balance the shooting scene. Suitable for situations such as: the other options One Touch 1 do not produce the desired colors, you are unsure as to the type of light source, or the subject is lit by multiple different sources. -
Page 38: Aspect
[L] N, XN [M] N, and WN [S] N, use [K Set] (P. 65) in Custom Menu E. *2 RAW: This format (extension “.ORF”) stores unprocessed image data for later processing. Using OLYMPUS Viewer 3 (P. 90), you can adjust settings such as exposure compensation and white balance or apply art filters. Be sure to use the latest version of OLYMPUS Viewer 3. -
Page 39: Record Mode (Movies)
Record mode (movies) Image quality options (movies) [Standard] is selected for A 1920×1080 Super Fine 60p 1920×1080 Super Fine 50p 1920×1080 Super Fine 30p 1920×1080 Super Fine 25p Choose the desired combination of frame 1280×720 Super Fine 30p size, bit rate, and frame rate. Bit rate and frame rate can be adjusted from the video 1280×720 Super Fine 25p menu (P. -
Page 40: Image Stabilizer (Still Images)
Record mode (movies) Image quality options (movies) [High-speed] is selected for A* 1920×1080 HighSpeed 120fps 1280×720 HighSpeed 240fps 1 Frame size 640×360 HighSpeed : 1920×1080 480fps : 1280×720 : 640×360 *2 The frame rate and bit rate can not be changed. Image stabilizer (still images) Image stabilization options (photos) Turn photo image stabilization on or off. -
Page 41: Flash* 2 * 3
“Manual” and press the INFO button before pressing Manual the A button, you can adjust flash output using FGHI (arrow pad) or the control dial. The dedicated underwater strobe or the Olympus wireless RC flash is used to take pictures. For # RC Remote Control details, see “Taking pictures with the Olympus... -
Page 42: O / Y
Sets the sequential shooting function and the o / Y time from pressing the shutter button until the picture is taken. One frame is shot each time the shutter button is Single pressed. Hold the shutter-release button all the way down to take a series of photographs. -
Page 43: Face Priority
Face priority Focus/exposure Face Priority On When [Face Priority On] is selected, the camera will automatically detect and adjust focus and exposure Face Priority Off for the faces of portrait subjects. Accessory Settings for optional accessories Select when taking pictures without a conversion Accessory Off lens. - Page 44 While the LOG switch is in the LOG position, the camera will log GPS and other sensor data (P. 78). Logs can be downloaded for use with the OLYMPUS Image Track (OI.Track) smartphone app. Recording and saving logs Rotate the LOG switch to LOG.
- Page 45 OLYMPUS Image Track (OI.Track) smartphone app and connect to the smartphone using the camera wireless LAN function (P. 73). Things you can do with the specified app, OLYMPUS Image Track (OI.Track) • Viewing the current log and images The current log and images can be viewed on the smartphone.
-
Page 46: Viewing Location Data
Location data/LED Illuminator Viewing location data Pressing the INFO button when the camera is off displays location data in the monitor. • The accuracy of the data displayed varies with weather conditions and the like. Use as a rough guide only. Location data displays Name 1 Time... - Page 47 Using the LED Illuminator Press and hold the INFO button down until the LED illuminator LED illuminator lights up. The illuminator will light even if the camera is off. If the Camera Is On The LED illuminator will remain lit for up to around 90 seconds while camera controls are in use, or up to 30 seconds if no operations are performed.
- Page 48 Using the menus Menu List 1 p Shooting Menu 1 (P. 52) Shooting Menu 1 Reset/Assign Custom Modes Reset/Assign Custom Modes Picture Mode Picture Mode AF Area AF Area AF Illuminator AF Illuminator Back 3 A Video Menu (P. 55) 2 q Shooting Menu 2 (P.
- Page 49 5 H Custom Menu (P. 61) D. # Custom # +WB E. K/WB/Color K Set W Keep Warm Color Color Space F. Record File Name Edit Filename Copyright Settings G. Field Sensor Elevation / Depth Record GPS location GPS Priority H.
-
Page 50: Using The Menus
Using the menus Press the button during shooting or playback to display the menu. The menu provides access to a variety of camera settings, such as shooting and playback functions, time and date settings, and display options. Some features may be unavailable depending on the shooting mode and camera settings. - Page 51 Use FG (arrow pad) to select the desired submenu 1 and then press the A button. Submenu 2 Shooting Menu 1 Shooting Menu 1 Reset/Assign Custom Modes Reset/Assign Custom Modes Picture Mode Picture Mode AF Area AF Area AF Illuminator AF Illuminator AF Illuminator Back...
- Page 52 For the operation method, refer to (P. 50). • The default settings of the function are highlighted in p Shooting Menu 1 Restoring default settings/saving settings p [Reset/Assign Custom Modes] Restoring Default Settings Camera settings can be easily restored to default settings. g “Menu directory”...
- Page 53 For the operation method, refer to (P. 50). Processing options p [Picture Mode] You can make individual adjustments to contrast, sharpness and other parameters in [Picture Mode] (P. 35) settings. Changes to parameters are stored for each picture mode separately. 1 Select [Picture Mode] in Shooting Menu 1 and press the A button.
- Page 54 For the operation method, refer to (P. 50). q Shooting Menu 2 Adjusting interval settings q [Intrvl. Sh./Time Lapse] Submenu 2 Submenu 3 Application Submenu 4 — — Interval shooting off. Number of Sets the number of frames to 1 to 299 (frames) Frames shoot.
- Page 55 For the operation method, refer to (P. 50). Setting the focus bracket shooting q [Focus BKT] Submenu 2 Submenu 3 Application Submenu 4 — — Bracketing disabled. Set number Sets the number of frames in the 10/20/30 of shots bracket shooting. Set focus Narrow/Normal/ Sets the interval between the...
- Page 56 Choosing a Background Track You can change [Party Time] to different BGM. After downloading tracks from the Olympus website onto the memory card, select [L] > [BGM] in the playback menu, highlight [Party Time], and press I (arrow pad). Visit the following website for the download.
- Page 57 For the operation method, refer to (P. 50). Rotating images q [y] Submenu 2 Application Images are not rotated for playback. Photographs taken in “tall” (portrait) orientation are automatically rotated for display in the monitor during playback. Editing still images q [Edit] Submenu 2 Submenu 3 Submenu 4 Application The JPEG copy is processed using the...
- Page 58 For the operation method, refer to (P. 50). Submenu 2 Submenu 3 Submenu 4 Application Converts the image size to 1280 × 960, 640 × 480, or 320 × 240. Images with an aspect ratio other than 4:3 (standard) are converted to the closest JPEG Edit image size.
- Page 59 For the operation method, refer to (P. 50). • Editing of a JPEG image is not possible in the following cases: When an image is processed on a PC, when there is not enough space in the card memory, or when an image is recorded on another camera. •...
- Page 60 For the operation method, refer to (P. 50). Image overlay 1 Use FG to select [Image Overlay] and press the A button. 2 Select the number of images to be overlaid and press the A button. 3 Use FGHI to select the RAW images to be overlaid (P. 11). •...
- Page 61 For the operation method, refer to (P. 50). H Custom Menu A. MF Manual focus assist H [MF Assist] Submenu 2 Submenu 3 Application Magnification off. Magnifies a portion of the screen. • The subject in the center of the frame is Magnify displayed at a higher magnification.
- Page 62 For the operation method, refer to (P. 50). B1. Disp/8/PC Configuring the information display H [G/Info Settings] Submenu 2 Application Add histogram or highlight and shadow displays to the playback q Info information display or hide default displays. Add histogram, highlight and shadow, or attitude indicator displays to the shooting information display or hide default displays.
- Page 63 For the operation method, refer to (P. 50). Adding framing guides to the shooting display H [Displayed Grid] Submenu 2 Application Hide framing guides. w / x Show framing guides. Choosing an outline color H [Peaking Color] Submenu 2 Application White/Black/ Choose an outline color.
- Page 64 For the operation method, refer to (P. 50). C. Exp/ISO Choosing the standard for optimal exposure H [Exposure Shift] Submenu 2 Application p / 5 Adjust correct exposure separately for each metering mode. • This reduces the number of exposure compensation options available in the selected direction.
- Page 65 For the operation method, refer to (P. 50). • This function may not work effectively with some shooting conditions or subjects. D. # Custom Adding flash compensation to exposure compensation H [w+F] Submenu 2 Application Exposure compensation is not added to flash compensation. Add exposure compensation to flash compensation.
- Page 66 For the operation method, refer to (P. 50). Adjusting colors for the light source H [WB] Set the white balance (P. 36). You can also fine-tune the white balance for each mode. Making fine adjustments to white balance 1 Highlight the white balance option you wish to fine-tune and press I (arrow pad).
- Page 67 Artist Name Enter the name of the photographer. Copyright Name Enter the name of the copyright holder. • OLYMPUS does not accept liability for damages arising from disputes involving the use of [Copyright Settings]. Use at your own risk. EN 67...
- Page 68 For the operation method, refer to (P. 50). G. Field Sensor Entering the altitude/depth for the current location H [Elevation / Depth] 1 Use FG (arrow pad) to choose a value. • To use different units, proceed to Step 2. To proceed without changing units, press the A button.
- Page 69 For the operation method, refer to (P. 50). Calibrating the attitude indicator H [Level Adjust] Submenu 2 Application Reset Resets adjusted values to the default settings. Adjust Sets the current camera orientation as the 0 position. Choosing the sleep delay H [Sleep] Submenu 2 Application Disable sleep (energy saving) mode.
- Page 70 For the operation method, refer to (P. 50). d Setup Menu Deleting all images or all data d [Card Setup] • Before formatting, check that no important data is left in the internal memory or card. • Cards must be formatted with this camera before first use or after being used with other cameras or computers.
- Page 71 For the operation method, refer to (P. 50). Changing the display language d [W] Submenu 2 Application The language for the menus and error messages displayed on Languages the monitor is selected. Adjusting the brightness of the monitor d [s] 1 Use FG (arrow pad) to adjust the brightness while viewing the monitor, and then press the A button.
- Page 72 By connecting to a smartphone through this camera’s wireless LAN function and using the specified app (OI.Track, OI.Share), you can enjoy even more features during and after shooting. Things you can do with the specified app, OLYMPUS Image Share (OI.Share) • Camera image transfer to a smartphone You can load images in the camera to a smartphone.
-
Page 73: Connecting To A Smartphone
Connecting to your smartphone. Read QR code by (The SSID and the password are displayed at 'OLYMPUS Image Share'. the lower left of QR code screen.). For the Wi-Fi setting for your smartphone, SSID : X-XX-X-XXXXXXXXX... -
Page 74: Transferring Images To A Smartphone
Transferring images to a smartphone You can select images in the camera and load them to a smartphone. You can also use the camera to select images you want to share in advance. [Share Order] (P. 13) Connect the camera to a smartphone. (P. 73) Tap the Image Transfer button in OI.Share. -
Page 75: Adding Position Information To Images
Adding position information to images You can add GPS tags to images that were taken while the GPS log was saving by transferring the GPS log saved on the smartphone to the camera. This is available only in [Private] (P. 76). Before beginning to shoot, launch OI.Share and turn on the switch on the Add Location button to begin saving the GPS log. - Page 76 Changing connection method There are two ways to connect the camera to a smartphone: [Private], by which you use the same setting every time, and [One-Time], by which you use different setting every time. It is recommended to use [Private] when connecting to your smartphone, and to use [One-Time] when transferring images to another smartphone.
-
Page 77: Cancelling A Share Order
Cancelling a share order Cancel share orders that are set on images. Select [Wi-Fi Settings] in the Setup Menu and press A. Select [Reset share Order] and press I (arrow pad). Select [Yes] and press A. Resetting wireless LAN settings Initializes content of [Wi-Fi Settings]. - Page 78 The A-GPS data can be updated using the smartphone app “OLYMPUS Image Track” (OI.Track) or the PC software “OLYMPUS A-GPS Utility”. • Make sure that the camera date is set correctly.
- Page 79 “Error message during Wi-Fi connection” (P. 73) Updating the A-GPS data using a PC Download the OLYMPUS A-GPS Utility software from the URL below, and install it on your PC. http://sdl.olympus-imaging.com/agps/ Refer to “OLYMPUS A-GPS Utility Instruction Manual” on the website with above URL for details on how to update the data.
-
Page 80: Viewing Camera Images On Tv
Connecting the camera to another device Viewing camera images on TV Connecting the camera to a high-definition device using an HDMI cable gives you a high-resolution display for shooting and playback. HDMI Micro connector (type D) HDMI cable (Connect to the HDMI connector on the TV.) Use the cable to connect the camera to the TV. - Page 81 Using the TV remote control When connected to a TV that supports HDMI control, the camera can be operated using the TV remote control. HDMI control must be enabled in the camera menus before the camera is connected. Highlight [HDMI] in Custom Menu B2 (P. 63) and press the A button.
-
Page 82: Printing Pictures
Printing Pictures Direct printing (PictBridge) By connecting the camera to a PictBridge-compatible printer with the USB cable, you can print out recorded pictures directly. Connecting the camera Smaller terminal Micro-USB connector USB cable USB port • Use a fully charged battery for printing. •... -
Page 83: Custom Printing
Custom printing Adjust print mode, paper type, and other settings before printing. Connect the camera to the printer using the supplied USB cable and turn the camera on. A list of options will be displayed. Storage Highlight [Print] and press the A button. - Page 84 Setting the print paper items This setting varies with the type of printer. If only the printer’s STANDARD setting is available, you cannot change the setting. Size Sets the paper size that the printer supports. Selects whether the picture is printed on the entire page Borderless or inside a blank frame.
- Page 85 Once you have set the pictures for printing and printing data, select [Print], then press A. • To stop and cancel printing, press A. To resume printing, select [Continue]. Cancelling printing To cancel printing, highlight [Cancel] and press A. Note that any changes to the print order will be lost;...
- Page 86 Print reservation (DPOF) In print reservations, the number of prints and date imprint option are saved in the image on the card. This enables easy printing at a printer or print shop supporting DPOF by using only the print reservations on the card without a computer or a camera.
- Page 87 Reserving one print each of all images on the card [U] Follow Steps 1 and 2 in [<] (P. 86). Use FG (arrow pad) to select [U], and press the A button. Follow Steps 5 and 6 in [<]. ...
-
Page 88: Connecting The Camera To A Computer
Connecting the camera to a computer Connecting the camera Smaller terminal Micro-USB connector USB cable USB port • If nothing is displayed on the camera screen even after connecting the camera to the computer, the battery may be exhausted. Use a full-charged battery. -
Page 89: Copying Pictures To A Computer
Copying pictures to a computer Your camera supports the USB Mass Storage Class. You can transfer images to a computer by connecting the camera to the computer with the provided USB cable. The following operating systems are compatible with the USB connection: Windows Vista SP2/Windows 7 SP1/Windows 8/ Windows Windows 8.1/Windows 10... -
Page 90: Installing Software
The photographs and movies you have shot with your camera can be transferred to a computer and viewed, edited, and organized using the OLYMPUS Viewer 3 offered by OLYMPUS. • To install OLYMPUS Viewer 3, download it from the website below and follow the on-screen instructions. http://support.olympus-imaging.com/ov3download/ •... -
Page 91: Troubleshooting
Usage Tips If the camera does not work as intended, or if an error message is displayed on the screen, and you are unsure of what to do, refer to the information below to fix the problem(s). Troubleshooting B attery The camera does not work even when batteries are installed. - Page 92 Monitor Difficult to see. • Condensation may have occurred. Turn off the power, and wait for the camera body to become acclimated to the surrounding temperature and dry out before taking pictures. The light is caught in the picture. •...
-
Page 93: Error Message
Error message • When one of the messages below is displayed on the monitor, check the corrective action. Error message Corrective action Card problem Insert a new card. Card Error Card problem The card write-protect switch is set to the “LOCK” side. Write Protect Release the switch. - Page 94 Error message Corrective action Printer problem Refill the ink in the printer. No Ink Printer problem Remove the jammed paper. Jammed Settings Printer problem Changed* Return to the status where the printer can be used. Printer problem Turn off the camera and printer, check the printer for any Print Error problems, and then turn the power on again.
- Page 95 Error message Corrective action Log recording problems • The area of camera memory used for temporary storage of the log file is full. Insert a memory card or confirm that the current card is correctly inserted and transfer to log file to the memory card. •...
-
Page 96: Shooting Tips
GPS malfunction. Turn the camera off and then on again; if the message does not clear from the display, (red) contact an OLYMPUS service representative. Shooting tips When you are unsure of how to take a picture that you envision, refer to the information below. -
Page 97: Camera Shake
• Taking a picture of subjects where autofocus is difficult. In the following cases, after focusing on an object (by pressing the shutter button halfway down) with high contrast at the same distance as the subject, compose the shot, and take the picture. Subject with low contrast Excessively bright light in Subject containing no center of frame... -
Page 98: Color Hue
• Taking pictures using [Spot]. g P. 42 Brightness is matched with a subject in the center of the screen and the image is not affected by background light. • Taking pictures using [Fill In] flash. g P. 28 A subject against backlight is brightened. •... -
Page 99: Cleaning And Storing The Camera
Information Cleaning and storing the camera Camera care Exterior: • Wipe gently with a soft cloth. If the camera is very dirty, soak the cloth in mild soapy water and wring well. Wipe the camera with the damp cloth and then dry it with a dry cloth. -
Page 100: Using A Separately Sold Charger
Storage • When storing the camera for extended periods, remove the battery, adapter and card, and keep in a cool, dry place that is well ventilated. • Periodically insert the battery and test the camera functions. • Avoid leaving the camera in places where chemical products are handled since this may result in corrosion. -
Page 101: Using The Card
Cards compatible with this camera SD/SDHC/SDXC/Eye-Fi (with Wireless LAN function) card (commercially available) (for compatibility card details, visit the Olympus website.) Eye-Fi card • Use the Eye-Fi card in compliance with the laws and regulations of the country where the camera is used. Remove the Eye-Fi card from the camera or disable the card functions in airplanes and other locations where use is prohibited. - Page 102 Number of Images (Stills)/Length of Footage (Movies) per Card • The figures for the number of storable still pictures and recording length are approximate. The actual capacity varies with shooting conditions and the card used. • The table below shows the approximate number of images and length of footage that can be stored on a 4 GB card.
- Page 103 Movies Recording length Icon Image size/bit rate/frame rate With sound Without sound [Standard] is selected for A* 1920×1080 Super Fine 60p 1920×1080 Super Fine 50p 10 min. 1920×1080 Super Fine 30p 1920×1080 Super Fine 25p 1280×720 Super Fine 30p 20 min. 1280×720 Super Fine 25p 1920×1080 Fine 60p 1920×1080 Fine 50p...
- Page 104 Recording length Icon Image size/bit rate/frame rate With sound Without sound [High-speed] is selected for A* 1920×1080 HighSpeed 120fps 20 sec. 1280×720 HighSpeed 240fps 640×360 HighSpeed 480fps *1 The recording length is up to 29 minutes in the HD quality specified. *2 The recording length is up to 20 sec.
-
Page 105: Using Separately Sold Accessories
System You can take pictures and underwater pictures with a wireless flash when using a flash compatible with the Olympus Wireless RC Flash System. The guideline of the setup range in wireless flash shooting is from 1 to 2 m, however note that it varies depending on the ambient environment. - Page 106 Using Optional Converters and Other Accessories A fish eye converter capable of shooting pictures with strongly emphasized perspective and the unique facial expressions of pets etc. and a teleconverter capable of shooting faraway scenes are available. When shooting with MACROs, you can use the LED light guide to prevent unevenness in the MACRO LED illumination.
- Page 107 To attach/remove the LED light guide Remove Marks for direction LED light attaching guide Attach direction Lens ring release button • When the LED light guide is installed, do not fire the flash. To attach/remove the conversion lens/protective filter Lens ring release button Converter Conversion adapter...
- Page 108 • To attach a lens ring, converter adapter, LED light guide, or diffuser, align the mounting marks and rotate the accessory in the “attach direction” until it clicks into place. • For details, please visit the Olympus website for your local area. 108 EN...
-
Page 109: Before Use
For additional information on our warranty, please visit to the Olympus website for your local area. - Page 110 (and seals) are replaced annually. For the Olympus distributors or service stations where the waterproof packing can be replaced, visit Olympus website for your local area. • The included accessories (e.g. USB-AC adapter) do not offer shock or water resistance.
- Page 111 List of settings available in each shooting mode For information on O, A, and ^, see “List of A settings” (P. 112), “List of O settings” (P. 114), and “List of ^ settings” (P. 113). ― Exposure Comp. ― Picture Mode ―...
- Page 112 List of A settings Exposure Comp. Picture Mode ― ― ― White balance AF Mode ― ― ― Aspect Image quality (still images) Record mode (movies) ― ― ― Flash ― ― ― Flash Compensation ― ― ― Image stabilizer (still images) ―...
- Page 113 List of ^ settings Exposure Comp. ― ― ― ― Picture Mode ― ― ― ― White balance AF Mode Aspect Image quality (still images) Record mode (movies) ― Flash ― Flash Compensation Image stabilizer (still images) ― ― ― ―...
- Page 114 List of O settings B e D U G G H X d C F ― R ― ― ― ― ― ― ― ― ― Exposure Comp. ― ― ― ― ― ― ― ― ― ― ― Picture Mode ―...
- Page 115 ` g s E W ― ― R ― ― Exposure Comp. ― ― ― ― ― Picture Mode ― ― ― ― ― ― ― R ― ― White balance ― ― ― ― ― AF Mode R R ― R R Aspect R R ―...
-
Page 116: Menu Directory
Menu directory *1 Items that can be stored in [Custom Mode C1] or [Custom Mode C2]. *2 Default can be restored by selecting [Full] for [Reset]. *3 Default can be restored by selecting [Basic] for [Reset]. p Shooting Menu 1 Function Default ... - Page 117 q Playback Menu Function Default ― ― ― ― Start ― Party Time P.56 ― Slide ― ― Slide Interval 3 sec ― ― Movie Interval Short ― P.57 Edit Sel. Image ...
- Page 118 Function Default ― Displayed Grid P.63 ― Peaking Color White P.63 B2. Disp/8/PC P.63 HDMI ― ― 1080p Output Size P.63 ― ― HDMI Control C. Exp/ISO Exposure Shift ―...
- Page 119 Function Default G. Field Sensor ― ― ― Elevation / Depth P.68 ― ― Record GPS location P.68 ― GPS Priority GPS accuracy P.68 H. K Utility ― ― ― ― Pixel Mapping P.68 ― ―...
- Page 120 Lightning — If a lightning storm occurs while using a USB-AC adapter, remove it from the wall outlet immediately. Attachments — For your safety, and to avoid damaging the product, use only accessories recommended by Olympus. Location — To avoid damage to the product, mount the product securely on a stable tripod, stand, or bracket.
- Page 121 • In places prone to strong vibrations. • The camera uses a lithium ion battery specifi ed by Olympus. Charge the battery with the specifi ed USB-AC adapter or charger. Do not use any other USB-AC adapters or chargers.
- Page 122 If the fl uid burns your skin, seek medical attention immediately. • The Olympus lithium ion battery is designed to be used only for the Olympus digital camera. Do not use the battery to other devices.
- Page 123 If using the wireless LAN function in a country outside the region where the camera was purchased, there is a risk that the camera will not conform to the wireless communication regulations of that country. Olympus will not be held responsible for any failure to meet such regulations.
- Page 124 • Olympus makes no representations or warranties regarding any damages or any benefi t expected by using this unit lawfully which are caused by erasing picture data.
- Page 125 Some studies have suggested that some biological effects might occur, but such fi ndings have not been confi rmed by additional research. IM005 has been tested and found to comply with IC radiation exposure limits set forth for an uncontrolled environment and meets RSS-102 of the IC radio frequency (RF) Exposure rules.
- Page 126 Representations and warranties made by any person, including but not limited to dealers, representatives, salespersons, or agents of Olympus, which are inconsistent or in confl ict with or in addition to the terms of this limited warranty, shall not be binding upon Olympus unless reduced to writing and approved by an expressly authorized offi...
- Page 127 WHAT TO DO WHEN SERVICE IS NEEDED The customer must contact the designated Olympus Consumer Support Team for your region to coordinate the submission of your Product for repair service. To contact your Olympus Consumer Support Team in your region please visit or call the following: Canada: www.olympuscanada.com/repair / 1-800-622- 6372...
- Page 128 3. Since this Warranty Certifi cate will not be re-issued, keep it in a safe place. 4. Please note that Olympus will not assume any risks or bear any costs incurred in transporting the product to the dealer or Olympus authorized service station.
- Page 129 Notes regarding warranty maintenance 1. This Warranty will only be valid if the Warranty Certifi cate is duly completed by Olympus or the dealer. Make sure that your name, the name of the dealer, the serial number and the year, month and date of purchase are all completed.
- Page 130 Disclaimer of Warranty Olympus makes no representations or warranties, either expressed or implied, by or concerning any content if these written materials or software, and in no event shall be liable for any implied warranty of merchantability or fi tness for any particular purpose or for any consequential, incidental or indirect damages (including but not limited to damages for loss of business profi...
-
Page 131: Specifications
Image pickup device : 1/2.3” CMOS (primary color filter) Lens : Olympus lens 4.5 mm to 18.0 mm, f2.0 to f4.9 (Equivalent to 25 mm to 100 mm on a 35 mm film) Photometric system : Digital ESP metering, spot metering system Shutter speed : 4 to 1/2000 sec. - Page 132 – 20 °C to 60 °C (– 4 °F to 140 °F) (storage) Humidity : 30% - 90% (operation)/10% - 90% (storage) Power supply : One Olympus lithium ion battery (LI-92B) or USB-AC adapter (F-5AC) Dimensions : 113.0 mm (W) × 66.0 mm (H) × 31.9 mm (D) (4.5 ×...
- Page 134 date of issue 2017.04. WD277701...
Need help?
Do you have a question about the IM005 and is the answer not in the manual?
Questions and answers