
Subscribe to Our Youtube Channel
Related Manuals for Olympus Super DLX IS-10


Summary of Contents for Olympus Super DLX IS-10
- Page 1 INSTRUCTIONS Before using your camera, read this manual carefully to ensure correct use. We recommend that you take test shots to get accustomed to your camera before taking important photographs.
-
Page 2: Main Features
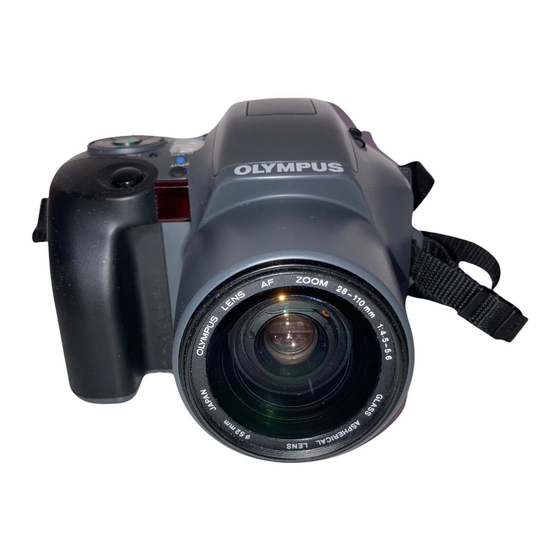
Thank you for purchasing an Olympus camera. Built-in 28mm~110mm approx. 4X zoom lens for increased shooting range. SLR lens ensures that what you see in the viewfinder is what you get on film. Direct Mode Select buttons let you easily select the right exposure mode for any shooting purpose. -
Page 3: Table Of Contents
PREPARATIONS BASIC OPERATIONS ADDITIONAL FUNCTIONS TAKING BETTER PICTURES CAMERA MAINTENANCE Viewfinder display LCD panel Diopter adjustment Using the strap/optional soft case Loading the film Taking pictures Unloading the film Using the focus lock Flash photography Selftimer Using the exposure modes Effects of zoom and its advantages Autofocus (AF) Exposure... -
Page 4: Names And Functions Of Parts
NAMES AND FUNCTIONS OF PARTS Direct Mode Select buttons (See p. 30.) Selects exposure modes: Stop Action, Portrait, Landscape, and Night Scene. F. No. button (See p. 35.) Sets the aperture in the Aperture-Preferred mode. Shutter release button Flash mode button Spot button (See p. - Page 5 Viewfinder (See p. 6.) Diopter adjustment dial Selftimer/remote control button Mid-roll rewind button Tripod socket Battery compartment cover Zoom (T/W) buttons (See p. 18.) Film window For confirmation of film ISO speed Back cover release Back cover...
-
Page 6: Viewfinder Display
VIEWFINDER DISPLAY Autofocus frame Position your subject within the autofocus frame. Spot frame For spot metering, position the subject within the spot frame. Flash Autofocus Lights when the subject is in focus. Overexposure/ Underexposure (p. 35) -
Page 7: Lcd Panel
Exposure counter (p. 17) Flash modes (p. 23) Self-timer/remote control (p. 29/39) Mode status indicator (p. 30) Displays the engaged exposure mode by showing the corresponding area. LCD PANEL Battery check (p. 13) Aperture setting (p. 35) Spot mode (p. 37) Full-Auto mode (p. -
Page 8: Diopter Adjustment
DIOPTER ADJUSTMENT To Adjust the Viewfinder to Compensate for Near and Farsighted Vision. Turn the diopter adjustment dial until the viewfinder display becomes clear. Turn up if you are nearsighted or down if you are farsighted. -
Page 9: Using The Strap/Optional Soft Case
USING THE STRAP/OPTIONAL SOFT CASE The optional remote control's case can be attached to the strap. The soft case can be attached to a belt with the belt loop. -
Page 10: Basic Shooting Procedures
OUTLINE OF OPERATIONS Load the batteries (p. 12). Press the zoom buttons to determine the composition (p. 18). Basic Shooting Procedures Open the back cover (p. 16). Place the autofocus frame on the subject you want to focus on (p. 19). Load the film (p. - Page 11 Close the back cover (p. 17). Depress the shutter release button fully to take a picture (p. 20). Turn the power switch ON (p. 17). When the film reaches the end, it will automatically rewind (p. 21). Make sure the exposure counter on the LCD panel reads (p.
-
Page 12: Loading The Batteries
LOADING THE BATTERIES Use two 3V lithium batteries (CR123A or DL123A). Turn the lock screw to OPEN with a coin. fingertip in the notch. open the battery cover. When replacing the batteries, make sure to turn the power switch OFF before unloading the batteries. -
Page 13: Checking The Batteries
CHECKING THE BATTERIES Turn the power switch ON. Be sure to check the batteries as well. Display lights (turns off Batteries are OK. You can shoot. after 12 sec.). Batteries are low blinks and other and should be indicators on the replaced. -
Page 14: Points To Remember
POINTS TO REMEMBER Hold the Camera Correctly. Correct. Correct. Note: As the focal length becomes larger, shaking the camera becomes more noticeable. Hold the camera firmly with both hands while keeping elbows at sides to prevent the camera from shaking. Cautions: Try not to hold the lens barrel. -
Page 15: Proper Shutter Release
Proper Shutter Release. Keep the shutter release button depressed halfway. To lock the focus. Make sure The image is clear, the autofocus beep is heard, and the autofocus indicator lights in the viewfinder. The shutter release button has two clicks. Practice before loading the film. Depress the shutter release button fully. -
Page 16: Loading The Film
LOADING THE FILM Slide the back cover release upward to open the back cover. Shutter curtains Caution: Do not touch the shutter curtain, and do not press it with the edge of film. Load the film. Note: Make sure the film is lying flat. - Page 17 Align the tip of the film leader with the mark as shown, and close the back cover. The film automatically advances to the first frame. Make sure The film does not overlap any of the positioning guides shown above. Turn the power switch Make sure The exposure counter on the LCD panel reads...
-
Page 18: Taking Pictures
TAKING PICTURES Follow this procedure for normal photography. When the power switch is turned ON, the camera is in the Full-Auto mode. (See p. 36.) Remove the lens cap, and turn the power switch ON. The lens advances, and the Make sure LCD panel lights. - Page 19 How to Use the Zoom Buttons Telephoto: Press the button to zoom in. Max. telephoto focal length: 110 mm Wide-angle: Press the button to zoom out. Max. wide-angle focal length: 28 mm Position the autofocus frame on your subject. Autofocus frame Working distance: 75 cm (2.5 ft) ~...
-
Page 20: The Picture
Depress the shutter release button halfway. Make sure The autofocus beep is heard and the autofocus indicator lights when the subject is in focus. It will blink if the subject is difficult for the autofocus to lock on, and when the subject is too close. Note: When the autofocus indicator blinks, the shutter won't release. -
Page 21: Unloading The Film
UNLOADING THE FILM The camera automatically rewinds the film when you reach the end of a roll. Make sure the motor has stopped and the is blinking on the LCD panel, before opening the back cover and removing the film. The final number of exposures may sometimes exceed the number of exposures specified on the film. -
Page 22: Using The Focus Lock
USING THE FOCUS LOCK When the main subject is not in the center of the autofocus frame, follow the procedure below. This is called focus lock. Position the autofocus frame on your subject and press the shutter release button halfway. Make sure The autofocus beep is heard, and the autofocus indicator lights in the... -
Page 23: Flash Photography
FLASH PHOTOGRAPHY Three flash modes are available to suit different requirements. How to Select the Flash Mode Set the power switch to to flip up the flash. The camera will recharge the flash, and the flash will be ready to use. Note: Recharging takes 0.2~3.5 seconds. -
Page 24: Flash Modes
Flash Modes Mode Automatically fires in low-light conditions. (p. 25) Significantly reduces the phenomenon of "red-eye" (when a subject's eyes appear red). (p. 27) Fires regardless of available light. (p. 28) Note: Use of the flash is recommended if in the viewfinder when the flash isn't flipped up. Otherwise the camera will select a long exposure and pictures may be blurred due to camera shake. -
Page 25: Auto Flash
The flash fires automatically when there is insufficient light or when there is backlighting. Set the flash mode to AUTO. Auto Flash Press the shutter release button halfway to make sure viewfinder. Note: If you press the shutter release button with blinking in the viewfinder, the shutter won't release. - Page 26 Press the shutter release button fully. Note: The shutter speed is automatically set at 1/100-sec. when the flash fires. If the subject requires a faster shutter speed, the flash won't fire. Auto Flash Range (with color negative film) Focal length 28mm ISO 100 4.3m (14.1 ft)
-
Page 27: Shutter Release Button
Red-Eye Reducing Flash Approximately 20 pre-flashes are emitted before the main flash fires, significantly reducing the phenomenon of "red-eye" (when a subject's eyes appear red). This mode is the same as Auto Flash except for the pre-flashes. Flip up the flash, and select the Auto-S mode. - Page 28 Forced Activation In this mode, the flash always fires. Even in backlighting, both the subject and background can be shot clearly. And portraits look lively by reflecting light into the subject's eyes. Make sure the exposure mode is set to FULL AUTO.
-
Page 29: Selftimer
SELFTIMER Press the /REMOTE button until displayed on the LCD panel. Fix the camera firmly on a tripod or other support. Notes: The focus and exposure will be locked when the shutter release button is depressed halfway. mode is cancelled after the shutter releases. button again. -
Page 30: Using The Exposure Modes
USING THE EXPOSURE MODES There are four preset settings for easy shooting in various common situations, as well as an Aperture-Preferred Auto mode that allows you to select your own setting. Exposure Modes For easy, effective shooting in various common situations: Stop Action (p. -
Page 31: Stop Action
STOP ACTION To freeze moving subjects. In this mode, the camera automatically selects a faster shutter speed to reduce blurring of moving subjects. (Max. shutter speed: 1/2000-sec.) Press the button. Aim the camera at the subject, and press the shutter release button. Note: In the Stop Action mode, for faster flash response, Auto-S pre-flashes will not be emitted. - Page 32 To take pictures with blurred backgrounds for a "portrait" effect. Portrait mode lets you take beautiful portrait photographs. This is especially effective when the lens is at the telephoto setting and/or when there is a great distance between the subject and the background. Press the button.
-
Page 33: Release Button
LANDSCAPE To take pictures with extended in-focus backgrounds. When shooting landscapes or landscapes with subjects in the foreground, all objects near and far are sharply in focus. Press the button. Press the shutter release button. Note: Set the lens at wide angle for optimal results. -
Page 34: Night Scene
NIGHT SCENE To shoot properly-lit night scenes In this mode, the camera automatically selects the ideal exposure for shooting night scenes free of subjects, and for shooting night scenes with subjects in the foreground. When subjects are in the foreground, flip up the flash. Press the shutter release Press the button. - Page 35 APERTURE-PREFERRED AUTO The background blur can be controlled by adjusting the aperture setting. The shutter speed will be selected automatically. Press the F.No. button to enter the Aperture- Preferred Auto mode. Notes: Additional pressing of the F.No. button stops down the aperture. Once the camera has passed the smallest available aperture setting, it will return to the largest available aperture setting.
-
Page 36: Restoring The Standard Shooting Mode
RESTORING THE STANDARD SHOOTING MODE Restore the standard shooting mode for easy, worry-free photography. Press the FULL AUTO button. The camera will also return to the standard shooting mode if the power is switched off and on again. Standard Shooting Mode Settings for the standard shooting mode are as follows: Exposure mode —... -
Page 37: Spot Metering
SPOT METERING In this mode, the camera limits light metering to a particular area, such as a subject's face, and sets the correct exposure. Spot frame In situations like the one illustrated above, the subject will be dark because of backlighting. Position the subject for spot metering within the spot frame, and press... - Page 38 Recompose the shot, then press the shutter release button to take the picture. Notes: When the flash is flipped up, or the Night Scene mode is engaged, the camera does not perform spot metering. After the shot, the Spot Metering mode is canceled.
-
Page 39: Remote Control (Optional)
REMOTE CONTROL (OPTIONAL) The optional RC-100 Remote Control is required. Position the autofocus frame Press the /REMOTE button on the subject. to engage the Remote Control mode. - Page 40 The battery of the remote control cannot be replaced. The remote control unit is expendable. Order a new one from your nearby camera store or Olympus service center when it no longer transmits signals to the camera. CAUTIONS: Keep the remote control out of the reach of children.
-
Page 41: Effects Of Zoom And Its Advantages
EFFECTS OF ZOOM AND ITS ADVANTAGES Zoom lens focal length is changed by moving part of the lens. With this camera, you can select any focal length between 28 mm and 110 mm. 28 mm wide-angle Because the angle of view is wide and the depth of field is large, you can take sharp photographs with enhanced perspective and contrast. - Page 42 Angle of view and depth of field Angle of view is directly related to the focal depth of field (the distance in front of and behind the subject that the camera is able to bring into focus). The greater the angle of view (wide angle), the greater the depth of field.
-
Page 43: Autofocus (Af)
AUTOFOCUS (AF) Although this camera's autofocus can lock on virtually any subject, there are certain conditions, such as not be possible to obtain the correct focus. In the situations shown below in , autofocus may not lock on the correct subject even though the autofocus indicator lights and the shutter releases. - Page 44 Two subjects at different distances • When the subject locks out-of- focus although the autofocus lamp lights, focus on another subject at the desired camera-to- subject distance first. Then recompose the frame to take the picture. Subjects with repetitive patterns •...
- Page 45 Automatic Exposure Mode Exposure refers to the amount of light which strikes the film, and is controlled by a combination of aperture size and shutter speed. The correct amount of light, called correct exposure, depends on the film speed (indicated on the film package, e.g.
-
Page 46: Film Speed
Night Scene Mode When shooting night scenes you may sometimes be dis- appointed with the result, usually because the camera's automatic exposure function works on a standard exposure ratio. In such situations a professional photo- grapher would adjust for exposure compensation based on personal experience, or select the manual shooting mode. -
Page 47: Metering The Amount Of Light
METERING THE AMOUNT OF LIGHT Light Metering Light metering can measure the brightness of the framed subject in various ways. This camera employs three metering systems: (1) ESP light metering, (2) center-weighted average light metering, and (3) spot metering. You can select the light metering system most suitable to the conditions. -
Page 48: Accessories (Optional)
ACCESSORIES (OPTIONAL) ACTION CASE C REMOTE CONTROL RC-100 IS/L LENS C-180 H.Q. CONVERTER 1.7X... - Page 49 NEVER ATTEMPT TO DISASSEMBLE THE CAMERA; IT CONTAINS A HIGH- VOLTAGE CIRCUIT. In case of malfunction, consult your nearest Olympus dealer or Olympus service center. NOTES Do not mix different types of batteries or new and old batteries. When the camera is not used for an extended period of time, remove the batteries.
-
Page 50: Troubleshooting
TROUBLESHOOTING Operating Problems Symptom The camera does The power is OFF. not work. The batteries are loaded incorrectly. The batteries are exhausted. The batteries are temporarily unable to function. The loaded film has been rewound. The film is incorrectly loaded. The LCD panel The LCD panel turns off automatically turns off suddenly... - Page 51 Symptom The autofocus may not work when the The camera doesn't subject is out of the auxiliary flash's focus on the subject even though the working distance (approx. 75cm~5m/ 2.5ft ~16.4ft). auxiliary flash lights. The autofocus may not be effective with this subject.
- Page 52 Problems with Printed Pictures Symptom The subjects' eyes This "red-eye phenomenon" occurs with all cameras when a flash is used. It is appear red in printed pictures. caused by light from the flash reflecting off the retina at the back of the eye. Red- eye varies depending on the individual and the shooting conditions such as ambient lighting.
-
Page 53: Questions And Answers
20 rolls of 24- exposure film on which the flash was used on half of all the shots (determined under Olympus test conditions). If you do not use the flash and zoom very often, the batteries will last much longer. -
Page 54: Specifications
28mm ~ 110mm zoom lens. Film format: 35mm standard DX-coded film (24 x 36mm). Lens: Olympus lens (filter available, 52mm filter diameter) 28mm ~ 110mm F4.5 ~ 5.6, 11 elements in 9 groups (5-group zoom construction). - Page 55 recycling time of about 0.2 ~ 3.5 sec. (at normal temperature). Flash range: Wide — 0.75~4.3 m (2.5~14.1 ft), Tele — 0.75~3.5 m (2.5~11.5 ft) with ISO 100 negative color film); Wide — 0.75~8.6 m (2.5~28.2 ft), Tele — 0.75~7.0 m (2.5~23.0 ft) with ISO 400 negative color film.
- Page 56 San-Ei Building, 22-2, Nishi Shinjuku 1-chome, Shinjuku-ku, Tokyo, Japan. Tel. 03-3340-2211 OLYMPUS AMERICA INC. Two Corporate Center Drive, Melville, NY 11747-3157, U.S.A. Tel. 516-844-5000 OLYMPUS OPTICAL CO. (EUROPA) GMBH. (Premises/Goods delivery) Wendenstrasse 14-16, 20097 Hamburg, Germany. Tel. 040-237730 (Letters) Postfach 10 49 08, 20034 Hamburg, Germany.
Need help?
Do you have a question about the Super DLX IS-10 and is the answer not in the manual?
Questions and answers