Table of Contents
Advertisement
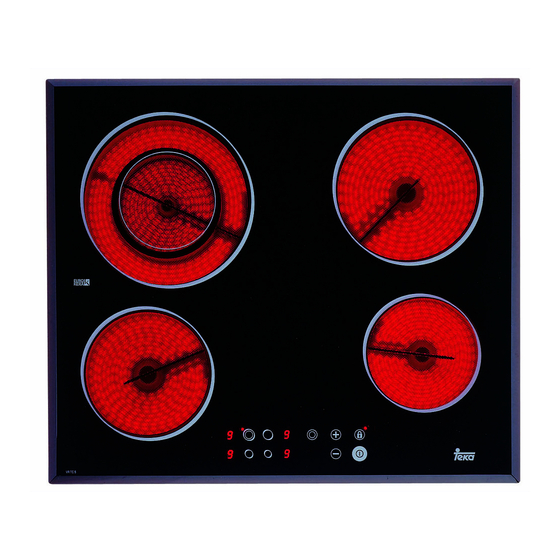
INSTALLATION AND MAINTENANCE MANUAL
CERAMIC HOBS
ANLEITUNG FÜR EINBAU UND INSTANDHALTUNG
GLASKERAMIK-KOCHFELDER
MANUEL D'INSTALLATION ET D'ENTRETIEN
CERAMIC HOBS
VTN DC – VS U – VT CM – VT DUAL.1 – VT HDC2
VTC HDC2 – VTC B – VTC DC – VR 622 – TS 600
TR 640 – TR 620 – VT TC 60.3 – VT TC 60 PH
TT 620 – TZ 640 – TZ 620 – VT CM INOX HALOGEN
TT 630 – TT 600 – TC 620 – TB 600 – TT 640
TZ 640 – TR 600 – TR 735 AB
Advertisement
Table of Contents

Related Manuals for Teka VTN DC


Summary of Contents for Teka VTN DC
- Page 1 MANUEL D’INSTALLATION ET D’ENTRETIEN CERAMIC HOBS VTN DC – VS U – VT CM – VT DUAL.1 – VT HDC2 VTC HDC2 – VTC B – VTC DC – VR 622 – TS 600 TR 640 – TR 620 – VT TC 60.3 – VT TC 60 PH TT 620 –...
-
Page 2: Table Of Contents
Contents / Inhalt / Table des Matières Page 4 Seite 4 Introduction Einführung Hinweise zum Gebrauch User Guide Einbau Installation Einbauort für die Kochfelder Positioning the hobs Einbauort für den Ofen oder Positioning the oven das Bedienfeld or the control panel Verankerung des Kochfelds Fixing the hob Gasanschluss... - Page 3 Page 4 Présentation Guide d’utilisation Installation Logement des tables de cuisson Logement du four ou du tableau de commandes Fixation des tables de cuisson Raccordement au gaz (Modèle VT DUAL.1) Branchement électrique Raccordement de la table de cuisson au four ou au bandeau de commandes Adaptation du gaz (Modèle VT DUAL.1)
-
Page 4: Introduction
Introduction / Einführung / Présentation Model VS U Model VTN DC 1 1,200 watt hotplate. 1 1,200 watt hotplate. 2 1,800 watt hotplate. 2 1,800 watt hotplate. 3 1,800 watt hotplate. 3 700/2,100 watt double circuit hotplate. 4 1,200 watt hotplate. - Page 5 Model VTC HDC2 Model VT HDC2 1 1,200 watt hotplate. 1 1,200 watt hotplate. 2 700/1,700 watt double circuit hotplate. 2 700/1,700 watt double circuit hotplate. 3 1,400/2,000 watt double circuit hotplate. 3 1,400/2,000 watt double circuit hotplate. 4 1,800 watt halogen hotplate. 4 1,800 watt halogen hotplate.
- Page 6 Model VT CM Model VTC B 1 1,200 watt hotplate. 1 1,200 watt hotplate. 2 1,800 watt hotplate. 2 1,800 watt hotplate. 3 1,800 watt hotplate. 3 2,100 watt hotplate. 4 1,200 watt hotplate. 4 1,200 watt hotplate. 5 Residual heat indicator lights. 5 Residual heat indicator lights.
- Page 7 Model VT DUAL.1 Model VT CM INOX HALOGEN 1 700/2,100 watt double circuit hotplate. 1 1,200 watt hotplate. 2 Semi-rapid burner 1,500 Kcal/h -1.75 kW. 2 1,800 watt halogen hotplate. 3 1200 watt hotplate. 3 1,800 watt hotplate. 4 Rapid burner 2,580 Kcal/h -3 kW. 4 1,200 watt hotplate.
- Page 8 Model VTC DC Model VR 622 1 1,500 watt hotplate. 1 1,200 watt hotplate. 2 1,400/2,000 watt double circuit hotplate. 2 1,800 watt hotplate. 3 700/2,100 watt double circuit hotplate. 3 700/2,100 watt double circuit hotplate. 4 1,800 watt hotplate. 4 1,500 watt hotplate.
- Page 9 Model VT TC 60.3 Model TT 620 1 1,200 watt hotplate. 1 1,400/2,000 watt double circuit hotplate. 2 700/1,700 watt double circuit hotplate. 2 1,800 watt hotplate. 3 1,400/2,000 watt double circuit hotplate. 3 1,200 watt hotplate. 4 1,200 watt hotplate. 4 1,500 watt hotplate.
- Page 10 Model VT TC 60 PH Model TS 600 1 1,200 watt hotplate. 1 2,100 watt hotplate. 2 1,800 watt hotplate. 2 1,800 watt halogen hotplate. 3 1,200 watt hotplate. 3 1,400/2,000 watt double circuit hotplate. 4 1,200 watt hotplate. 4 1,200 watt hotplate. * Residual heat indicator.
- Page 11 Models TR 620 and TZ 620 Models TR 640, TT 640 and TZ 640 1 700/1,700 watt double circuit hotplate. 1 700/2,100 watt double circuit hotplate. 2 1,800 watt hotplate. 2 1,500/2,400 watt double circuit hotplate. 3 1,500 watt hotplate. 3 1,200 watt hotplate.
- Page 12 Model TT 630 Model TT 600, TR 600 and TB 600 1 1,800 watt hotplate. 1 2,100 watt hotplate. 2 1,500/2,400 watt double circuit hotplate. 2 1,800 watt hotplate. 3 1,200 watt hotplate. 3 1,200 watt hotplate. 4 1,200 watt hotplate. * Residual heat indicator.
- Page 13 Model TC 620 Model TR 735 AB 1 1,400/2,000 watt double circuit hotplate. 1 1,800 watt hotplate. 2 1,800 watt hotplate. 2 900 / 1,950 / 2,700 watt hotplate. 3 1,200 watt hotplate. 3 1,200 watt hotplate. 4 1,500 watt hotplate. * Residual heat indicator.
-
Page 14: User Guide
Likewise, any internal work on the hob should only be done by TEKA’s Before installing and using it, we would technical staff. ask that you read this Manual carefully... -
Page 15: Installation
20, 30 and 40 mm. In the packaging of the models VTN DC, VT HDC2 and TC 620, there is a template included that is for use in sizing the space for these glass minimun 40 mm ceramic hob models. -
Page 16: Positioning The Oven Or The Control Panel
RANTEE DOES NOT COVER THE GLASS IF IT SUFFERS A VIOLENT BLOW OR IF IT IS USED IMPROPERLY. VTN DC, VT HDC2 and TC 620. TR 735 AB VS U*, VT CM, VT DUAL.1, VTC HDC2, VTC B, VTC DC, Positioning the oven or the VR 622, TS 600*, TR 640, TR 620, VT TC 60.3, VT TC 60... -
Page 17: Connecting The Gas (Model Vt Dual. 1)
the washer will be stuck to the lower face of The clips and the sealing washer are pro- the glass. vided, and can be found in the packaging. Connecting the gas Silicone should not be applied between the glass and the unit worktop because if it becomes necessary to remove the Model VT DUAL.1 cooker from its position, the glass could... -
Page 18: Connecting The Electricity
4 Put the oven part-way into its space, hob model ever needs to be changed, it taking care not to drag the cardan teles- should be replaced by TEKA’s official service. copic shafts coming from the hob, and leaving enough space to put in the other... -
Page 19: Gas Conversion (Model Vt Dual. 1)
TEKA INDUSTRIAL, S.A. assumes no Information for Technical Assis- responsibility for any hob malfunction if the tance: whenever the type of gas or the gas conversion or the adjustment of the appliance’s pressure is changed, the new... -
Page 20: Technical Information
Technical information Dimensions and Characteristics Models VS U VTC B VT CM HDC2 HDC2 DUAL.1 Hob dimensions Height (mm) Length (mm) Width (mm) Dimensions of the placement in the unit Length (mm) Width (mm) Depth (mm) Configuration Double radiant hotplate 700/2100W circuit Double radiant hotplate 700/1700W circuit... - Page 21 VT CM TT 600 TR 640 VT TC VT TC TR 735 TR 600 INOX 60.3 60 PH TZ 640 Models TB 600 HALO- TT 640 Hob dimensions Height (mm) Length (mm) Width (mm) Dimensions of the placement in the unit Length (mm) 560/580 Width (mm)
-
Page 22: Technical Details
clear, a window opened, or an effective Technical details mechical ventilation system device, such as a hood, installed. CHARACTERISTICS COMMON TO ALL The intense and prolonged use MODELS of the appliance may call for comple- mentary ventilation, such as opening a The supply voltage and frequency will be window, or more efficient ventilation as shown on the rating plate. -
Page 23: Use And Maintenance
Use and Maintenance Models VT TC 60.3 and VT TC 60 PH Special requirements before first use Before connecting the hob to the electric mains, check that the voltage and fre- quency of the mains matches what is shown on the hob’s rating plate, which is located lower down, and on the guarantee or, where appropriate, the technical datas- heet supplied, which should be kept toge-... - Page 24 Models TS 600, TR 640, TT 640, TZ 640, TR 620, TZ 620 and TT 620 fig. 9 The controls are all operated by using the 1 Touch the chosen hotplate's sensor (2). A sensors, each of which has an indicator appears on the corresponding power associated with it.
-
Page 25: Double Or Triple Circuit Hotplate
cut while the H is turned on, and then Please note: the power comes straight back on To do anything with a hotplate, it needs again, the residual heat indicators will to be selected. When you want to use a not come back on even if the cooking hotplate, check that the corresponding surfaces are still hot. -
Page 26: Blocking The Hob's Sensor
at any time, providing the hotplate is swit- SAFETY FUNCTION (only models TT ched on. 600, TB 600, TR 600, TT 630,TC 620 and TR 735 AB) DISCONNECTING / TURNING OFF THE DOUBLE HOTPLATE The safety function can be activated after the hob is connected. -
Page 27: Remote Cooking
The touch control pre-programs the selec- by touching sensor for 5 seconds ted hotplate to full power and then decrea- immediately after activating the touch con- ses it to the power you have chosen after trol. This should be done within 5 seconds a certain length of time (see table 5). -
Page 28: Timer Function
MODIFYING THE POWER LEVEL counter"). DURING REMOTE COOKING MODELS VT TC 60 PH, TR 640, TT 640 1 The hotplate must have already been and TZ 640 selected. The corresponding decimal point has to be lit. (13) Switching on the clock 2 Use sensor to change the 1 The hotplate that is to be controlled must... - Page 29 1 The hotplate that is to be controlled must minutes, and as a hotplate timer for times have been already selected. The corres- of between 1 and 99 minutes. All the coo- ponding decimal point (13) has to be lit. king areas can be programmed indepen- dently and simultaneously.
-
Page 30: The Clock As Countdown
When more than one cooking area is 2 Select the counter sensor (7). The being timed simultaneously the time indi- corresponding decimal point (13) has to cator will, by default, show the cooking be lit. time remaining in the area that will discon- nect first. -
Page 31: Power Surges
(more or less appliance and contact TEKA's technical heat). (See fig. 10) service. Each power regulator control knob has Power surges numbering from “0”... -
Page 32: Advice On Using The Glass Ceramic Hotplates Effectively
both, you can regulate the temperature by setting the control to intermediary posi- tions, just as with the normal and halogen hobs described in the previous paragraph. With double circuit regulators, when the control is set to “0” it may only be turned clockwise, as there is a catch which prevents you moving from “0”... -
Page 33: Cleaning And Care
* Do not cook with plastic pans. fig. 12 * Pans should be made of a material which is heat-resistent so that they do not melt on the glass. * The glass will tolerate bangs from big pans that do not have sharp edges. Be careful with impacts from small, sharp Wrong Right... - Page 34 the hob. glass ceramic cleaning agent (for exam- ple, Vitroclen), although it may be that the LOOKING AFTER THE GLASS cleaning needs to be repeated more than once. The degree of soiling should be taken into account when cleaning, and the items and Worn trim is the result of using abrasive products used should vary according to cleaning products or pans with uneven...
-
Page 35: Anti-Accidental Turn System On Gas Controls
the glass. burner shows which control belongs to which burner. Press the control knob LOOKING AFTER THE SURROUND (figure 14) and at the same time turn it anti-clockwise to the maximum position Clean dirt off using a damp cloth or warm, (the big flame). -
Page 36: Cleaning And Looking After The Burners (Model Vt Dual.1)
kept well away. * Pans placed on the burners should not jut out past the edge of the hob, becau- For safety reasons, we advise se the effect of the flame being reflected that the instructions provided by the from the pan can damage hobs whose gas supply company are followed and surfaces are not resistent to high tempe- that the supply tap is turned off when... - Page 37 TEKA INDUSTRIAL S.A. reserves the right office, your household waste disposal to alter its appliances in any way it deems service or the shop where you purcha- necessary or useful while not altering their sed the product.
-
Page 38: If Something Fails To Work
If something doesn’t work Before calling the Technical Service, please make the following checks: Fault Possible cause Possible solution FOR ALL THE MODELS: Neither the hotplates nor the pilot lights are working The cable is not connected Connect the cable to the to the mains mains Message ER 25 and the beeping signal... - Page 39 Fault Possible cause Possible solution VT DUAL.1 The gas burners are not lighting Gas is not coming Check that the gas cylinder through to the hob tap is properly positioned and open If it is piped gas, open the gas tap The gas burners are making the pans dirty The burner openings are dirty Clean the burners’...
Need help?
Do you have a question about the VTN DC and is the answer not in the manual?
Questions and answers
Cómo se conectan los cables
To connect the cables for the Teka VTN DC hob:
1. Check Compatibility: Ensure the voltage and frequency of the mains match those on the hob’s rating plate.
2. Use an Omnipolar Switch or Plug: The connection should be made via an accessible switch or plug that can handle the required intensity and has at least a 3 mm gap between contacts for emergency disconnection.
3. Ensure Proper Earthing: The connection must include correct earthing in compliance with regulations.
4. Secure the Cable: If the flexible supply cable needs replacement, it must be done by TEKA’s official service.
5. Avoid Damaging the Input Cable: Ensure the input cable is not pinched or damaged during installation.
Follow all safety and regulatory guidelines when making the connection.
This answer is automatically generated