Table of Contents
Advertisement
F u l l W i r e l e s s W e a t h e r S t a t i o n K i t
w i t h U S B u p l o a d
M o d e l : W M R 8 9 / W M R 8 9 A
U S ER M A NU A L
C O NT ENT S
I n t r o d u c t i o n . . . . . . . . . . . . . . . . . . . . . . . . . . . . . . . . . . . . . . . . . . . . . . . . . . . . . . . . . . . . . . . 1
P a c k a g i n g c o n t e n t s . . . . . . . . . . . . . . . . . . . . . . . . . . . . . . . . . . . . . . . . . . . . . . . . . . . . . 1
Base station ..............................................................1
Wind sensor ..............................................................1
Temperature & humidity sensor ................................1
Rain gauge ................................................................2
A c c e s s o r i e s - s e n s o r s . . . . . . . . . . . . . . . . . . . . . . . . . . . . . . . . . . . . . . . . . . . . . . . . 2
O v e r v i e w . . . . . . . . . . . . . . . . . . . . . . . . . . . . . . . . . . . . . . . . . . . . . . . . . . . . . . . . . . . . . . . . . . . . . . . 2
Top view ....................................................................2
Back view ..................................................................2
LCD display ...............................................................2
Wind sensor ..............................................................3
Rain gauge ................................................................3
Outdoor temperature / humidity sensor ....................3
G e t t i n g s t a r t e d . . . . . . . . . . . . . . . . . . . . . . . . . . . . . . . . . . . . . . . . . . . . . . . . . . . . . . . . . . . . . 4
Set up remote wind sensor .......................................4
Set up remote temperature / humidity sensor ...........4
Set up rain gauge ......................................................4
Set up base station ...................................................4
M o u n t i n g / p l a c i n g o f s e n s o r s . . . . . . . . . . . . . . . . . . . . . . . . . . . . . . . . . . . . . . 5
Wind sensor ..............................................................5
Temperature / humidity sensor ..................................5
Rain gauge ................................................................6
B a c k l i g h t . . . . . . . . . . . . . . . . . . . . . . . . . . . . . . . . . . . . . . . . . . . . . . . . . . . . . . . . . . . . . . . . . . . . . . 6
C l o c k r e c e p t i o n . . . . . . . . . . . . . . . . . . . . . . . . . . . . . . . . . . . . . . . . . . . . . . . . . . . . . . . . . . . . 6
C l o c k / c a l e n d a r . . . . . . . . . . . . . . . . . . . . . . . . . . . . . . . . . . . . . . . . . . . . . . . . . . . . . . . . . . . 7
M o o n p h a s e . . . . . . . . . . . . . . . . . . . . . . . . . . . . . . . . . . . . . . . . . . . . . . . . . . . . . . . . . . . . . . . . . . 7
A u t o s c a n n i n g f u n c t i o n . . . . . . . . . . . . . . . . . . . . . . . . . . . . . . . . . . . . . . . . . . . . . . 7
W e a t h e r f o r e c a s t . . . . . . . . . . . . . . . . . . . . . . . . . . . . . . . . . . . . . . . . . . . . . . . . . . . . . . . . . 7
T e m p e r a t u r e a n d h u m i d i t y . . . . . . . . . . . . . . . . . . . . . . . . . . . . . . . . . . . . . . . . . . 7
Temperature and humidity trend ...............................8
W i n d c h i l l / d i r e c t i o n / s p e e d . . . . . . . . . . . . . . . . . . . . . . . . . . . . . . . . . . . . . . 8
B a r o m e t e r / u v / r a i n f a l l . . . . . . . . . . . . . . . . . . . . . . . . . . . . . . . . . . . . . . . . . . . . . . . . . . . 8
Barometer .................................................................9
UV index ...................................................................9
Rainfall ......................................................................9
U p l o a d d a t a t o p c s o f t w a r e . . . . . . . . . . . . . . . . . . . . . . . . . . . . . . . . . . . . . . . 1 0
R e s e t . . . . . . . . . . . . . . . . . . . . . . . . . . . . . . . . . . . . . . . . . . . . . . . . . . . . . . . . . . . . . . . . . . . . . . . . . . . 1 0
Specifications . . . . . . . . . . . . . . . . . . . . . . . . . . . . . . . . . . . . . . . . . . . . . . . . . . . . . . . . . . . . 1 0
Base station ............................................................10
Indoor barometer ....................................................10
Indoor temperature .................................................10
Indoor relative humidity ...........................................10
Radio-controlled / atomic clock ...............................10
Remote wind sensor unit ........................................10
Outdoor temperature / humidity unit .......................10
Remote rain gauge .................................................10
P r e c a u t i o n s . . . . . . . . . . . . . . . . . . . . . . . . . . . . . . . . . . . . . . . . . . . . . . . . . . . . . . . . . . . . . . . . 1 1
About Oregon Scientific . . . . . . . . . . . . . . . . . . . . . . . . . . . . . . . . . . . . . . . . . . . 1 1
EU - D e c l a r a t i o n o f C o n f o r m i t y . . . . . . . . . . . . . . . . . . . . . . . . . . . . . . . . . . 1 1
F C C s t a t e m e n t . . . . . . . . . . . . . . . . . . . . . . . . . . . . . . . . . . . . . . . . . . . . . . . . . . . . . . . . . . . 1 1
D i s p o s a l i n f o r m a t i o n f o r u s e r s . . . . . . . . . . . . . . . . . . . . . . . . . . . . . . . . 1 2
I NT R O D U C T I O N
Thank you for selecting the Oregon Scientific™ Full
Wireless Weather Station Kit (WMR89/WMR89A).
This system can provide you with weather information
through several sensors with high levels of accuracy. All
sensors are cabled to a transmitter box which is battery
and solar powered operated for wirelessly communicating
and displaying the data on an indoor LCD main unit.
This system records the data up to 7 days for you to
monitor and analyze the weather status. You can also
export the data to a PC by an USB cable for systematic
data management and analysis.
The base station is compatible with other sensors. To
purchase additional sensors, please contact your local
retailer.
N O T E Please keep this manual handy as you use
your new product. It contains practical step-by-step
instructions, as well as technical specifications and
warnings you should know about.
P A C K A G I NG
C O NT ENT S
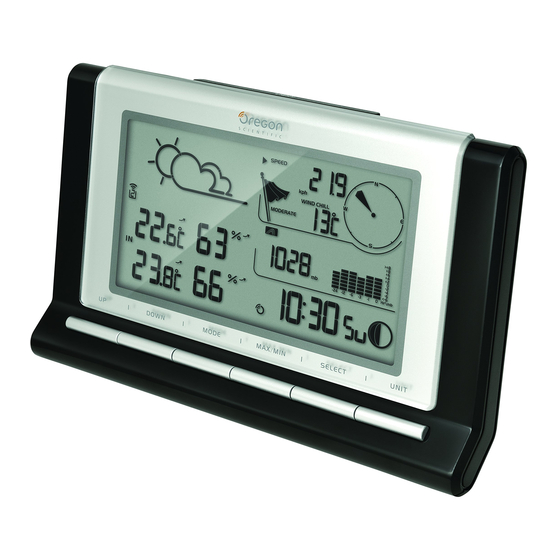
B A S E S T A T I O N
AVG
GUST
1 x base station
W I ND S ENS O R
1 x wind sensor
(1 x wind vane
above and 1 x
anemometer below)
T EM P ER A T U R E & H U M I D I T Y S ENS O R
1 x temperature /
humidity sensor
1
3 x AA
UM-3 1.5V batteries
1 x USB cable
1 x adapter
1 x sensor
2 x AA UM-3
connector
1.5V batteries
4 x screws
1 x round
(Type A)
U- bolt
1 x table stand
1 x wall mount
2 x AAA UM-4
bracket
1.5V battery
Advertisement
Table of Contents

Related Manuals for Oregon Scientific WMR89


Summary of Contents for Oregon Scientific WMR89
-
Page 1: Table Of Contents
About Oregon Scientific ........ -
Page 2: Rain Gauge
4. R ES ET : Returns unit to default settings R A I N G A U G E 5. EU / U K switch: Select the nearest radio signal (W M R 8 9 only) 6. Micro USB socket 7. -
Page 3: Wind Sensor
B . W i n d s p e e d / w i n d d i r e c t i o n / w i n d c h i l l a r e a W I ND S ENS O R GUST 1. -
Page 4: G Et T I Ngs T A R T Ed
G ET T I NG S T A R T ED NO T E Install batteries in the remote sensors before the base station matching the polarities (+ and -). NO T E Use alkaline batteries for longer usage and consumer grade lithium batteries in temperatures below freezing. -
Page 5: M O U Nt I Ng / P L A C I Ngo F S Ens O R S
b. Insert 4 type A screws into the holes of the sensor T h e b a t t e r y i c o n i n d i c a t o r a p p e a r s i n t h e connector. -
Page 6: Rain Gauge
Secure the sensor in the desired location using the wall mount bracket or table stand. NO T E For best results, ensure the base is horizontal to allow maximum drainage of any collected rain. R A I N G A U G E T I P Press R ES ET button on back of the base station to erase all testing data. -
Page 7: C L O C K / C A L End A R
C L O C K / C A L END A R A U T O S C A NNI NG F U NC T I O N T o a c t i v a t e t h e o u t d o o r t e m p e r a t u r e a n d h u m i d i t y To set the clock manually, disable the clock signal reception first a u t o - s c a n f u n c t i o n :... -
Page 8: Temperature And Humidity Trend
v i e w c u r r e n t temperature, heat index and M A X / • Kilometers per hour (k p h ) M I N readings: • Miles per hour (m p h ) 1. Press S EL EC T repeatedly to navigate icon to the •... -
Page 9: Barometer
The timestamp of when maximum UV was recorded is The number shown in the horizontal axis (Hr) indicates how displayed accordingly in the clock area. long ago each measurement was taken (e.g. 3 hours ago, 6 hours ago, etc.). The bar represents the measurement T o c l e a r m a x i m u m U V r e a d i n g : taken for that specific 1 hour period. -
Page 10: U P L O A D D A T A T O P C S O F T W A R
U P L O A D D A T A T O P C S O F T W A R E Accuracy 25% - 40%: +/- 7% 40% - 80%: +/- 5% N O T E Download and install the software before 80% - 90%: +/- 7% uploading the data. -
Page 11: P R E C A U T I O N
Do not subject the unit to excessive force, shock, Hereby, Oregon Scientific, declares that Full Wireless dust, temperature or humidity. Weather Station Kit with USB upload (model: WMR89/ • Do not cover the ventilation holes with any items such WMR89A) is in compliance with the essential requirements as newspapers, curtains etc. -
Page 12: D I S P O S A L I N F O R M A T I O N F O R U S E R
Telephone No.: 1-800-853-8883 d e c l a r e t h a t t h e p r o d u c t Product No.: WMR89 / WMR89A Product Name: Full Wireless Weather Station Kit with USB upload Manufacturer:...
Need help?
Do you have a question about the WMR89 and is the answer not in the manual?
Questions and answers