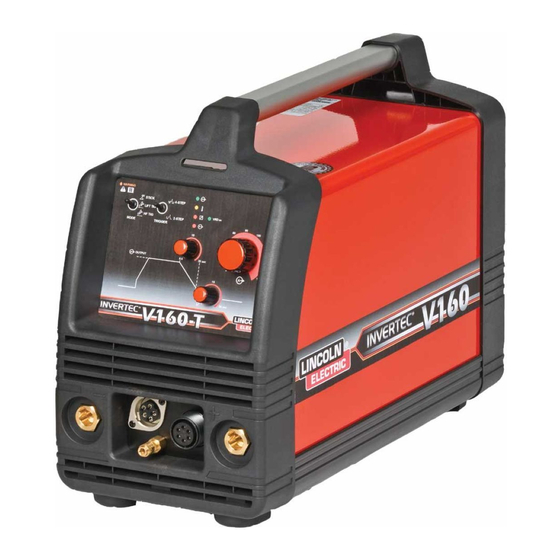
Lincoln Electric INVERTEC V160 Service Manual
Europe version
Hide thumbs
Also See for INVERTEC V160:
- Operator's manual (12 pages) ,
- Operator's manual (9 pages) ,
- Operator's manual (81 pages)

Related Manuals for Lincoln Electric INVERTEC V160


Summary of Contents for Lincoln Electric INVERTEC V160
-
Page 1: Service Manual
Rev.02 05/2006 INVERTEC V160 SERVICE MANUAL Europe Version LINCOLN ELECTRIC ITALIA S.r.l www.lincolnelectric.it BACK... - Page 2 Read and understand the following explanations of the warning symbols. Lincoln Electric is not responsible for damages caused by improper installation, improper care or abnormal operation.
- Page 3 WELDED MATERIALS CAN BURN: Welding generates a large amount of heat. Hot surfaces and materials in work area can cause serious burns. Use gloves and pliers when touching or moving materials in the work area. CAUTION: The high frequency used for contact-free ignition with TIG (GTAW) welding, can interfere with the operation of insufficiently shielded computer equipment, EDP centers and industrial robots, even causing complete system breakdown.
- Page 4 The operator must install and operate this equipment as described in this manual. If any electromagnetic disturbances are detected the operator must put in place corrective actions to eliminate these disturbances with, if necessary, assistance from Lincoln Electric Italia. Do not modify this machine without the written approval of Lincoln Electric Italia.
-
Page 5: Table Of Contents
INDEX Technical specification…………………………………………………………………………………………6 Installation and Operator Instructions……………………………………………………………………..7 Accessories……………………………………………………………………………………………………….11 Maintenance……………………………………………………………………………………………………..12 Major Component Location.…………………………………………………………………………………14 Theory of Operation……………………………………………………………………………………………15 Troubleshooting and Reapair………………………………………………………………………………..21 Electrical Diagram……………………………………………………………………………………………….48 BACK... -
Page 6: Technical Specification
INVERTEC V160 Technical Specifications INPUT Input Voltage Input Power at Rated Output Frequency 230V ± 15% 5.4kW @ 100% Duty Cycle 50/60 Hertz (Hz) Single Phase 7.0kW @ 35% Duty Cycle RATED OUTPUT AT 40°C Output Current Output Voltage Duty Cycle (Based on a 10 min. -
Page 7: Installation And Operator Instructions
Installation and Operator Instructions Read this entire section before installation or operation It is important to check these conditions because many of the machine. engine driven generators produce high voltage spikes. Operation of this machine on engine driven generators Location and Environment not conforming to these conditions is not recommended and may damage the machine. - Page 8 REMOTE LED, and switch to remote control mode. is ready for Lift TIG welding. Lift TIG is a method More information on this mode of operation will be of starting a TIG weld by first pressing the TIG torch given in the next section. electrode on the work piece in order to create a low current short circuit.
- Page 9 Arc Control (V160-S only): In stick welding mode, this controls the amount of current used during arc O. Pulsing Mode Switch (V160-T Pulse only): In the force. In TIG welding mode, this is not used. TIG welding modes, this switch turns the pulsing function ON and controls the pulsing frequency K.
- Page 10 Possible variations of this standard sequence are shown instead of step 3 described above. below. (If necessary, other variations are also available; contact your Lincoln Electric sales representative for Quickly press and release the TIG torch more information.) trigger.
-
Page 11: Accessories
Accessories Welding Cables & Connectors W79X0281R Work and Electrode Cable Kit W79X0263R Work Cable Kit W8800072R Male Quick Connect Gas Fitting (For V160-T and V160-T Pulse) Remote Controls K10095-1-10 Hand Amptrol (For V160-T and V160-T Pulse) K870 Foot Amptrol (For V160-T and V160-T Pulse) BACK... -
Page 12: Maintenance
MAINTENANCE WARNING 6. Locate the two terminals DC+ and DC – on the input board. See Figure 1 7. Use electrically insulate gloves and insulated pliers. Hold the body of the resistor and connect the resistor leads across the two terminals. Hold ELECTRIC SHOCK can kill the resistor in place for 10 seconds. -
Page 13: Routine Maintenance
ROUTINE MAINTENANCE THERMAL PROTECTION 1. Keep the welding area around the machine clean Thermal detection device protect the machine from and free of combustible materials. No debris excessive operating temperatures. Excessive should be allowed to collect which could obstruct temperatures may be caused by a lack of cooling air or air flow to the machine operating the machine beyond the duty cycle and 2. -
Page 14: Major Component Location
MAJOR COMPONENTS LOCATION 1. Cover 2. Input board 3. Inverter board 4. Rear panel 5. Front panel BACK... -
Page 15: Theory Of Operation
THEORY OF OPERATION General description…………………………………………………………………………………16 Input Line Voltage, Auxiliary Voltage, Precharge…………………………………………………16 Inverter Board , Main Transformer, Output Rectifier and Choke………………………………….17 Control board……………………………………………………………………………………….18 Protection Circuits………………………………………………………………………………….19 Over Current Protection………………………………………………………………………..19 IGBT operation……………………………………………………………………………………..20 Block diagram BACK... -
Page 16: General Description
The Invertec V160 series is an inverter based welding power sources that offers Tig and Stick process. The Invertec V160 can be connected to a 230 single- Depending of the type of the power sources ( V160S, phase input voltage. -
Page 17: Inverter Board , Main Transformer, Output Rectifier And Choke
Inverter board , Main transformer, Output rectifier and Choke The output rectifier receives the AC output from the INVERTER BOARD , MAIN TRANSFORMER, OUTPUT RECTIFIER AND CHOKE main transformer secondary winding and rectifies it to a DC voltage level. Since the output choke is in series When the input capacitors are fully charged they act as with the positive leg of the output rectifier. -
Page 18: Control Board
Control board CONTROL BOARD There are 3 status indicators for the V160S and four for The control board receives status and analog feedback the V160T and TP: from the inverter board, input board and various Power On sensor. The control circuitry interprets these signals, Thermal Overload makes decisions and changes the machine mode and Output Voltage On... -
Page 19: Protection Circuits
The thermal protection device is self-resetting once the machine cools sufficiently. If the shut down was The Invertec V160 is electrically protected from caused by excessive output or duty cycle and the fan is producing higher than normal output currents. An... -
Page 20: Igbt Operation
INSULATED GATE BIPOLAR TRANSISTOR (IGBT) OPERATION Drawing B shows the IGBT in an active mode. When the gate signal, a positive DC voltage relative to the An IGBT is a type of transistor. IGBTs are semicon- source, is applied to the gate terminal of the IGBT, it ductors well suited for high frequency switching and is capable of conducting current. -
Page 21: Troubleshooting And Reapair
TROUBLESHOOTING AND REPAIR SECTION How to use troubleshooting Guide………………………………………………………………….22 Troubleshooting Guide……………………………………………………………………………...24 Input Filter Capacitors discharge procedure………………………………………………………..28 Input Board Resistance Test………………………………………………………………………..29 Inverter Board Resistence Test……………………………………………………………………..31 Input Board Voltage Test…………………………………………………………………………...35 Inverter Board Voltage Test………………………………………………………………………..37 Gas solenoid Test ( Tig version only )……………………………………………………………..39 Control board removal and replacement…...……………………………………………………….41 Input board removal and replacement……..……………………………………………………….43 Inverter board removal and replacement…….……………………………………………………..44... -
Page 22: How To Use Troubleshooting Guide
HOW TO USE TROUBLESHOOTING GUIDE Service and repair should be performed by only Lincoln Electric Factory Trained Personnel. Unauthorized repairs performed on this equipment may result in danger to the technician and machine operator and will invalidate your factory warranty. For your safety and to avoid Electrical Shock, please observe all safety notes and precautions detailed throughout this manual. - Page 23 WARNING NOTE: Allow the machine to heat up so that all electrical components can reach their operating temperature. ELECTRIC SHOCK can kill 5. Remove the replacement PC board and substitute it with the original PC board to recreate the • Have an electrician install and service this original problem.
-
Page 28: Input Filter Capacitors Discharge Procedure
INPUT FILTER CAPACITORS DISCHARGE PROCEDURE 14. Locate the two terminals DC+ and DC – on the input board. See Figure 1 WARNING 15. Use electrically insulate gloves and insulated pliers. Hold the body of the resistor and connect the resistor leads across the two terminals. Hold the resistor in place for 10 seconds. -
Page 29: Input Board Resistance Test
INPUT BOARD RESISTANCE TEST WARNING Service and repair should be performed by only Lincoln Electric factory trained personnel. Unauthorized repairs performed on this equipment may result in danger to the technician or machine operator and will invalidate your factory warranty. For your safety and to avoid electrical shock, please observe all safety notes and precautions detailed throughout this manual. - Page 30 RESISTORE INPUT RECTIFIRE BRIDGE TEST PROCEDURE 1. Remove main input power to the Invertec V160 2. Remove the four screws in the rear panel of the machine 3. Pull the rear panel and take out the handle 4. Pull up carefully the red cover and disconnect the ground connection 5.
-
Page 31: Inverter Board Resistence Test
MAIN INVERTER BOARD RESISTANCE TEST WARNING Service and repair should be performed by only Lincoln Electric factory trained personnel. Unauthorized repairs performed on this equipment may result in danger to the technician or machine operator and will invalidate your factory warranty. - Page 32 INVERTER BOARD – TEST PROCEDURE - IGBT’s Check the IGBTs for “shorts”. NOTE: These devices will usually fail “ short” resulting in a zero or very low resistance reading. If they “open “ physical damage should be evident. BACK...
- Page 33 D11,D19 & D17 Check the Diodes D11,D19 and D17 for “shorts” or “opens”. Take note that some resistance will be read in both polarities, see the wiring diagram. BACK...
-
Page 34: Output Connections
OUTPUT CONNECTIONS THERMAL PROTECTION TERMINALS Point Point OUTPUT DIODES HEATSINK • Check the output diodes for “shorts” or “opens” . Check between Point 1 and heatsink , Point 2 and heatsink. • Check the resistence between the thermal protection terminals. It should be about 36 ohms •... -
Page 35: Input Board Voltage Test
INPUT BOARD VOLTAGE TEST WARNING Service and repair should be performed by only Lincoln Electric factory trained personnel. Unauthorized repairs performed on this equipment may result in danger to the technician or machine operator and will invalidate your factory warranty. For your safety and to avoid electrical shock, please observe all safety notes and precautions detailed throughout this manual. - Page 36 6 for -5V dc, pin 8 for +15 Vdc and pin 10 for + 5 Vdc. ( see the wiring diagram 1. Remove main input power to the Invertec V160 X0187 ) 2. Remove the four screws in the rear panel of the...
-
Page 37: Inverter Board Voltage Test
INVERTER BOARD VOLTAGE TEST WARNING Service and repair should be performed by only Lincoln Electric factory trained personnel. Unauthorized repairs performed on this equipment may result in danger to the technician or machine operator and will invalidate your factory warranty. For your safety and to avoid electrical shock, please observe all safety notes and precautions detailed throughout this manual. - Page 38 X0190 ) 11. Check on A1 connection (see the below picture) the following voltage references( machine in Tig HF ) : 1. Remove main input power to the Invertec V160 • Use pin 20 as a ground 2. Remove the four screws in the rear panel of the •...
-
Page 39: Gas Solenoid Test ( Tig Version Only )
GAS SOLENOID TEST WARNING Service and repair should be performed by only Lincoln Electric factory trained personnel. Unauthorized repairs performed on this equipment may result in danger to the technician or machine operator and will invalidate your factory warranty. For your safety and to avoid electrical shock, please observe all safety notes and precautions detailed throughout this manual. - Page 40 ( see below picture ) 9. Check the coil resistance of the solenoid at the 1. Remove main input power to the Invertec V160 two terminals. The normal resistance is about 13 2. Remove the four screws in the rear panel of the ohms.if the resistance is abnormal may be the gas...
-
Page 41: Control Board Removal And Replacement
CONTROL BOARD REMOVAL AND REPLACEMENT WARNING Service and repair should be performed by only Lincoln Electric factory trained personnel. Unauthorized repairs performed on this equipment may result in danger to the technician or machine operator and will invalidate your factory warranty. - Page 42 8. A nut is located under the red plastic cap. Loosen this nut and remove the knob. 9. Remove the eight screws that fixed the metal 1. Remove main input power to the Invertec V160 protection 2. Remove the four screws in the rear panel of the behind the front control board.
-
Page 43: Input Board Removal And Replacement
INPUT BOARD REMOVAL AND REPLACEMENT WARNING Service and repair should be performed by only Lincoln Electric factory trained personnel. Unauthorized repairs performed on this equipment may result in danger to the technician or machine operator and will invalidate your factory warranty. - Page 44 7. Remove the harness plug and the power wires ( AC1;AC2;DC+;DC- ) from the input PCB. 1. Remove main input power to the Invertec V160 8. Remove the four screws using the 7mm nut driver 2. Remove the four screws in the rear panel of the 9.
-
Page 45: Inverter Board Removal And Replacement
INVERTER BOARD REMOVAL AND REPLACEMENT WARNING Service and repair should be performed by only Lincoln Electric factory trained personnel. Unauthorized repairs performed on this equipment may result in danger to the technician or machine operator and will invalidate your factory warranty. - Page 46 6. Perform the Discharge procedure 7. Remove the harness plug and the power wires ( 1. Remove main input power to the Invertec V160 DC+;DC- ;W1 and W2 ) from the inverter PCB. 2. Remove the four screws in the rear panel of the 8.
-
Page 47: Retest After Repair
RETEST AFTER REPAIR Should a machine under test be rejected for any reason requiring the removal of any mechanical part that could affect the machine’s electrical characteristics, or if any electrical components are repaired or replaced, the machine must be retested. -
Page 48: Electrical Diagram
BACK... - Page 49 BACK...
- Page 50 BACK...
- Page 51 BACK...
- Page 52 BACK...
- Page 53 BACK...
- Page 54 BACK...
- Page 55 BACK...
- Page 56 Wiring Diagram Reference Number: • X0315 Block diagram V160S • X0314 Block diagram V160T • X0313 Block diagram V160TP • X0199 Display Board V160T • X0187 Input Board • X0190 Inverter Board • X0245 Display Board V160S • X0233.1 Weld Controller pg.1 •...
- Page 57 WARNING Be sure that only qualified individuals perform all installation, operation, maintenance and repair procedures. Lincoln Electric is not responsible for damages caused by improper installation, improper care or abnormal operation. Before opening or disassembling any parts of the product, the power must be turned OFF and the product must be disconnected from the input power source.
- Page 58 Correction of the Problem • Remove the connections of the HF transformer from the Input P.C. Board. • Correct the wire tie position (see picture #1 or #2). • Reconnect the HF transformer wire to the HF1 and HF2 faston, as follow: Wire tie side to HF1;...
- Page 59 Recommended Spare Parts are Highlighted in Bold. Use only the the parts marked "x" in the column under the heading number called for in the model index page. SP001 INVERTEC V160-S, V160-T & V160-T PULSE EUROPE 23 Oct 2002 Sub Assembly Item No.
- Page 60 SP001-B Part list Item Description Part Number FRONT PANEL W95X0222R REAR PANEL W95X0223R • • • BASE W93X0242R • • • BASE W93X0376R WRAPAROUND W93X0243R • • • CENTER PANEL / BACK PANEL W93X0237R • • • CENTER PANEL / BACK PANEL W93X0377R •...
Need help?
Do you have a question about the INVERTEC V160 and is the answer not in the manual?
Questions and answers