Kramer VIA GO User Manual
Wireless presentation device
Hide thumbs
Also See for VIA GO:
- Quick start manual (96 pages) ,
- Quick start manual (4 pages) ,
- Quick start manual (4 pages)

Related Manuals for Kramer VIA GO


Summary of Contents for Kramer VIA GO
- Page 1 USER MANUAL MODEL: VIA GO Wireless Presentation Device P/N: 2900-300637 Rev. 2 www.kramerAV.com...
-
Page 6: Table Of Contents
Logging-In to VIA GO by QR Code Scanning Logging-In to VIA GO Using a VIA Pad Logging-In to VIA GO Using a VIA NFC Tag for Android Using iOS/OS X / Android Mirroring to Share your Screen Defining VIA GO Functions... -
Page 7: Introduction
The solution includes iOS, Windows & Android mirroring. With industry-leading 1024-bit encryption and built-in Wi-Fi, you can securely use VIA GO on the internal network. Every local connection to VIA GO is wireless, free of dongles, cables, and other compatibility peripherals. -
Page 8: Applications & Features
Applications & Features Here are just a few of the things you can do with VIA GO: • Multiviewing: Show up to two participant screens at the same time. VIA GO automatically sizes each screen to the maximum available resolution. -
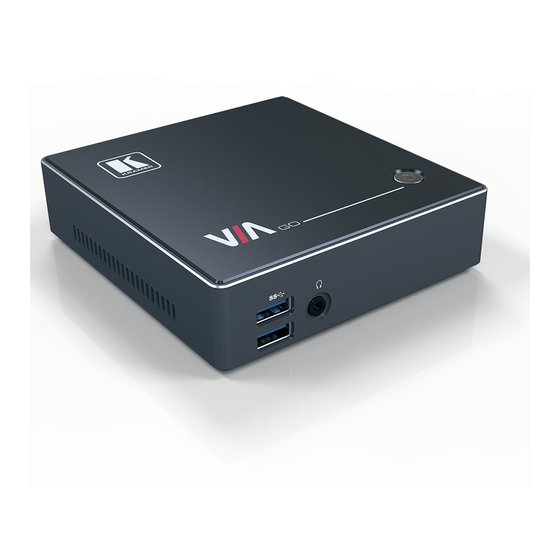
Page 9: Controls And Connections
Controls and Connections This section defines VIA GO. Figure 1: VIA GO Collaboration Hub Feature Function USB 3.0 Connectors Connect to up to two USB devices 3.5mm Mini Jack Connects to earphones or a speaker (digital embedded audio from HDMI and analog audio... -
Page 10: Setting Up Via Go
Setting Up VIA GO Always switch off the power to each device before connecting it to your VIA GO. After connecting VIA GO, connect its power and then switch on the power to each device. To connect the VIA GO as illustrated in the example in... -
Page 11: Connecting Via Go To A Display
Figure 2: Connecting the VIA GO Presentation device Connecting VIA GO to a Display VIA GO is equipped with HDMI and mini DP display output connectors. • Use the HDMI connection with any compatible projection or direct-view display, such as an LCD monitor. This connection carries embedded audio, and can also be routed and switched just like any other HDMI connection. -
Page 12: Downloading And Running Via Go Software
Phone app. To access the PC and Mac executable files: • Open your Web browser and enter the IP address for your VIA GO unit. • Your Web browser recognizes your OS (MAC/Windows) and directs you to the correct client software. - Page 13 For Chromebooks, the VIA App is available from the Chrome Web Store. For tablets and smartphones, the Kramer VIA app is found in the App Store (iOS) or Google Play (Android) or Windows Store (Windows Phone). Alternatively, you can open your Web browser on your mobile device and enter the IP address for your VIA GO unit;...
-
Page 14: Logging In To Via Go
VIA GO. iOS, Android and Windows Phone • First, enter the IP address for VIA GO found on the main display screen in the lower left. • Next, choose a username (nickname) for your device (it can be any mix of letters and numbers) then enter it on the login screen of your device. -
Page 15: Logging-In To Via Go By Qr Code Scanning
Logging-In to VIA GO by QR Code Scanning For iOS, Android & Windows Phone users: 1. Connect to the Room Wi-Fi and launch the application on your mobile device. Click the QR code icon (on the lower right corner). 2. Put your mobile device in front of the VIA main display QR code (found on the VIA main display screen in the lower right corner). -
Page 16: Logging-In To Via Go Using A Via Pad
Logging-In to VIA GO Using a VIA Pad Note: Make sure that your VIA Pad has been paired with your VIA GO unit before using it (see the “VIA Pad Configuration” section in the Settings) For Windows and Mac OS users: 1. -
Page 17: Logging-In To Via Go Using A Via Nfc Tag For Android
Logging-In to VIA GO Using a VIA NFC Tag for Android To write an NFC tag: 1. Install the VIA NFC Writer on an Android device. Download the .apk file freely from the Kramer Website: www.kramerav.com/support/download.asp?f=50898&pname=via%20nfc%2 0writer 2. Open VIA NFC Writer. - Page 18 Swipe up from the bottom of the iPad or iPhone to reveal the Control Center. • Click AirPlay and choose VIA GO’s AirPlay device name. By default the VIA’s AirPlay device is named VIA_AirMirror_XXXX, where XXXX is a random combination of letters and numbers.
- Page 19 Note: If the room code is enabled on VIA GO, you are prompted to enter the same 4-digit security code when attempting to mirror your iOS device. This code appears on the main screen of VIA GO. 2.7.2 Mirroring MacBooks and Apple Computers 1.
- Page 20 VIA_AirMirror_XXXX, where XXXX is a random combination of letters and numbers. Note: If the Room Code is enabled on VIA GO, you are prompted to enter the same 4-digit security code when attempting to mirror you iOS device. This code appears on the main screen of VIA GO.
- Page 21 7. To stop sharing your screen, re-open the VIA application and click Stop Presenting. Note: Android mirroring does not support audio. Audio is heard from your device and not from the output of the VIA device. VIA GO - Setting Up VIA GO...
-
Page 22: Defining Via Go Functions
Defining VIA GO Functions VIA GO presents two types of screens depending whether it is used by the Admin or by a User. The following screen shots illustrate both types. Figure 3 shows the VIA GO main Admin screen and its functions:... -
Page 23: Using Via Go
Clicking the Multimedia tab on the main menu allows the user to access the video player of VIA GO. Users can add and remove movies to this list and also select the ones they want to play on main screen. - Page 24 VIA. VIA GO features a 10Mbps maximum video bitrate for 30fps or 60fps videos and handles video files of up to 8GB. It supports up to 6Mbps video bit rate when using the built-in Wi-Fi module in Access Point mode.
- Page 25 Clients of media servers issue commands like play and pause, to facilitate real-time control of playback of media files from the server. VIA GO supports RTSP. A media played locally on a computer can be streamed on VIA GO, provided the computer and VIA GO are on connected networks.
- Page 26 4. Click Next on the next screen. 5. Choose RTSP from the New Destination drop down and click Add. 6. Enter a short name to be used as Path, uncheck Activate Transcoding and click Next. VIA GO - Using VIA GO...
- Page 27 8. Check Stream all elementary streams and click Stream. 7. Open VIA GO client and click Features > Multimedia > Streaming Player. 8. Type a name as the URL name. 9. The URL takes the path from: rtsp://<local computer IP address>:8554/<name mentioned in step 6>.
- Page 28 Web-based push-to-talk features. VIA GO supports RTP. Media can stream on a VIA GO unit, provided the computer and VIA GO are on connected networks. VIA GO - Using VIA GO...
- Page 29 Add. 6. Enter VIA GO unit’s IP address and click Stream. 7. Open VIA GO client and click Features > Multimedia > Streaming Player. 8. Type a name as the URL name. 9. The URL path takes the form: Rtp://<VIA GO IP address>:5004.
-
Page 30: Figure 5: Mac Control Center & Windows Notification Tray
“Display” - select the “Secondary” option to share your extended content. Note: This feature is available only if your Windows laptop does support Virtual Extended desktop drivers. Check your graphic card specifications. VIA GO - Using VIA GO... -
Page 31: Via Go Settings Menu
VIA GO Settings Menu This section refers to VIA GO gateway settings. The Settings menu is where you configure your VIA GO unit. More settings are available from the Web interface management console. The Settings menu tabs include: • LAN Settings - configures network parameters. -
Page 32: Figure 7: Lan Settings Screen
4.2.1 LAN Settings Use LAN settings to change the IP address, DNS and default gateway of VIA GO. Alternatively, the DHCP option can be set as default on your unit to get an automatic IP address, for easy Plug and Play setup when connecting your VIA GO to the network. -
Page 33: Figure 8: System Control Screen
The system controls access the control panel, audio settings, display settings, system health and log files of VIA GO. The log folder is only available if system logging is activated from the configurations tab of settings. Clock and language for VIA GO can also be changed here. - Page 34 VIA GO is activated by default in “Standalone Wi-Fi” mode. In this mode, the device creates an autonomous Wi-Fi network (SSID) named “VIA_WI-FI”. The default password of this SSID is “123456789”. You can change the default SSID to create your own one and select your preferred Wi-Fi channel for this network.
- Page 35 VIA app, connecting it to VIA GO. The only thing to do is now to click Present from the VIA menu to start sharing a content on the main display.
- Page 36 802.1X (EAP-TLS, PEAP, EAP-FAST), PAP, CHAP, TLS, MS-CHAP, MS-CHAPv2 security level (in Client mode). To attach your VIA GO as a client device to your main network: 1. Browse for and select an available network. 2. Enter the required password.
-
Page 37: Managing Settings From The Via Web Management Interface
• When leaving this client mode to switch to another network option, make sure to connect a LAN cable to the RJ-45 connector of your VIA GO. Managing Settings from the VIA Web Management Interface To manage settings using the Web browser: •... - Page 38 Note: You can create an additional user and get “Web administrator” credentials. 4.3.1 Network Settings Use LAN settings to change the IP address, DNS and default gateway of VIA GO. Apply Settings after finishing. Alternatively, you can set the DHCP option as default to get an automatic IP address, for easy Plug and Play setup when connecting your VIA GO to the network.
- Page 39 VIA Pad overrides Room Code: Enable this feature if you want the VIA Pad to bypass the need to type in the Room Code authentication. • Room Name: Is automatically populated; it reflects the name of VIA GO. VIA GO - Using VIA GO...
- Page 40 Encryption: Select the type of encryption key used by your router. • Key: Type the password required to join your network. • Apply Settings to save the configuration. There is no need to reboot your unit. VIA GO - Using VIA GO...
- Page 41 The VSMS can automatically provide individual configuration to added gateways or the settings can be configured locally. Some changes must be made to the gateway before it can be managed from a VIA Site Management Server. VIA GO - Using VIA GO...
- Page 42 5. Choose the settings “From VIA Site Management” to download the setting from the VIA Site Management server or choose “From Gateway” to keep the local settings. 6. Click Reboot to restart the unit. Contact your regional sales representative for more details about this solution. VIA GO - Using VIA GO...
- Page 43 • Activate System Log - Activates the logging of all system activity either by the client or the gateway to aid diagnosing a problem with VIA GO. • Activate Energy Saver Mode - To allow your unit to enter into sleep mode after 15 minutes of inactivity.
- Page 44 Select “Print QR Code” to get a hard copy of it for displaying it in the room. • To relocate the QR code on the VIA main display, click and drag it with the mouse and drop it anywhere on the screen. VIA GO - Using VIA GO...
- Page 45 To change the Room Name, enter the new address or DNS name, then click Apply and reboot VIA GO. To login any device to the VIA GO client, you must enter the same Room Name in the location field on your device.
- Page 46 • Additionally, it defaults to allow 4 iOS devices to be mirrored to VIA GO simultaneously. This setting can also be changed. Once these setting changes are made, click Apply. Reboot VIA GO to allow the settings to take effect.
- Page 47 VIA GO - Using VIA GO...
- Page 48 TimeZone: 4.3.7 Authentication In this section, you can activate Moderator mode. In this mode, a participant requires permission from the moderator to use the “Present” function on VIA GO. To enable Presentation Mode: • Select Activate Basic Moderator Mode.
- Page 49 1. Open the VIA GO client and enter the location (IP address of the VIA GO gateway). 2. Enter the nickname. The Room Code field appears. 3. Enter the room code (if Room Code is active). 4. Click Login and go to Participants’ screen.
- Page 50 • Make sure you click Apply and Reboot to apply these changes. VIA GO - Using VIA GO...
- Page 51 4.3.9 Using Gateway/Webadmin Activity Log Activate and retrieve logs of your VIA GO unit on the Gateway and/or the Web interface. Export this data to a .csv file. 4.3.10 Update Firmware Register your VIA GO unit to our VIA Registration Portal and get your authentication file.
- Page 52 To update VIA GO, ONLY use the .rpm file available for download from our technical support Web page: http://www.kramerav.com/support/downloads.asp. Upon completion of the process, reboot the unit. Note: that the upload process and then the unit reboot may take a few minutes.
- Page 53 If you need to re-activate the VIA unit, upload the activation key on this page: 4.3.12 Maintenance Click Utilities on the left menu and then select Maintenance. Select the default configurations one-by-one to reset or click select all to reset to complete default factory settings. VIA GO - Using VIA GO...
-
Page 54: User Experience
User Experience Following is a summary of VIA GO functions: Presentation capabilities were enhanced with the addition of the popular cloud services to your VIA mobile application: • Google Drive • DropBox • OneDrive • iCloud (for iOS users only) Link your cloud service (Google Drive, Dropbox, OneDrive or iCloud) account to your VIA application and enjoy full access to your online documents. - Page 55 VIA GO - Using VIA GO...
-
Page 56: Technical Specifications
11.70cm x 10.70cm x 3.00cm (4.61" x 4.21" x 1.18" ) W, D, H NET WEIGHT: 0.5kg (1.1lbs) approx. INCLUDED ACCESSORIES: 1x power cord, 1x Kramer mini DP to VGA adapter, VESA mounting bracket Specifications are subject to change without notice at www.kramerav.com VIA GO - Technical Specifications... -
Page 58: Safety Warning
SAFETY WARNING Disconnect the unit from the power supply before opening and servicing For the latest information on our products and a list of Kramer distributors, visit our Web site to find updates to this user manual. We welcome your questions, comments, and feedback.
Need help?
Do you have a question about the VIA GO and is the answer not in the manual?
Questions and answers