
Related Manuals for Sunquest PRO 24RS


Summary of Contents for Sunquest PRO 24RS
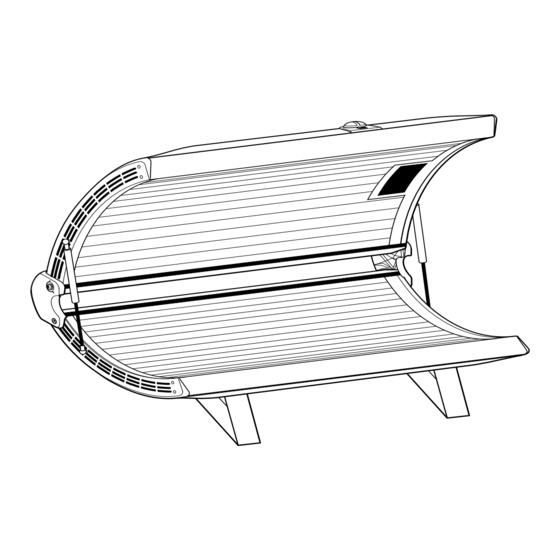
- Page 1 S S E M B L Y S E R U I D E M O D E L S P R O 2 4 R S 2 4 R S F 2 4 R S T 2 6 R S 2 6 R S T 22031A...
- Page 2 SunQuest will repair or replace, at their discretion, any defect to the structure which affects the performance of the unit.
-
Page 3: Table Of Contents
elcome Congratulations on your purchase of this technologically advanced sun tanning unit. It has been designed to provide years of dependable service for you. Please read all the instructions in this booklet before installing and using the unit. Always be sure to observe all safety precautions. ontents Safety Information . -
Page 4: Safety Information
afety Information LABELING NOTICE: Labels are affixed on all systems to inform the user of possible dangers. Regulations are stated in 21 CFR, Section 1040.20, and require that all products manufactured after September 8, 1986 which use sunlamps must display the following: Ultraviolet radiation. -
Page 5: Installation
nstallation The canopy box contains the canopy unit Unpacking and Inspection and a pair of gas springs. The bench box contains the following items: Your sunbed comes in two cardboard car- tons, one for the bench and one for the •... -
Page 6: Tools Required
Installation-Tools Required Tools Required You’ll need the following tools to assemble your sunbed: Utility Knife Allen Wrench (Supplied in Hardware Box) -
Page 7: Pre-Installation Planning
Installation-Pre-Installation Planning Pre-Installation Planning Before you begin to assemble your sunbed, you should observe the following pre- installation considerations. • Your sunbed operates from a 220V • Make sure the room in which you AC source. You should have an elec- intend to use your sunbed is well ven- trical outlet (like the type shown tilated. -
Page 8: Assembly Procedures
Installation-Assembly Procedures Allen-Head Bolt Assembly Procedures 5/16" x 1" Quantity 8 Hardware Inventory 5/16" Metal Washer Before you begin, use the utility knife to Quantity 6 cut open the Hardware Box and remove the small bag of hardware. In addition to 5/16"... - Page 9 Installation-Assembly Procedures Attaching Legs to Bench Lay the bench upside down on the floor. Locate the two stand legs and attach to the bench as shown below. 1. Using the 5/16" x 1" bolts and the six larger sized 5/16" washers, attach the stand legs with the skirt mounting holes toward the back of the bed as shown.
- Page 10 Installation-Assembly Procedures Attaching Hinge Brackets to Bench 2. Place the bushings into the hinge brackets as shown below. Locate the two hinge brackets and iden- tify the left and right brackets. 1. Install the hinge brackets to the ends of the bench such that the short boss engages the stud above the bolt hole, and the long boss engages the hole below the...
- Page 11 Installation-Assembly Procedures Attaching Canopy to Bench 1. Lift the canopy and hold it between the hinge brackets. You may want to use some of the cardboard packing, laid across the bench, to support the canopy. 2. Insert the 5/16" x 1 1/2" bolts with the nylon washers into both hinge brackets.
- Page 12 Installation-Assembly Procedures Attaching Gas Springs 3. Lift and lower canopy a few times to lubricate gas springs for optimum perfor- 1. The gas springs are shipped with lock- mance. ing clips installed. These clips must be removed before gas springs can be installed on the bed.
-
Page 13: Making Electrical Connections
Installation-Making Electrical Connections Making Electrical Connections Warning! Be sure AC power is discon- nected before connecting cables. 1. Connect the canopy to bench power cord to the bench receptacle. The plug is polarized. Align the terminals and firmly push on until seated then tighten the threaded locking ring, as shown. -
Page 14: Operation
peration • Some medication may increase your Before You Tan sensitivity to ultraviolet light. It is rec- ommended that you consult a physi- Before using your sunbed, please note cian before using this sunbed if taking the following important precautions: any medication or if you suspect that your skin might be especially sensitive •... -
Page 15: Using Your Sunbed
Operation-Using Your Sunbed Using Your Sunbed Once you have read Before You Tan and Exposure Times, you are ready to use your sunbed. Proceed as follows. WARNING! Your sunbed is designed for individual use. Only one pair of protec- tive goggles is provided. Always wear these or another approved pair of gog- gles. -
Page 16: Care And Maintenance
® ® SunQuest disinfectant and SunQuest Step 4. Wipe the reflectors with a clean acrylic cleaner. damp cloth. Step 5. Re-install the lamps and acrylic Thorough Periodic Cleaning shields. Introduction Mechanical Inspection... -
Page 17: Replacing Lamps
Care & Maintenance-Replacing Lamps Canopy Shield Replacing Lamps Standing in front of the sunbed, grasp the Introduction long exposed edge of the acrylic and carefully begin sliding it toward you, until To be assured of maximum tanning effec- it is removed from the sunbed. You may tiveness, change lamps after approxi- need to pull the shield edge down slight- mately 800-1000 hours of use. - Page 18 Only the following lamp types have been certified for use in SunQuest Solariums Lamp Model Number Application Pro 24RS Diamond Sun ®...
- Page 19 Care & Maintenance-Replacing Lamps Removing/Replacing Face Tanner Lamp Note! Never take hold of the lamp such on F Models that your fingers are in contact with the lamp glass. Finger oils will greatly reduce After removing the canopy acrylic shield, the lamp’s operational life.
-
Page 20: Timer Maintenance
Step 1. Obtain an accurate watch capa- Timer Maintenance ble of measuring in seconds. Set the timer to its maximum inter- Your SunQuest ® sunbed is equipped with val. Using the watch, time how a backup shut-off timer which will auto- long the lamps remain on. -
Page 21: Troubleshooting
roubleshooting Problem Solution Lamps fail to light 1. Check source of AC power. Reset circuit breaker or replace fuse if necessary. 2. Make sure the unit is plugged into outlet. 3. Make sure cord between canopy and bench is properly connected. 4. - Page 22 Notes...
- Page 23 CALL FOR SERVICE OR QUESTIONS: 1•800•228•6292 6270 Corporate Drive Indianapolis, IN 46278-2900 Have the following information ready when calling ETS to order parts or service for your bed: Date Purchased Canopy Serial Number Bench Serial Number...
Need help?
Do you have a question about the PRO 24RS and is the answer not in the manual?
Questions and answers
what transformer should i use with tanning bed
The transformer should have a 120/240V high side and a 12/24V low side. However, it cannot drop the voltage to 220V. If a transformer was previously used with the tanning bed at a different location, it may be necessary to check the markings on the transformer wires to confirm compatibility.
This answer is automatically generated
Where is the fuse located on my Sunuest 24 SRF wd
Where is the fuse located on the bed? It will power on but my canopies do not light up or the **** doesn't power pn
A group of 4 bulbs won’t light. Have replaced bulbs and fuses with no luck
If a group of 4 bulbs is not lighting on a Sunquest PRO 24RS after replacing the bulbs and fuses, possible causes include:
1. The lamps may not be installed correctly—check installation.
2. There may be a faulty ballast or wiring issue affecting that group.
3. The timer system or AC power source may be malfunctioning.
4. If individual lamp replacement and fuse checks do not fix the issue, contact a service representative.
This answer is automatically generated