Table of Contents
Advertisement
Advertisement
Table of Contents

Related Manuals for Brady BBP 30


Summary of Contents for Brady BBP 30
- Page 1 ® LABEL PRINTER USER’S MANUAL...
- Page 3 30 Sign and Label Printer is a trademark of BRADY Worldwide, Inc. Microsoft and Windows are registered trademarks of Microsoft Corporation. BRADY reserves the right to make changes without further notice to any product or system described herein to improve reliability, function, or design.
- Page 4 • Connect the equipment into an outlet on a circuit different from that to which the receiver is connected. • Consult BRADY Technical Support for help. Changes or modifications not expressly approved by the party responsible for compliance could void the user’s authority to operate the equipment.
- Page 5 RoHS Directive 2011/65/EU This product is CE marked and complies with the European Union's Directive 2011/65/EU OF THE EUROPEAN PARLIAMENT AND OF THE COUNCIL of 8 June 2011 on the restriction of the use of certain hazardous substances in electrical and electronic equipment. Turkey Turkish Ministry of Environment and Forestry (Directive on the Restriction of the use of certain hazardous substances in electrical and...
- Page 6 BRADY’s satisfaction to have been defective at the time BRADY sold it. This warranty does not extend to any persons obtaining the product from the buyer.
-
Page 7: Technical Support
Technical Support Technical Support Numbers/On-line Help For repair or technical assistance, find your regional Brady Tech Support office in the following list. • United States: 1-800-643-8766 or via the web at www.bradyid.com/techsupport • Australia: 1-800 644 834 or via the web at www.bradyid.com.au/en-au/supportlanding... -
Page 9: Table Of Contents
Table of Contents Introduction............1 Features and Functions . - Page 10 Table of Contents USB Test............25 USB Flash Drive Test .
-
Page 11: Introduction
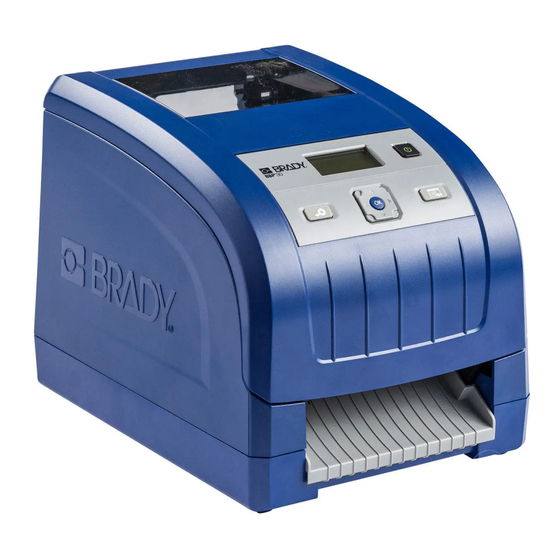
30 Label Printer mono-color peripheral printer. This compact, easy-to-operate thermal transfer printer easily connects to your computer for printing labels that you produce using Brady Workstation software. Media and ribbons from Brady Corporation are programmed to work specifically with the printer. -
Page 12: System Specifications
Introduction System Specifications • Weight: 11 lbs (4.9 kg) • Dimensions (stored): 8.9 in. x 12.0 in. x 9.5 in. (22.6 cm x 30.5 cm x 24.1 cm) • Operating Temperature: 50 to 104°F (10-40°C) • Relative Humidity: 10% to 80% RH non-condensing •... -
Page 13: Keypad And Menu Functions
Keypad and Menu Functions Keypad and Menu Functions The following describes the keys, buttons and display screen that are used to navigate through ® and use the BBP 30 Label Printer. User Interface The user interface (UI) contains the keypad and buttons for using the printer. The main functions are as follows: Item # Icon... -
Page 14: Display Screen
Keypad and Menu Functions Display Screen The display screen has two modes: • : Indicates printer status and displays estimated remaining media and Ready Mode estimated remaining ribbon. Also indicates the media and ribbon installed. • : Lets you configure system defaults, view and set printer Menu Selection Mode information, perform input and output operations and perform diagnostics. -
Page 15: Menu Selection Mode
Keypad and Menu Functions Menu Selection Mode The table describes the main options of the display screen when in menu selection mode. See page 6 for a list of all the menu options. Menu Item Description Cut Media Used to automatically cut the media. Status Info Options to display or print status and configuration information, font list and/or graphic list. -
Page 16: User Interface Menu Structure
User Interface Menu Structure User Interface Menu Structure ® 30 User’s Manual Rev A... -
Page 17: Printer Set Up
Printer Set Up Printer Set Up Unpack and Set up Printer Carefully unpack and inspect the printer surfaces (interior and exterior) and the labeling system for possible damage during shipping. Note: Be sure to remove any transportation protection from around the printhead and inside the enclosure cover. -
Page 18: System Components
Printer Set Up System Components Figure 1 • Printer Components Enclosure cover Media guides Label exit chute/auto cutter Ribbon cartridge Power button Ribbon cover latch Media Ribbon cover Media wiper Ribbon cartridge latch ® 30 User’s Manual Rev A... -
Page 19: Set Up The Printer
Printer Set Up Set up the Printer Connect Printer Power To setup the printer: Plug the power cord into the printer at the location shown. Plug the other end of the power cord into an AC power outlet. The printer automatically turns on and displays the printer status and the size and color of the currently installed media. -
Page 20: Install Or Change Supplies
Printer Set Up Install or Change Supplies The media and ribbon supply cartridges use a “smart cell” to define and track the supply information. The system automatically recognizes the supply information for the installed media and ribbon. Note: The printer can be either on or off when changing supplies. To install or change ribbon: Open the enclosure cover Release the latch on the ribbon cover and... - Page 21 Printer Set Up To install a ribbon: Place the ribbon cartridge with the ribbon Close and latch the ribbon cover. over the print head and the product label toward machine, then snap into place. Close the enclosure cover. If printer was off, press .
- Page 22 Printer Set Up To install or change media: Open the enclosure cover. Release the latch on the ribbon cover and swing open. If engaged, swing yellow media wiper to Slide yellow media guides out to the sides the back. to fully open. Remove existing media, if installed, by pulling the cartridge from printer.
- Page 23 Printer Set Up Insert the media cartridge until spindle Feed media from the top of the roll until it ends rest in slots of media holder. Media sits just past the black rubber roller. unwinds from the top of the roll and the smart cell should be on the left side of the spindle.
-
Page 24: Feeding And Cutting Label Stock
Printer Set Up Close and latch the ribbon cover. Close the enclosure cover. If printer was off, press . The system detects the media and ribbon colors and sets the amount of remaining supplies. Feeding and Cutting Label Stock Use this procedure to advance the media to the cut position, and (optionally) cut the media. Note: For die-cut media, the media is advanced to the cut position which is the next die-cut label. -
Page 25: System Power
System Power System Power These procedures describe how to power-up the printer when starting from a non-powered state (i.e., printer has been unplugged) and how to remove power from the printer. Note: With power removed (i.e., printer disconnected from power source), the system clock retains its settings for about 30 days. -
Page 26: Connect Printer To A Pc Via Usb
Connect Printer to a PC via USB Connect Printer to a PC via USB Unless you are using Brady Workstation and Direct Print, to use your PC with the BBP®30 Sign and Label printer, you must have the USB device driver installed on your PC. -
Page 27: User Interface Menu
User Interface Menu User Interface Menu The User Interface (UI) menu provides feedback and also allows you to access and change printer settings, printer status and tools. A 5-way navigation keypad lets you navigate through the menu structure to choose the option(s) you want. In Ready mode, the UI menu indicates printer status and displays estimated remaining material and ribbon. -
Page 28: Status Info
User Interface Menu Status Info Status Info includes information about the printer configuration and fonts. From this menu, you can print a configuration label. To view system information: Note: Press to exit a menu at any time. Press Menu to go to the navigation menu. -
Page 29: Printer Settings
User Interface Menu Printer Settings The Printer Settings menu lets you set the default values for the printer. Defaults are common settings that are pre-assigned to make the system usable as soon as power is applied (e.g., set date and time to your local date and time). By changing the defaults, you can set the printer to your specific requirements. -
Page 30: Tools
User Interface Menu Tools Upgrade from USB Flash Drive Use this procedure to upgrade the firmware or software from a USB flash drive that contains the upgrade. The system will support only one USB device at a time. To upgrade software from a USB flash drive: CAUTION CAUTION Do not interrupt power during an upgrade from a USB flash drive. -
Page 31: Diagnostics
Diagnostics Some diagnostics are not available for users. Advanced diagnostics are password protected and to be used only with Brady Technical Support. The password is assigned by Brady. Enter Diagnostic Mode Use this procedure to access any of the diagnostics menus. -
Page 32: Sensor Conditions
Diagnostics Sensor Conditions This diagnostic detects the sensor conditions for ribbon motion, door, cutter, leading (edge), diecut, tapeout, wiper, and center. Conditions are: • (blocked) • Clos (closed) or Open • (home position) • (engaged) • (unblocked) To view the PEB settings: Access Diagnostic mode (see... -
Page 33: Analog Readings
Diagnostics Analog Readings This diagnostic detects the analog readings for the diecut analog/digital converter, head voltage and thermistor temperature. To view the analog readings: Access mode (see page 21). Diagnostic Press to scroll to , then press . The readings display for the Analog Readings following: Diecut A/D... -
Page 34: Script Error Log
Diagnostics Script Error Log Access mode (see page 21). Diagnostic Press to go to , then press Copy Error Logs Press to go to Script Error Log Press . The error log is written to the USB drive and the message Successfully Copied BPL Error Log and Successfully Copied SM Error Log displays. -
Page 35: Usb Test
Diagnostics USB Test The USB test verifies that the USB ports are active. The tests can be performed with a flash drive or a type-B cable. USB Flash Drive Test To perform a USB test: Access Diagnostic mode (see page 21). -
Page 36: Keyboard Setup
(up to 15). Press repeatedly to exit to the main menu. Advanced Diagnostics A password is required to enter the advanced diagnostic procedures. Contact your Brady Technical Support contact for help with these diagnostics. ® 30 User’s Manual... -
Page 37: Printer Maintenance
Printer Maintenance Printer Maintenance Removing Power and Media from Printer Before performing any maintenance procedure that involves opening the enclosure cover, you should remove the power and media from the printer. To remove printer power and media: Remove the power plug from the printer. Open the enclosure cover. - Page 38 Printer Maintenance Move yellow media wiper to the back. Move yellow media guides to full-open. Remove media cartridge from the slots of media holder. ® 30 User’s Manual Rev A...
-
Page 39: Cleaning The Printer
Printer Maintenance Cleaning the Printer Remove Dust Dust generated by media cuts can accumulate in the unit. If a significant amount of dust is built up, clean the unit using this procedure. Materials Required • Isopropyl Alcohol • Compressed Air Bottle, purchased locally (e.g., HOSA AIR-464 Gear Duster) To clean dust from the printer: CAUTION CAUTION... -
Page 40: Clean Printer And Keypad Residue
Printer Maintenance Clean Printer and Keypad Residue Whenever performing any maintenance on the printer, you should also clean any residue caused by the media. Materials Required • Compressed Air Bottle, purchased locally (e.g., HOSA AIR-464 Gear Duster) • Lint-free Cloth •... -
Page 41: Clean Lcd Screen
Printer Maintenance Clean LCD Screen Materials Required • Lint-free Cloth, non-abrasive • Isopropyl Alcohol - or - • Pre-moistened Cloth (appropriate for cleaning PC screens) To clean the LCD screen: Note: Normal cleaners with ammonia, soaps, or any acids can damage the screen. Use only a lint-free cloth dampened with isopropyl alchohol. -
Page 42: Clean Auto-Cutter Blade
Printer Maintenance Clean Auto-Cutter Blade Note: When cleaning the cutter, you should also clean the media and cutter sensors (see page 34). Materials Required • Isopropyl Alcohol • Cleaning Kit (Cat # B31-CCT), includes foam swabs, adhesive scraping tool, plastic bottle (not available in all regions) To clean the cutter: Remove power and media from the printer. - Page 43 Printer Maintenance Clean metal cutting blade: • If the cutting blade shows significant residue, use the adhesive scraping tool from the cleaning kit, or other flat-edged tool, to gently scrape the reside off the cutting blade. • Moisten one of the foam swabs from the cleaning kit with the alcohol. Do not allow the alcohol to drip from the swab.
-
Page 44: Clean Sensors
Printer Maintenance Clean Sensors The sensors are located inside the printer and may be covered with dust that results from cutting the media. The media sensor is located under the yellow media guide. Materials Required • Cleaning Kit (Cat # B31-CCT), includes foam swabs, adhesive scraping tool, plastic bottle (not available in all regions) •... -
Page 45: Clean Tape Entrance
Printer Maintenance Clean Tape Entrance This procedure cleans the tape entrance, exit area and exit chute. The tape entrance can become sticky because of adhesive buildup Note: Clean the exit area after cleaning the sensors (see page 34). The cleaning swab may be damaged when cleaning the exit area. - Page 46 Printer Maintenance Wet a cotton swab with isopropyl alcohol and thoroughly clean along the entire media entrance area. CAUTION CAUTION When cleaning, don’t pinch or gouge the platen roller. Use only compressed air Use compressed air to clean off dust on the entire printer, including the platen roller. ®...
-
Page 47: Clean The Cutter Blade Exit Area
Printer Maintenance Clean the Cutter Blade Exit Area This procedure cleans the cutter blade exit area and the exit chute. Note: You should clean the exit area after cleaning the cutter blade and sensors. The cleaning swab may be damaged when cleaning the exit area. Materials Required •... -
Page 48: Clean Printhead
Printer Maintenance Clean Printhead Materials Required • Cleaning Kit (Cat # B31-CCT), includes foam swabs, adhesive scraping tool, plastic bottle (not available in all regions) • Isopropyl Alcohol CAUTION CAUTION Use only the materials supplied in the cleaning kit. Using other materials may permanently damage the printhead. -
Page 49: Replacing The Media Wiper
Printer Maintenance Replacing the Media Wiper Materials Required • Media Wiper (5 pack) Kit, Cat #B31-WIPER (sold separately) To replace the media wiper: Remove power and media from the printer (see page 27). LIft and hold the wiper arm while grasping the tab of the wiper insert [2]. Pull the tab slightly forward and then slide the wiper insert out of the wiper arm. - Page 50 Printer Maintenance ® 30 User’s Manual Rev A...
-
Page 51: Troubleshooting
Troubleshooting Troubleshooting Messages ® The BBP 30 Label Printer contains error messages that describe what action you should take to resolve any messages or errors. Messages indicate the problem for the task being performed and also provide a possible corrective action. Printing Errors Problem Cause... -
Page 52: Hardware Errors
Troubleshooting Hardware Errors Problem Cause Corrective Action Printer too warm. Print job The printhead is too hot. The printhead has reached canceled. maximum operating temperature. Allow printer to cool down Error: 18 approximately 10 minutes, then re-initiate the print job. Printer too cold. -
Page 53: Media Errors
Troubleshooting Media Errors Problem Cause Corrective Action Error reading media Printer cannot read the Replace media. If problem memory cell. Reload or media memory cell: media persists, contact Technical replace media. validation failed [48]; support. cannot read media cell [49]; cannot read memory Errors: 48, 49, 50, 51, 52 CRC [50];... -
Page 54: Ribbon Errors
Troubleshooting Ribbon Errors Problem Cause Corrective Action Ribbon Out. The ribbon ran out or broke Replace ribbon and close during the print job. inside printer cover. Re- initiate the print job. Error: 58 Ribbon too narrow. The installed ribbon is Replace the ribbon narrower than the installed cartridge with wider ribbon. - Page 56 Y4181115 © 2015 Brady Worldwide, Inc. All Rights Reserved.
Need help?
Do you have a question about the BBP 30 and is the answer not in the manual?
Questions and answers