Brady BBP 31 User Manual
Hide thumbs
Also See for BBP 31:
- User manual (168 pages) ,
- Graphics manual (46 pages) ,
- Tutorial (17 pages)
Table of Contents
Advertisement
Quick Links
Advertisement
Table of Contents
Troubleshooting

Related Manuals for Brady BBP 31


Summary of Contents for Brady BBP 31
- Page 1 User’s Manual...
-
Page 3: Copyright And Trademarks
This manual is copyrighted with all rights reserved. No portion of this manual may be copied or reproduced by any means without the prior written consent of Brady. While every precaution has been taken in the preparation of this document, Brady... - Page 4 End User License Agreement for Microsoft Windows CE © You have acquired a device that includes software licensed by Brady Worldwide, Inc. from Microsoft Licensing or its affiliates (“MS”). Those installed software products of Microsoft origin, as well as associated media, printed materials, and “online”...
- Page 5 Brady warrants to the buyer that its products are free from defects in material and workmanship, but limits its obligation under this warranty to replacement of the product shown to Brady’s satisfaction to have been defective at the time Brady...
- Page 6 Operation of this equipment in a residential area is likely to cause interference, in which case required corrective measures will be at the owner’s expense.The user is cautioned that any changes or modifications not expressly approved by Brady Worldwide, Inc. could void the user’s authority to use the equipment.
- Page 7 Brady Network Card Compliance and Approvals Cumplimiento normativo y seguridad Brady Network Card Compliance and Approvals Warranty 1 year from the date of purchase. Terms and conditions apply. Refer the printer manual for more details. Garantía 1 año a partir el día de la compra. Se aplican términos y condiciones. Consulte el manual de la impresora para obtener más detalles.
- Page 8 Brady Network Card Compliance and Approvals Indicaciones de seguridad Safety Notices • Do not use this product near water, for example, in a wet basement or near a swimming pool. • Avoid using this product during an electrical storm. There may be a remote risk of electric shock from lightning.
- Page 9 Brady Network Card Compliance and Approvals Indicaciones de seguridad FCC Radiation Exposure Statement: This equipment complies with FCC radiation exposure limits set forth for an uncontrolled environment. This equipment should be installed and operated with minimum distance 20cm between the radiator & your body.
-
Page 10: Declaration Of Conformity
Brady Network Card Compliance and Approvals Declaration of Conformity Aviso de clase B de la FCC Note : Este equipamiento ha sido probado y cumple con los límites de un dispositivo digital Clase B, conforme a la Parte 15 de las reglas FCC. Estos límites están designados para proporcionar una protección razonable contra la interferencia perjudicial en una instalación... - Page 11 Brady Network Card Compliance and Approvals Declaration of Conformity Canada ICES-003 Class B Notice This device complies with Industry Canada licence-exempt RSS standard(s). Operation is subject to the following two conditions: (1) this device may not cause interference, and (2) this device must accept any interference, including interference that may cause undesired operation of the device.
- Page 12 Brady Network Card Compliance and Approvals Declaration of Conformity Wireless Disclaimer The maximum performance for wireless is derived from Bluetooth 2.0 specifications. Actual performance can vary, including lower wireless network capacity, data throughput rate, range and coverage. Performance depends on many factors, conditions and variables, including...
- Page 13 Brady Network Card Compliance and Approvals EU Declaration of Conformity EU Declaration of Conformity Europe – EU Declaration of Conformity This device complies with the essential requirements of the R&TTE Directive 1999/5/EC. The following test methods have been applied in order to prove presumption of conformity with the essential requirements of the R&TTE Directive 1999/5/EC:...
- Page 14 Brady Network Card Compliance and Approvals EU Declaration of Conformity FR - Français Par la présente [nom du fabricant] déclare que l'appareil [type d'appareil] est [French] conforme aux exigences essentielles et aux autres dispositions pertinentes de la directive 1999/5/CE. Íslenska Þetta tæki er samkvæmt grunnkröfum og öðrum viðeigandi ákvæðum Tilskipunar...
- Page 15 Brady Network Card Compliance and Approvals National Restrictions National Restrictions This product may be used in all EU countries (and other countries following the EU directive 1999/5/EC) without any limitation except for the countries mentioned below: Ce produit peut être utilisé dans tous les pays de l’UE (et dans tous les pays ayant transposés la directive 1999/5/CE) sans aucune limitation, excepté...
- Page 16 Brady Network Card Compliance and Approvals Waste Electrical and Electronic Equipment Directive Waste Electrical and Electronic Equipment Directive In accordance with the European WEEE Directive, this device needs to be recycled in accordance with local regulations. English - Environmental Information for Customers in the European Union European Directive 2002/96/EC requires that the equipment bearing this symbol on the product and/or its packaging must not be disposed of with unsorted municipal waste.
- Page 17 Brady Network Card Compliance and Approvals Waste Electrical and Electronic Equipment Directive Dansk (Danish) - Miljøinformation for kunder i EU EU-direktiv 2002/96/EF kræver, at udstyr der bærer dette symbol på produktet og/eller emballagen ikke må bortskaffes som usorteret kommunalt affald. Symbolet betyder, at dette produkt skal bortskaffes adskilt fra det almindelige husholdningsaffald.
- Page 18 Brady Network Card Compliance and Approvals Waste Electrical and Electronic Equipment Directive Ελληνικά (Greek) - Στοιχεία περιβαλλοντικής προστασίας για πελάτες εντός της Ευρωπαϊκής Ένωσης Σύμφωνα με την Κοινοτική Οδηγία 2002/96/EC, ο εξοπλισμός που φέρει αυτό το σύμβολο στο προϊόν ή/και τη συσκευασία του δεν πρέπει να απορρίπτεται μαζί με τα μη διαχωρισμένα αστικά...
- Page 19 Brady Network Card Compliance and Approvals Waste Electrical and Electronic Equipment Directive Lietuvškai (Lithuanian) - Aplinkosaugos informacija, skirta Europos Sąjungos vartotojams Europos direktyva 2002/96/EC numato, kad įrangos, kuri ir kurios pakuotė yra pažymėta šiuo simboliu (įveskite simbolį), negalima šalinti kartu su nerūšiuotomis komunalinėmis atliekomis.
- Page 20 Brady Network Card Compliance and Approvals Waste Electrical and Electronic Equipment Directive Polski (Polish) - Informacja dla klientów w Unii Europejskiej o przepisach dotyczących ochrony środowiska Dyrektywa Europejska 2002/96/EC wymaga, aby sprzęt oznaczony symbolem znajdującym się na produkcie i/lub jego opakowaniu nie był wyrzucany razem z innymi niesortowanymi odpadami komunalnymi.
-
Page 21: Copyright Notice
Copyright (C) 1993, 1994, 1995, 1996, 1997, 1998, 1999,2000, 2001, 2002, 2003, 2004, 2005, 2006 by Larry Wall and others Open Source Licensing Information The Brady Network Card contains open source software licensed under Version 2 of the GNU General Public License. http://www.bradyid.com/opensource To view the license acreement, go to ®... - Page 22 Safety and Environment Precautions Safety and Environment ® Please read and understand this manual before using the BBP 31 Sign & Label Printer for the first time. This manual describes all of the main functions of the ® 31 printer. Precautions ®...
-
Page 23: Contact Information
Technical Support and Registration Repair and Return Technical Support and Registration Contact Information For repair or technical assistance, locate your regional Brady Technical Support office by going to: • Americas: www.bradyid.com • Europe: www.bradyeurope.com • Asia Pacific: www.bradycorp.com Registration Information To register your printer, go to www.bradycorp.com/register. - Page 24 Overview Conventions Overview About this Document The purpose of this guide is to provide information and instructions on using the ® 31 Sign & Label Printer. Conventions When using this document, it is important that you understand the conventions used throughout the manual. •...
-
Page 25: Table Of Contents
Install WiFi (first time) ............... 2- 13 Install Ethernet (first time) ..............2- 22 Install Additional PC’s using Brady Network Card Utility ....2- 31 Install USB Driver (only) ..............2- 36 Install Adhoc Connection (first time) ..........2- 41 Troubleshooting Brady Network Card ............ - Page 26 Using Brady Network Card Configuration Utility ........2-48 General Settings ................2- 48 Network Settings ................2- 49 WiFi Settings ..................2- 50 Firmware Upgrade/Factory Reset ............. 2- 52 Creating Your First Label ................2-56 Using Your Printer with a PC ............... 2-57 Installing USB Driver ................
- Page 27 Working with Text ..................4-10 Selecting or Deselecting Text ..............4-10 Increase or Decrease Text Size ............... 4-11 Delete/Clear Text ..................4-11 Changing Character Font, Size or Style ........... 4-12 Horizontal Text Justification ..............4-14 Vertical Text ..................... 4-14 Expanding or Condensing Text ..............4-15 Reversing Text ..................
- Page 28 5 - Printing Your Labels Previewing Labels ................... 5-1 Previewing a Label without Serialized Objects ........... 5-1 Previewing a Label with Serialized Objects ..........5-2 Printing Labels ....................5-3 Printing Labels without Serialized Objects ..........5-3 Printing Labels with Serialized Objects ............5-4 Printing Mirror-Image Labels ..............
- Page 29 9 - Troubleshooting Messages ......................9-1 Problem Resolution ..................9-2 Hardware Errors ..................9-2 Media Errors ....................9-3 Ribbon Errors .................... 9-3 Power Errors ..................... 9-4 Printing Errors .................... 9-5 A - Glossary of Terms B - Character Mapping & Keyboard Layouts Character Mapping ..................B-1 Americas QWERTY ...................
- Page 30 QuickLabels - North America ............... 1-11 Creating Quick Labels ................1-11 Quick Label Reference Images - Europe ..........1-13 Quick Label Reference Images - North America ........1-13 Admittance, Exit, Confined Spaces ..........1- 13 Alerts and First Aid ................1- 14 Chemical - Hazardous Materials ............
-
Page 31: Introduction
Type your text and insert objects or symbols of your choice; or choose a preformatted layout design. Material and ribbons from Brady Corporation are programmed with the ability to communicate with the printer and software. This allows you to gain the full benefit of the... -
Page 32: Compatible Applications
Compatible Applications Compatible Applications ® The BBP 31 Sign & Label Printer is compatible with the following software applications (when connected to a PC): • MarkWare™ Tape and Label Software • MarkWare™ EXPRESS Facility Identification Software When used with one of these software packages, the printer will automatically recognize all enabled and compatible materials up to 4 in. -
Page 33: Keyboard Configurations
Keyboard Configurations Keyboard Configurations Your keyboard configuration depends on the region where you do business. The following are the currently supported keyboard configurations. ® There are five keypad configurations available for the BBP 31 Sign & Label Printer. The keypad layouts and the language supported by each are as follows: Keyboard Type Language Applied Americas QWERTY... -
Page 34: About Menus, Dialog Boxes And Screens
About Menus, Dialog Boxes and Screens Home Page About Menus, Dialog Boxes and Screens The following information describes the menus, dialog boxes and screens used in ® the BBP 31 Sign & Label Printer system. Home Page The Home page automatically displays when you first start the printer. The main sections of the Home page are: Item Icon... -
Page 35: Tools Panel
About Menus, Dialog Boxes and Screens Tools Panel Tools Panel The Tools panel contains options for editing a label. If no label is selected, the panel contains only the Help button. Undo is available only when there is an operation to undo. Delete and Size are available only when you have an object selected. -
Page 36: Menu
About Menus, Dialog Boxes and Screens Menu Menu To display menu options: 1. Touch to display the menu options. 2. Choose from the following areas: • File: Create new file, open existing file, save a file or delete a file. •... -
Page 37: Control Panel
About Menus, Dialog Boxes and Screens Control Panel Control Panel The Control Panel provides options specific to the object selected or the function being performed. Home Page Control Panel From the Home page, the control panel provides options for selecting available label types (e.g., Pipe Markers, Right-to-Know, etc.). -
Page 38: Button Actions
Button Actions Control Panel Button Actions These button actions are used throughout the system. Unless necessary, button actions are assumed to be understood and are not included in the procedures. • Help : Available at any time by touching the help button. You can also access the user guide from the product CD that comes with the printer. -
Page 39: Available Label Types
Available Label Types Control Panel Available Label Types From the Home page, you can access all of the available label types. You can see all available label types by pressing More Label Types Note: Not all label types will be available with all configurations. Icon Description General Templates: Templates for creating commonly-used label... -
Page 41: Setting Up Your Printer
Setting up Your Printer Unpacking and Setting up Printer Carefully unpack and inspect the printer surfaces (interior and exterior) and the labeling system for possible damage during shipping. Note: Be sure to remove any transportation protection from around the printhead and inside the enclosure cover. -
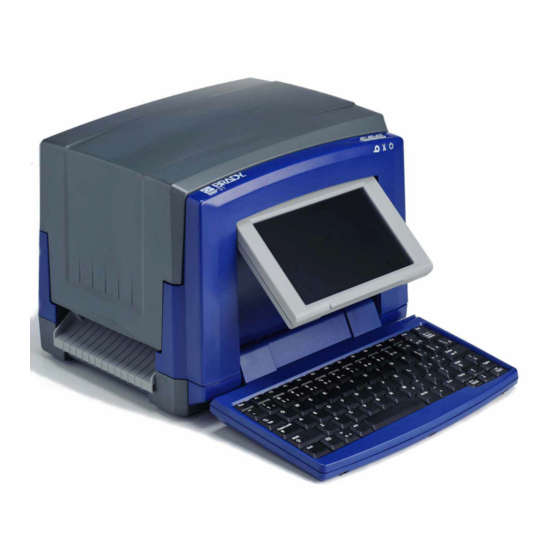
Page 42: System Components
10 Ribbon Cartridge 11 Ribbon Cover 12 USB, Power, Expansion Ports and Brady Network Card 13 Keyboard Note: The printer is equipped with a universal power supply and can be operated with a supply voltage of 100 to 240 V~, 50- to 60 Hz. The printer senses the voltage type and automatically adjusts for the power source. -
Page 43: Setting Up The Printer
Unpacking and Setting up Printer Setting up the Printer Setting up the Printer Connect Printer Power To setup the printer: 1. Plug the power cord into the printer at the location shown. 2. Plug the other end of the power cord into an AC power outlet. The printer automatically comes on and displays the primary Home Page. -
Page 44: Install Or Change Supplies
Unpacking and Setting up Printer Setting up the Printer Install or Change Supplies The media and ribbon supply cartridges use a “smart cell” to define and track the supply information. The system automatically recognizes the supply information for the installed media and ribbon. Note: The printer can be either on or off when changing supplies. - Page 45 Unpacking and Setting up Printer Setting up the Printer 4. Place ribbon cartridge with ribbon over print head (product label toward machine), then snap into place. 5. Close and latch the ribbon cover. 6. Close the enclosure cover. 7. If printer was off, press .
- Page 46 Unpacking and Setting up Printer Setting up the Printer To install or change media: 1. Open the enclosure cover (opens from left). 2. Release the latch on the ribbon-cover [2] and swing ribbon cartridge open. ® 31 Sign & Label Printer User’s Manual...
- Page 47 Unpacking and Setting up Printer Setting up the Printer 3. Swing yellow media wiper [3] to far right (when facing display), if engaged. 4. Slide yellow media guides [4] to full-open. 5. Remove existing media, if installed, by pulling cartridge from printer. Media unwinds from the top of the roll.
-
Page 48: Feeding And Cutting Label Stock
Unpacking and Setting up Printer Feeding and Cutting Label Stock Feeding and Cutting Label Stock Use this procedure to advance the media to the cut position, and (optionally) cut the media. To feed and/or cut label stock: 1. With the printer power on, press and hold Feed until the length of media you want exits the printer. -
Page 49: System Power
System Power Waking the Printer from Sleep Mode System Power Starting Printer from a Non-powered (Cold) State This procedure describes the power-up sequence when starting from a non- powered state (i.e., printer has been unplugged). The printer does not retain the label during a power interruption. -
Page 50: Powering Off The Printer
System Power Resetting the Printer Powering Off the Printer When the system is shut down, the display turns off and the system goes into a low power consumption state but does not require a cold start to turn back on. In this state, you can either touch the screen or press the power button to return the system to the same state it was in before going into lower power consumption mode. -
Page 51: Brady Network Cards
Brady Network Cards Supported Networks Brady Network Cards Supported LED Light Networks LED Light The changing colors of the LED light on the Brady Network Card signifies the following: Color Status Solid Green Card is functioning normally, status is OK. Blinking Orange The firmware is corrupted and it needs to be upgraded. -
Page 52: Installing A Brady Network Card
Installing a Brady Network Card Installing a Brady Network Card If your Brady printer is equipped with a Brady Network Card (WiFi or Ethernet), you can configure the printer to run as a local printer (physically attached to your PC via a USB cable) and as a network (shared) printer through Ethernet or WiFi. -
Page 53: Install Wifi (First Time)
Brady Network Cards Installing a Brady Network Card Install WiFi (first time) Use this installation process to configure your Brady Network Card (BNC) for WiFi printing and install the printer driver for your Brady printer: • If you have just purchased the printer and are setting it up for the first time. - Page 54 Installing a Brady Network Card 6. Click First time install for network driver (default), then click Next. 7. Check that your printer is powered on and that the Brady Network Card LED is solid green. 8. Connect the printer to your PC with a USB cable.
- Page 55 Brady Network Cards Installing a Brady Network Card 9. If the Found New Hardware Wizard displays, continue with the next step, otherwise skip to Step 14. 10. Click the radio button Yes, now and every time I connect a device, then click Next.
- Page 56 Brady Network Cards Installing a Brady Network Card 12. When completed, click Finish to close the wizard, then click Next. 13. The networks supported by your Brady Network Card are shown. To activate WiFi, click Wireless, then click Next. ®...
- Page 57 Brady Network Cards Installing a Brady Network Card 14. In the Printer Description field, enter an easy-to-identify name/description for this network connection. You can use any alphanumeric characters. 15. In the Network Address Type field, choose DHCP protocol (default). Note: If you choose Static, you must enter the IP Address, Subnet Mask and Default Gateway fields.
- Page 58 Brady Network Cards Installing a Brady Network Card 18. Choose the network that your PC is currently connected to, then click Next. Note: If you do not see your network in the list, you can choose Other to manually specify a network.
- Page 59 Click Next. Note: The Bonjour program is designed to establish and monitor network printers. The Bonjour Printer Wizard establishes your Brady printer as a network printer. 21. Read the Apple End User License Agreement then click I accept the terms in the license agreement.
- Page 60 Note: For easier identification, the name or description you assigned in Step 14. displays in the lower left corner of the screen. 24. In the Manufacturer field, click Brady (the manufacturers are listed in alphabetical order). 25. In the Model field, click the printer to install, then click Next.
- Page 61 Brady Network Cards Installing a Brady Network Card 26. When the Bonjour Printer wizard completes, click Finish. 27. The Brady Printer Installation is completed. Click Finish to exit the wizard. ® 31 Sign & Label Printer User’s Manual 2-21...
-
Page 62: Install Ethernet (First Time)
PC using Ethernet or over a LAN network. Note: The Brady Network Card is configured to support either Ethernet or WiFi connections. You cannot have both connections active at the same time. - Page 63 Brady Network Cards Installing a Brady Network Card 5. If your printer and PC are still connected with a USB cable, disconnect it now, then click Next. 6. Click First time install for network driver (default), then click Next. ®...
- Page 64 Brady Network Cards Installing a Brady Network Card 7. Verify that your printer printer is powered on and the Brady Network Card LED is solid green. 8. Connect the printer to your PC with a USB cable. 9. If the Found New Hardware Wizard displays, continue with the next step, otherwise skip to Step 16.
- Page 65 Brady Network Cards Installing a Brady Network Card 11. Click the radio button Install software automatically (Recommended), then click Next. 12. When the installation is complete, click Finish to close the wizard, then click Next. ® 31 Sign & Label Printer User’s Manual...
- Page 66 Brady Network Cards Installing a Brady Network Card 13. Click the radio button for Ethernet, then click Next. 14. In the Printer Description field, enter an easy-to-identify name/description for this network connection. You can use any alphanumeric characters. 15. In the Network Address Type field, choose the default DHCP protocol.
- Page 67 Brady Network Cards Installing a Brady Network Card 17. Verify that your printer and PC are connected to the same network, then click Next. Note: To verify that your printer and PC are on the same network, see the connection guidelines shown below.
- Page 68 Click Next. Note: The Bonjour program is designed to establish and monitor network printers. The Bonjour Printer Wizard establishes your Brady printer as a network printer. 19. Read the Apple End User License Agreement, then click I accept the terms in the license agreement and click Next to continue.
- Page 69 Note: For easier identification, the name or description you assigned in Step 14. displays in the lower left corner of the screen. 21. In the Manufacturer field, click Brady (the manufacturers are listed in alphabetical order). 22. In the Model field, click the printer to install, then click Next.
- Page 70 Brady Network Cards Installing a Brady Network Card 23. When the Bonjour Printer wizard completes, click Finish. 24. When the Brady Printer Installation is completed click Finish to exit the wizard. ® 2-30 31 Sign & Label Printer User’s Manual...
-
Page 71: Install Additional Pc's Using Brady Network Card Utility
Note: Your additional PC must be on the same network as the printer. If not, it will not be detected during installation. Once the Brady Network Card has been configured for Ethernet or WiFi, you can install those network drivers on additional PC’s. - Page 72 Brady Network Cards Installing a Brady Network Card 4. Verify that the printer is powered on and the Brady Network Card is functioning properly (green light is on), then click Next. The Bonjour wizard lauches automatically. Note: The Bonjour program is designed to establish and monitor network printers.
- Page 73 Brady Network Cards Installing a Brady Network Card 6. Read the Apple End User License Agreement, then click I accept the terms in the license agreement. 7. Click Next to continue. 8. Click the assigned network printer name. Note: For easier identification, the name or description you assigned previously displays in the lower left corner of the screen.
- Page 74 10. In the Manufacturer field, click Brady (the manufacturers are listed in alphabetical order). 11. In the Model field, click the printer to install, then click Next. 12. If Brady cannot be found in the Manufacturer field, click Have Disk. ® 2-34...
- Page 75 .inf file for installing a BBP31 printer. Example 14. When the Bonjour Printer wizard completes, click Finish. 15. When the Brady Printer Installation is completed, click Finish to exit the wizard. ® 31 Sign & Label Printer User’s Manual...
-
Page 76: Install Usb Driver (Only)
Use this installation process if you intend to send print jobs to the printer from a PC using USB cable only. This procedure installs the printer driver for your Brady printer and installs the Brady Network Card (BNC) configuration utility. - Page 77 Brady Network Cards Installing a Brady Network Card 5. If your printer and PC are still connected with a USB cable, disconnect it now, then click Next. 6. Click the radio button to Install USB Driver Only, then click Next.
- Page 78 Brady Network Cards Installing a Brady Network Card 7. Connect the printer to your PC with a USB cable. 8. If the Found New Hardware Wizard displays, continue with the next step, otherwise skip to Step 10. 9. Click the radio button Yes, now and every time I connect a device, then click Next.
- Page 79 Brady Network Cards Installing a Brady Network Card 10. Click the radio button Install software automatically (Recommended), then click Next. 11. When the install is complete, click Finish to close the wizard, then click Next. ® 31 Sign & Label Printer User’s Manual...
- Page 80 Brady Network Cards Installing a Brady Network Card 12. When the Brady Network Card Configuration Utility and USB Driver are successfully installed, click Finish. ® 2-40 31 Sign & Label Printer User’s Manual...
-
Page 81: Install Adhoc Connection (First Time)
Establish Adhoc Connection An ad hoc network is a temporary connection between computers and devices used for a specific purpose, such as printing documents from a Brady printer. Ad hoc networks can only be wireless. 1. Open the Brady Network Card Configuration Utility by choosing: Start>Programs>Brady>Brady Network Card>Brady Network Card... - Page 82 Brady Network Cards Installing a Brady Network Card 4. Click the radio button Ad-hoc, enter a SSID (network name) and set Channel to Auto (default). 5. Click Connect. The WiFi settings update. ® 2-42 31 Sign & Label Printer User’s Manual...
- Page 83 3. Click Connect. The adhoc connection is established. Install Network Driver To install network drivers, refer to Steps 1 through 13 in “Install Additional PC’s using Brady Network Card Utility” on page 2-31). ® 31 Sign & Label Printer User’s Manual...
-
Page 84: Troubleshooting Brady Network Card
Brady Network Cards Troubleshooting Brady Network Card Troubleshooting Brady Network Card Ethernet Connection Failed If Ethernet connection fails, an error message displays. The Ethernet connection can fail if the PC and printer are not on the same network. 1. Click Back. -
Page 85: Wifi Connection Failed
Brady Network Cards Troubleshooting Brady Network Card WiFi Connection Failed WiFi connection can fail for two reasons: • The PC and printer are not on the same network. • A wrong passkey or security code was entered. PC and Printer not on Same Network 1. - Page 86 Brady Network Cards Troubleshooting Brady Network Card Wrong Passkey or Security Mode 1. Click Back. 2. Re-enter the correct passkey. Note: If you selected ‘Other’ in the network list, you need to enter the security mode as well. 3. Click Next to continue with installation.
-
Page 87: Usb Connection Failed
Brady Network Cards Troubleshooting Brady Network Card USB Connection Failed The USB connection could fail for two reasons: • The printer is powered OFF. • The USB cable is not connected. If the connection fails: 1. Click Back. 2. Power ON the printer and connect the USB cable. -
Page 88: Using Brady Network Card Configuration Utility
Card Configuration Utility. One dialog box iswith multiple tabs is displayed. General Settings On the General Settings tab, the model number of the Brady Network Card is identified and the previously defined connections listed. To change the status of each supported configuration: 1. -
Page 89: Network Settings
Brady Network Cards Using Brady Network Card Configuration Utility Network Settings The Network Settings tab displays the unique name you gave to the printer and the Address Type used by it. DHCP is the recommended setting. Note: If Static is selected, you must enter the IP Address, Subnet Mask, and Default Gateway. -
Page 90: Wifi Settings
Brady Network Cards Using Brady Network Card Configuration Utility WiFi Settings The WiFi Settings tab displays: • The network type - Infrastructure vs. Adhoc. • The currently connected network. • Security settings for the currently connected network. To setup WiFi settings: 1. - Page 91 Brady Network Cards Using Brady Network Card Configuration Utility 3. If you selected: • A network from the list, enter the network mode or re-enter the network passkey. The SSID (Network Name) field is non-editable. • Other, you can enter a Network Name.
-
Page 92: Firmware Upgrade/Factory Reset
1. Access the Brady website at www.bradyid.com. 2. Click Customer & Tech Support 3. Under Product & Software Downloads, click the the Brady Network Card firmware upgrade. 4. In the list presented, select the upgrade you want to download, then click BEGIN DOWNLOAD. - Page 93 Brady Network Cards Using Brady Network Card Configuration Utility 5. On the File Download screen, click Save. 6. Using standard Windows procedures, determine the directory where you want to save the download data. ® 31 Sign & Label Printer User’s Manual...
- Page 94 Brady Network Cards Using Brady Network Card Configuration Utility 7. On the Firmware Upgrade tab of the Configuration Utility screen, click Browse. 8. Find the directory in which you saved the download ZIP file, then click Open. 9. On the Firmware Upgrade/Factory Reset tab, click Upgrade. The upgrade program information is automatically installed on your system.
- Page 95 Brady Network Cards Using Brady Network Card Configuration Utility Factory Reset To return all settings to the original Factory settings (defaults): 1. On the Firmware Upgrade/Factory Reset tab of the Configuration Utility, click Restore Factory Defaults. A warning message displays indicating all previous defined settings will be removed.
-
Page 96: Creating Your First Label
Creating Your First Label Using Brady Network Card Configuration Utility Creating Your First Label ® Creating your first label on the BBP 31 Sign & Label Printer is as easy as starting to type! You don’t need special software and you don’t have to be connected to a PC to create or print labels. -
Page 97: Using Your Printer With A Pc
Using Your Printer with a PC Creating and Printing Labels from a PC Using Your Printer with a PC You can use a personal computer to install software upgrades, or to create labels on the PC rather than working directly on the printer. Note: You must have labeling software installed on your computer to create, edit or print labels from the PC. -
Page 98: Setting Up The System Defaults
Setting up the System Defaults Creating and Printing Labels from a PC Setting up the System Defaults The System Setup function is used to set the printer default settings. Default values are common settings that are pre-assigned to make the system usable as soon as power is applied (e.g., date and time are set to your local date and time). -
Page 99: Set Clock
Setting up the System Defaults Creating and Printing Labels from a PC Set Clock To set date, time and sleep mode: Note: With power removed (i.e., printer disconnected from power source), the system clock retains its settings for about 30 days. 1. -
Page 100: Localization And Unit Of Measure
Setting up the System Defaults Creating and Printing Labels from a PC Localization and Unit of Measure To choose a language and unit of measure: 1. Select Menu. 2. In the menu list, select Setup 3. From the Setup menu, select Localization 4. -
Page 101: Set Text Defaults
Setting up the System Defaults Creating and Printing Labels from a PC Set Text Defaults To set the text defaults: 1. Select Menu 2. In the menu list, select Setup 3. In the Setup menu, select Text Defaults 4. In the Text Defaults menu, change any of the following options: Note: Text/object options take effect with the next text object created. -
Page 102: Set Barcode Defaults
Setting up the System Defaults Creating and Printing Labels from a PC Set Barcode Defaults To set the barcode defaults: 1. Select Menu 2. In the menu list, select Setup 3. In the Setup menu, select Barcode Defaults 4. In the Barcode Defaults menu, change any of the following options: •... -
Page 103: Set Printing
Setting up the System Defaults Creating and Printing Labels from a PC Set Printing To set the printing defaults: 1. Select Menu 2. In the menu list, select Setup 3. Select Printing 4. In the Printing dialog, change the Auto cut settings to your desired options. 5. -
Page 104: Customizing Home Page Defaults
Customizing Home Page Defaults Creating and Printing Labels from a PC Customizing Home Page Defaults You can choose which three label types to display on your Home page. The selected label types will be set as the default on your printer. The Preview area will immediately reflect the changes. -
Page 105: Displaying System Information
Displaying System Information Creating and Printing Labels from a PC Displaying System Information Use this procedure to view additional information about the system, such as the current software or firmware version and the available memory. To view system information: 1. From the Editor, select Menu 2. -
Page 107: Working With Labels
Working with Labels Create Labels Creating a Label from a Template Use this procedure to create a label using a general template or specialty template. To create a label from a general template: 1. From the Home page, select General Templates 2. - Page 108 Create Labels Creating a Label from a Template 3. Choose a template from the list of available templates. The label is displayed in the Editor with the objects scaled to fit the installed media. 4. To choose a different template, select Change Template Notes: •...
-
Page 109: Creating A Custom Label
Create Labels Creating a Custom Label Creating a Custom Label Use this procedure to create a label without using a predefined template. You can add objects to a label by touching a blank area in the Editor, or by using the Add Object button. -
Page 110: Set Label Attributes
Set Label Attributes Creating Auto-Sized Label Set Label Attributes Creating Fixed-Length Label Use this procedure to create a label where the continuous-media label length is set, not variable. Once selected, the printable area shown on the label is reduced by the amount of the leader/trailer required for the installed supply, so that the total label length output matches the selected length. -
Page 111: Orientation
Set Label Attributes Orientation Orientation Use this procedure to set the label in either portrait or landscape orientation. You can change the label orientation even if you are working on a label in the Editor. To set the label orientation: 1. -
Page 112: Label Width
Set Label Attributes Label Width Label Width You can adjust the width of the installed media to accommodate up to 4 labels printed in the space of the adjusted width. Adjusting the width automatically changes the size of the font and the margins (boundaries). In this function, label width also addresses the height of the label, measured from top to bottom. - Page 113 Set Label Attributes Label Width 4. In the Set Label Width dialog box, with the Width option box selected, touch the desired width. (Observe the preview panel on the right side of the screen to view how the labels will print.) You can also set a custom width.
-
Page 114: Framing A Label
Set Label Attributes Framing a Label Framing a Label Note: When printing with frames around the labels, be sure the media guides fit snug against the media so the tape does not shift while printing. For making fine adjustments to the frame, see “Adjusting Print Offset” on page 5-8. Use this procedure if you want to place a frame (border) around the entire label. -
Page 115: Tools
Tools Scrolling the Label View Tools Zooming the Label View To zoom a label view: 1. Touch to zoom in or to zoom out. 2. Touch the zoom control again, as necessary, until you reach the desired zoom level. Note: If all of the label objects cannot be displayed on the screen, the scroll arrows display. -
Page 117: Working With Objects
Working with Objects Overview What is an Object? An object can be any text, graphic or barcode element on a label. Objects can be edited, moved, aligned, deleted, rotated, framed and/or sized. Some objects also have characteristics that can be added or changed (e.g., bold, justified, underlined, density). Object Types Object types include Text, Graphics, Barcodes, Serialization, and Date/Time. -
Page 118: Undo
Overview Object Sizing Undo Undo allows you to restore the last editing operation(s) that have taken place. For example, if a segment of text has been deleted or changed, performing an undo will restore the original text. The number of undo actions are limited and are based on the complexity of the label and the specific objects on the label.Typically, the fewer objects on the label, the more undo actions can be done. -
Page 119: Adding Objects
Adding Objects Text Objects Adding Objects The easiest way to add an object is to touch a blank area of the Editor. If you are currently editing an object, touch the screen twice, once to deselect the current object and once to insert a new object. You can also add objects using any of the following the methods. -
Page 120: Graphic Objects
Adding Objects Graphic Objects Graphic Objects To add a graphic object: 1. Use one of the following methods to add a graphics object: • Touch anywhere in the Editor. - or - • If you are already in a label, select Add Object 2. -
Page 121: Barcode Objects
Adding Objects Barcode Objects Barcode Objects To add a barcode object: 1. Use one of the following methods to add a barcode object: • Touch anywhere in the Editor. - or - • If you are already in a label, select Add Object 2. -
Page 122: Serial Objects
Adding Objects Serial Objects Serial Objects Serialization lets you create labels that contain number or letter sequences that print as multiple labels at print time. Note: This procedure applies only when not using a template. If using a template, see “Converting Text or Barcode to Variable Data” on page 4-31. To add a serial object: 1. - Page 123 Adding Objects Serial Objects 4. In the Serial dialog box, type or select values for setting the serial attributes (the Sample area will immediately display an example of the selections): • Starting Value: Starting label value for the serialization to begin. Can use alpha or numeric (positive or negative) values.
-
Page 124: Date/Time Objects
Adding Objects Date/Time Objects Date/Time Objects The Date/Time option lets you place a time stamp on your label (text or barcode). Depending on the options you choose, you can add a date, time or date and time. You can change the clock settings at any time by selecting Clock Settings (see “Set Clock”... - Page 125 Adding Objects Date/Time Objects 4. In the Date/Time menu, select the format(s) you want included on the label. The Preview area immediately displays the changes. • Include date: Toggles the date on or off. • Include time: Toggles the time on or off. •...
-
Page 126: Working With Text
Working with Text Selecting or Deselecting Text Working with Text Selecting or Deselecting Text To select or deselect words in a text box: 1. In the Editor, touch the word(s) you want to select: • Select a single word: Touch the word. The system highlights the word. •... -
Page 127: Increase Or Decrease Text Size
Working with Text Delete/Clear Text Increase or Decrease Text Size When you change a character-level attribute, any highlighted text will reflect the change and new text following the current cursor position will also reflect the change. You can grow or shrink the text sizing by this procedure. To increase text size: •... -
Page 128: Changing Character Font, Size Or Style
Working with Text Changing Character Font, Size or Style Changing Character Font, Size or Style Character-level attributes are those that affect a single character or characters in an object (e.g., The "T" in the word Text). Character-level attributes include font, font size and font style (bold, italic and underline). - Page 129 Working with Text Changing Character Font, Size or Style To change a character font, size or style in the Fonts dialog box: 1. In the Editor, select a single character or characters from the text box. 2. In the Text Attributes controls, select Fonts 3.
-
Page 130: Horizontal Text Justification
Working with Text Vertical Text Horizontal Text Justification Use this procedure to set or change how text is horizontally aligned within the object. This primarily affects text objects with multiple lines; the alignment setting is either at the left edge, center, or right edge of the object. Note: Horizontal alignment affects the way the text grows as characters are added. -
Page 131: Expanding Or Condensing Text
Working with Text Reversing Text Expanding or Condensing Text Use this procedure to expand or condense the text characters horizontally. This does not change the font size. To expand or condense text: 1. In the Editor, select the text object you want to expand or condense. 2. -
Page 132: Typing Text And Accented Characters
Working with Text Typing Text and Accented Characters Typing Text and Accented Characters As with standard PC keyboards, each character key supports multiple characters when used in combination with the <Shift> and <Alt Gr> keys. Keycaps show characters in one of four positions (see Figure 4-1). The character position on the physical key indicates how to access the characters with the <Shift>... -
Page 133: Typing Accented Characters
Working with Text Typing Text and Accented Characters Typing Accented Characters To access accented characters, typing the key combinations may vary depending on the keyboard configuration you are using. The following shows an example of using each of the 4 key combinations. Note: See “Character Mapping &... -
Page 134: Entering Special Characters
Working with Text Entering Special Characters Entering Special Characters Use this procedure to enter text characters, such as accented characters or special characters, that are not present on the physical keyboard. To enter special characters: 1. In the Editor, choose a text object then select Special Characters . -
Page 135: Working With Barcodes
Working with Barcodes Changing a Barcode Working with Barcodes A Barcode element represents a barcode graphic generated from user input. Barcodes are generated following industry standard symbology. A typical barcode is composed of vertical lines (bars) and spaces of varying thickness, depending on the text entered. -
Page 136: Changing Barcode Options
Working with Barcodes Changing Barcode Options 3. In the Barcode dialog box, change the desired options: • Data value • Symbology • Set Data Source (optional). See “Converting Text or Barcode to Variable Data” on page 4-31 for details. 4. When done, select OK Changing Barcode Options Barcode options include changing the barcode symbology and data value, setting a different ratio and density and increasing or decreasing the barcode size. -
Page 137: Barcode Density
Working with Barcodes Changing Barcode Options Barcode Density Density controls the width of the barcode lines and spaces (choose between 10 and 80 mils). Typically, the thinner the bar and spaces, the higher the bar code density and the less space it takes on a label. To change the barcode density: 1. -
Page 138: Human-Readable Text Options
Working with Barcodes Changing Barcode Options Human-Readable Text Options Barcode text options let you choose whether to show any human-readable text on your barcode and where it should be positioned (above or below the barcode). You can also decide whether you want the text to include a check character or a start/stop character. -
Page 139: Handling Objects
Handling Objects Moving Objects Handling Objects Editing Objects To edit an object, touch the object and then edit it using any of the settings and/or attributes available in the Control Panel. If you want to change to a different graphic or barcode, select Change Graphic or Change Barcode, then change any of the options available in the Barcode or Select Graphic dialogs. -
Page 140: Set Object Position
Handling Objects Moving Objects Set Object Position Use this procedure if you want to move an item on the label to a specific position by setting the specific x- and y-coordinates. To move an object using object position coordinates: 1. In the Editor, select the object you want to move. 2. -
Page 141: Aligning Objects
Handling Objects Aligning Objects Aligning Objects To align objects on label: 1. In the Editor, select the object you want to align. 2. Choose More Options and go to the alignment Control Panel: 3. Choose the alignment option(s) you want (changes are immediately reflected in the Editor): •... -
Page 142: Sizing Objects
Handling Objects Sizing Objects Sizing Objects Use this procedure to set the object size. Objects can be sized by using the size buttons, dragging objects to size or setting object label length and width. Note: Sizing an object too large may cause it to overlap or cover other objects in the Editor. -
Page 143: Drag Objects To Size
Handling Objects Sizing Objects Drag Objects to Size To drag objects to size: 1. In the Editor, select the object you want to resize. 2. In the Tools panel, touch Size to display the sizing handles on the object. Note: If an object is rotated, the non-proportional sizing handles are hidden. To size non-proportionally, return the object to an unrotated state (0 degrees). -
Page 144: Set Object Size
Handling Objects Sizing Objects Set Object Size Use this procedure if you want to size an object by setting the object height and width. To size an object using object dimensions: 1. In the Editor, select the object you want to resize. 2. -
Page 145: Deleting An Object
Handling Objects Framing an Object Deleting an Object To delete an object from a label: Note: This procedure does not delete the text within an object. To delete text, see “Delete/Clear Text” on page 4-11. 1. In the Editor, select the object you want to delete. 2. -
Page 146: Rotating An Object
Handling Objects Rotating an Object Rotating an Object To rotate an object: 1. In the Editor, touch the object you want to rotate. 2. In the Tools Panel, touch Size [1] to display the sizing and rotation handles. 3. On the label, touch Rotate [2]. -
Page 147: Converting Text Or Barcode To Variable Data
Handling Objects Converting Text or Barcode to Variable Data Converting Text or Barcode to Variable Data Use these procedures to convert an existing text or barcode object into a serial or date/time object on the label. This applies to both template or freeform objects. Note: You cannot add serial data to a graphic. - Page 148 Handling Objects Converting Text or Barcode to Variable Data 6. In the Serial dialog box, type or select values for setting the serial attributes (the Sample area will immediately display an example of the selections): 7. When you select OK , The text or barcode object is converted to a serial object on the label.
-
Page 149: Convert From Serial Data
Handling Objects Converting Text or Barcode to Variable Data Convert from Serial Data Use this procedure if you want to convert a serial object to constant data. To convert text or barcode to constant data: 1. In the Editor, select the serialized text or barcode object that you want converted to constant data. -
Page 150: Convert To Date/Time
Handling Objects Converting Text or Barcode to Variable Data Convert to Date/Time To convert a date/time object to constant data: 1. Select an object. - or - Touch the Editor to create an object. 2. Touch Serial & Date/Time . Displays the Date/Time dialog box. See “Serial Objects”... -
Page 151: Convert From Date/Time
Handling Objects Convert from Date/Time Convert from Date/Time To convert a date/time object to constant data: 1. Select the date or time object. 2. Select More Options to go to the Set Data Source option. 3. Select Set Data Source 4. -
Page 153: Printing Your Labels
Printing Your Labels Previewing Labels The Preview options differ depending on whether the label is a standard label or a serialized label. Previewing a Label without Serialized Objects To preview a label with no serial data: 1. With a defined label in the Editor, select Print 2. -
Page 154: Previewing A Label With Serialized Objects
Previewing Labels Previewing a Label with Serialized Objects Previewing a Label with Serialized Objects To preview a serialized label: 1. With a defined label in the Editor, select Print 2. Select Preview . The entire label is displayed, plus options to view the other labels generated by the serial object. -
Page 155: Printing Labels
Printing Labels Printing Labels without Serialized Objects Printing Labels As you print your labels, keep the following in mind: • During printing, the print status is displayed and the Editor is unavailable. When printing is complete, you are returned to the Editor. •... -
Page 156: Printing Labels With Serialized Objects
Printing Labels Printing Labels with Serialized Objects Printing Labels with Serialized Objects Use this procedure to print labels that contain a serial object. If your label does not contain a serialized object, see “Printing Labels without Serialized Objects” on page 5-3. Note: You can only select one set of copies when printing labels that contain serialized objects. -
Page 157: Printing Mirror-Image Labels
Printing Labels Canceling a Print Job Printing Mirror-Image Labels Use this procedure to print labels suitable for reading in a mirror or through the back of the label. To print a mirror-image label: 1. With a defined label in the Editor, select Print 2. -
Page 158: Resuming An Interrupted Print Job
Printing Labels Resuming an Interrupted Print Job Resuming an Interrupted Print Job Use this procedure to resume a print job that was interrupted. To resume an interrupted print job: 1. When the job interruption message displays, correct the condition that caused the interruption (e.g., replace the media or ribbon). -
Page 159: Adjusting Print Energy
Printing Labels Adjusting Print Energy Adjusting Print Energy If your printing is spotty, you may want to increase the print energy to make sure more of the ribbon ink transfers to the label. However, if your ribbon is sticking or tearing during printing, the heat energy may be too high and should be reduced. -
Page 160: Adjusting Print Offset
Printing Labels Adjusting Print Offset Adjusting Print Offset Print Offset is a value that will move the image from its "nominal" position slightly in one direction or another on the label. Adjust Offset is typically used to do a fine adjustment of the printed image on a die-cut label, or to move the image slightly closer or further from the edge of a continuous supply. -
Page 161: Printing From A Pc
Printing Labels Printing from a PC Printing from a PC Use this procedure to print labels that you created on a PC. See “Compatible Applications” on page 1-2 for more details. Note: To use this procedure, the printer must be physically connected to PC, the appropriate drivers (i.e., printer driver, USB driver) must be installed on the PC (see ®... -
Page 163: Working With Label Files
Working with Label Files Save a Label File Use this procedure to save a label file. 1. With a label created in the Editor, select Menu 2. Select Save File . The Save File dialog box displays. Note: If the label was previously saved, the system defaults to that location and file name. If the storage location is no longer available (e.g., the external storage location has been removed), the system defaults to the internal memory location. -
Page 164: Open A Label File
Open a Label File Open a Label File Use this procedure to retrieve a label file that has been saved in internal or external storage. 1. Select Menu 2. Select Open File . If a label file with unsaved changes is currently in the Editor, you will be prompted to save the current label. -
Page 165: Delete A Label File
Delete a Label File Delete a Label File To delete a label file: 1. Select Menu 2. In the menu list, select Delete File 3. In the Delete Label File dialog box, choose the location where the file is located: •... -
Page 167: Using System Tools
Using System Tools Import Graphics Use this procedure to add your own graphics for use in labels that will be created on the printer. Graphics that will be imported must be in the supported format(s) and imported from a USB flash drive. Supported graphics file formats are Windows metafile (*.wmf) and Bitmap (*.bmp). - Page 168 Import Graphics 4. Select Import . The Import dialog box displays. 5. In the Import dialog box, select Graphics 6. In the Available: list, select the graphic you want to import. A preview of the selected graphic shows at the bottom of the dialog box. 7.
-
Page 169: Delete Imported Graphics
Delete Imported Graphics Delete Imported Graphics Use this procedure to delete your own imported graphics that you no longer need. To delete a graphic: 1. Select Menu 2. Select Import . The Import dialog box displays. 3. In the Import dialog box, select Graphics 4. -
Page 170: Shapes
Shapes Shapes Shapes and graphics can be added to your label. Shapes are added to your label through the Graphic Object. To add a shape to your label: 1. Touch the Editor screen where you want the shape to be added. 2. - Page 171 Shapes The selected shape is displayed in the Editor. You can have the shape display as an outline or have it filled in with color. To fill in the shape: 1. In the control panel, touch Fill If you want to change from fill back to outline: 2.
-
Page 172: Import Fonts
Import Fonts Import Fonts Use this procedure to add your own fonts for use in labels created on the printer. Only True-Type fonts can be imported. To import a font: 1. Copy the fonts you want to import into the root directory of the USB flash drive you will be using. -
Page 173: Printer Upgrades
Printer Upgrades Printer Upgrades ® Future upgrades to BBP 31 software can be downloaded from the Brady website www.bradyid.com/bbp31 www.bradyeurope.com To download printer upgrades: 1. Click Support>Downloads. ® 2. Select BBP 31 printer from the list of products. 3. See “Installing Software Upgrades” on page 7-8 for instructions on upgrading the software on your printer. -
Page 174: Installing Software Upgrades
Installing Software Upgrades Upgrade from a PC Installing Software Upgrades Upgrade from a PC Use this procedure to upgrade your printer to a new version. To upgrade: 1. Before installing, verify the following: • Upgrade Utility is available on your PC or via www.bradyid.com/support. ®... -
Page 175: Upgrade From Usb Flash Drive
Installing Software Upgrades Upgrade from USB Flash Drive Upgrade from USB Flash Drive Use this procedure to upgrade the firmware or software from a USB flash drive that has the upgrade on it. The system will support only one USB device at a time. To upgrade software from a USB flash drive : CAUTION! Do not interrupt power during an upgrade from a USB flash drive . -
Page 177: Maintenance
Maintenance Printer Maintenance Removing Power and Media from Printer Before performing any maintenance procedure that involves opening the enclosure cover, you should remove the power and media from the printer. To remove printer power and media: 1. Remove the power plug [1] from the printer. 2. - Page 178 Printer Maintenance Removing Power and Media from Printer 3. Release the latch on the ribbon cover [2] and swing open. 4. Release the ribbon cartridge latch [3] and lift the ribbon cartridge up and out. 5. Move yellow media wiper [4] to far right (when facing display). 6.
-
Page 179: Cleaning The Printer
Printer Maintenance Cleaning the Printer Cleaning the Printer Cleaning Residue from Printer and Keyboard Whenever performing any maintenance on the printer, you should also clean any residue caused by the media. Materials Required • Compressed Air Bottle, purchased locally (e.g., HOSA AIR-464 Gear Duster) •... -
Page 180: Cleaning The Touch Screen
Printer Maintenance Cleaning the Printer Cleaning the Touch Screen Materials Required • Lint-free Cloth, non-abrasive • Isopropyl Alcohol - or - • Pre-moistened Cloth (appropriate for cleaning PC screens) To clean the touch screen: Note: Normal cleaners with ammonia, soaps, or any acids can damage the screen. Use only a lint-free cloth dampened with isopropyl alchohol. -
Page 181: Cleaning The Cutter Blade
Printer Maintenance Cleaning the Printer Cleaning the Cutter Blade Note: When cleaning the cutter, you should also clean the media and cutter sensors. Materials Required ® • 31 Cleaning Kit (Cat # B31-CCT) • Isopropyl Alcohol • Cutter Cleaning Tool (included in cleaning kit) To clean the cutter: 1. - Page 182 Printer Maintenance Cleaning the Printer 4. Clean metal cutting blade [9]: a. If the cutting blade shows significant residue, use a flathead screwdriver or other flat-edged tool to gently scrape the reside off the cutting blade. b. Moisten one of the foam swabs from the cleaning kit with the alcohol. Do not allow the alcohol to drip from the swab.
-
Page 183: Cleaning The Sensors
Printer Maintenance Cleaning the Printer Cleaning the Sensors The media and cutter sensors are located inside the printer and may be covered with dust that results from cutting the media. The media sensor is located under the yellow media guide. The cutter sensor is located above the cutting blade and is visible only when the cutter is released. -
Page 184: Cleaning The Cutter Blade Exit Area
Printer Maintenance Cleaning the Printer Cleaning the Cutter Blade Exit Area This procedure cleans the cutter blade exit area and the exit chute. Note: You should clean the exit area after cleaning the cutter blade and sensors. The cleaning swab may be damaged when cleaning the exit area. Materials Required ®... -
Page 185: Dust Cleaning
Printer Maintenance Cleaning the Printer Dust Cleaning Dust generated by media cuts can accumulate in the unit. If a significant amount of dust is built up, clean the unit using this procedure. Materials Required ® • 31 Cleaning Kit (Cat # B31-CCT) •... -
Page 186: Cleaning The Printhead
Printer Maintenance Cleaning the Printer Cleaning the Printhead Materials Required ® • 31 Cleaning Kit (Cat # B31-CCT) • Isopropyl Alcohol To clean the printhead: 1. Remove power and media from the printer (see Removing Power and Media from Printer on page 1). 2. -
Page 187: Replacing The Media Wiper
Printer Maintenance Replacing the Media Wiper Replacing the Media Wiper Materials Required • B31-WIPER To replace the media wiper: 1. Remove power and media from the printer (see Removing Power and Media from Printer on page 1). 2. LIft and hold the wiper arm while grasping the tab of the wiper insert [15]. 3. -
Page 188: Clearing Jams
Printer Maintenance Clearing Jams Clearing Jams To clear jams from the printer: 1. Remove all damaged ribbon and/or media from the printer. 2. Check that there is no damage to the print head, cutter blades, sensors, etc.. 3. Check whether any cleaning is needed. If cleaning is required, see “Cleaning the Printer”... -
Page 189: Troubleshooting
Troubleshooting Messages ® The BBP 31 Sign & Label Printer contains pictures and animations that describe (or show) what action you should take to resolve any messages or errors. The following example is for illustration only and may not represent the exact message text. -
Page 190: Problem Resolution
Problem Resolution Hardware Errors Problem Resolution Messages indicate the problem for the task being performed and also provide a possible corrective action. The following sections provide additional information for troubleshooting printer errors. Hardware Errors Problem/Message Cause Corrective Action Cut quality is poor. Cutter needs cleaning. -
Page 191: Media Errors
Problem Resolution Ribbon Errors Media Errors Problem/Message Cause Corrective Action Printer will not feed labels. The leading edge of the label roll is Install the media correctly not inserted correctly. - or - - or - The leading edge of the label roll is Cut a straight leading edge on the uneven or torn (not a straight edge). -
Page 192: Power Errors
Problem Resolution Power Errors Power Errors Problem/Message Cause Corrective Action Printer does not power up Power cord has been pulled out of Check power cord. when turned on. printer or wall socket. Screen freezes User Interface error 1. Press Power to turn printer off. -
Page 193: Printing Errors
Problem Resolution Printing Errors Printing Errors Problem/Message Cause Corrective Action • Tension the ribbon by rotating Faint print on labels. Ribbon not advancing correctly. the rewind spool (top spool) in a downward direction until all slack is removed. • Try another ribbon cartridge. Print energy might be too low. -
Page 195: A Glossary Of Terms
Glossary of Terms The following are the definitions of terms that are used in this manual. • Alignment/Justification page 14: Refers to how text lines are aligned in the text object. Alignment can refer to both horizontal and vertical alignment. Justification is only used in the context of horizontal alignment. - Page 196 • Barcode Ratio: The thickness ratio between a narrow bar and a wide bar. Usually, the ratio is between 2:1 and 3:1. • Barcode Density: The number of characters that can be captured in a particular space, usually a linear inch. The "X" dimension determines a bar code's density.
- Page 197 • Keystrokes page 16: A combination of keys that when typed together result in a special or accented character. Keystroke types are: • Alt Gr (Alternative Graphic): A modifier key used to access alternate characters, represented on keys with a third or fourth symbol on the right side. Key accessed also depends on the state of the “Caps Lock”...
- Page 198 • Reverse Print page 15: Attribute applied to an object where the foreground and background colors are switched. • Rotate page 30: Turning the label data some number of degrees on the label (the printer supports 90, 180, 270 degree rotation only). •...
-
Page 199: B Character Mapping & Keyboard Layouts
Character Mapping & Keyboard Layouts Keyboard configurations vary by region. See “Character Mapping” on page B-1 for a list of accent characters available for each keyboard configuration. See “Keyboard Layouts” on page B-9 for a graphical layout of the keyboard configurations. When used in combination with the <Shift>... -
Page 200: European Azerty
Character Mapping European AZERTY European AZERTY Accent Characters Affected A, a, E, e, I, i, O, o, U, u ´ A, a, E, e, I, i, O, o, U, u, Y, y, C, c, S, s, N, n ˆ A, a, E, e, I, i, O, o, U, u ˜... -
Page 201: European Qwertz
Character Mapping European QWERTZ European QWERTZ Accent Characters Affected A, a, E, e, I, i, O, o, U, u ´ A, a, E, e, I, i, O, o, U, u, Y, y, C, c, S, s, Y, y, N, n ˆ... -
Page 202: European Qwerty
Character Mapping European Cyrillic European QWERTY Accent Characters Affected A, a, E, e, I, i, O, o, U, u ´ A, a, E, e, I, i, O, o, U, u, Y, y, S, s, Z, z, C, c, N, n ˆ... -
Page 203: Using The Input Method Editor (Ime
Using the Input Method Editor (IME) Chinese Simplified Using the Input Method Editor (IME) An Input Method Editor (IME) application lets you add Asian text to your labels using a standard 101-key keyboard. When your keystrokes are entered, the IME converts them into Asian characters. -
Page 204: Chinese Traditional
Using the Input Method Editor (IME) Chinese Traditional Chinese Traditional To use IME: 1. Press the symbol on the left of the IME control panel [1] to change the language option from English to Chinese Traditional. 2. In the editor, type the words or keystroke(s) that you want converted. If the keystroke combination forms a character, it will display in the candidate list [2]. -
Page 205: Japanese
Using the Input Method Editor (IME) Japanese Japanese To use IME: The Language option menu displays automatically when the printer is on. 1. Press the first symbol in the IME control panel [1a] to display the language option menu [1b], then select a language: •... -
Page 206: Korean
Using the Input Method Editor (IME) Korean To use IME: 1. Press the symbol on the left of the IME control panel [1] to change the language option to Korean. 2. In the editor, type the words or keystroke(s) that you want converted. If the keystroke combination forms a character, it will display in the text box [2]. -
Page 207: Keyboard Layouts
Keyboard Layouts Keyboard Layouts The following figures show the supported keyboard layouts for each of the configurations. ® 31 Sign & Label Printer User’s Manual... - Page 208 Keyboard Layouts Figure 3. QWERTY - America’s Keyboard Configuration ® 31 Sign & Label Printer User’s Manual B-10...
- Page 209 Keyboard Layouts Figure 4. QWERTY - EU Keyboard Configuration ® 31 Sign & Label Printer User Guide B-11...
- Page 210 Keyboard Layouts Figure 5. AZERTY - EU Keyboard Configuration ® 31 Sign & Label Printer User’s Manual B-12...
- Page 211 Keyboard Layouts Figure 6. QWERTZ - EU Keyboard Configuration ® 31 Sign & Label Printer User Guide B-13...
- Page 212 Keyboard Layouts Figure 7. CYRILLIC - EU Keyboard Configuration ® 31 Sign & Label Printer User’s Manual B-14...
-
Page 213: C Specialty Label Types
Specialty Label Types Pipe Markers Set Up Pipe Marker Options Setup options for Pipe Markers are different than those for standard labels. Use this procedure to set up the pipe marker color norms. To setup pipe marker color norms: 1. From the Home page, select Pipe Markers - or - Select More Label Types, then select Pipe Markers 2. - Page 214 Pipe Markers Set Up Pipe Marker Options 4. In the Pipe Marker Preferences dialog, choose from the following options: Preference Description Printing Prints multiple labels across the tape, if they fit (e.g., if Supply Saver you create a 1.125" pipe marker and have 3" media installed, it will print 2 labels across the tape).
-
Page 215: Create Pipe Marker Labels
Pipe Markers Create Pipe Marker Labels Create Pipe Marker Labels Use these procedures to create pipe marker labels. See “Set Up Pipe Marker Options” on page C-1 for an explanation on setting color norm and other Pipe Marker preferences. To create a pipe marker label: 1. -
Page 216: Creating A Standard Pipe Marker
Pipe Markers Create Pipe Marker Labels Creating a Standard Pipe Marker To create a standard pipe marker: 1. In the Dimensions dialog, choose a Tape Width that corresponds to the diameter of your pipe, then select Next. 2. In the Pipe contents dialog, choose the type of material that will flow through the pipe, then select Next. - Page 217 Pipe Markers Create Pipe Marker Labels 5. In the Graphics dialog: a. Touch the graphic(s) you want to include on the label. A white line appears around the selected graphic(s) and the total number of selected graphics immediately updates. A maximum of 4 graphics are allowed. Note: To deselect a graphic, touch the graphic again.
- Page 218 Pipe Markers Create Pipe Marker Labels 7. In the Arrows dialog, choose from the following options: • Include: Before legend, After legend (selecting both will include arrows both before and after the legend). • Direction: Left, Right, Both 8. Select Finish. The completed label will display in the Editor. 9.
-
Page 219: Creating A Rollform Pipe Marker
Pipe Markers Create Pipe Marker Labels Creating a Rollform Pipe Marker To create a rollform pipe marker: 1. In the Dimensions dialog, enter the pipe diameter. 2. Choose a Tape width from the list, then select Next. 3. In the Pipe contents dialog, choose the type of material that will flow through the pipe, then select Next. - Page 220 Pipe Markers Create Pipe Marker Labels 6. In the Graphics dialog: a. Touch the graphic(s) you want to include on the label. A white line appears around the selected graphic(s) and the total number of selected graphics immediately updates. A maximum of 4 graphics are allowed. Note: To deselect a graphic, touch the graphic again.
-
Page 221: Creating A Symbol Or Arrow Tape Pipe Marker
Pipe Markers Create Pipe Marker Labels Creating a Symbol or Arrow Tape Pipe Marker To create a symbol or arrow pipe marker: 1. In the Dimensions dialog, enter the pipe diameter. 2. Choose a Tape width from the list. 3. Select Next. 4. -
Page 222: Save, Open Or Delete A Pipe Marker Label
Pipe Markers Save, Open or Delete a Pipe Marker Label Save, Open or Delete a Pipe Marker Label You can only save, open or delete pipe marker labels from the Pipe Marker application. To open the pipe marker application: 1. From the Home page, select Pipe Markers - or - Select More Label Types, then select Pipe Markers To save a pipe marker:... -
Page 223: Quicklabels - North America
QuickLabels - North America Creating Quick Labels QuickLabels - North America Creating Quick Labels QuickLabel is an application that lets you choose from a list of predefined labels. Use this procedure to open QuickLabels. To create a QuickLabel: 1. From the Home page, select QuickLabel - or - Select More Label Types, then select QuickLabel. - Page 224 QuickLabels - North America Creating Quick Labels Touch Browse , choose a category, then select the label you want. The label immediately opens in the Editor. See “Quick Label Reference Images - North America” on page C-13 for examples of available quick labels. 3.
-
Page 225: Quick Label Reference Images - Europe
QuickLabels - North America Quick Label Reference Images - North America Quick Label Reference Images - Europe For information about the available labels for Europe, contact your local Sales Representative. Note: Quick Labels for Europe are available only in French, German, Italian and Dutch. -
Page 226: Alerts And First Aid
QuickLabels - North America Quick Label Reference Images - North America Alerts and First Aid Chemical - Hazardous Materials ® C-14 31 Sign & Label Printer User’s Manual... -
Page 227: Conduit - Voltage
QuickLabels - North America Quick Label Reference Images - North America Conduit - Voltage Electrical Hazard - Lockout ® 31 Sign & Label Printer User’s Manual C-15... -
Page 228: Fire
QuickLabels - North America Quick Label Reference Images - North America Fire Funny Signs ® C-16 31 Sign & Label Printer User’s Manual... -
Page 229: Graphics - Mandatory
QuickLabels - North America Quick Label Reference Images - North America Graphics - Mandatory ® 31 Sign & Label Printer User’s Manual C-17... -
Page 230: Graphics - Packaging
QuickLabels - North America Quick Label Reference Images - North America Graphics - Packaging Graphics - PPE ® C-18 31 Sign & Label Printer User’s Manual... -
Page 231: Graphics - Prohibition
QuickLabels - North America Quick Label Reference Images - North America Graphics - Prohibition ® 31 Sign & Label Printer User’s Manual C-19... -
Page 232: Graphics - Signal Words
QuickLabels - North America Quick Label Reference Images - North America Graphics - Signal Words ® C-20 31 Sign & Label Printer User’s Manual... -
Page 233: Graphics - Warning
QuickLabels - North America Quick Label Reference Images - North America Graphics - Warning ® 31 Sign & Label Printer User’s Manual C-21... -
Page 234: Inspection
QuickLabels - North America Quick Label Reference Images - North America Inspection Machine - Operational No Smoking ® C-22 31 Sign & Label Printer User’s Manual... -
Page 235: Pipe Marker Arrows
QuickLabels - North America Quick Label Reference Images - North America Pipe Marker Arrows ® 31 Sign & Label Printer User’s Manual C-23... -
Page 236: Pipe Markers
QuickLabels - North America Quick Label Reference Images - North America Pipe Markers ® C-24 31 Sign & Label Printer User’s Manual... - Page 237 QuickLabels - North America Quick Label Reference Images - North America ® 31 Sign & Label Printer User’s Manual C-25...
-
Page 238: Protective
QuickLabels - North America Quick Label Reference Images - North America Protective Warning Stakes ® C-26 31 Sign & Label Printer User’s Manual... -
Page 239: Right To Know (Rtk)
Right to Know (RTK) Setting RTK Preferences Right to Know (RTK) Setting RTK Preferences From the Right-to-Know Preferences menu, you can choose default label settings for size and format. You can also add or delete hazards and/or organ types. Any defaults set here will stay in effect until you change them. -
Page 240: Set Label Defaults
Right to Know (RTK) Setting RTK Preferences Set Label Defaults Format To setup a default label format: 1. In the Right-to-Know Preferences dialog, select Format 2. In the Right-to-Know Format dialog, choose a format type from the list. An example of the highlighted format type will display on the right side of the screen. -
Page 241: Add Or Delete Hazards Or Organs
Right to Know (RTK) Setting RTK Preferences Add or Delete Hazards or Organs Hazard Types To add a hazard type: 1. In the Right-to-Know Preferences dialog, select Hazards 2. In the Add or delete hazards dialog, type the new hazard you want to include. 3. - Page 242 Right to Know (RTK) Setting RTK Preferences Organ Types To add an organ type: 1. In the Right-to-Know Preferences dialog, select Organs 2. In the Add or delete organs dialog, type the new organ you want to include. 3. Select Add .
-
Page 243: Create Rtk Labels
Right to Know (RTK) Create RTK Labels Create RTK Labels The selected label format determines the options that are available. See Table C.1 “Available RTK Formats and Options” on page C-33 for a list of formats and options that are available from the RTK menu. To create a new RTK label: 1. -
Page 244: Open, Save Or Delete An Rtk Label
Right to Know (RTK) Open, Save or Delete an RTK Label Open, Save or Delete an RTK Label You can only save, open or delete RTK labels from the Right To Know (RTK) application. To open an existing RTK label: 1. - Page 245 Right to Know (RTK) Open, Save or Delete an RTK Label Table C.1Available RTK Formats and Options RTK Formats Available Options* Description NFPA Diamond Only Size Select a label size for the chosen format. Color Bar Standard Chemical Name / Name Enter the chemical description.
-
Page 246: Ghs/Clp
GHS/CLP Open, Save or Delete an RTK Label GHS/CLP CLP is the regulation on classification, labeling and packaging of substances and mixtures. This regulation aligns previous EU legislation on classification, labeling and packaging of chemicals to the GHS (Globally Harmonised System of Classification and Labeling of Chemicals). - Page 247 GHS/CLP Open, Save or Delete an RTK Label 5. In the Product Name: data field, enter the name of the chemical (product) you want to use. OR, if chemical names have been saved (previously used): Under Primary Language, touch the down arrow next to Product name to display a list of products, then touch the desired product.
- Page 248 GHS/CLP Open, Save or Delete an RTK Label 12. On the Select Hazardous Statements screen, touch the up/down arrows in the scroll bar to view more statements. OR, if you know the code number, or wording, of the statement you want to use: Touch the Search data field and enter the number or wording.
- Page 249 GHS/CLP Open, Save or Delete an RTK Label The label displays the added statements. There are other fields on the label where you can add custom data. These fields are designated by brackets < >. To add the suggested custom information: 1.
-
Page 251: D Material / Ribbon Cross Reference
Material / Ribbon Cross Reference BBP® 31 Material / Ribbon Cross Reference Guide Material Ribbon ● = Recommended ∆ = Acceptable Brady B30-R10000 B30-R6000 B30-R4300 M30-R4400-WT Material Description Material # (Black, Colors) (Black) (Black) (White) B-423 Polyester ● ∆ B-427 Self-Laminating Vinyl ●... - Page 254 © 2012 Brady Worldwide, Inc. All Rights Reserved.
Need help?
Do you have a question about the BBP 31 and is the answer not in the manual?
Questions and answers