Advertisement
Advertisement
Table of Contents

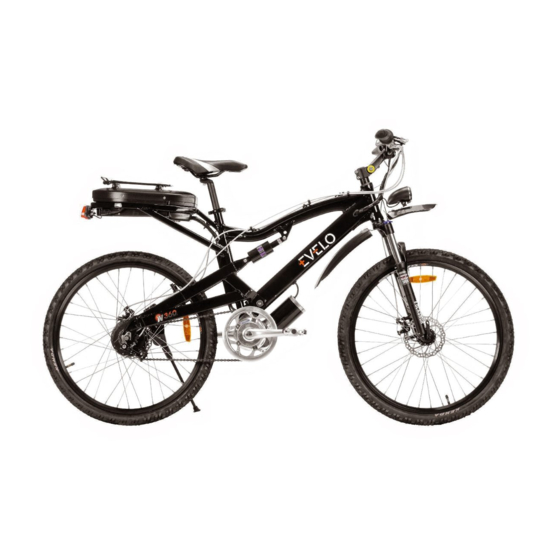
Related Manuals for Evelo Aries


Summary of Contents for Evelo Aries
- Page 1 Owner’s Manual Important Safety and Product Information eVelO.COM...
-
Page 2: Table Of Contents
TaBle OF COnTenTs Welcome! Congratulations on the purchase of your new, power- assisted electric bike from EVELO Electric Bicycles! Contact Information This manual is designed to give you an understanding of the basic operation and Registration maintenance of this bike. We believe that great customer service is part of your purchase, so please reach out to us if you ever need guidance or assistance. -
Page 3: Registration
For warranty issues, EVELO will cover the cost of labor involved in handling the warranty service within a 30-day period after purchase. To receive this service, the customer needs to bring the bike to the authorized EVELO Full Service Dealer from which the bike was warranTY purchased. - Page 4 EVELO. Unless this falls within the 30-day free labor repair period, the customer is responsible for labor costs associated with warranty replacements.
-
Page 5: Battery Care And Maintenance
BaTTerY Care & MaInTenanCe The battery provided with your EVELO Electric Bicycle is a high-quality unit that requires very little from the user in terms of care. However, a few things are worth noting with respect to any Lithium Ion battery. To maximize the lifespan of your battery, we suggest an initial conditioning charge of 12 hours. -
Page 6: Assembly
Once again, if you do not feel comfortable assembling the bicycle yourself, please take it to a qualified bicycle mechanic. The following are assembly directions for each of the four EVELO models. Find and follow the specific directions for the model of electric bicycle you have purchased. - Page 7 Note: Do not loosen the bolt located in the top-center of the metal cap. You can now lower the kickstand to keep the bike upright for the remainder of the assembly. FIG 5. STEM CLAMP BOLTS arIes MODel arIes MODel...
- Page 8 Fully push the hole in the brake. the large, three-pronged plug on the right side of the bicycle into the socket Repeat for the other brake. in the battery. FIG 10. BATTERY SOCkET arIes MODel arIes MODel...
- Page 9 Just loosen the two bolts that clamp the handlebar, rotate it to the desired position, and re-tighten the bolts. (This is described in the section, “Attach Handlebars” on Page 13.) Many parts of your new EVELO Electric Bicycle can be Double-check all bolts to make sure they are tight. customized for a personalized fit.
-
Page 10: Aurora
asseMBlY aurOra STEp 1 : InSTALL FROnT WhEEL The front wheel is attached to the bike with a quick-release type of skewer. After locating the skewer, remove the nut on the end opposite the lever, and slide one of the conical springs onto the skewer — wide-end first. Once the spring is against the lever’s nut, slide the skewer through the axle so that aurOra the lever is on the same side as the brake disc. - Page 11 : ATTACh FROnT FEnDER : InSTALL hEADLIGhT STEp 2 STEp 4 Locate the special threaded nut on the Attach the headlight to the front fender bracket, taking care to run the wires as cleanly underside of the fork that has been as possible.
- Page 12 Locate the right-side pedal (marked with an “R”). Thread the “R” pedal clockwise onto the drive-side crank (side of the bike with gears). Many parts of your new EVELO Electric Bicycle can be Tighten the “R” pedal clockwise with a 15 mm wrench or the wrench provided.
-
Page 13: Luna
Next, slightly loosen the bolts on either side. Once you have loosened all three bolts, move the stem to the desired height. Re-tighten the two side bolts first, ensuring they are tightened very well. Finish by re-tightening the first bolt located under the handlebars (the one indicated by the arrow in Fig. - Page 14 asseMBlY luna CRITICAL : If the wheel is oriented correctly, the brake arch (the painted portion of the fork that bridges the two fork legs) of the front fork should be rotated FORWARD, as in Fig 1C. STEp 1 : InSTALL FROnT WhEEL You can now lower the kickstand to keep the bike upright for the remainder of the assembly.
- Page 15 Now pivot the assembly to a 90-degree angle. Place the long end of the Allen wrench Now that the front wheel is on, into the stem and turn it so that the wedge-shaped nut at the lower end comes up squeeze the brake arms together near slightly.
- Page 16 FIT aDJusTMenTs luna Many parts of your new EVELO Electric Bicycle can be customized for a personalized fit. Seat Adjustment The seat is easily adjusted up or down by flipping the quick-release lever that clamps the post into the bike.
-
Page 17: Orion
asseMBlY OrIOn STEp 1 : InSTALL FROnT WhEEL To install the front wheel, you first need to determine the right and left sides of the front wheel. The easiest way to accomplish this is to find the small magnet located on one of the spokes, and orient the wheel so that the magnet is on the same side as the black sensor attached to the fork. - Page 18 : ATTACh FROnT FEnDER & hEADLIGhT CRITICAL : If the wheel is oriented STEp 3 correctly, the brake arch (the painted Loosen and remove the pre-attached bolt that goes through the brake arch. portion of the fork that bridges the two Slide the fender into position, placing the silver tab that extends upward in front of the fork legs) of the front fork should be brake arch.
- Page 19 OrIOn Tighten the “R” pedal clockwise with a 15 mm wrench or the wrench provided. Locate the left-side pedal (marked with an “L”). Many parts of your new EVELO Electric Bicycle can be Thread the “L” pedal CouNter-CloCKWiSe* onto the non-drive-side crank (side of the bike without gears).
-
Page 20: Riding Your Evelo Electric Bicycle
Stem Adjustment To adjust the handlebars to a customized height: Loosen the bolt indicated by the arrow in Fig. 10. Access this bolt from underneath YOur eVelO eleCTrIC BICYCle the handlebars. Next, slightly loosen the bolts on either side. Once you have loosened all three bolts, move the stem to the desired height. - Page 21 This is a safety feature. bike to a walking pace. Do NOT come to a complete stop. Repeat this acceleration and braking sequence 20 times. Braking power will increase during this process. eVelO.COM eVelO.COM...
- Page 22 In THe raIn you need to shift the gears. EVELO Electric Bicycles are designed so that you can operate them in rainy In general, when starting from a dead stop, you should be in a low gear. With weather. Factory-level design elements keep the electrical components well- Shimano 8-Speed or Nexus-equipped bikes, this means number 1 or 2.
-
Page 23: Maintenance
Inspect your bike often — especially the brakes. • Seek maintenance if there are any notable changes in bike performance. OF YOur eVelO eleCTrIC BICYCle • know and observe the rules of the road before cycling. Bike users must follow all road rules. -
Page 24: Troubleshooting
TrOuBlesHOOTInG If you experience difficulty with your EVELO Electric Bicycle, consult the following list. If you do not find the problem on this list, contact our Customer Service Team, and we will work with you to identify the source of the problem and help with a solution. -
Page 25: Evelo.com
Questions? Get In Touch: Email: contact@evelo.com Call: 877-991-7272 eVelO.COM...
Need help?
Do you have a question about the Aries and is the answer not in the manual?
Questions and answers