Bosch WAN SERIES Instruction Manual And Installation Instructions
Hide thumbs
Also See for WAN SERIES:
Table of Contents
Advertisement
Advertisement
Table of Contents

Related Manuals for Bosch WAN SERIES


Summary of Contents for Bosch WAN SERIES
- Page 1 Washing machine WAN... en Instruction Manual and Installation Instructions...
-
Page 2: Your New Washing Machine
Your new washing machine Note/tip Information about the optimum use of You have chosen a Bosch washing the appliance/any other useful machine. information. Please take a few minutes to read and 1. 2. 3. / a) b) c) become familiar with the advantages of your washing machine. -
Page 3: Table Of Contents
Contents e n I n s t r u c t i o n M a n u a l a n d I n s t a l l a t i o n I n s t r u c t i o n s Intended use. -
Page 4: Intended Use
Intended use Drum ......33 Intended use Descaling..... 33 Detergent drawer and housing . -
Page 5: Safety Instructions
Safety instructions Children must not play with Safety instructions ■ this appliance. Do not allow children to The following safety information ■ clean or maintain this S a f e t y i n s t r u c t i o n s and warnings are provided to appliance unsupervised. -
Page 6: Installation
Safety instructions Keep packaging, plastic film Installation and packing components away Warning from children. Risk of electric shock/fire/ Warning material damage/damage to Risk of poisoning! the appliance! Detergents and care products If the appliance is not installed may result in poisoning if properly, this can be consumed. - Page 7 Safety instructions If you take hold of any of the Warning ■ appliance's protruding parts Risk of electric shock/fire/ (e.g. the appliance door) in material damage/damage to order to lift or move it, these the appliance! parts may break off and If the appliance's mains cable is cause injury.
-
Page 8: Operation
Safety instructions The appliance is secured for Caution! ■ transportation by transport Material damage/damage to locking devices. If the the appliance transport locking devices are If the water pressure is too ■ not removed before the high or too low, the appliance is operated, this appliance may not be able to may result in damage to the... - Page 9 Safety instructions Do not use cleaning agents that drawer is opened while the contain solvents. appliance is in operation. Rinse eyes/skin thoroughly if Warning they/it come(s) into contact Risk of injury! with detergents or care If you support your weight/sit products.
-
Page 10: Cleaning/Maintenance
Safety instructions Do not use cleaning agents that Cleaning/Maintenance contain solvents. Warning Warning Danger of death! Risk of electric shock/material The appliance is powered by damage/damage to the electricity. There is a risk of appliance! electric shock if you come into If moisture penetrates the contact with live components. -
Page 11: Environmental Protection
Environmental protection Clean the appliance with The temperatures which can be ■ ■ selected refer to the care labels on nothing but water and a soft, the textiles. The temperatures used damp cloth. in the machine may deviate from this Remove any detergent, to ensure you get the optimum ■... -
Page 12: Positioning And Connecting
Positioning and connecting Aqua-Stop ■ Positioning and connecting Included with the appliance P o s i t i o n i n g a n d c o n n e c t i n g Notes Check the machine for transport ■... -
Page 13: Safety Instructions
Positioning and connecting In addition, a hose clamp (24 - 40 mm Notes diameter, available from specialist In addition to the safety information ■ retailers) is required to connect the listed here, the local water and water drain hose to a siphon. electricity supplier may have special requirements. -
Page 14: Installing The Appliance In A Kitchenette
Positioning and connecting Installing the appliance in a kitchenette Warning Risk of death! There is a risk of electric shock if you touch live components. Do not remove the appliance covering Remove the mains cable from the holders. Unscrew and remove all plate. -
Page 15: Water Inlet
Positioning and connecting Right-hand connection Do not alter (shorten, cut through) ■ ■ the water supply hose (otherwise, its strength is no longer guaranteed). Only tighten the screw connections ■ by hand. If the screw connections are tightened too much with a tool (pliers), the thread may become damaged. -
Page 16: Water Outlet
Positioning and connecting Model: AquaSecure Warning ■ Risk of scalding! When you are washing at high temperatures, there is a risk of scalding if you come into contact with hot water (e.g. when draining hot water into a washbasin). Do not reach into the hot water. Caution! Model: Aqua-Stop ■... -
Page 17: Levelling
Positioning and connecting Levelling Notes The mains voltage and voltage ■ Level the appliance using a spirit level. indicated on the washing machine (rating plate) are the same. Incorrect levelling may result in intense The connected load and fuse noise, vibrations and "wandering". required are specified on the rating Loosen the lock nuts using a plate. -
Page 18: Transportation
Positioning and connecting Never use a damaged Remove the covers and keep them Note: machine. Inform the after-sales in a safe place. service. Use a screwdriver if necessary. Remove the protective foil from the worktop and the control panel. Connect the mains plug. Turn on the water tap. -
Page 19: Getting To Know The Appliance
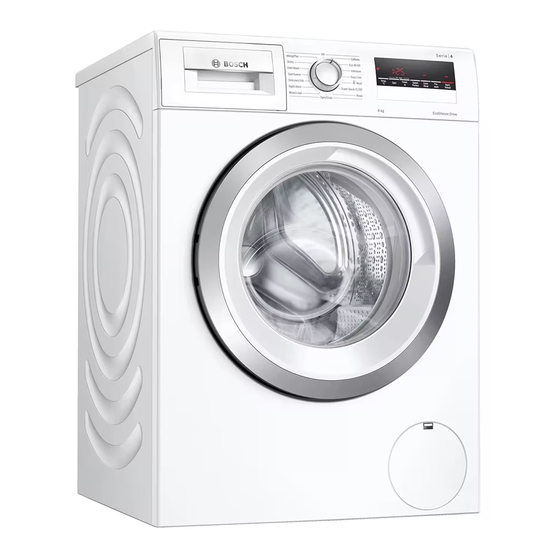
Getting to know the appliance Getting to know the appliance Washing machine G e t t i n g t o k n o w t h e a p p l i a n c e Detergent drawer Operating/display panel Loading door with door handle Service flap... -
Page 20: Control Panel
Getting to know the appliance Control panel Control panel differs depending on the model 8 Display panel for settings and ( Programmes ~ Supplementary information sheet for the operating and installation instructions. 0 Programme selector The buttons are sensitive, so they Note: only need to be touched gently. - Page 21 Getting to know the appliance More information on the display panel Button Display in- Description Display in- Description dicator dicator Selectable Tempera- ‰** kg Load recommendation ture Programme progress: - - - Š‹ °C In °C; - - = cold Washing Selectable Spin speed Rinse...
-
Page 22: Laundry
Laundry Check for metal items (paper clips, Display in- Description ■ etc.) and remove them. dicator Wash delicates in a laundry bag ■ “: - - Fault display (tights, underwired bras, etc.). ~ "Information on the display panel" on page 37 ‹... -
Page 23: Starching
Laundry – Stains: Remove/pretreat stains Soaking while they are fresh. Firstly, dab with soapy water; do not rub. Pour soaking agent/detergent into Then wash the items of laundry compartment II in accordance with with the appropriate programme. the manufacturer's instructions. Stubborn or dried-in stains can Select the desired programme. -
Page 24: Detergent
Detergent Detergent Saving Soiling/note Reduced temper- Light C orrect selection of detergent ature and deter- No visible dirt or stains. Cloth- D e t e r g e n t gent quantity as ing has taken on some body The care label is crucial for selecting per the recom- odour, e.g.: the correct detergent, temperature and... -
Page 25: Programme Default Settings
Programme default settings spin speed (in rpm; revolutions per Programme default minute) before and during the programme. settings Setting ‹: The rinsing water is drained The programme default settings for all but there is no spin. The laundry stays P r o g r a m m e d e f a u l t s e t t i n g s programmes are preset at the factory wet inside the drum, e.g. -
Page 26: Additional Programme Settings26
Additional programme settings During the timer count-down, you can Speed ■ change the preselected number of Washing in a shorter time while hours as follows: achieving a washing result that is Press the Start Reload A button. consistent with, but uses more Use the Ready in button to change energy than, the selected the number of hours. -
Page 27: Prewash
Operating the appliance Prewash Switching on the appliance/ selecting a programme (T, Prewash) Setting depending on the model If you have activated the Note: childproof lock, you must first deactivate For heavily soiled laundry. it before you can set a programme. There will be a prewash cycle at a low ~ "Childproof lock"... -
Page 28: Placing Laundry Into The Drum
Operating the appliance The settings can be selected or deselected depending on the programme progress. The indicator lamp for the button lights up if a setting is active. The settings are not saved when the appliance is switched off. The Start Reload A button indicator ~ "Additional programme settings"... -
Page 29: Starting The Programme
Operating the appliance Filling Measuring aid for liquid detergent Warning Position the measuring aid for dosing the correct amount of liquid detergent: Eye/skin irritation! Pull out the detergent drawer. Press Detergents and care products may down the insert and fully remove the spray out if the detergent drawer is drawer. -
Page 30: Childproof Lock
Operating the appliance activates additional rinse cycles. This The childproof lock remains active, ■ extends programme duration. even once the washing machine has been switched off. You can also remove the foam yourself. Mix one tablespoon of fabric softener Adding/removing laundry with 1/2 litre of water and pour it into compartment II. -
Page 31: Programme End During Rinse Stop
Sensors Press the Start Reload A button. Notes To cool down laundry: Select Rinse. Always wait until the programme ■ Press the Start Reload A button. ends, as the appliance could still be locked. For programmes at low temperature: At the end of the programme, the ■... -
Page 32: Unbalanced Load Detection System
Appliance settings Unbalanced load detection Activating the setting mode Turn the programme selector to system position 1. The washing machine is switched on. The automatic unbalanced load Press the Start Reload A button detection system detects imbalances and, at the same time, turn the and ensures even distribution of the programme selector clockwise to laundry by repeatedly starting and... -
Page 33: Cleaning And Maintenance
Cleaning and maintenance Remove the detergent residue ■ Cleaning and immediately. Do not clean with a water jet. maintenance ■ Drum Warning C l e a n i n g a n d m a i n t e n a n c e Risk of death! Use chlorine-free cleaning agents, do There is a risk of electric shock if you... -
Page 34: Drain Pump Is Blocked
Cleaning and maintenance b) If the measuring aid* for liquid detergent is used, slide it forwards, fold down and click into place. b) If the measuring aid for liquid detergent is used, pull it upwards. Push in the detergent drawer. Clean the detergent drawer and insert with water and a brush, and dry it. -
Page 35: Drain Hose At The Siphon Is Blocked
Cleaning and maintenance Take the drain hose out of the Drain hose at the siphon is retainer. blocked Remove the sealing cap and allow the water to flow out into a suitable Switch off the appliance. Disconnect container. the mains plug. Replace the sealing cap and place Loosen the hose clamp. -
Page 36: Faults And What To Do About Them
Faults and what to do about them Warning Risk of injury! You may injure your hands if you reach into the drum while it is turning. Do not reach into the drum when it is turning. Wait until the drum has stopped turning. -
Page 37: Information On The Display Panel
Faults and what to do about them Information on the display panel Display Cause/remedy è lights up The temperature is too high. Wait until the temperature drops. ■ The water level is too high. It is not possible to add laundry. Close the door ■... -
Page 38: Faults And What To Do About Them
Faults and what to do about them Faults and what to do about them. Faults Cause/Remedy Water is leaking from the Attach the drain hose correctly or replace it. ■ appliance. Tighten the screw connection of the drain hose. ■ The machine is not filling Have you pressed the Start Reload A button? ■... - Page 39 Faults and what to do about them Faults Cause/Remedy Residual water in the Not a fault – the effect of the care product is not impaired. ■ care-product compart- Clean the insert if necessary. ■ ment i. Odours or greasy depos- Depending on the model, run the Drum Clean* or Cottons 90 °C programme its in the washing without laundry.
-
Page 40: After-Sales Service
After-sales service After-sales service Technical data If you cannot rectify a fault yourself, Dimensions: A f t e r - s a l e s s e r v i c e T e c h n i c a l d a t a please contact our after-sales service. -
Page 41: Aqua-Stop Warranty
Aqua-Stop warranty Aqua-Stop warranty Only for appliances with Aqua-Stop A q u a - S t o p w a r r a n t y In addition to warranty claims against the vendor based on the purchase agreement and to our appliance warranty, we will provide compensation under the following conditions: If water damage is caused due to a... - Page 44 0344 892 8979 (Calls charged at local or mobile rate.) 01450 2655 (0.03 € per minute at peak. Off peak 0.0088 € per minute.) You can find the contact information for all countries in the attached after-sales service directory. Robert Bosch Hausgeräte GmbH Carl-Wery-Straße 34 81739 München, GERMANY *9001123077*...