
Related Manuals for IQCCTV IQR1080D4

Summary of Contents for IQCCTV IQR1080D4
- Page 1 1080P HD1080P Hybrid DVR Models IQR1080D4 IQR1080D8 IQR1080D16 User Guide Version 1...
-
Page 2: Table Of Contents
Contents CHAPTER 1 FUNCTION DESCRIPTIONS AND FEATURES......1 CHAPTER 2 OVERVIEW OF IQDVR ..............2 2.1 F ....................... 2 RONT ANEL 2.1.1 Front panel of IQDVR with 4 channels ............2 2.1.2 Front panel of IQDVR with 8 and 16 channels ......... 3 2.2 R ......................... - Page 3 6.3.3 Remote Setting ................... 41 6.3.4 Network ......................43 6.3.5 Alarm ......................46 6.3.6 Device ......................47 6.3.7 System ......................48 6.3.9 Local Setting ....................54 6.3.10 Logout......................54 CHAPTER 7 APPENDIX ..................54 ....................54 7.1 T ROUBLESHOOTING ..................56 7.2 U SAGE AINTENANCE...
-
Page 4: Safety Instruction
SAFETY INSTRUCTION Check the input voltage (AC100V–AC240V) to the power supply module before connecting it. Do not install the equipment in an environment with too much moisture, dust or smoke dust as this may result in fire or electric shock. ... -
Page 5: Chapter 1 Function Descriptions And Features
Chapter 1 Function Descriptions and Features Function Brief Description Supported outputs, VGA and HDMI, supports real-time monitoring by XIQCMS Real time Windows software CMS and Smart phone XIQCMS, supports electronic monitoring amplifier, multi-screen sequence and PIP display. Video compression H.264, The video quality, resolution of each channel and video frame rate are adjustable. -
Page 6: Chapter 2 Overview Of Iqdvr
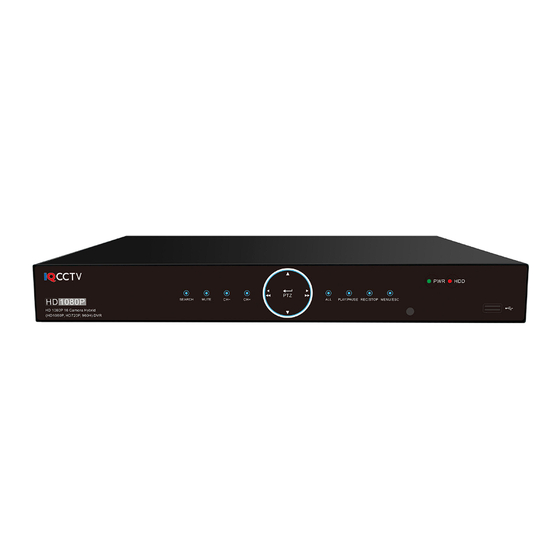
Chapter 2 Overview of IQDVR 2.1 Front Panel 2.1.1 Front panel of IQDVR with 4 channels Key or indicator Identification Functions Ch1-4 Change between the viewing channels. Up Key Move up Down Key Move Down Mute switch for record search. Switch to the previous SEL/EDIT channel or next channel (8-channel IQDVR) Move to left;... -
Page 7: Front Panel Of Iqdvr With 8 And 16 Channels
Stop playing or stop manual recording - Start manual STOP/ REC record MENU/ESC Enter into Main menu, exit or stop playing USB port for Mouse, External HDD and DVD backup drive. 2.1.2 Front panel of IQDVR with 8 and 16 channels Key or indicator Identification Functions... - Page 8 Ch. Up Change between the viewing channels. Move Up Move to left; Rewind function; Decrease PTZ rotation LEFT/REW speed and parameter value of graphic setting; Press and hold the key on Preview screen to switch GUI device. Down Move Down Right key;...
-
Page 9: Rear Panel
2.2 Rear Panel IQDVR 2.2.1 Rear panel for with 4/8 channel Physical Interface Connection Connect with CH1-4 or CH1-8 (analog) video input device, standard BNC Video input port Audio input Connect with CH1-4 audio input signals, RCA port Audio output Audio signal output, RCA port USB port Connect with U flash disk, disk burner, and other USB storage devices... -
Page 10: Remote Controller
LAN: Network port Connect with LAN, Ethernet and RJ45 port. Power Switch Turn on/off power supply VGA port Connect with VGA display device, such as PC monitor HDMI port HDMI high definition port USB port Connect with USB Power port Connect with the power supply DC12V 5A, attached with the machine 2.3 Remote Controller Table 2-3 Operation of remote controller. -
Page 11: Chapter 3 Iqdvr Connection
Chapter 3 IQDVR Connection 3.1 HDD Installation (1) Make sure your IQDVR is not powered, now you can remove the screws on both sides of the IQDVR and the rear panel. Slide the cover away from the front panel and lift off. (2) Within the IQDVR original box you will have the SATA cables for data and a Molex cable for power, connect these to the main board. -
Page 12: Chapter 4 Iqdvr Boot Up
Chapter 4 IQDVR Boot up 4.1 System Initialization After connecting the power cable of IQDVR to wall outlet and pressing the power button, you will enter into the IQDVR system initializing screen shown as Picture 4-1. Picture 4-1 4.2 Start-up Wizard Once booted you will be greeted with the startup wizard, if you do not want to see this wizard again after you have completed it, you may click “Don't show this window next time”... -
Page 13: Main Interface
2. Record Schedule (Picture 4-4). Set recording time and scheduled recording of IQDVR. Picture 4-4 3. HDD Management (Picture 4-5). HDD format and overwrite type. Picture 4-5 4.3 Main Interface Picture 4-6 Note: When internal HDD is not connected to IQDVR, the character “H” will appear on the lower part of the main interface and accompany buzzer alarm. -
Page 14: Chapter 5 Iqdvr Menu
Chapter 5 IQDVR Menu Popup Menu After finishing with the system wizard, right click the mouse, this will show the preview interface or slide the mouse to the bottom of screen to enter into Pop-up Menu. Now you can make system changes in the Main Menu, The options in the pop-up menu may be varied slightly according to different parameter settings The options in the menu will be explained in detail in the following chapters. -
Page 15: Main Menu Guide
5.1 Main Menu Guide Live Display Output Private Zone Record Record Schedule Mainstream Parameter Network Sub stream Email Network DDNS RTSP Main Menu Motion Alarm Alarm Record Record Search Search Event Search Device General Cloud Storage General Users System Info Maintenance Advanced Events... -
Page 16: Main Menu
5.2 Main Menu On LIVE mode, click the mouse button, or [Menu] button on the remote controller, or click [ ] icon on the toolbar to enter the main menu screen, as shown in Picture 5-2. If system interface is locked, refer to section 4.3 to unlock by inputting password. - Page 17 2. Output Go to “Main Menu”→ “Parameter”→ “Display”→ “Output” to enter into the interface shown as Picture 5-5. Video Output: Live Output Sequence Mode: Set sequence mode SEQ Time: Sequence time is set 5 seconds by default. User may set it as required ...
- Page 18 Channel: Set the desired channel in the drop-down menu Record Switch: Enable/disable record Pre Record: Enable to pre-record motion detection or I/O trigger record. Picture 5-8 5. Record Schedule Go to “Main Menu” → “Parameter” → “Record” → “Record Schedule” to enter into the Record Schedule interface to make record schedule for IQDVR, as shown in Picture 5-9.
- Page 19 “Main Menu”→ “Record” → “Mainstream” Mode: Support AHD, 960H and D1. Select a resolution, save and exit main menu. Then the system will automatically restart to take effect. Resolution (960H): Support three kinds of picture quality: WD1, WHD1, and WCIF. ...
- Page 20 8. Sub stream Go to “Main Menu” → “Parameter” → “Network” → “Sub stream” to enter into the interface shown as Picture 5-12 on the following page. Video: Sub stream switch. Select enable to preview the sub stream in the client, so as to ensure smooth playing;...
- Page 21 10. E-mail Schedule Go to “Main Menu” → “Parameter” → “Network” → “E-mail Schedule” to make Email schedule, as shown in Picture 5-14. Select the channel and the date to be set. One week’s schedule can be set. The record schedule of the current channel can be copied to any other channel or all channels. Note: 1.
- Page 22 12. RTSP Go to “Main Menu” → “Parameter” → “Network” → “RTSP” Set User Name and Password to view video by PC software VLC (See Picture 5-16 below). Picture 5-16 Follow the instruction to input IP and port to preview video (See Picture 5-17). Picture 5-17 13.
- Page 23 Picture 5-18 Picture 5-19 14. Motion Go to “Main Menu” → “Parameter” → “Alarm” → “Motion” to enter into the interface shown as picture 5-20 on the following page. Channel: Enable or disable Motion function. Sensitivity: Support 1-8 level, 8 is the highest level.
- Page 24 15. Alarm Go to “Main Menu” → “Alarm” → “Alarm” to enter into the interface shown as Picture 5-22. Alarm management and setting of the machine. Set alarms under different status in the interface. Please refer to Table 2-4. Alarm In: Set four groups of alarm input.
-
Page 25: Record Search
5.2.2 Record Search 1. General Go to “Main Menu” → “Record Search” → “Record Search” to enter into the interface shown as Picture 5-23. Channel: Select the channel you want to search. Type: Select the type the playback record. There are two options, i.e. - Page 26 Time Axis setup, file clip and zoom in/out 1) The IQDVR supports the processing control bar function when playing back record files (See Picture 5-25 and 5-26) Picture 5-25 Picture 5-26 Time Axis zoom: Default value is 24hours. Allow user to select 2 hours, 1 hour, 30 minutes or user-defined.
- Page 27 2. Events Go to “Main Menu” → “Record Search” → “Events” to enter into the interface shown as Picture 5-29. In this page, Search details by date, time, channel and record type. The relevant operations are as follows: Picture 5-29 : Previous page;...
- Page 28 After backup finishes, message Backup Finishes will appear at down-right corner, as shown in Picture 5-31. Note: Before backup, connect devices for backup (USB flash disk or other mobile storage devices with USB interface) Picture 5-31 3. Play Backup Files 1.Copy backup files to the computer.
- Page 29 : Open file : Full screen display : Never on top : Always on top : On top during playing Screenshot: Save path: installation directory\Video Client\Capture : Adjust volume : Add folder or file. : Delete file in the list. : Delete all files in the list.
-
Page 30: Device
5.2.3 Device Go to “Main Menu” → “Device” → “HDD” to enter into the interface shown as Picture 5-35. When HDD is connected, the system will automatically detect if HDD is normal or not; if HDD needs to be formatted, status will be shown as “Not formatted”. -
Page 31: Ptz And Cloud Storage
5.2.4 PTZ and Cloud Storage 1. PTZ Go to “Main Menu” → “Device” → “PTZ” to enter into the interface shown as Picture 5-37 below Select a PTZ channel and set PTZ protocol (Pelco-D, Pelco-P), Baud rate (1200, 2400, 4800, 9600), Data Bit(8, 7, 6, 5), Stop Bit (1, 2), Parity (None, Odd, Even Mark Space), Address and Cruise. -
Page 32: System
6) Click [Active Cloud] to activate Cloud and Email will receive the URL related to Cloud Input the registered user name to visit the above website and the following interface will pop up. 7) Click the icon at the upper-left to view the folder (CloudDVR000) made in the 4 step. - Page 33 3. NTP Go to “Main Menu” → “System” → “General” → “NTP” to enter into the interface shown as Picture 5-42. NTP service: Enable/Disable NTP function. Server Address: Select NTP server (time.windows.com,time.nist.gov, pool.ntp.org). Time Zone: Corresponding time zones for various nations or regions.
- Page 34 5. User Edit Enable or disable the function or set password (See Picture 5-45). Picture 5-45 6. Info Go to “Main Menu” → “System” → “Info” to enter into the interface shown as Picture 5-46. Picture 5-46 7. Log Go to “Main Menu” → “System” → “Log”, as shown in Picture 5-47. Picture 5-47 Search log information in different period of time.
-
Page 35: Advanced
5.2.6 Advanced Maintain Go to “Main Menu” → “Advanced” → “Maintain” to enter into the interface shown as Picture 5-48. Auto Reboot: Enable the auto maintenance function reboot system regularly every day/week/month. When Auto Reboot is enabled, IQDVR should be in the main interface and no user operation. -
Page 36: Shutdown
5.2.7 Shutdown Go to “Main Menu” → “Shutdown” to enter into the interface shown as Picture 5-50. Picture 5-50 5.3 Menu Lock In consideration of system safety, click the icon on the toolbar when the end user leaves away from IQDVR and the system interface will be locked. User has to input Device ID, User Name and Password on the login interface to unlock (Default: User Name: admin, Password: blank). -
Page 37: Record Search
5.5 Record Search Click icon on the toolbar to enter into the Record Search interface to search and playback. Refer to former section for specific operating method. 5.6 Mute Click icon on the toolbar or Mute button on the panel or remote controller to control the mute of NVR. -
Page 38: Chapter 6 Web Application Manager
Chapter 6 Web Application Manager 6.1 ActiveX control download and installation Open your web browser and input the IP address of the IQRDVR, such as: . Your PC will download and install “ActiveX” plug-in automatically. If your http://192.168.1.168 computer system is Windows Vista or Windows 7/8, you may need to setup the user authority for remote control, or you may not be unable to backup or record. -
Page 39: Web Application Manager Login
Picture 6-1-2 Picture 6-1-1 6.2 Web Application Manager Login After ActiveX controls installation, please input user name and password, select Main Stream or Sub Stream (In general, select main stream for intranet and sub stream for outer net), and input web port number and select language in the interface (See picture 6-2). -
Page 40: Live Interface
6.3 Live Interface Log in and enter into the live interface, as shown in Picture 6-3. Picture 6-3 6.3.1 Menu Bar Menu Bar: Live, Replay, Configuration, Local Setting and Logout. Live Display Log in the Web Application Manager, system will be defaulted to enter into <Live> interface shown as Picture 6-3. -
Page 41: Playback
: Open all the live channels. : Close all the live channels : Display previous group of channels : Display next group of channels : Click to maximize the current window to full screen. Right click to pop up menu option and select Exit Full Screen. - Page 42 Record Search Record playback procedure Firstly, select the date you want to check and tick 1 to 4 channels. Any record files in current channel at current date will be displayed in the status bar of the interface. (See Picture 6-7). Picture 6-7 Secondly, select record type (Normal record, Alarm record and All) and channels, and then click “...
- Page 43 icon to zoom in/out the time bar display ratio, as shown in Picture 6-8. 2. Playback Control Playback control bar, as shown in picture 6-9. Picture 6-9 Please see below for a detailed description: Description Description Play Enable the volume switch Pause Volume adjustment bar Slow playing 1/2,1/4, 1/8, Fast...
- Page 44 The captured file will be saved as .bmp format. Record file download Click download icon “ ” on the control bar to display all the matched record file according to the search conditions of channels, as shown in picture 6-11. Picture 6-11 Tick-select the record file you want to download and click [Start download].
-
Page 45: Remote Setting
6.3.3 Remote Setting Click Remote Setting to enter into the interface shown as Picture 6-12, including Display, Record, Network, Alarm, Device, System and Advance. Picture 6-12 1. Display Unfold [Display] option to find its sub-options: Live and Privacy zone. Live: You may change channel name, position, channel preview and relevant parameters. If show time is set as <disable>, current IQDVR system time will not appear on the screen on live mode. - Page 46 Picture 6-14 Record Click <Record> option to unfold its sub-options: Record parameter and Schedule. 1) Record Parameters. The parameters should be consistent with IQDVR local setting, as shown in Picture 6-15. Picture 6-15 3) Record Schedule. The parameters should be consistent with DVR local setting, as shown in Picture 6-16.
-
Page 47: Network
4) Mainstream: User may set Mainstream, as shown in Picture 6-17. The relevant parameters should be consistent with IQDVR local setting. Picture 6-17 6.3.4 Network Unfold <Network> to show its sub-options: Network, Email, and DDNS configuration, as shown in Picture 6-18. 1. - Page 48 Picture 6-19 3. Email Email: Set IQDVR alarm Email configuration parameters, including Email address, SSL, Email Enable, Interval and Email Schedule, etc. Detailed parameters should be consistent with IQDVR local setting. Refer to Picture 6-20. Picture 6-20 4. DDNS DDNS: After user applies for DDNS service, you could enable <DDNS> function under any one network type mode (Static, DHCP and PPPoe).
- Page 49 Picture 6-21 5. RTSP Refer to Picture 6-22. The relevant parameters should be consistent with IQDVR local setting. Picture 6-22 6. FTP Refer to Picture 6-23. The relevant parameters should be consistent with IQDVR local setting. Picture 6-23...
-
Page 50: Alarm
6.3.5 Alarm Alarm setting includes Motion Detection and I/O Alarm Parameters. 1. Motion Detection Configure Sensitivity, Alarm out, Alarm Record and Alarm Capture, etc. Detailed setting should be consistent with IQDVR local setting (See Picture 6-24). Picture 6-24 2. I/O Alarm Set parameters for I/O Alarm, Alarm Out, Alarm Record, Send Email, etc. -
Page 51: Device
6.3.6 Device Click <Device> to unfold its sub-options: HDD and PTZ. 1. HDD Check HDD status of IQDVR and overwritten time. Detail setting should be consistent with IQDVR local setting. Please refer to Picture 6-26. Picture 6-26 2. PTZ Set the relevant parameters of PTZ. Detail setting should be consistent with IQDVR local setting. Please refer to Picture 6-27. -
Page 52: System
3. Cloud Storage Set the relevant parameters of Cloud Storage. Detail setting should be consistent with IQDVR local setting. Please refer to Picture 6-28-1 and 6-28-2. Picture 6-28-1 Picture 6-28-2 6.3.7 System Click <System> option to unfold its sub-options: General, Users and Information. 1. - Page 53 Picture 6-29 2. Users Configure user name and password and detailed setting should be consistent with IQDVR local setting. Please refer to Picture 6-30. Picture 6-30 3. Information Search device name, device number, device type, MAC address, software version, IE version and hardware version of IQDVR shown as Picture 6-31.
- Page 54 6.3.8 Advanced Click Advance to unfold its sub-options: Firmware Update, Load default, Events and Maintain. 1. Firmware Update Remotely update IQDVR system, as shown in Picture 6-32. Picture 6-32 Updating procedure: Firstly, select the update file path. The file format is .sw. Please refer to Picture 6-33. Secondly, click “Start”...
- Page 55 2. Load Default Remotely restore default parameters of DVR, with same setting method as that of IQDVR, shown as Picture 6-34. Picture 6-34 3. Events Configure Event Type, Buzzer, Send Email, Show Message and other parameters shown as Picture 6-35. Detailed setting should be consistent with IQDVR local setting. Picture 6-35 4.
- Page 56 Picture 6-36...
-
Page 57: Local Setting
6.3.9 Local Setting Set Record Path (save Live record and Playback clip file), Download Path for remote file, Snapshot Path for captured pictures, Interval for switching record files (Packaging time), and File type (H264 and AVI) shown as Picture 6-40. Picture 6-40 6.3.10 Logout Click... -
Page 58: Chapter 7 Appendix
Chapter 7 Appendix 7.1 Troubleshooting Q: What can I do if the system does not detect the HDD? A: Check if the power supply system is properly connected and data cord and power cables are securely connected. Check if your HDD is supported, please contact your place of purchase to confirm. - Page 59 11. Q: The IQDVR cannot control PTZ? A: Please check if: 1. Check the PTZ connection and power supply. 2. Protocol of PTZ decoder does not match that of IQDVR. 3. Address of PTZ decoder does not match that of IQDVR. If many decoders are connected, the farthest side of AB line of PTZ decoder should be added 120Ω...
-
Page 60: Usage Maintenance
Usage Maintenance 1. To shut down IQDVR, please firstly shut down the system and then turn off the power. Do not turn off the power directly or the HDD data will be lost or damaged. 2. Please keep IQDVR away from heat sources. 3. -
Page 61: Dvr Specification's
7.3 DVR Specification’s Model IQR1080D4 Camera Inputs 4CH inputs Audio Inputs 1CH inputs Monitor Outputs VGA and HDMI output Spot Output Backup Method USB, IE Controls Mouse, remote control, front panel Recording Compression H.264 Recording Modes Continuous/Manual/Motion detect 1920x1080 15fps... - Page 62 Model IQR1080D8 Camera Inputs 8CH inputs Audio Inputs 4CH inputs Monitor Outputs VGA and HDMI output Spot Output Backup Method USB, IE Controls Mouse, remote control, front panel Recording Compression H.264 Recording Modes Continuous/Manual/Motion detect 1920x1080 15fps Recording Rate/Resolution 1280x720, 960x576 25fps Multi-screen Playback Maximum Recording Capacity Network / Email Alerts...
- Page 63 Model IQR1080D16 Camera Inputs 16CH inputs Audio Inputs 16CH inputs Monitor Outputs VGA and HDMI output Spot Output Backup Method USB, IE Controls Mouse, remote control, front panel Recording Compression H.264 Recording Modes Continuous/Manual/Motion detect 1920x1080 15fps Recording Rate/Resolution 1280x720, 960x576 25fps Multi-screen Playback Maximum Recording Capacity 12TB...
-
Page 64: Accessories
7.4 Accessories Remote Controller Power Adapter User Manual (Good in kind prevail) USB mouse... - Page 65 (including accidental damage) and damage caused by normal wear and tear. In the unlikely event that you encounter a problem with this product, it should be returned to the place of purchase. IQCCTV, Unit 2 Valley Point, Beddington Farm Road, Croydon, Surrey CR0 4WP www.iqcctv.co.uk...
Need help?
Do you have a question about the IQR1080D4 and is the answer not in the manual?
Questions and answers