Table of Contents
Advertisement
Thank you for purchasing this Panasonic product.
l Please read these instructions carefully before using
this product and save this manual for future use.
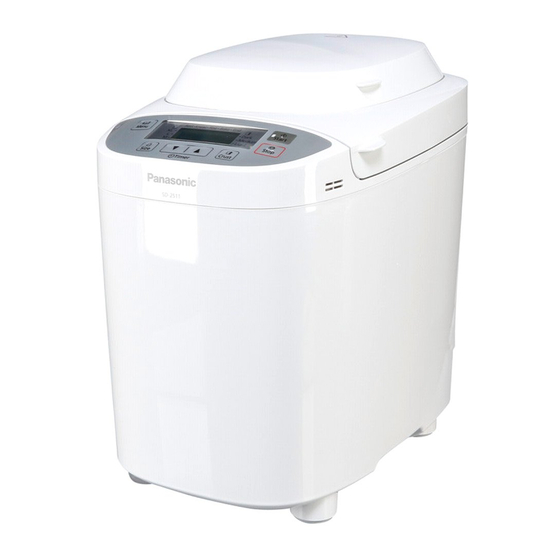
l The explanations inside mainly focus on the SD-2511
white model.
l This product is intended for household use only.
l For more recipes please visit The ideas kitchen
www.theideaskitchen.com
SD-2511_UK.indd
1
Automatic Bread Maker
OPERATING INSTRUCTIONS AND RECIPES (Household Use)
SD-2511
Model No.
2015/01/09
15:29:22
Advertisement
Table of Contents

Related Manuals for Panasonic SD-2511


Summary of Contents for Panasonic SD-2511
- Page 1 Thank you for purchasing this Panasonic product. l Please read these instructions carefully before using this product and save this manual for future use. l The explanations inside mainly focus on the SD-2511 white model. l This product is intended for household use only.
-
Page 2: Table Of Contents
Contents Before Use p p Safety Instructions ································································································································································· 3 p p Accessories/Parts Identification ················································································································································ 6 p p Bread-making Ingredients ······················································································································································· 8 How to Use p p List of Bread Types and Baking Options ····································································································································10 p p Baking Bread ······································································································································································12 p p When adding extra ingredients ················································································································································14 p p Baking Brioche ····································································································································································15 p p Baking Rustic Artisan ····························································································································································16 p p Rustic Sourdough/Rustic Sourdough Dough... -
Page 3: P P Safety Instructions
Safety Instructions Please make sure to follow these instructions. In order to prevent accidents or injuries to the user, other people, and damage to property, please follow the instructions below. pp T he following charts indicate the degree of damage caused by wrong operation. Warning: Indicates serious injury or death. -
Page 4: Safety Instructions
● The appliance makes abnormal turning noise during use. ● Unplug the appliance immediately and consult a Panasonic dealer and have it serviced by an authorized technician. Do not touch, block or cover the steam vent holes during use. - Page 5 If you lose the fuse cover, the plug must not be used until a replacement cover is obtained. A replacement fuse cover can be purchased from your local Panasonic Dealer. If the fitted moulded plug is unsuitable for the socket outlet in your home, then the fuse should be removed and the plug cut off and disposed of safely.
-
Page 6: P P Accessories/Parts Identification
Accessories/Parts Identification Main Unit Raisin nut dispenser The ingredients placed in the raisin nut dispenser will drop into the bread pan automatically upon selecting the menu with raisin (3, 4, 7, 16, 20, 21, 23 and 31). Turn to P. 14 for ingredients which may be placed in the raisin nut dispenser. -
Page 7: Control Panel
Control Panel n Operation status : displayed for the current stage of the program. Ingredients are being regulated on the ‘Rest’ stage before kneading. : displayed when there has been an interruption in the power supply. : displayed when adding ingredients manually on menu 4, 13, 21 and 29. n Time remaining until program finished Also when adding ingredients manually, display will show the time until adding extra ingredients in the... -
Page 8: P P Bread-Making Ingredients
Bread-making Ingredients Water Flour l Use normal tap water. l Use tepid water if using menu 2, 6, 8, 14 or 24 in a Main ingredient of bread. The protein in flour cold room. forms gluten during kneading. Gluten provides l Use chilled water if using menu 8, 9, 13, 15, 16, 24, structure and texture and helps the bread to 25, 29, 30 or 31 in a hot room. -
Page 9: Main Flours Used In Bread
Main Flours Used in Bread Strong flour is milled from hard wheat and has a high content of protein which is necessary for the development of gluten. Carbon dioxide produced during fermentation is trapped within the elastic network of gluten, thus making the dough rise. White flour: Made by grinding wheat kernel, excluding bran and germ. -
Page 10: List Of Bread Types And Baking Options
List of Bread Types and Baking Options n Function Availability and Time Required • Time required for each process will differ according to room temperature. Options Processes Menu Menu Rest Knead Rise Bake Total Size Crust Timer Number 30 min– 1 hr 50 min–... - Page 11 Options Processes Menu Menu Rest Knead Rise Bake Total Size Crust Timer Number 30 min– 1 hr 10 min– — — — — Basic 2 hr 20 min 15–30 min 50 min 1 hr 30 min 30 min– 1 hr 10 min– Basic Raisin —...
-
Page 12: Baking Bread
Baking Bread Turn to P. 30-35 for bread recipes Place the ingredients in the bread pan Kneading blade Remove the bread pan and Place the measured ingredients set the kneading blade in the bread pan 1 Twist the bread pan anti- 1 Place the dry yeast at the clockwise and lift up to bottom (so that it does not mix... - Page 13 Set the program and start Remove the bread Select a bake menu Press Stop pad and (The display shows when menu ‘1’ is selected.) remove bread when machine beeps 8 times and the bar at ‘End’ flashes. n To change the size n To change the crust colour l The flashing start light will go off.
-
Page 14: When Adding Extra Ingredients
When adding extra ingredients Adding extra ingredients to bread or dough By selecting a menu with Raisin (3, 4, 7, 16, 20, 21, 23 or 31), you can mix your favourite ingredients into the dough to make all kinds of flavoured breads. -
Page 15: Baking Brioche
Baking Brioche Yeast ⁄ Strong White Bread Flour 400 g (14 oz) Sugar 4 tbsp Salt 1 tsp Skimmed milk 2 tbsp Butter (Cut into 2 cm cubes and keep in 50 g (2 oz) fridge) Eggs 280 g (mixture of Water eggs and water) Butter for adding later (Cut into 1–2 cm... -
Page 16: P P Baking Rustic Artisan
Baking Rustic Artisan n To cancel/stop once started (hold for more than 1 second) 2, 3 Preparations 1 Put the kneading blade into the bread pan. (P. 12) 2 Place the ingredients in the bread pan in the order listed in the recipe (P.31). For ingredients marked with , we recommend adding into the bread pan at step 3 when the sound beeps. - Page 17 Turn to P. 31 for bread recipes Add extra or moist/sticky ingredients l For ingredients, use max. 100 g as size-M, 125 g when the beep sounds, then press Start as size-L or 150 g as size-XL. pad again l Even without pressing the Start pad, kneading will continue after 5 min.
-
Page 18: Stage 1 Making Sourdough Starter
Rustic Sourdough/Rustic Sourdough Dough STAGE 1 Making Sourdough starter Remove the kneading blade. Sourdough starter spoon Sourdough cup Bread pan (Keep clean and use sourdough starter only) Two sourdough cups can be set at a time. n To cancel/stop once started (hold for more than 1 second) One quantity of sourdough starter Preparations... -
Page 19: Stage 2 Baking Rustic Sourdough
STAGE 2 Baking Rustic Sourdough n To cancel/stop once started (hold for more than 1 second) Preparations 1 Put the kneading blade into the bread pan. Stage 1 Sourdough starter : Menu ‘27’ (24hr) (P. 12) 2 Tip the sourdough starter in the bread pan. See P. -
Page 20: Stage 2 Making Rustic Sourdough Dough
Rustic Sourdough/Rustic Sourdough Dough STAGE 2 Making Rustic Sourdough Dough n To cancel/stop once started (hold for more than 1 second) Preparations 1 Put the kneading blade into the bread pan. Stage 1 Sourdough starter : Menu ‘27’ (24hr) (P. 12) 2 Tip the sourdough starter in the bread pan. -
Page 21: P P Making Dough
Making Dough Turn to P. 38–43 for dough recipes n To cancel/stop once started (hold for more than 1 second) Preparation 1 Put the kneading blade into the bread pan. (P. 12) 2 Place the ingredients in the bread pan in the order listed in the recipe. 3 Set the bread pan into the main unit, and plug the machine into the socket. -
Page 22: P P Making Brioche Dough
Making Brioche Dough Turn to P. 43 for dough recipes n To cancel/stop once started (hold for more than 1 second) 2, 3 Preparation 1 Cut the butter for adding later into 1–2 cm cubes and keep them in fridge. (P. -
Page 23: P P Making Rustic Artisan Dough
Making Rustic Artisan Dough Turn to P. 38 for dough recipes n To cancel/stop once started (hold for more than 1 second) 2, 3 Preparations 1 Put the kneading blade into the bread pan. (P. 12) 2 Place the ingredients in the bread pan in the order listed in the recipe (P.38). For ingredients marked with , we recommend adding into the bread pan at step 3 when the sound beeps. -
Page 24: P P Baking Rustic Scone
Baking Rustic Scone Turn to P. 35 for bread recipes n To cancel/stop once started (hold for more than 1 second) 2, 4, 6 Preparations 1 Put the kneading blade into the bread pan. (P. 12) 2 Place the ingredients in the bread pan in the following order: mixture of eggs and milk →... - Page 25 Open the lid and scrape off the dough, l After 3 minutes have passed in step 5, the beeps shape the surface of the dough within sound and ‘Bake’ starts automatically. (The 3 minutes, when the beep sounds surface of the rustic scone became uneven, because you did not shape the surface of the dough.) Press Start pad again...
-
Page 26: P P Baking Cake
Baking Cake Turn to P. 44–47 for cake recipes n To cancel/stop once started (hold for more than 1 second) • Remove the kneading blade Preparation 1 Prepare the ingredients according to the recipe. 2 Line the bread pan with parchment paper or loaf tin liners and pour in the mixed ingredients. -
Page 27: P P Making Jam
Making Jam Turn to P. 48 for jam recipes n To cancel/stop once started (hold for more than 1 second) Preparation 1 Prepare the ingredients according to the recipe. 2 Put the kneading blade into the bread pan. 3 Place the ingredients into the bread pan in the following order: half of the fruits → half of the sugar →remainder of fruits → remainder of sugar. -
Page 28: P P Making Compote
Making Compote Turn to P. 49 for compote recipes n To cancel/stop once started (hold for more than 1 second) Preparation 1 Prepare the ingredients according to the recipe. (Remove the kneading blade.) 2 P lace the ingredients into the bread pan in the following order: fruits → sugar →liquid. 3 Set the bread pan into the main unit, and plug the machine into the socket. (Make sure the start light is off.) Select menu ‘33’... -
Page 29: P P Recipe Contents
Recipe Contents Bread Recipes White Loaf ··························30 Wheat Germ Loaf ·················30 Malted Fruit Loaf ··················31 Rapid White Loaf··················30 Oat and Bran Loaf ················30 Curry and Mango Loaf ···········31 Basic Spicy Fruit Loaf ····················30 Pizza Loaf···························30 Cheese and Bacon Loaf ········31 [1 Basic] [2 Basic Rapid] Cider Apple Bread ················30 5 Seeded Bread Loaf ············30... - Page 30 Bread Recipes White Loaf Milk Loaf Menu ‘1’ (4hr-4hr 5min) Menu ‘1’ (4hr-4hr 5min) Yeast ⁄ 1 tsp ⁄ Yeast ⁄ 1 tsp ⁄ Strong White Bread 400 g 500 g 600 g Strong White Bread 400 g 500 g 600 g Flour (14 oz)
- Page 31 Brown Loaf Curry and Mango Loaf Menu ‘1’ (4hr-4hr 5min) Menu ‘1’ (4hr-4hr 5min) Yeast ⁄ 1 tsp ⁄ Yeast ⁄ Strong Brown Bread 400 g 500 g 600 g Strong Brown Bread Flour 400 g (14 oz) Flour (14 oz) (1 lb 2 oz) (1 lb 5 oz) Sugar...
- Page 32 Bread Recipes [5 Whole wheat] Wholemeal Loaf 100% Olive Loaf Menu ‘5’ (5hr) Menu ‘7’ (5hr) [6 Whole wheat Rapid] [7 Whole wheat Raisin] Yeast ⁄ 1 tsp ⁄ Yeast ⁄ (wholemeal flour) Strong Wholemeal 400 g 500 g 600 g Strong Wholemeal Bread Flour 200 g (7 oz) Bread Flour (14 oz)
-
Page 33: Granary Loaf
Spicy Fruit Loaf Granary Loaf ® Menu ‘7’ (5hr) Menu ‘5’ (5hr) Yeast 1 tsp Yeast ⁄ 1 tsp ⁄ Strong Wholemeal Bread Flour 400 g (14 oz) 400 g 500 g 600 g Strong Granary Flour ® Sugar 2 tsp (14 oz) (1 lb 2 oz) (1 lb 5 oz) - Page 34 Bread Recipes [9 French] French Rustic French Menu ‘9’ (6hr) Menu ‘9’ (6hr) (white flour/wholemeal flour) Make bread with a crispy crust and Yeast 1 tsp Yeast 1 tsp texture. Strong White Bread Flour 400 g (14 oz) Strong White Bread Flour 275 g (10 oz) Butter 15 g (...
- Page 35 [13 Brioche] Basic Brioche Panettone Menu ‘13’ (3hr 30min) Menu ‘13’ (3hr 30min) Yeast ⁄ Yeast ⁄ Strong White Bread Flour 400 g (14 oz) Strong White Bread Flour 400 g (14 oz) Sugar 4 tbsp Sugar ⁄ tbsp Salt 1 tsp Salt 1 tsp...
-
Page 36: Gluten Free Recipes
The raisin nut dispenser does • Panasonic Accessory Shop: 0844 8443899 not operate on the Gluten Free does contain gluten. • Direct Online: program. - Page 37 Gluten Free Bread Glutafin Gluten Free Bread Mix Juvela Bread Mixes Menu ‘14’ -‘Dark’ Crust (1hr 55min) Menu ‘14’ -‘Dark’ Crust (1hr 55min) Tepid Water 400 mL Gluten Free Mix Fibre Mix 2 tsp Water 400 mL 430 mL Bread Mix 500 g (1 lb 2 oz) Salt ⁄...
- Page 38 Dough Recipes Rolls l Select one of the following recipes and follow the method below. Shape dough. Place onto a greased baking tray and allow to prove until doubled in size. Brush with beaten egg. Bake in a preheated oven at 220˚C/425˚F/Gas Mark 7 for [19 Basic] [20 Basic Raisin] [21 Rustic Artisan] 10–15 mins or until golden brown.
- Page 39 Wholemeal Dough 50% Ciabatta Menu ‘22’ (3hr 15min) Stage 1 Culture : Menu ‘28’ (45min) Yeast ⁄ Yeast ⁄ Strong Wholemeal Bread Flour 300 g (11 oz) Strong White Bread Flour 175 g (6 oz) Strong White Bread Flour 300 g (11 oz) Water 200 mL Sugar...
- Page 40 Dough Recipes Rye and White Rolls Chelsea Buns Stage 1 Culture : Menu ‘28’ (45min) Enriched Dough : Menu ‘19’ (2hr 20min) Yeast 1 tsp Yeast ⁄ Strong White Bread Flour 75 g (3 oz) Strong White Bread Flour 250 g (9 oz) Rye flour 150 g (5 oz) Sugar...
- Page 41 Croissants Soft Rolls/Baps Menu ‘19’ (2hr 20min) Menu ‘19’ (2hr 20min) Yeast ⁄ Yeast 1 tsp Strong White Bread Flour 300 g (11 oz) Strong White Bread Flour 450 g (1 lb) Sugar 1 tsp Sugar ⁄ Butter 25 g (1 oz) Butter 25 g (1 oz) Salt...
- Page 42 Dough Recipes Dough for Tear & Share Bread Picnic Tear & Share Bread Menu ‘19’ (2hr 20min) Dough for Tear & Share Bread One batch (on the left) Yeast ⁄ Grainy Mustard 2 tbsp Strong White Bread Flour 550 g (1 lb 4 oz) Cooked Ham, chopped 75 g (3 oz) Sugar...
- Page 43 Brioche Dough (Chocolate Chip Brioche Roll) Focaccia ; for 12 rolls Menu ‘28’ (45min) Menu ‘29’ (1hr 50min) Yeast ⁄ Strong White Bread Flour 300 g (11 oz) Yeast ⁄ Olive Oil 1 tbsp Strong White Bread Flour 400 g (14 oz) Salt 1 tsp Sugar...
-
Page 44: Recipes
Cake Recipes Apple and Ginger Cake Banana and Walnut Loaf Menu ‘18’ (1hr 5min) Menu ‘18’ (55min) Butter 100 g (4 oz) Soft Light Brown Sugar 50 g (2 oz) Golden Syrup 200 g (8 oz) Butter 75 g (3 oz) Self Raising Flour 300 g (11 oz) Egg, medium... - Page 45 Boozy Cake Remove the kneading blade from the bread pan and line the Menu ‘18’ (55min) bottom and sides with baking parchment. Butter 125 g (4 oz) Place the mixture into the bread pan, being careful to ensure Mixed Dried Fruit 300 g (11 oz) that the mixture is inside the baking parchment.
- Page 46 Cake Recipes Hazelnut and Honey Loaf Place the mixture in the bread pan, being careful to ensure Menu ‘18’ (1hr) that the mixture is inside the baking parchment. Butter 175 g (6 oz) Select menu 18 and enter 1 hr on the timer. Dark Brown Sugar 50 g (2 oz) Honey...
- Page 47 Soda Bread Yeast and Dairy Free Spelt Loaf Menu ‘18’ (50min) Menu ‘18’ (50min) Plain Flour 400 g (14 oz) Spelt Flour 400 g (14 oz) Bicarbonate of Soda 1 tsp Bicarbonate of Soda 1 tsp Sugar 1 tsp Salt 1 tsp Salt ⁄...
-
Page 48: Jam Recipes
Jam Recipes [32 Jam] l Depending on the type of pectin, it may be better to increase or decrease the amount of it. Plum Jam Strawberry Jam Menu ‘32’ (1hr 40min) Menu ‘32’ (1hr 40min) Plums, finely chopped 700 g (28 oz) Strawberries, finely chopped 600 g (24 oz) Sugar... -
Page 49: Compote Recipes
Compote Recipes [33 Compote] Spiced Apple Compote Mixed Berry Compote Menu ‘33’ (1hr 20min) Menu ‘33’ (1hr) Mixed Berries Apples, peeled, cored and diced 1000 g (40 oz) 800 g (32 oz) E.g. Strawberries, Raspberries, Blueberries Cinnamon stick Sugar 75 g (3 oz) Cloves Water 2 tbsp... -
Page 50: P P Care & Cleaning
Care & Cleaning Before cleaning, unplug your Bread Maker and allow it to cool down. Wipe with a damp cloth. n To avoid damaging your Bread Maker... l Do not use anything abrasive! (cleansers, scouring pads etc) Use a soft sponge when cleaning bread pan and kneading blade. -
Page 51: To Protect The Non-Stick Finish
Dispenser lid Remove and wash with water. l Raise the dispenser lid to an angle of approximately 75 degrees. Align the connections and pull towards you to remove or push carefully back at the same angle to attach. (Wait until the machine has cooled down first, because it will be very hot immediately after use) l Take care not to damage or pull the seal. -
Page 52: Troubleshooting
Troubleshooting Before calling for service, please check through this section. Problem Cause Action [All bread] The quality of the gluten in your flour is poor, or you have not used strong flour. (Gluten quality can vary depending on temperature, humidity, how the flour is stored, and the season of harvest) Try another type, brand or another batch of flour. - Page 53 If the kneading mounting shaft does not rotate when the blade is attached, you will need to replace the kneading mounting shaft unit (consult the place of purchase or a Panasonic Accessory Shop: 0844 8443899 or order online at https://www.pas-europe.com).
- Page 54 Troubleshooting Before calling for service, please check through this section. Problem Cause Action Ingredients may have been spilt on the heating element. I can smell burning while the Sometimes a little flour, raisins or other ingredients may be flicked out of the bread pan bread is baking.
- Page 55 Remove the ingredients and start again using new. The display indicates a problem with the Bread Maker. H01–H02 appears on the Consult the place of purchase or a Panasonic service centre: 0844 8443899 display. l T he unit is hot (above 40˚C/105˚F). U50 appears on the display.
- Page 56 If you wish to discard this product, please contact your local authorities or dealer and ask for the correct method of disposal. Panasonic Test and Development Kitchen Panasonic Consumer Electronics U.K. A Division of Panasonic U.K. Ltd Willoughby Road, Bracknell, Berks, RG12 8FP For COOKERY ADVICE call : 01344862108...
Need help?
Do you have a question about the SD-2511 and is the answer not in the manual?
Questions and answers
Timer for rapid large white loaf?
Where is recipe for granary loaf
You can find a recipe for a granary loaf using the Panasonic SD-2511 in the manual provided with the bread maker. The recipe uses menu number 5 with a 5-hour setting and includes ingredients such as 1 tsp yeast, 500 g granary flour, 1½ tsp sugar, 25 g butter, 1¼ tsp salt, and 340 mL water for a large loaf.
This answer is automatically generated