
Related Manuals for Toshiba TDP-SW20


Summary of Contents for Toshiba TDP-SW20
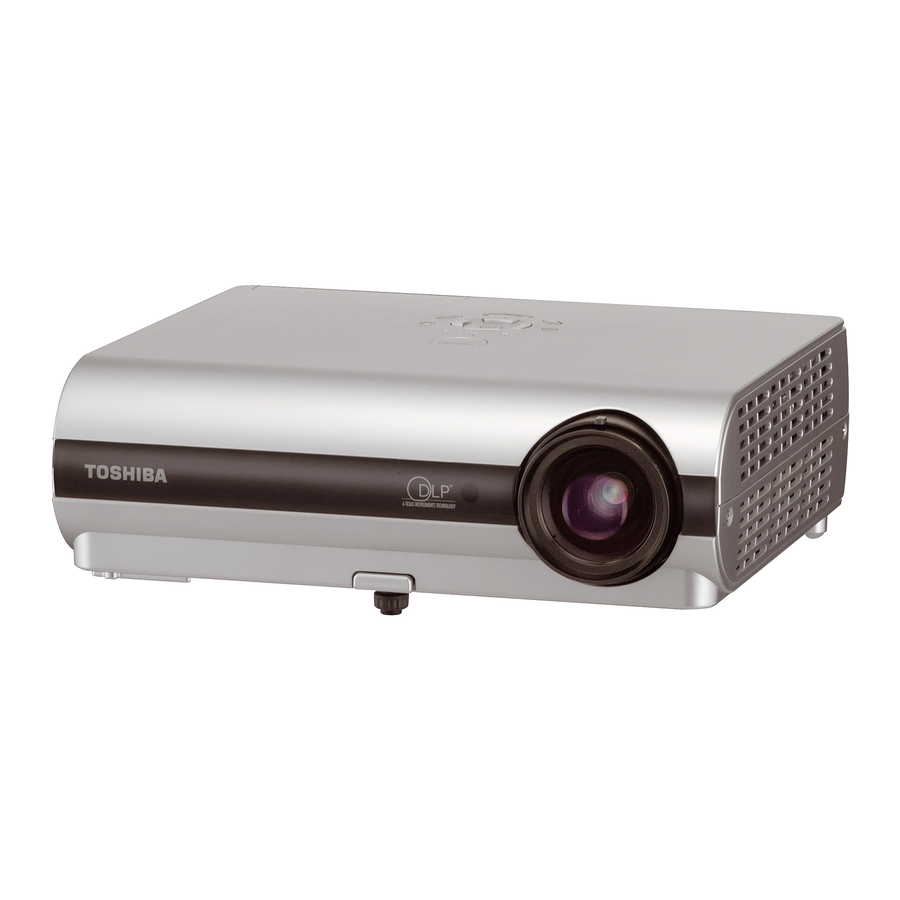
- Page 1 FILE NO. 330-200406 REVICSED. 2 SERVICE MANUAL DLP PROJECTOR TDP-S20 TDP-S21 TDP-SW20 Document Created in Japan Sep.,2004...
-
Page 2: Table Of Contents
TABLE OF CONTENTS Introduction TDP-S20/S21/SW20 Specifications Parts on the rear panel (TDP-S20/S21) Parts on the rear panel (TDP-SW20) Names of each part on the document camera (TDP-S21) Names of each part on the control panel and remote control Using the menu LED Display (Error ID No.) -
Page 3: Introduction
230 W TDP-S20: 3.0 kg TDP-SW20: 3.1kg Weight TDP-S21: 3.9 kg TDP-S20 TDP-SW20: 285 × 98 × 254 mm (W × H × D) External Dimensions TDP-S21: 369 × 98 × 259 mm (W × H × D) (including protruding parts) -
Page 4: Parts On The Rear Panel (Tdp-S20/S21)
Parts on the rear panel (TDP-S20/S21) (2) (1) CONTROL S-VIDEO MONITOR AUDIO OUT VIDEO COMPUTER 2 IN COMPUTER 1 IN AUDIO IN (15) (14) (13) (12) (11) (10) Name : Main Function (1) Infrared remote sensor : Senses commands from the remote control. (2) S-VIDEO terminal : Input S video signals from video equipment. -
Page 5: Parts On The Rear Panel (Tdp-Sw20)
Parts on the rear panel (TDP-SW20) ■ Removing the PC card slot cover (11) (10) (7) (6) Press on the circle (“O”) while sliding the cover in the direction of the arrow. The CONTROL S-VIDEO cover will come off. MONITOR... -
Page 6: Names Of Each Part On The Document Camera (Tdp-S21)
Names of each part on the document camera (TDP-S21) (10) (6) (7) (12) (11) Name : Function (1) Camera head : Document camera. (2) Camera lens : Shooting lens for the document camera. (3) Focusing lever : Adjusts the focus. (4) Camera arm : Adjusts the shooting angle. -
Page 7: Names Of Each Part On The Control Panel And Remote Control
Names of each part on the control panel and remote control Control panel Remote Control Remote control transmitter (9) (10) (11) TEMP LAMP (12) (13) Name : Main Function (1) ENTER button : Accepts the selected mode. (2) MENU button : Displays menus. - Page 10 LED DISPLAY (Problems Shown on LED Indicator Combination) Error Status of Trouble and Cause Solution Code Indicator Lights Standby power is not on. Check the power supply. -> There's a problem with the power supply Check the connector. or the MAIN Board. Check the MAIN Board.
-
Page 11: Check Mode
[Check Mode] How to enter to the Check Mode While the Volume adjustment bar is displayed on the screen, press the buttons, [Input] , [Return] , [Setup] and [Menu] simultaneously. Then, the projector enters to the Check mode. The Check mode will be maintained until you turn off the Main power switch.. How to display the Operation state After the projector has entered to the Check mode, press [Return] button and [Up] button at once. - Page 13 1. Card indicator (LED) Card indicator LED is placed next to the PCMCIA card slot. It indicates whether the PC card is available in normal condition. TDP-TW90 TDP-SW20 2. Lighting pattern Color or state Lighting pattern Blink times Condition ● Off Continuous Power off / PC card cannot be recognized.
-
Page 17: Electrical Adjustment
SN: 23587154 SN: 23368760 Connect the Green Pin to JIG. Fig.2 5) Memory PC Card (TDP-SW20 Only) Copy the following files into memory pc card. XGA_16_255.jpg and XGA_240_255.jpg <For connection and setting of Personal computer> 1) Connection of personal computer Connect the PC to computer 1 input as shown in following Fig.3... - Page 18 DMD Bias voltage, C/W index delay, Sub brightness for Computer 1 input, Sub contrast for Computer 1 input, Sub brightness for Y/Pb/Pr 1 input, Sub brightness for Wireless/Card, (TDP-SW20 Only) Sub contrast for Wireless/Card, (TDP-SW20 Only) Altitude, And, save data to EEPROM should be applied.
- Page 19 3. Preparation for the projector Plug in the power cord, turn on main power switch and the power of the projector. Set the Auto input search is off by setting the “default setting“ menu. Select computer 1 input. How to enter to the Adjustment Mode While the Volume adjustment bar is displayed on the screen, set value to 2, and press the buttons, [Input], [On/Standby] and [Setup] simultaneously.
- Page 20 4. MAIN Board adjustment 1) DMD Bias voltage Press [Return] and [Left] buttons simultaneously . The following menu appears. Note: For it disappears, press [Return] button. Select the DMD bias voltage item by pressing [Up] or [Down] button. Check the bar code seal on the ENGINE. (EX.
- Page 21 2) Color Wheel (C/W) index delay adjustment Select the C/W index delay item by pressing [Up] or [Down] button. For preparation, set the value to 480 by pressing [Left] or [Right] button. Press [Return] button. Start the signal generating software (SINGOWS2000.exe), the following signal pattern appears and click PIC button.
- Page 22 The following Picture dialog box appears. Select the downloaded file of S20_V_Ramp.bmp. Click [ENTRY] button. Double click the S20_V_Ramp window, the following V-Ramp signal appears. Press [Return] and [Left] buttons simultaneously .
- Page 23 Adjust the C/W index delay by pressing [Left] or [Right] button <STEP 1> Check on blue. Read the value when the horizontal stripes (EX. Fig.5) is minimized and the value is referred to "A.". Fig.5 <STEP 2> Check on red. Read the value when the horizontal stripes (EX.
- Page 24 3)Sub brightness for Computer 1 input For preparation, call the menu dialog box and click the minimize button. Change (or confirm) the screen resolution and refresh rate to the SVGA (800x600) 60Hertz of display properties.
- Page 25 Click the SINGOWS2000 of taskbar and select full-white (raster) signal. Right - click to display the following color pallets. Click the other button, the following RGB level adjustment dialog box appears. (1) Set the RGB level to 16. Then click the OK button. (2) Move the mouse cursor out of a screen to avoid the error.
- Page 26 Press [Return] and [Down] buttons simultaneously. The following menu appears. Notes: For it disappears, press [Return] button. For it initialize the values, press [Setup] button. Press [Enter] button of the projector. Press [Return] and [Down] buttons simultaneously. When the adjustment is successfully completed, values changes from default [63].
- Page 27 Press [Return] and [Down] buttons simultaneously. The following menu appears. Notes: For it disappears, press [Return] button. For it initialize the values, press [Setup] button. Select the Sub contrast item by pressing [Up] or [Down] button. Press [Enter] button of the projector. Press [Return] and [Down] buttons simultaneously.
- Page 28 Change the screen resolution and refresh rate to the VGA (640x480) 60Hertz of display properties.
- Page 29 Click the SINGOWS2000 of taskbar and select full-white (raster) signal. Right - click to display the following color pallets. Click the black button. Move the mouse cursor out of a screen to avoid the error. When you adjust Y/Pb/Pr, connect RGB output of [SINGOWS2000] to the JIG. The signal from RCA pin through the JIG is input the computer 1 of the projector by green signal pin of the conversion cable.
- Page 30 Press [Return] and [Down] buttons simultaneously. The following menu appears. Notes: For it disappears, press [Return] button. For it initialize the values, press [Setup] button. Press [Enter] button of the projector. Press [Return] and [Down] buttons simultaneously. When the adjustment is successfully completed, left (R) and right (B) values changes from default [63].
- Page 31 6) Sub brightness for Wireless/Card (TDP-SW20 Only) Change input mode to Wireless/card and insert the memory card, the following screen appears. Select the file of XGA_16_255.jpg and press [Enter] button. Press [Return] and [Down] buttons simultaneously. The following menu appears.
- Page 32 7) Sub contrast for Wireless/Card (TDP-SW20 Only) Press [Return] button, the following menu appears Select the file of XGA_240_255.jpg and press [Enter] button. Press [Return] and [Down] buttons simultaneously. The following menu appears. Notes: For it disappears, press [Return] button.
- Page 33 8) Altitude Press [On/Standby] and [Up] buttons simultaneously. The following menu appears. Notes: For it disappears, press [Return] button. For it initialize the values, press [Setup] button. Select proper value by pressing the [Left] or [Right] button. Factory setting is 0. The value 1 is more than 500m (1,640ft) and under 1,000m (3,281ft).
-
Page 34: Optical Adjustment
5. Optical Parts adjustment 1) ENGINE Upgrade the Firmware to the latest version. 1-1) DMD bias voltage Check the Label on new DMD chip. (EX. Fig.7). Adjust DMD bias voltage as same as 4. -1) DMD bias voltage. Fig.7 1-2) C/W index delay Adjust C/W index delay as same as 4. -
Page 35: Functional Tests
Make sure the video player has an S-video Out port and cables. The player should also have a Composite video port (RCA). Toshiba strongly suggests you use a DVD player to test the Video quality. DVD players reproduce colors better and project Sharper images. - Page 36 Perform the following tests Test Verification Power Up Verify that the proper splash(logo) screen Connect AC power, and turn the unit on. Appears. Verify image quality. Cosmetics and mechanicals Verify that the elevator and leveling foot Adjust the projector so that the image is Are functional.
- Page 37 Test Verification Focus Verify that the image synchronizes properly through the computer 1 input. SINGOWS2000 Cross Hatch image. Verify that image focuses through the full Zoom range. Verify there are no problems Color Wheel Index Delay Verify that the image synchronizes properly SINGOWS2000 through the computer 1 input.
- Page 38 Test Verification DMD Images Verify that each image synchronizes properly through the computer 1 input. SINGOWS2000 White image (Level 100%) SINGOWS2000 Black image (Level 0%) SINGOWS2000 SMPTE image Verify there are no problems...
- Page 39 Test Verification System Reset Verify that the image synchronizes after On the keypad, press the Menu key. System reset. Navigate through the basic menu to the default setting menu. Select Reset all. Power Down Verify unit is powered off before After all tests are complete turn the power disconnecting cables.
- Page 40 Install the Software on the Computer. The software you download is bundled into one .MSI file. Double-click the file to install the upgrade software. The Install Wizard appears, ready to begin the install process. Click the next button.
- Page 41 The Select Installation Folder dialog box appears. Navigate to the location where you stored the upgrade files. Click the next button. The confirm Installation dialog box appears. Click the next button.
- Page 42 The Installing software dialog box appears. The Installation Complete dialog box appears. Click the close button.
- Page 43 Upgade the software Connect the control cable to the control terminal on the projector. Then plug the RS232C connector on the other end of the cable into an RS232C port on the computer. Open Windows Explorer, navigate to the location where you stored the upgrade files, Then double click the TDPWRI2_0001E.EXE.
- Page 44 In the Open File dialog box, select the .img file, then click Open. The upgrade file appears in the Select File box. Press and hold the projector’s [Input] and [Setup] keys, then plug in the power code and turn on Main power switch. The projector shifts the Firmware upgrade mode.
- Page 45 The computer begins downloading the upgrade files to the projector. The process may take several minutes.
- Page 46 When the upgrades finishes, click the X(close) button. The upgrade is complete.
- Page 47 Confirm the software upgrade 1. Power up the projector. 2. On the projector keypad, press the MENU key to display the menus. 3. Press button Right or Left arrow to highlight Status display, then press [Enter] button. 4. The Status display dialog box display the software version at last line. These should match the upgrade version you downloaded.
- Page 48 Turn the projector off with Main power switch behind the projector, and insert the PC card into a card slot. Fig.1 (a) TDP-TW90 (b) TDP-SW20 Step 4) Turn Main power switch on while you are pressing the UNMOUNT button next to the slot.
-
Page 49: Install The Signal Generating Software
Install the Software on the Computer. The software you download is bundled into one .MSI file. Double-click the file to install the signal generating software. The Install Wizard appears, ready to begin the install process. Click the next button. - Page 50 The Select Installation Folder dialog box appears. Navigate to the location where you stored the software files. Click the next button. The confirm Installation dialog box appears. Click the next button.
- Page 51 The Installing software dialog box appears. The Installation Complete dialog box appears. Click the close button.
- Page 52 Startup the software Open Windows Exploler, navigate to the location where you stored the files, Then double click the SINGOWS2000.EXE. Moreover, even if it chooses the shortcut of the All programs of start, it can startup.
-
Page 53: Troubleshooting
Troubleshooting You use this section to diagnose problems with the projector. Choose the problem you are trying to diagnose from the list below. The Power, Image and Audio sections provide a variety of symptoms, while the other include only one page. 1. - Page 54 No standby LED Check the Power cord and AC power outlet. Check the Main power switch. Check the US-622 and both-ended voltage (same as AC IN) (P100:Thermal guard switch). Check the Key Board cable has broken or not. Check the connect cables inside the Unit. Does the projector Problem resolved.
- Page 55 No lamp Check the error code log at service mode When there is the error code, refer to the LED error List. When the error code is Lamp error (No.1), remove the lamp to see if it looks good. There should be no ruptures,no bulges,no cracks in the reflector.
- Page 56 Lamp or projector shuts off after running a Short period of time. Note: This is usually a thermal issue caused by excessively high internal temperature. The high temperature could cause a component on the MAIN Board or the power supply to fail when it gets hot. Check the error code log at service mode When there is the error code, refer to the LED error List.
- Page 57 Troubleshooting Image Problems The image is not correct. The projector starts and runs normally. The menus are accessible. The lamp is lit. Upgrade the software to the latest version or reinstall the projector software. Confirm that all image adjustments are set to factory defaults Confirm that the cable and source signal Are good.
- Page 58 No image at all. Vertical or horizontal lines. Sparkly picture. Clusters of dark pixels. Replace the MAIN Board. Image good ? Problem resolved Replace the optical engine...
- Page 59 Dim image Substitude known good lamp. Replace the lamp. Image brighter ? Substitude known good MAIN Board. Replace the MAIN Board. Image brighter ? Replace the optical engine...
- Page 60 Bad or missing tint or color. Distorted image, excess noise, rolling, torn, frozen,”plaid” image, repeated single image or shifted image. Make sure cables are good. Check the color wheel delay index value in the service mode. Image good ? Problem resolved Replace the MAIN Board...
- Page 61 Troubleshooting Audio Problems No audio or distored audio from the speaker. Make sure cables are good. Problem resolved Is audio OK ? What is the problem? No audio from Audio is distored. the speaker...
- Page 62 No audio from the speaker. Check the speaker resistance. Connect a known good 16 ohms speaker in place of the existing Does it measure speaker. around 16 ohms ? Is audio OK ? Does it measure less Problem resolved than 8 ohms ? Replace the MAIN Board.
- Page 63 Audio sounds scratchy or distored. Verify that audio signal source and cables are good. Problem resolved Sound good ? Connect a known good 16 ohms speaker in the Place of the existing speaker. Problem resolved Sound good ? Replace the MAIN Board.
- Page 64 Troubleshooting Remote Control Problems Infrared Remote Problem Install known good batteries in te remote. Does the remote Problem resolved work ? Use a known good remote with the projector. Does the remote Problem resolved work ? Replace the MAIN Board.
- Page 65 Troubleshooting Keypad Problems Keypad does not respond to key presses. Is a known good Substitute a known good MAIN Board. Key B. available for substitution ? Substitute the good key Board. Does the projector Respond the key presses ? Does the projector Respond the key presses ? Replace the Key Board.
- Page 66 Troubleshooting Menu Problems Menu does not appear on screen. Startup screen and other images appear normal. Try pressing the Menu button on both the remote and keypad. If the remote works and the keypad doesn’t, go to Troubleshooting Keypad problems Does the menu appear ? If the keypad works and the remote...
- Page 67 Troubleshooting Camera Problems Camera isn’t recognized from the projector. The error code is Camera error (No.13) at service mode. The image of Camera is not correct. Check the RGB cable is a attachment and make sure it is good. Check the Input mode is computer 2 Replace the Document Is the Camera Camera...
-
Page 68: Troubleshooting For Wireless Utility And Pc Card
Troubleshooting for Wireless Utility &PC card viewer functions I. Display JPEG images stored on a memory PC card. The blue screen of “Wireless/Card input” is not displayed. The picture in a PC memory card is not displayed. Go to START 1 II. - Page 69 START 1 Are the main board and the network board connected Reconfirm the connection. correctly? Is LED of network board turned on? TW90 – Next of D702 SW20 – D701 If [RESET] button is pushed, does it operate normally? When the network board is replaced, does it operate normally? Replace the main board.
- Page 70 START 2 Please check the following items about the projector. ・ Is the main power supply set to ON? ・ Isn’t the projector a standby state? ・ Is the input “Wireless/Card mode”? Isn’t the projector muted? ・ Please check the following items about the PC memory card.
- Page 71 START 3 PJ : Projector PC : Computer Please end once and reboot Wireless Utility. AP : Access point Please check the following items. ・ Is the main power supply of PJ set to ON? Is the wireless LAN PC card attached in the PC card ・...
- Page 72 Is the wireless LAN (IEEE 802.11b conformity) of PC enabled? built-in To solution 1 wireless LAN set to ON?) Is the wired LAN of PC enabled? Are the settings of SSID To solution 3 and the encryption key of To solution 2 PC/AP in agreement? PC : DHCP use or not?
- Page 73 Does wireless LAN apparatus exist in the range which an electric wave reaches? Aren't there any obstacles? Isn’t much wireless To solution 6 LAN apparatus operating around? When the wireless LAN PC card is replaced, does it To solution 7 operate normally? When the network board is replaced, does it operate...
- Page 74 Solution 1 It is necessary to communicate by IEEE802.11b or IEEE802.11g. ・ ・ When using a wireless LAN PC card, please attach the card correctly to PC and enable the wireless function. (Please refer to the manual of a wireless LAN PC card for details.) ・...
- Page 75 START 4 Please check the following items. Isn't the projector a standby state? ・ Is the input of the projector “Wireless/Card ・ mode”? ・ Isn’t the projector muted? Screen image File Screen image? File? Except a desktop Image is Desktop? Does file currently...
- Page 76 Solution 10 ・ Please activate the selected window. ・ Please move in the window currently displayed by overlapping on the selected window not to become obstructive. Solution 11 ・ An animation may not be displayed when a multi-monitor setting of PC is on. Please turn OFF a multi-monitor function and re-connect.
- Page 77 START 5 It returns to a default display (blue screen)? When Wireless Utility is chosen as the transmission image, connection operation performed, Wireless Utility is minimized, then does connection break off? Is the spec. of PC sufficient? To solution 17 Isn't the burden to PC heavy? To solution 16 Isn't...
- Page 78 Solution 16 ・ As for the spec. of PC, the following value is recommended. CPU is more than Pentium III 750MHz, memory is more than 256MB, and resolution of a screen is XGA (1024x724 pixels). ・ Display speed may become slow if resources run short for the reason of using application in large quantities.
- Page 79 START 6 PJ : Projector PC : Computer AP : Access point Please check the following items. Is the main power supply of PJ set to ON? ・ ・ Is the wireless LAN PC card attached in the PC card slot? ・...
- Page 80 Is the wireless LAN (IEEE 802.11b conformity) of PC enabled? built-in To solution 23 wireless LAN set to ON?) Is the wired LAN of PC enabled? Are the settings of SSID To solution 25 and the encryption key of To solution 24 PC/AP in agreement? PC : DHCP use or not?
- Page 81 Is URL (IP address of a projector) right? Doesn't the apparatus of the same IP address as the To solution 28 circumference exist? When using a proxy, is the proxy setting correctly? To solution 29 Does wireless LAN apparatus exist in the range which an electric wave reaches? Aren't there any obstacles? Isn’t much wireless...
- Page 82 Solution 23 ・ It is necessary to communicate by IEEE802.11b or IEEE802.11g. ・ When using a wireless LAN PC card, please attach the card correctly to PC and enable the wireless function. (Please refer to the manual of a wireless LAN PC card for details.) When using a built-in wireless LAN, please enable the wireless LAN function of PC, according to the ・...
-
Page 83: Troubleshooting The Main Board
Troubleshooting the MAIN Board 1. For Power problems, see below 2. For Image problems, see page 3. For Audio problems, see page 4. For Remote problems, see page 5. For Keypad problems, see page 6. For Menu problems, see page 7. - Page 84 No Lamp Lamp or projector shuts off after running a short period of time. Confirm that the cables of PJ110 and PJ108 are connected to MAIN Board. Does the Projector Problem resolved. run properly ? Update the Firmware to the latest version. Does the Projector Problem resolved.
- Page 85 Troubleshooting Image Problems No Image at all. Doesn't CW rotate Replace IC130. at all after power on? Is image OK ? Problem resolved. Does 1pin of Replace the CW board. IC129 remain Hi- level ? Is image OK ? Problem resolved. Is IC131 hot Replace IC131.
- Page 86 Vertical or horizontal lines. Sparky pictures. Clusters of dark pixels. Replace IC106. Problem resolved. Is image OK ? Replace the MAIN board. Bad or missing tint or color. Replace IC106. Problemd resolved. Is image OK ? Replace the MAIN board.
- Page 87 Troubleshooting Audio Problems No audio from the speaker Audio sounds scratchy or distored Confirm that the speaker and cables are good. Replace IC605. Problem resolved. Is audio OK ? Replace IC604. Is audio OK ? Problem resolved. Replace the MAIN board.
- Page 88 Troubleshooting Remote Problems Infrared Remote Problem. Are both remote If front receiver is NG, confirm the connection of receiver OK ? PJ101. If it is OK, replace the remote board. If Rear receiver is NG, confirm that it receive a light leak from the lamp.
- Page 89 Troubleshooting Keypad Problems Keypad does not respond to key presses. Replace IC121. Problem resolved. Is keypad OK ? Replace IC119. Is keypad OK ? Problem resolved. Replace the MAIN board.
- Page 90 Troubleshooting Menu Problems Menu does not appear on screen. Startup screen and other images appear normal. Replace IC106 Does Projector run Problem resolved. properly ? Replace the MAIN board.
- Page 91 Troubleshooting Camera Problems Camera is'nt recognized from the projector. The error code is camera error (No.13) at service mode. Replace IC512. Problem resolved. Is camera OK ? Replace IC450. Is camera OK ? Problem resolved. Replace the MAIN board.
- Page 94 Operating of Power Supply APS-M526 Contents Operating of Power Supply 1. The AC-DC Converter 1) Input Line Filter 2) Power Factor Correction Control Circuit 3) Switching Converter 4) Feedback Control 5) Rectifier & Output Filter 2. Time Sharing Multi-output Control Circuit...
-
Page 95: Lamp
Operation of Power Supply The APS-M526 power supply circuit can be divided into 2 main blocks (Fig.1) 1.the AC-DC converter, 2.the Time Sharing Multi-output control circuit. These are shown as below. AC-DC Input 6.5V Converter Time 3.4V Sharing 6-13V Multi-output Control Circuit Lamp Output... - Page 96 2) Power Factor Correction Control Circuit This circuit has 4 functions as below. A) Generate stable voltage B) Reduce input harmonic currents C) Over current protection D) Over voltage protection A) Generate stable voltage This circuit operate as step up to 370Vdc(typ.) and voltage control. Actually, Q102 and Q103 are switched by MC101.
- Page 97 D) Over Voltage Limit Output voltage is detected by winding voltage of B1-B2 (T101). This voltage is same as Vcc of IC101 (pin 6). If output voltage becomes over voltage condition, pin 8 of IC102 to be pulled up through zener diode ZD102, then power supply is shut down 5) Rectifier &...
- Page 102 PARTS PEPLACEMENT 1.Lamp Step Figure Explanation Loosen 2 screws. (These screws are retained with split washers) Remove the lamp cover. Loosen 2 screws that secure the lamp module. (These screws are retained with split washers) Lift the Lamp module and take out from the projector.
-
Page 103: Top Cover
2.Top Cover Step Figure Explanation Remove 2 screws Remove 2 screws Remove 2 screws. Remove 1 screw. (Bottom side) Remove 1 connector. The state which removed the top cocver. -
Page 104: Main Board
3.Main Board Step Figure Explanation Remove 1 screw. Remove a shield board together with a tape. Remove connector holder. ② ① Note: For remove, Take an action from (1) to (2)for attach. Take an action from (2) to (1)for attach. ... - Page 105 3.Main Board Step Figure Explanation Main Board is removed from a set. Remove 1 screw. Input terminal cover is removed.4 4.Thermal Switch Remove 1 screw. Remove thermal switch from a lamp holder.
-
Page 106: Lamp Frame
5.Lamp Frame Step Figure Explanation Remove 2 screws. Remove lamp frame. The state which removed the lamp frame. Remove 3 screws. Remove plate as shown. -
Page 107: Optical Engine
6.Optical engine Step Figure Explanation Remove 3 screws. Take opticalengine off from bottom chassis. Optical engine is take out. Remove 4 screws. Remove projection lens. - Page 108 6.Optical engine Step Figure Explanation Remove 2 screws. Remove Color wheel. (C/W) Attention) It takes care so that neither a crack nor a fingerprint may be attached. Remove 1 screw. Remove C/W sensor board. Remove 4 screws.
- Page 109 6.Optical engine Step Figure Explanation Composition parts for DMD chip attachment . These assigned as spare parts. DMD chip DMD Board heat conduction sheet DMD socket [DMD block assembly] DMD chip and a DMD socket are coalesced. Attention) In replacement of DMD, it takes measures against static electricity, such as a list strap.
-
Page 110: Fan
6.Optical engine Step Figure Explanation Spacer is piled up. Attention) Use torque dreverr. employment. (4 Screw) Driver bolting torque: 2.5kgf・cm=24.5cN・m Fixes with 4 screws. Heat sink is Screw bolting piled up. -
Page 111: Power Supply And Block
7.Fan Step Figure Explanation Fan is removed from a fan frame. Remove 4 screws. Power supply fan block (left) 2 screws Lamp fan block (right) 2 screws Fan block is removed from a bottom chassis. Remove 2 screws. (Power supply fan block) ... - Page 112 8.Power supply Step Figure Explanation Remove 4 screws. One connector for lamp power output cable removed. (Lamp driver output cable) Take out power supply from bottom chassis. (Teke action while pulling a bottom chassis outside) The state power block taken out. ...
- Page 113 .Power supply bloc Step Figure Explanation Remove 5 screws. Remove top cover. Remove 4 screws. Shield metallic of both sides are removed. Remove 4 PC board fix screws. PC board...
-
Page 114: Lamp Driver
1 .Lamp Driver Step Figure Explanation Remove 3 screws. Take lamp driver out from bottom chassis. Remove 2 screws. Remove remote control PC board. Remove 4 screws. Lamp connector is removed from a lamp driver. - Page 115 1 .Lamp Driver Step Figure Explanation Remove 4 screws. Remove shield cover. Lamp driver PC board, frame, insulated sheet, and connector frame are separated.
- Page 116 1 .Bottom chassis Step Figure Explanation Remove door switch PC board, sensor PC board, speaker, and foot adjuster. * Bottom chassis * Door switch PC board * Sensor PC board * Speaker * Foot adjuster 1 .Key button PC board Remove 5 screws.
-
Page 117: Document Camera
1 .Document camera Step Figure Explanation Remove 1 screw. Remove 1 screw. Remove 5 screws and camera unit is taken out. Remove 2 screws and arm cover is taken out. The state which removed the camera unit and the focus ring. - Page 118 .Document camera Step Figure Explanation Remove 9 screws. PC board fixed metallic ornaments are removed from arm. Remove 2 RGB connector fixed by nuts. PC board and fixed metallic ornaments are separated. Camera arm exterior parts.
-
Page 119: Wireless Lan Pc Board
1 .W ireless LAN PC board Step Figure Explanation W ireless LAN model appearance (TDP- SW20) Remove LAN card holder cover. Remove 4 screws. W ireless PC board is removed. Remove 1 screw. Wireless PC board and cover plate are separated. -
Page 122: Combination Of Repair Parts (Cw/Cw Sensor Board/Main Board)
Combination of Repair Parts (CW/CW Sensor Board/Main board) ◆Repair mode CW Sensor Board Main Board Comment Failure Part × CW Trouble When CW sensor board is old things, it is replaced Old Sensor Replacement with an old board. When CW sensor board is new things, it is replaced New Sensor Replacement with a new board. - Page 123 How to recognize the MAIN Board R308 -> 100 ohm 1. Old MAIN Board PJ110 PJ106 PJ104 PJ450 R308 -> 0 ohm (Jumper) 2. New MAIN Board PJ110 PJ106 PJ104 PJ450...
-
Page 124: Parts Lists
Parts lists (TDP-S20) Location No. Description Part Number Block P800 P0WER UNIT (MAIN) 23122469 C101 CAPACITOR 23587212 C102/103 CAPACITOR 23587213 C111 CAPACITOR 23587214 C121 CAPACITOR 23587215 C122/123 CAPACITOR 23587216 CN103 WIRE HARNESS 23587217 D101 DIODE 23587218 D103 DIODE 23587219 D201 DIODE 23587220 Main power... - Page 125 U001/006 PC BOARD MAIN & AV 75000812 IC100 LOW POWER-LOSS VOLTAGE REGULA 75000883 IC101 VOLTAGE REGULATOR 75000881 IC102 LOW POWER-LOSS VOLTAGE REGULA 75000883 IC104 VOLTAGE REGULATOR 75000888 IC105 VOLTAGE REGULATOR 75000888 IC106 DLP IMAGE PROCESSOR 75000874 IC107 TRIPLE PROCESSOR SUPERVISORS 75000878 IC109 WATCHDOG TIMER AND MANUAL RES...
- Page 126 POWER CORD US,TW 23372148 Y260 POWER CORD 23372167 Y260 POWER CORD 23372149 Y260 POWER CORD 23372155 Y291 SUPPLEMENT, S20MANUAL 23589668 Parts lists (TDP-SW20) Location No. Description Part Number Block P800 P0WER UNIT (MAIN) 23122469 C101 CAPACITOR 23587212 C102/103 CAPACITOR 23587213 C111...
- Page 127 A220 LENS CAP 23890113 A300 TOP TAG 23541162 A301 LABEL RATING 23511778 Coating and A400 CARTON, BOX 23067751 packing parts A401 PACKING 23946797 A402 CARTON, PARTITION 23067752 A403 CARTON, PROTECTOR 23067753 B100 BTM CHASSIS 23429133 B110 FOOT, ADJUSTER 23436845 B111 CAP, FOOT PUSH 23890112 E200...
- Page 128 IC453 VOLTAGE REGULATOR 75000903 IC454 8BIT 4CH D/A CONVERTER 75000884 IC503 INVERTER GATE 75000890 IC504 OCTAL BUFFER/LINE DRIVER WITH 75000894 IC505 TRIPLE 2:1 MULTIPLEXERS 75000886 IC507 SWITCHED CAPACITOR VOLTAGE CO 75000899 IC508 DUAL AND TRIPLE OPERATIONAL AM 75000898 IC509 ANALOG FLAT PANEL INTERFACE 75000885 IC510 INVERTER GATE...
- Page 129 B337 PIECE, SCREW COVER 23940115 camera B360 TOP COVER S21 23532803 B031 PRODUCTS, IKK66LC 23771366 E400 WIRE HARNESS, S21CAMERA 23507337 U007 PCB FS2RL2 75000867 P800 P0WER UNIT (MAIN) 23122469 C101 CAPACITOR 23587212 C102/103 CAPACITOR 23587213 C111 CAPACITOR 23587214 C121 CAPACITOR 23587215 C122/123 CAPACITOR...
- Page 130 E208 DMD SOCKET 23903238 E209 THERMAL SHEET 23937056 U001/006 PC BOARD MAIN & AV 75000812 IC100 LOW POWER-LOSS VOLTAGE REGULA 75000883 IC101 VOLTAGE REGULATOR 75000881 IC102 LOW POWER-LOSS VOLTAGE REGULA 75000883 IC104 VOLTAGE REGULATOR 75000888 IC105 VOLTAGE REGULATOR 75000888 IC106 DLP IMAGE PROCESSOR 75000874 IC107...
- Page 131 U002 PC BOARD KEY 75000814 U003 PC BOARD SENSOR 75000815 U004 PC BOARD DOOR 75000816 U005 PC BOARD REMOTE CONTROL 75000817 IC1100 PD WITH REMOTE CONT 75000893 Y100 CABLE, RGB 23368818 Y101 CABLE, PIN-PIN 3M 23368800 Y102 CABLE, ST-MINI--ST-MINI 3 23368798 Y103 CABLE, MINI-PINX2 3M...
-
Page 132: Appendix 1
APPENDIX 1 [How to reset the User lamp time and error items] 1. How to reset the User lamp time only Plug the power cord. Press and hold the projector’s [Input], [ON/Standby], and [Menu] buttons simultaneously, turn on the Main power switch. The User lamp time is reset and +1 is added to the reset counter. - Page 133 T O S H I B A C O R P O R A T I O N 1- -1, SHIBAURA 1- - CHOME, MINATO - - KU, TOKYO 105 -- 8001, JAPAN...