
Related Manuals for Toshiba TDP- T80


Summary of Contents for Toshiba TDP- T80
- Page 1 FILE NO. 330-200501 SERVICE MANUAL TDP- T80, TDP-T90, TDP-T91, TDP-TW90 TDP-S80,TDP-S81, TDP-SW80 TDP-MT200 Document Created in Japan Jan., 2005...
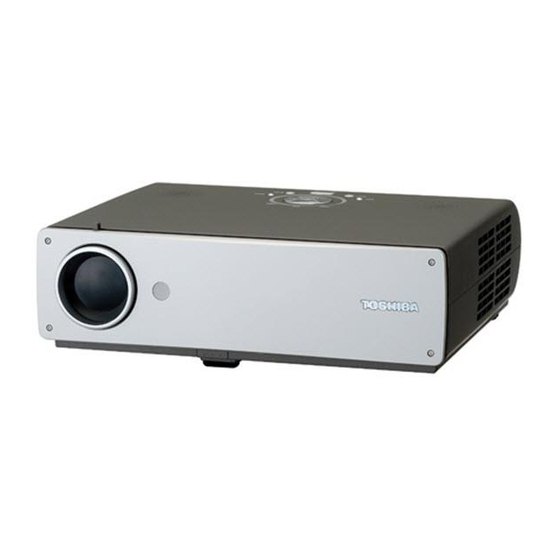
- Page 2 Preface This manual is applied to T80/T90/T91/TW90/MT200 / S80 / S81 / SW80 DMD Projector with digital imaging functionality based on Digital Micro-mirror Device (DMD) technology. It’s the mode of single Panel, 200 watt Lamp. The manual gives you a brief description of basic technical informa- tion to help in service and maintaining the product.
-
Page 3: Table Of Contents
Table of Contents Chapter 1 Introduction ..............1-1 Product Highlights .................. 1-1 Machanical Specifications ..............1-2 Display Panel Specifications ..............1-2 Electrical Specifications ................1-2 Optical Specifications ................1-3 Environmental Specifications ..............1-4 Firmware....................1-4 Chapter 2 Disassembly Procedure ..........2-1 Tools Needed .................. - Page 4 Chapter 5 Firmware Upgrade Procedure ........5-1 Equipment Needed ................. 5-1 Setup Procedure ..................5-1 Firmware Upgrade Procedure ..............5-6 Chapter 6 EDID Upgrade Procedure (For MT200 Only) ....6-1 Equipment Needed ................. 6-1 Setup Procedure ..................6-2 EDID Upgrade Procedure ............... 6-2 Chapter 7 Exploded View and Replacement Parts List ....
-
Page 5: Chapter 1 Introduction
Chapter 1 Introduction Product Highlights e t I i r c i t p... -
Page 6: Machanical Specifications
Mechanical Specifications e t I c i f i t a i r c i t p Display Panel Specifications c i f Electrical Specifications c i f... -
Page 7: Optical Specifications
e t I c i f i t a i r c i t p Optical Specifications... -
Page 8: Environmental Specifications
Environmental Specifications e t I c i f i t a i r c i t p Firmware... -
Page 9: Chapter 2 Disassembly Procedure
Chapter 2 Disassembly Procedure Tool Needed Removing Lamp Module... -
Page 10: Removing Front Cover, Option Cover And Rear Cover Module
Removing Front Cover, Option Cover and Rear Cover Module... -
Page 12: Removing Top Cover, Keypad Board, Speaker And Select Button Module
Removing Top Cover, Keypad Board, Speaker and Select Button Module... -
Page 14: Removing Main Board, Lvps Module, Lamp Driver Module And Fan Module
Removing Main Board, LVPS Module, Lamp Driver Module and Fan Module... -
Page 16: Removing Interrupter Switch, Engine Module, Fan Module And Dmd Board
Removing Interrupter Switch, Engine Module, Fan Module and DMD Board... -
Page 18: Removing Dmd Chip, Color Wheel And Photo Sensor Board
Removing DMD Chip, Color Wheel and Photo Sensor Board 2-10... -
Page 19: Removing Thermal Board, Ir Sensor Board And Fan Duct
Removing Thermal Board, IR Sensor Board and Fan Duct 2-11... -
Page 20: Removing Wireless Board (For Tw90 Only)
Removing Wireless Board (For TW90 Only) 2-12... -
Page 21: Chapter 3 Troubleshooting
Chapter 3 Troubleshooting Equipment Needed After changing parts, check the below information. For example : Change the M/B, then check the Version Update, Color Wheel Delay, RGB Level, Frequency, Phase, Reset Lamp Use Time and Reset All. Update i l a 0 &... -
Page 22: Main Procedure
Main Procedure Start Connect Power Cord, PC, Video, S-video, & Audio Signal, and then press on/standby button.(Lamp LED will flicker) A. Power Is on LED Light On? Troubleshooting B. Image Performance Is Image OK ? Troubleshooting C. OSD Function Is OSD function OK ? Troubleshooting D. - Page 23 3-2.1 A. Power Troubleshooting Start Lamp Is Power Change Reassemble LED indicator ? Cover assembly Main Board lamp Cover OK ? Change Lamp Driver Change LVPS Change Change Is Lamp LED Change Lamp Module Main Board indicator OK ? DMD Board Is Fan Change Is System Fan...
- Page 24 3-2.2 B. Image Performance Troubleshooting Start Change Change Change Cable connec- Have image ? tions are OK? Board Chip Change Change Have garbage DMD Board pattern ? Have bar at the Change right & left side of DMD Board image ? Change Uniformity OK ? Engine Module...
- Page 25 3-2.3 C. OSD Function Troubleshooting Start Change E. Remote Control Is Keypad Does OSD show Keypad FFC Troubleshooting FFC OK ? up ? Change Is Keypad OK? Main BD Keypad BD Change Can OSD function Keypad Main board be adjusted ? Change Can OSD data Main board...
- Page 26 3-2.4 D. Audio Troubleshooting Start Change Can hear Change Change Main Board Keypad Board sound ? Speaker Change Sound is clear Change Main Board without noise ? Speaker 3-2.5 E. Remote Control Troubleshooting Start Replace the battery Change Remote Controller Change IR Receiver Board Change M/B...
-
Page 27: Main Procedure Description
Main Procedure Description Power Troubleshooting Image Troubleshooting *Note Note : Press “Menu” button to enter setting display. Adjust the R-level, G-level, B-level. - Page 29 Audio Troubleshooting D. Remote Control Troubleshooting Wireless Troubleshooting (for TW90 and SW80) Camera Troubleshooting (for T91 and S81 )
-
Page 30: Factory Mode
Factory Mode Hot Keys to enter Factory Mode (T90 Series and S80 Series) (For TW90, it should have signal input) [Press Volume button, set value to 9 and press “On/Standby”, “Input” and “Setup” button simultaneously.] Repeat the above-mentioned procedure in the bracket three times. Hot Keys to enter Factory Mode (MT200) [Press the “ON/STANDBY”... - Page 31 Upward calibration Requirement: Procedure: Downward calibration Requirement: Procedure: Horizontal calibration after heat-run Requirement: Procedure: Save data to E2PROM Procedure: 3-11...
- Page 32 3-4.2 Burn in mode menu (Press Hot Keys, then press “Input”+”Down” key simultaneously Key : a.) Burn in mode setting Procedure : b.) Burn in on time setting Procedure : c.) Burn in off time setting Procedure : d.) Burn in cycle setting Procedure : 3-12...
- Page 33 e.) Save setting to EEPROM Procedure : Notes : If settings are valid, the burn in mode will start when the projector becomes the standby mode. Test patterns during the burn in mode are rotated on white, black, red, green and blue solid fields. The On LED blinks during the burn in mode. Pushing the return key will cancel execution of the burn in mode.
- Page 34 3-4.3 Test pattern menu (Press Hot Keys, then press “Input”+”Right” key simultaneously Key : Notes : 3-14...
- Page 35 3-4.4 Service status (Press Hot Keys, then press “Return”+”Up” key simultaneously Notes : The service status OSD is displaying factory settings. There is no item which can be operated. Right side numbers of the user lamp time and the panel lamp time mean reset counters of them.
- Page 36 3-4.5 CW index delay menu (includes the DMD bias voltage) (Press Hot Keys, then press “Return”+”Left” key simultaneously Key : a.) CW index adjustment Procedure : b.) DMD bias voltage adjustment Procedure : c.) Save data to EEPROM Procedure : Push Up / Down / Left / Right at the same time.
- Page 37 3-17...
-
Page 38: Chapter 4 Function Test And Alignment Procedure
Chapter 4 Function Test & Alignment Procedure Product T80 / T90 / T91 / TW90 / MT200 / S80 / S81 / SW80 Test Equipment IBM PC with SXGA resolution (Color Video Signal & Pattern Generator) DVD player with component video(Y, Pb, Pr) and Multi-system(NTSC / PAL / SECAM) HDTV Tuner or Source (480i, 480p, 720p, 1080i) Test Condition Circumstance Brightness :... -
Page 39: Test Display Modes & Pattern
Test Display Modes & Pattern 4-4.1 Compatible Modes T80/T90/T91/TW90 Computer Compatibility (Analog) i l i... - Page 40 i l i " 6 " 9...
- Page 41 4-4.2 Compatible Modes MT200 Computer Compatibility (Analog / DVI with HDCP) i l i...
- Page 42 i l i " 6 " 9...
- Page 43 4-4.3 Compatible Modes S80 Series Computer Compatibility (Analog ) t i l " "...
-
Page 44: Function Test Display Pattern
4-4.4 Function Test Display Pattern PC Signal : c i f i l E e s i & e r i o i t i t s a r t g i r r o l . l a e t i r o l r o l e t i... - Page 45 Figure 1. Fine Line Moire Figure 2. 32 Gray Scale Figure 3. 64 RGBW Scale Figure 4. Red Pattern Figure 5. Green Pattern Figure 6. Blue Pattern...
- Page 46 Figure 7. Full White Figure 8. Full Black Figure 9. Gary 30 Pattern Figure 10. Blue 60 Pattern Figure 11. Text Pattern Figure 12. Boundary Frame...
-
Page 47: Inspection Procedure
Video & Audio Signal : c i f r o l . l a e t i i t c r o l . l a r o l . l a r o l . l a Inspection Procedure Elevator Function : Please check and ensure the function of elevator works well. - Page 48 R, G, B and white color contrast : Test Signal : 1280*1024 @ 75Hz Test Pattern : 64 RGBW scale pattern Please check and ensure if each color is normal and distinguishable. If not, please return the unit to repair area. Screen Uniformity : Test Signal : 1280*1024 @ 75Hz Test Pattern : Full white pattern...
- Page 49 Focus : Test Signal : 1280*1024 @ 75Hz Test Pattern : Text pattern Please check and ensure the unit is within the spec. (The text in the corner should be shown clearly) If not, please return the unit to repair area. Boundary : Test Signal : 1280*1024 @ 75Hz Test Pattern : Boundary frame pattern...
-
Page 50: Wireless Testing Procedure (For Tw90 And Sw80)
Wireless Testing Procedure (For TW90 and SW80) Software : Wireless Utility 4-6.1 Wireless Setup Procedure Press “Setup” icon to execute the program. 4-13... - Page 51 Press “Next” icon. Press “Yes” icon. 4-14...
- Page 52 Press “Next” icon. 4-15...
- Page 53 Choose “Yes, I want to restart my computer now”, then press “Finish” icon. 4-16...
- Page 54 4-6.2 Projector Setup Procedure Press “Menu” twice, then into “Wireless setting” mode. Choose “Ad hoc” function. 4-17...
- Page 55 3. Choose “Projector name” function. 4. Key-in any English name when the “Projector name” appears on the screen. Note : “Ad hoc” function is P to P(Point to Point) transmission. The “Projector Name” can be keyed in by the Remote Control. 4-18...
- Page 56 4-6.3 Network Setup Procedure Press “Wireless Network Connection”. Click “Properties”. 4-19...
- Page 57 Select “Wireless Networks”. Click “DPJ” and then press “Ok”. 4-20...
- Page 58 Click “Close”. Select “Show all connections”. 4-21...
- Page 59 Right click “Wireless Network Connection” and select “View Available Wireless Networks”. 4-22...
- Page 60 Choose “DPJ” and check the below box “Allow me to connect to..”, and then press “Connect”. If the wireless connection is well established, the below message will appear on the task bar. 4-23...
- Page 61 Execute “Wireless Utility” program. Choose the Projector name, and then press “GO” button to link the Projector. Then you will find the projectors and your PC(or laptop) are wireless connected. The “Projection name” is the name you keyed in by the romote control previously 4-24...
-
Page 62: Camera Setup Procedure (For T91 And S81)
Camera Setup Procedure (For T91 and S81) 4-7.1 Equipment Needed T91 Projector * 1 Camera * 1 VGA Cable * 1 (Special) 4-7.2 Setup Procedure Connect Camera to the 2nd VGA port of T91 by VGA Cable. Power on the Projector. Press “Input” button on the Keypad. Note : Projector will find Image function from Camera automatically. -
Page 63: Firmware Upgrade Procedure
Chapter 5 Firmware Upgrade Procedure Equipment Needed Hardware : – Firmware Cable Firmware Cable – – T80 / T90 / T91 / TW90 / MT200 / S80 / S81/ SW80 Projector Software : – DLP composer – DDP2000~1.img Environment : –... - Page 64 DLP composer Setup : Execute “DLP Composer Lite Setup.exe” to start the setup procedure. Press “Next” button.
- Page 65 Choose the “I accept and agree to be bound by all the terms and conditions of this License Agreement”. Then press “Next” button. Press “Next” button.
- Page 66 Choose “All” icon and then press “Next” button. Press “Next” button.
- Page 67 Press “Next” button. Press “Yes” button to reboot.
-
Page 68: Firmware Upgrade Procedure
Firmware Upgrade Procedure Press and hold “Input” and “Setup” buttons simultaneously and then power on the Projector to enter the firmware upgrade mode. Note : If the firmware upgrade mode is activated, the LEDs of LAMP, TEMP and FAN will be blinking. - Page 69 Choose “Output”, setting Number of is “2000”. Choose “Communications”, setting Port is “COM2” and then press “Configure” button into the next setup procedure.
- Page 70 Setup the Baud Rate is “115200”, Data Bits is “8”, Stop Bits is “1”, Parity is “None”, RTS is “Disable” and CTS is “Disable”, then press “OK” button. Come back to this layer, and then press “OK” button to execute the program.
- Page 71 Click “Flash Loader.” Choose the Firmware upgrade program from Browser. Then press “Start Download” button to execute upgrade program. Press “Yes” button.
- Page 72 After the firmware upgrade is complete, power off projector, and then restart it again. 5-10...
- Page 73 Chapter 6 EDID Upgrade Procedure (For MT200 Only) Equipment Needed Hardware : – Power Cord – DVI To DFP Cable – RS-232 Cable – MT200 Projector – Fixture for MT200 RS-232 Cable 6-pin Power Adapter Fixture for MT200 DVI To DFP Cable Software : –...
-
Page 74: Chapter 6 Edid Upgrade Procedure (For Mt200 Only)
Setup Procedure Connect DVI-DFP Cable to MT200. Connect RS-232 of Fixture to COM1 of PC. (Can be connected to COM1 or COM2) Connect Power of Fixture. Power RS-232 DVI Port EDID Upgrade Procedure Execute “EDID” icon. - Page 75 Press “Model” icon. Choose the “MT_200_EDID.ini” file then press “open” icon.
- Page 76 Press Port setting button. Setting the right COM Port. Select “Digital”. Press “Write” icon.
- Page 77 The message will shown on the screen. “OK” means the EDID upgrade is complete.
- Page 78 Check if EDID is ok, press “Read” botton and then the data will show up as step 2 shows. 1 1 1 1 2 2 2 2 Note : The below information is for English version of Windows.
-
Page 79: Exploded View And Replacement Parts List
Chapter 7 Exploded View and Replacement Parts List Packing Assembly TDP-T80/T90/T91/TW90... - Page 80 CAUTION: The international hazard symbols “ ” in the schematic diagram and the parts list designate compo- nents which have special characteristics important for safety and should be replaced only with types identicall to those in the original circuit or specified in the parts list. The mounting position of replace- ments is to be identical with originals.
-
Page 81: Chassis Assembly (Tdp-T80/T90/T91/Tw90)
Chassis Assembly TDP-T80/T90/T91/TW90... - Page 82 LOCA. NO. PARTS NO. DISCRIPTION TW90 √ √ √ √ √ 23587395 ASSY TOP COVER & SHIELDING T80 √ √ √ √ √ 23587308 ASSY TOP COVER & SHIELDING T90 √ √ √ √ √ 23587338 ASSY TOP COVER & SHIELDING T91 √...
- Page 83 LOCA. NO. PARTS NO. DISCRIPTION TW90 √ √ √ √ √ 23587337 PCBA DMD BOARD √ √ √ √ √ √ √ √ √ √ √ √ √ √ √ 23587313 PCBA DMD BOARD √ √ √ √ √ √ √ √ √ √ √...
-
Page 84: Packing Assembly (Tdp-S80/S81/Sw80)
Packing Assembly TDP-S80/S81/SW80... - Page 85 CAUTION: The international hazard symbols “ ” in the schematic diagram and the parts list designate compo- nents which have special characteristics important for safety and should be replaced only with types identicall to those in the original circuit or specified in the parts list. The mounting position of replace- ments is to be identical with originals.
-
Page 86: Chassis Assembly (Tdp-S80/S81/Sw80)
Chassis Assembly TDP-S80/S81/SW80... - Page 87 LOCA. NO. PARTS NO. DISCRIPTION SW80 √ √ √ √ √ 23587455 ASSY TOP COVER & SHIELDING S80 √ √ √ √ √ 23587456 ASSY TOP COVER & SHIELDING S81 √ √ √ √ √ 23587457 ASSY TOP COVER & SHIELDING SW80 √...
- Page 88 LOCA. NO. PARTS NO. DISCRIPTION SW80 √ √ √ √ √ √ √ √ √ √ √ √ √ √ √ 23587299 DMD SCREW √ √ √ √ √ √ √ √ √ √ √ √ √ √ √ 23587284 DMD THERMAL PAD √...
-
Page 89: Packing Assembly (Tdp-Mt200)
Packing Assembly TDP-MT200 7-11... - Page 90 CAUTION: The international hazard symbols “ ” in the schematic diagram and the parts list designate compo- nents which have special characteristics important for safety and should be replaced only with types identicall to those in the original circuit or specified in the parts list. The mounting position of replace- ments is to be identical with originals.
-
Page 91: Chassis Assembly (Tdp-Mt200)
Chassis Assembly TDP-MT200 7-13... - Page 92 LOCA. PARTS LOCA. PARTS DISCRIPTION DISCRIPTION 23587409 ASSY TOP COVER & SHIELDING 23587377 UV/IR FILTER OF DP739 SERIES MT200 23587262 FOCUS RING 23587448 ASSY SELECT BUTTON 23587429 ZOOM PROJECTION LENS MODULE MT200 (TDP-MT200/S80) 23587447 ASSY KEY PAD MODULE 23587466 KLIXON YS11 THERMAL SWITCH TDP-M200 WIRE LENGTH 23587411...
- Page 93 TOSHIBA CORPORATION 1-1, SHIBAURA 1-CHOME, MINATO-KU, TOKYO 105-8001, JAPAN...
Need help?
Do you have a question about the TDP- T80 and is the answer not in the manual?
Questions and answers