
Related Manuals for BIO RAD CFX96


Summary of Contents for BIO RAD CFX96
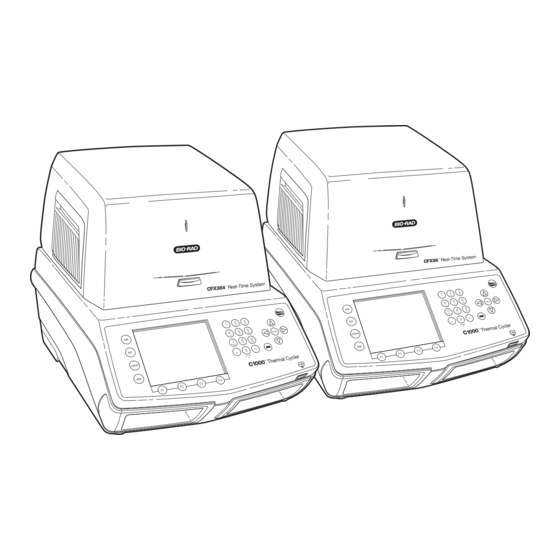
- Page 1 CFX96 and CFX384 Real-Time ™ ™ PCR Detection Systems Instruction Manual Catalog # 184-5384 # 185-5384 # 184-5096 # 185-5096...
- Page 2 States Patent No. 6,814,934 B1 for use in research and for all other fields except the fields of human diagnostics and veterinary diagnostics. This CFX96 or CFX384 detection module, when combined with a C1000 thermal cycler for which the applicable real- time thermal cycler royalty fee has been paid, constitutes a real-time thermal cycler licensed under U.S. Patent No.
-
Page 3: Bio-Rad Resources
Writing Conventions Used in this Manual This manual explains how to safely set up and operate the CFX96 system or the CFX384 system. The manual uses the writing conventions listed in Table 2. Table 2. Conventions used in this manual... -
Page 4: Safety And Regulatory Compliance
CFX96 and CFX384 Systems Manual Safety and Regulatory Compliance For safe operation of the CFX96 system or the CFX384 system, we strongly recommend that you follow the safety specifications listed in this section and throughout this manual. Safety Warning Labels Warning labels posted on the instrument and in this manual warn you about sources of injury or harm. - Page 5 Safe Use Specifications and Compliance Table 5 lists the safe use specifications for the CFX96 system or the CFX384 System. Shielded cables (supplied) must be used with this unit to ensure compliance with the Class A FCC limits. Table 5. Safe Use Specifications...
-
Page 6: Table Of Contents
CFX96 and CFX384 Systems Manual Table of Contents Bio-Rad Resources ..........ii Writing Conventions Used in this Manual . - Page 7 Table of Contents Chapter 5. Plates ..........41 Plate Editor Window .
- Page 8 CFX96 and CFX384 Systems Manual Chapter 10. Users and Preferences ......121 Log in or Select User .
- Page 9 Table of Contents viii...
-
Page 10: Chapter 1. System Installation
C. Relative humidity maximum of 80% (non-condensing) • USB cable. If the CFX96 system is going to be controlled by a computer via a USB cable, the provided cable from Bio-Rad is sufficiently shielded for use. NOTE: For a full list of the safety and compliance requirements for this instrument,... -
Page 11: System Overview
• Optical reaction module. This module includes an optical system to collect fluorescent data and a thermal cycler block NOTE: The serial number of the CFX96 or CFX384 module is located on the back. • C1000 thermal cycler base. The C1000 base includes a user interface to control the... -
Page 12: Setting Up The System
• Power input. Plug in the power cord here • Ethernet port. Connect an ethernet cable to email run logs and stand-alone data files • USB connections. Use these ports to connect the CFX96 system or CFX384 system to a computer or to connect an S1000... - Page 13 System Installation 2. Lift the optical reaction module using the handle indents above the side air vents (Figure 4). Figure 4. Lifting the optical reaction module into the C1000 chassis. 3. Position the module in the reaction module bay of the C1000 chassis, leaving about 2 cm of space in the front.
- Page 14 CFX96 and CFX384 Systems Manual 5. Check that the module is completely and evenly seated in the C1000 base. As shown in Figure 6, check the space around the bottom of the module. There should be no extra space between the module and the base; the space should be even.
-
Page 15: Installing Cfx Manager Software
CFX Manager software is run on a PC computer with either the Windows XP or Windows Vista operating system and is required to analyze real-time PCR data from the CFX96 system or CFX384 system. This software can also be used to control the CFX96 system or CFX384 system in software-controlled mode. - Page 16 Software Manually” on page 136. Installing the Drivers If the CFX96 system or CFX384 system is going to be run in Software-controlled mode, drivers must be installed on the computer. Use only the supplied USB cable, which is sufficiently shielded to prevent data loss.
- Page 17 System Installation 3. On the first screen, select Yes, this time only to instruct the Windows operating system to connect to Windows Update to search for software (Figure 9). Click Next. Figure 9. Found New Hardware Wizard. 4. Instruct the wizard to “ Install the software automatically .”...
-
Page 18: Running Experiments
• HSP-3866. Low-profile 384-well Hard-Shell plates with black shell and white wells • MSB-1001. Microseal ‘B’ adhesive seals, optically clear The CFX96 system accepts both low profile 0.2 ml plates and tubes. For optimal results, Bio- Rad recommends the following consumables: •... - Page 19 (correct) Figure 11. Plate Editor window showing plate orientation. WARNING! When running the CFX96 system, always balance the tube strips or cut microplates in the wells (Figure 12). For example, if you run one tube strip on the left side of the block, run an empty tube strip (with caps) on the right side of the block to balance the pressure applied by the heated lid.
-
Page 20: Chapter 2. Introduction To Cfx Manager Software
CFX96 and CFX384 Systems Manual Introduction to CFX Manager Software Read this chapter for information about getting started with CFX Manager software. • Main software window (below) • Startup Wizard (page 15) • Detected Instruments pane (page 16) • Instrument Properties window (page 18) •... -
Page 21: Status Bar
Introduction to CFX Manager Software • Startup Wizard window. Access common software commands (page 16) Figure 13. The main software window. Status Bar The status bar at the bottom of the main software window shows the status of the software. View the left side of the status bar (Figure 14) to see the current status of instruments. - Page 22 CFX96 and CFX384 Systems Manual Select the commands shown in the menu bar (Table 7). Table 7. Menu bar items in the main software window Menu Item Command Function File Create a new protocol, plate, experiment, or Gene Study Open Open existing files, including protocol (.prcl), plate...
- Page 23 Introduction to CFX Manager Software Table 7. Menu bar items in the main software window (continued) Menu Item Command Function Windows Cascade Arrange software windows on top of each other Tile Vertical Arrange software windows from top to bottom Tile Horizontal Arrange software windows from right to left Close All Close all open software windows...
-
Page 24: Startup Wizard
CFX96 and CFX384 Systems Manual Table 8. Toolbar buttons in the main software window (continued) Button Button Name Function Experiment Setup Open the Experiment Setup window to run an experiment (page 21) Protocol AutoWriter Open the Protocol AutoWriter window to create a new... -
Page 25: Detected Instruments Pane
CFX Manager software installation CD. You can simultaneously run up to four instruments with CFX Manager software, including a combination of CFX96 system and CFX384 systems, or a mix of real-time PCR systems and thermal cyclers. Viewing Detected Instruments Connected instruments appear in the Detected Instruments pane (page 17). - Page 26 CFX96 and CFX384 Systems Manual • One CFX96 system (CFX96SIM02) Figure 18. Instruments listed at the top of the Detected Instruments pane. Right-click on the instrument icon or block to select one of these options: • View Status. Open the Run Details window to check the status of the selected instrument block •...
-
Page 27: Instrument Properties Window
Introduction to CFX Manager Software If only one instrument is detected, then the View Summary button does not appear. To view the Instrument Summary window for a single instrument, select View > Instrument Summary. Instrument Properties Window To open the Instrument Properties window to view information about an instrument, right-click on the instrument icon in the Detected Instruments pane (Figure 18 on page 17). - Page 28 The Shipping Screw tab includes instructions for installing or removing the red shipping screw. To prevent damage to the optical reaction modules, install the shipping screw any time you ship the CFX96 system or CFX384 system. NOTE: If the shipping screw is detected by the software, the Instrument Properties window automatically opens with the Shipping Screw tab in front.
-
Page 29: Software Files
Introduction to CFX Manager Software Software Files CFX Manager software stores information about experiments in specific files (Table 9): Table 9. Open these file types with CFX Manager software File Type Extension How to View and Edit File Protocol .prcl Select in Experiment Setup and edit in Protocol Editor Plate .pltd... -
Page 30: Chapter 3. Running Experiments
CFX96 and CFX384 Systems Manual Running Experiments Read this chapter for information about running experiments using CFX Manager software: • Experiment Setup window (below) • Protocol tab (page 22) • End point only runs (page 22) • Plate tab (page 23) •... -
Page 31: Protocol Tab
Running Experiments The Experiment Setup window opens with the Protocol tab in front (Figure 23). To open another tab, click that tab or click Prev and Next buttons at the bottom of the window. Figure 23. Experiment Setup window, including the Protocol, Plate, and Start Run tabs. Protocol Tab The Protocol tab shows a preview of the selected protocol file loaded in the Experiment Setup (Figure 23). -
Page 32: Plate Tab
CFX96 and CFX384 Systems Manual Figure 24 shows the default end point protocol. Figure 24. End Point Only protocol. To change the step temperature or sample volume for the end point only run, click the Start Run tab and edit the Step Temperature or Sample Volume. Figure 25 shows the step temperature is changed to 55.0oC. -
Page 33: Start Run Tab
Running Experiments • Edit Selected button. Open the currently selected plate in the Plate Editor Figure 26. Plate tab window. Start Run Tab The Start Run tab (Figure 27) includes a section for checking information about the run that is going to be started, including the selected protocol and plate files, and a section for selecting the instrument block. -
Page 34: Run Details Window
CFX96 and CFX384 Systems Manual By default, the Start Run on Selected Block(s) pane shows the block name, block type and status of each instrument detected by the software. These descriptions can not be edited. NOTE: You can override the Sample Volume loaded in the Protocol file by selecting the volume in the spreadsheet cell and typing a new volume. - Page 35 Running Experiments Figure 28 shows the features of the Run Details window. Figure 28. Run Details window. Run Status Tab The Run Status tab (Figure 28) shows the current status of a run in progress in the Run Details window and provides buttons (page 26) to control the lid and change the run in progress. •...
- Page 36 CFX96 and CFX384 Systems Manual Table 11. Run Status buttons and their functions (continued) Button Function Add more repeats to the current GOTO step in the protocol. This button is only available when a GOTO step is running. Skip the current step in the protocol. If you skip a GOTO step, the software verifies that you want to skip the entire GOTO loop and proceed to the next step in the protocol.
-
Page 37: Instrument Summary Window
Running Experiments Replacing a Plate File During a run, replace the plate file by clicking the Replace Plate button (Figure 29) in the Real- time Status tab. Select the new plate file (.pltd) from the list in the windows browser. NOTE: CFX Manager software checks the scan mode and plate size for the plate file;... - Page 38 CFX96 and CFX384 Systems Manual Instrument Summary Toolbar The Instrument Summary toolbar includes buttons and functions listed in Table 12. Table 12. Toolbar buttons in the Instrument Summary window Button Button Name Function Set Up Experiment Set up an experiment on the selected...
- Page 39 Running Experiments • Copy. Copy the entire list • Copy as Image. Copy the list as an image file • Print. Print the list • Print Selection. Print only the selected cells in the list • Export to Excel. Export the list as an Excel formatted file •...
-
Page 40: Chapter 4. Protocols
CFX96 and CFX384 Systems Manual Protocols Read the following chapter for information about creating and editing protocol files: • Protocol Editor window (below) • Protocol Editor controls (page 33) • Temperature control mode (page 37) • Protocol AutoWriter (page 37) - Page 41 Protocols • Protocol Editor buttons. Edit the protocol by clicking one of the buttons to the left of the text view Figure 32. Protocol Editor window with buttons for editing protocols. Protocol Editor Menu Bar The menu bar in the Protocol Editor window provides the menu items listed in Table 13 Table 13.
-
Page 42: Protocol Editor Controls
CFX96 and CFX384 Systems Manual Table 14 lists the function of the Protocol Editor toolbar buttons: Table 14. Protocol Editor toolbar buttons Toolbar Button and Menus Name Function Save Save the current protocol file Print Print the selected window Insert Step... - Page 43 Protocols 3. (Optional) Click the Step Options button to enter an increment or extend option to the step (page 36). Figure 34 shows the new step that was inserted after step 2. Figure 34. Protocol with inserted step. Add or Remove a Plate Read To add a plate read to a step or to remove a plate read from a step: 1.
- Page 44 CFX96 and CFX384 Systems Manual Figure 35 shows the inserted gradient step. The temperatures of each row in the gradient are charted on the right side of the window. Figure 35. Protocol with inserted gradient step. Insert GOTO Button To insert a GOTO step before or after the selected step: 1.
- Page 45 Protocols Figure 36 shows a melt curve step added after step 6: Figure 36. Protocol with inserted melt curve step. Step Options To change a step option for the selected step: 1. Select a step by clicking on the step in the graphic or text view. 2.
-
Page 46: Temperature Control Mode
CFX96 and CFX384 Systems Manual • Increment. Enter a temperature to increment the selected step; the increment amount is added to the target temperature with each cycle • Ramp Rate. Enter a rate for the selected step; the range depends on the block size •... - Page 47 Protocols Figure 38 shows a protocol (bottom of window) written by the Protocol AutoWriter. Figure 38. Protocol AutoWriter window with a new protocol. Protocol AutoWriter Overview The Protocol AutoWriter window uses information about your reaction to automatically generate a protocol file. Enter the following information about your PCR experiment: •...
- Page 48 CFX96 and CFX384 Systems Manual For example, a typical PCR protocol includes the following three sets of steps with a total run time of 1.5 to 2.0 hours: 1. Initial template denaturation and enzyme activation (95°C for 3-10 minutes). 2. Cycles of three temperature steps (30 to 40 cycles): Denaturation of template (94-95°C for 15-30 seconds), annealing of primers (anneal for 15-30 seconds), and extension of product (72°C for 15-60 seconds).
- Page 49 Protocols...
-
Page 50: Chapter 5. Plates
CFX96 and CFX384 Systems Manual Plates Read this chapter for information about creating and editing plate files: • Plate Editor window (next section) • Plate size and type (page 44) • Scan mode (page 45) • Select Fluorophores window (page 45) •... - Page 51 Plates Figure 39. Plate Editor window. Plate Editor Window The Plate Editor window includes the following features: • Menu bar. Select settings for the plate size, plate type, number conventions, and units (page 43) NOTE: A 96-well plate collects data for up to 5 channels (All Channels scan). A 384-well plate collects data for up to four channels (All Channels scan).
- Page 52 CFX96 and CFX384 Systems Manual Plate Editor Menu Bar The menu bar in the Plate Editor window provides the menu items shown in Table 15. Table 15. Menu bar items in the Plate Editor Menu Item Command Function File Save...
- Page 53 • Plate Size. Select a plate size that represents the size of the reaction module block of your instrument. Choosing the instrument type, CFX96 or CFX384, from the pull down menu option on the Startup Wizard will change the default plate size loaded in the Plate tab of the Experiment Settings window.
-
Page 54: Select Fluorophores Window
Select one of these scan modes int he Plate Editor window toolbar: • All Channels. Includes channels 1 through 5 on the CFX96 system or channels 1 through 4 on the CFX384 system •... - Page 55 Plates Well Loading Controls A plate file contains information about the contents of each well loaded with sample for an experiment. After the run, the software links the well contents to the fluorescence data collected during the protocol and applies the appropriate analysis in the Data Analysis window. For example, wells loaded with standard sample type are used to generate a standard curve.
- Page 56 CFX96 and CFX384 Systems Manual Table 17. Options for loading the plate and wells in the Plate Editor (continued) Option Function For gene expression analysis or to distinguish between multiple samples, select a Sample Name from the pull- down menu to load that sample name in the selected wells.
-
Page 57: Experiment Settings Window
Plates Table 17. Options for loading the plate and wells in the Plate Editor (continued) Option Function Click the Dilution Series button to enter a dilution series for the concentration of Standard samples, and load a standard curve Enter the Starting Concentration for the dilution series, the Replicates from (starting replicate number) and to (ending replicate number), and the Dilution Factor (amount to change the concentration with each replicate... - Page 58 CFX96 and CFX384 Systems Manual • Targets. A list of target names for each PCR reaction, such as a genes or sequences of interest. Click the Reference column to assign reference genes in an experiment • Samples. A list of sample names that indicate the source of the target, such as a sample taken at 1 hour (1 hr), or taken from a specific individual (“mouse1”).
-
Page 59: Well Groups Manager Window
Plates • Select the sample as a control sample for gene expression data analysis by clicking the box in the Control column next to the name for that sample Click the Show Analysis Settings box in the Experiment Settings window to view or change analysis parameters applied in the Gene Expression tab. -
Page 60: Plate Spreadsheet View Window
CFX96 and CFX384 Systems Manual 5. (Optional) Create more well groups by repeating steps 1 and 2. 6. (Optional) Delete well groups by selecting the group name in the pull-down list, and clicking the Delete button. 7. Click OK to finish and close the window, or click Cancel to close the window without making changes. - Page 61 Plates Open the spreadsheet view to import or export the well contents to Excel or to another tab- delimited format: • Click Import Template to import well contents from a comma delimited file • Click Export Template to export well contents in Excel file (.csv format) Sort or edit a column by selecting it and using these methods: •...
-
Page 62: Chapter 6. Stand-Alone Operation
CFX96 and CFX384 Systems Manual Stand-Alone Operation Read this chapter for information about running the CFX96 system or CFX384 system in stand-alone mode: • Control panel (below) • Main menu (page 54) • Experiment setup (page 55) • Exporting data for analysis (page 61) •... -
Page 63: Main Menu
Cancel a function. Delete a letter, number, or word Main Menu When it starts, the CFX96 system or CFX384 system runs a self-test to verify proper functions, and then displays the main menu. Use the main menu to begin operating the instrument. The... -
Page 64: Experiment Setup
• New Protocol (F4). Create a new protocol Experiment Setup The CFX96 system or the CFX384 system can run real-time PCR experiments without a computer. You can export the fluorescence data acquired during a run using the USB thumb key. You can also choose to have the data emailed directly to you if the C1000 base is attached to the internet and the email functionality has been configured (see “Exporting Data... - Page 65 (Figure 47). Figure 47. Default real-time PCR protocol. NOTE: By default, the protocol template contains a plate read step when a CFX96 or a CFX384 optical reaction module is inserted in the C1000 chassis. TIP: To change an existing protocol, press the EDIT command key to open the file library and select a protocol to edit.
- Page 66 • To change the default lid temperature, select the lid temperature box (LID) by pressing the arrow keys (Figure 47 on page 56). Use the alphanumeric keys to enter a new temperature. For the CFX96 system, use a lid temperature of 105 C; for the CFX384 system use a lid temperature of 95 NOTE: Heating the lid prevents condensation in the sealed reaction vessels.
- Page 67 Stand-Alone Operation 2. Enter a protocol name if you have already not done so, or edit the name previously created in the Protocol window. Use arrow keys to select a destination folder (Figure 49). Figure 49. Saving a protocol. 3. Click Edit Filename (F1) and type a new name in the box (Figure 50). Figure 50.
- Page 68 CFX96 and CFX384 Systems Manual 5. Click Run (F2) to continue and run the protocol (Figure 51). Figure 51. Protocol successfully saved. 6. Edit the Sample Volume or Lid Temperature that will be used for the run (Figure 52). 7. Enter the Sample ID or User to be recorded in the Run information screen.
- Page 69 Figure 53. Scan mode and data file name. Scan modes detect calibrated fluorophores in these channels: • All Channels. Collects data from channels 1 through 5 on the CFX96 system, or channels 1 through 4 on the CFX384 system • SYBR/FAM only. Collects data only from channel 1 on either system, and provides a fast scan •...
-
Page 70: Exporting Data For Analysis
CFX96 and CFX384 Systems Manual • Time Status. Press the VIEW command key to see a full-screen count-down timer for the protocol. Press the VIEW key again to switch back to the Status screen. Figure 54. Monitoring run status. Exporting Data for Analysis When the run is finished, the fluorescence data needs to be transferred to a computer running CFX Manager software for analysis. - Page 71 Stand-Alone Operation 2. Use the up and down arrow keys to navigate to the RT_DATA folder and then press the right arrow key to open the folder. 3. Select the file using the up and down arrow keys. 4. Press the Export File (F1) button to export a copy of the run data (.zpcr) to the USB key, as shown in Figure 56.
- Page 72 CFX96 and CFX384 Systems Manual To send an email with attached data (.zpcr) at the end of a run, follow these instructions: 1. After saving the name of the protocol or selecting a protocol out of the File Library using the Run command key, select Options (F4) in the Run information screen (Figure 58).
-
Page 73: Creating A Data File
Stand-Alone Operation 5. Click OK (F1) to continue to run the assay. Figure 60. Confirming export to USB key. Creating a Data File The stand-alone run data (.zpcr) data needs to be converted into a data file (.pcrd) by CFX Manager software in order to be analyzed. -
Page 74: Setting Up Email
CFX96 and CFX384 Systems Manual NOTE: CFX Manager software checks the scan mode and plate size for the plate file, these must match the current run settings that were started during the experiment. TIP: Load a Quick Plate file to quickly access data from all the wells. - Page 75 Stand-Alone Operation 5. In the Administrator Settings Menu, select 9: SMTP Server Settings (Figure 62). Figure 63. Administrator Settings Menu window. 6. Contact your network administrator for your the SMTP server name. NOTE: The SMTP server name is provided by your ISP. 7.
- Page 76 CFX96 and CFX384 Systems Manual 9. Click Save (F1) to save the name of the SMTP server (Figure 65). Figure 65. Saving server name. 10.The added server name will appear in the SMTP Server Names pull-down menu, as shown in Figure 66.
- Page 77 Stand-Alone Operation 12.Use the arrow keys to select the Test Current Server button and click the Enter navigation button (Figure 67). Figure 67. Test the current server. 13.Type an email address in the text box and select Test Server (F1) (Figure 68). Figure 68.
-
Page 78: Chapter 7. Data Analysis Overview
CFX96 and CFX384 Systems Manual Data Analysis Overview Read this chapter for information about data analysis: • Data Analysis window (below) • Quantitation tab (page 72) • Well groups (page 73) • Data analysis settings (page 73) • Well selectors (page 75) •... - Page 79 Data Analysis Overview The Data Analysis window displays up to nine tabs (Figure 69). Each tab shows the analyzed data for a specific analysis method: Figure 69. All the tabs that can display in the Data Analysis window. The software only displays a tab in the Data Analysis window if the data are collected in the run and data are available for that type of analysis.
-
Page 80: Data Analysis Menu Bar
CFX96 and CFX384 Systems Manual Data Analysis Menu Bar The menu bar in the Data Analysis window (Figure 71) provides these menu items: Figure 71. Menu bar in the Data Analysis window. Table 20 lists the functions of items in the menu bar. -
Page 81: Quantitation Tab
Step Number Selector The CFX96 system or CFX384 system can acquire fluorescence data at multiple protocol steps; the software maintains the data acquired at each step independent. The software displays the Step Number selector below the Standard Curve chart on the Quantitation tab whenever a protocol contains more than one data collection step. -
Page 82: Data Analysis Settings
CFX96 and CFX384 Systems Manual Viewing Well Groups in Data Analysis Wells in the plate can be grouped into subsets for independent analysis using well groups. When you create well groups in the Well Groups Manager window in the Plate Editor (page 50), group names appear in the Data Analysis window within the Well Groups list on the toolbar. - Page 83 Data Analysis Overview Adjusting the Threshold In Single-Threshold mode, adjust the threshold for a fluorophore by clicking on the threshold line in the Amplification chart and moving the mouse pointer vertically. Alternatively, specify an exact crossing threshold for the selected fluorophore by following these instructions: 1.
-
Page 84: Well Selectors
CFX96 and CFX384 Systems Manual 3. Click OK to confirm the change and close the window. Select the Analysis Mode Select the Analysis Mode to determine the method of baseline subtraction for all fluorescence traces. Select Settings > Analysis Mode to choose one of these three options: •... - Page 85 Data Analysis Overview • Empty wells (dark gray). These wells were not loaded in the Plate Editor window Figure 76. Three well colors appear in a well selector. Well Selector Right-Click Menu Items Right-click any well selector view to select the items listed in Table 21. Table 21.
- Page 86 CFX96 and CFX384 Systems Manual 2. Choose Exclude Well XX from Analysis from the menu options. Figure 77. Right-click to exclude a well from analysis. NOTE: Unselect the Exclude Well from Analysis from the right-click menu to reinclude the well.
-
Page 87: Charts
Data Analysis Overview In Figure 79, one well (under the pointer) was excluded from data analysis in the Plate Editor. Notice that the excluded well is marked with an asterisk (*). Figure 79. Excluded well (marked with *) in the Plate Editor. Alternatively, to permanently remove wells from analysis, clear the contents from wells in the Plate Editor by clicking the Clear Wells button. -
Page 88: Spreadsheets
CFX96 and CFX384 Systems Manual NOTE: Menu items that apply to specific charts are described in the next chapter “Data Analysis Windows” (page 81). Spreadsheets The spreadsheets shown in Data Analysis include options for sorting and transferring the data. Sort the columns by one of these methods: •... - Page 89 Data Analysis Overview...
-
Page 90: Chapter 8. Data Analysis Windows
CFX96 and CFX384 Systems Manual Data Analysis Windows Read this chapter for more information about the tabs in the Data Analysis window: • Quantitation tab (below) • Quantitation Data tab (page 84) • Melt Curve tab (page 87) • Melt Curve Data tab (page 89) •... - Page 91 Data Analysis Windows • Spreadsheet. Shows a spreadsheet of the data collected in the selected wells Figure 80. Layout for the Quantitation tab in Data Analysis window. Fluorophore Selector To select the fluorophore data to display in the Quantitation tab charts and spreadsheets, click the fluorophore selector below the Amplification chart (Figure 81).
- Page 92 CFX96 and CFX384 Systems Manual Figure 82. Trace Styles window. Use the tools in the Trace Styles window to adjust appearance of traces and preview the changes in the well selector at the bottom of the window. • Select a specific set of wells by using the well selector at the bottom of the window.
- Page 93 Data Analysis Windows Standard Curve Chart The software creates a Standard Curve chart (Figure 84) in the Quantitation tab if the data include sample types defined as standard (Std) for one fluorophore in the experiment. Figure 84. Standard Curve chart. The Standard Curve chart displays the following information: •...
-
Page 94: Quantitation Data Tab
CFX96 and CFX384 Systems Manual Quantitation tab Spreadsheet Table 25 shows the type of data shown in the spreadsheet at the bottom right side of the Quantitation tab: Table 25. Quantitation tab spreadsheet content Information Description Well Well position in the plate... - Page 95 Data Analysis Windows Table 26. Results spreadsheet content (continued) Information Description Target Amplification target name (gene) Sample Sample description Threshold Cycle (C(t)) Threshold cycle C(t) Mean Mean of the threshold cycle for the replicate group C(t) Std. Dev Standard deviation of the threshold cycle for the replicate group Starting Quantity (SQ) Estimate of the starting quantity of the target...
-
Page 96: Melt Curve Tab
CFX96 and CFX384 Systems Manual RFU Spreadsheet Select the RFU spreadsheet to see the RFU readings for each well acquired at each cycle of the experiment. Select individual fluorophores by clicking a tab at the bottom of the spreadsheet. The well number appears at the top of each column, and the cycle number appears to the left of each row (Figure 87). - Page 97 Data Analysis Windows Figure 88. Layout of the Melt Curve tab in the Data Analysis window. Adjusting Melt Curve Data Adjust the Melt Curve data by any of these methods: • Click and drag the threshold bars in the Melt Peak chart to include or exclude peaks in data analysis •...
-
Page 98: Melt Curve Data Tab
CFX96 and CFX384 Systems Manual Melt Curve Data Tab The Melt Curve Data tab shows the data from the Melt Curve tab in multiple spreadsheets that include all the melt peaks for each trace. Select one of these four options to show the melt curve data in different spreadsheets: •... - Page 99 Data Analysis Windows Plate Spreadsheet Select the Plate spreadsheet (Figure 90) to view melt curve data in a plate format: Figure 90. Plate spreadsheet in Melt Curve Data tab. NOTE: To adjust the peak that the software calls, adjust the threshold line in the Melt Peak chart on the Melt Curve tab.
-
Page 100: End Point Tab
CFX96 and CFX384 Systems Manual Table 32 lists the type of information shown in the RFU spreadsheet. Table 32. RFU spreadsheet content Information Description Well number (A1, A2, A3, A4, Well position in the plate for the loaded wells A5...) Temperature Melting temperature of the amplified target. - Page 101 Data Analysis Windows The End Point tab shows the average RFU values to determine whether or not the target was amplified by the last (end) cycle. Use these data to determine if a specific target sequence is present (positive) in a sample. Positive targets have higher RFU values than the cutoff level you define.
-
Page 102: Allelic Discrimination Tab
CFX96 and CFX384 Systems Manual Adjusting the End Point Data Analysis Adjust the information shown in the End Point tab by following these methods: • Choose a Fluorophore from the pull-down list to view the data • Choose an End Cycle to Average value to set the number of cycles that the software uses to calculate the average end point RFU •... - Page 103 Data Analysis Windows • Well spreadsheet. Shows a spreadsheet listing the allelic discrimination data collected in the selected wells Figure 94. Layout of the Allelic Discrimination tab in the Data Analysis window. Adjusting Data for Allelic Discrimination The software automatically assigns a genotype to wells with unknown samples based on the positions of the vertical and horizontal threshold bars, and then lists genotype calls in the spreadsheet view.
-
Page 104: Qc Tab
CFX96 and CFX384 Systems Manual • Change a call manually by highlighting a row in the spreadsheet, and then selecting an option in the Call Selected Alleles list (including Allele 1, Allele 2, Heterozygote, None, Unknown, Control 1, or Control 2) •... - Page 105 Data Analysis Windows • Amplification chart. Shows the RFU for each well at every cycle. Each trace in the chart represents data from a single fluorophore in one well • QC rules. Shows the currently applied QC rules and the settings that define each rule NOTE: You can turn on or turn off rules by clicking the check box next to the rule in the Use Rule column.
-
Page 106: Reports For Data Files
CFX96 and CFX384 Systems Manual • View the Other section to see events, such as error messages, that might have occurred during the run. View these messages to help troubleshoot a run Figure 96. Layout of the Run Information tab in the Data Analysis window. - Page 107 Data Analysis Windows • Preview pane (right side of window). View the current report in a preview Figure 97. Example of a Report window for a data file. TIP: The layout of the report can define the type of information that appears in any report if you save the report as a template.
- Page 108 CFX96 and CFX384 Systems Manual Data Analysis Report Categories A report can include any of the options in each category described in Table 36, depending on the type of data in Data Analysis window. Table 36. Data analysis report categories in the options list...
- Page 109 Data Analysis Windows Table 36. Data analysis report categories in the options list (continued) Category Option Description End Point Analysis Settings Includes fluorophore, end cycles to average, mode, lowest RFU value, highest RFU value, and cut off value Data Spreadsheet listing the data in each well...
-
Page 110: Chapter 9. Gene Expression Analysis
CFX96 and CFX384 Systems Manual Gene Expression Analysis Read this chapter for information about performing Gene Expression Analysis: • Gene Expression (below) • Plate setup for gene expression analysis (page 102) • Gene Expression tab (page 102) • Experiment Settings window (page 107) •... -
Page 111: Plate Setup For Gene Expression Analysis
Gene Expression Analysis Plate Setup for Gene Expression Analysis To perform gene expression analysis, the contents of the wells must include the following: • Two or more targets. The two targets that represent different amplified genes or sequences in your samples •... - Page 112 CFX96 and CFX384 Systems Manual Figure 100. Layout of the Gene Expression tab in the Data Analysis window. TIP: Right-click on the chart to select right-click menu options. Select Sort from this menu to rearrange the order of the Target and Sample names in the chart.
- Page 113 Gene Expression Analysis Relative Quantity By definition, relative quantity (ΔC(t)) data are not normalized. This method is used to quantitate samples that do not include any reference genes (targets). Typically, researchers are confident in one of the following considerations when they set up their experiment: •...
- Page 114 CFX96 and CFX384 Systems Manual • Highest expression. Scale the normalized gene expression to the highest for each target by dividing the expression level of each sample by the highest level of expression in all the samples. This scaling option uses the scaled to highest formula •...
- Page 115 Gene Expression Analysis Table 37. Right-click menu items (continued) Item Function X-axis labels Choose to display x-axis labels horizontal or angled Gene Expression Spreadsheet Table 38 describes the information shown in the Gene Expression spreadsheet. Table 38. Description of information in the spreadsheet on the Gene Expression tab Information Description Target...
-
Page 116: Experiment Settings Window
CFX96 and CFX384 Systems Manual Experiment Settings Window Open the Experiment Settings window by clicking the Experiment Settings button in the Gene Expression tab. In this window, view or change the list of Targets and Samples, select reference genes, select control samples or set the Gene Expression Analysis sample group to be analyzed if Collection Names have been added to the wells (Figure 101). - Page 117 Gene Expression Analysis • Enter a number for the efficiency of a target. The software will calculate the relative efficiency for a target using Auto Efficiency if the data for a target includes a standard curve. Alternatively, type a previously determined efficiency Figure 102 shows the efficiency of all the targets, which appear if Auto Efficiency is selected.
-
Page 118: Gene Study
CFX96 and CFX384 Systems Manual Gene Study Create a Gene Study to compare gene expression data from one or more real-time PCR experiments using an inter-run calibrator to normalize between the experiments. Create a Gene Study by adding data from one or more data files (.pcrd extension) to the Gene Study, the software groups them into a single file (.mgxd extension). - Page 119 Gene Expression Analysis Figure 104 shows the Gene Study window, including the Study Setup and Study Analysis tabs. Figure 104. Gene Study window. Study Setup Tab Before importing data into a Gene Study, do the following in the Data Analysis window: •...
- Page 120 CFX96 and CFX384 Systems Manual The Study Setup tab lists the data files in the Gene Study, as described in Table 40. Table 40. Study Setup tab in Gene Study window Column Title Description File Name Name of the experiment data file (.pcrd extension)
-
Page 121: Gene Study Data Spreadsheet
Gene Expression Analysis Highlighting a sample in the Gene Expression chart, highlights the corresponding cell in the spreadsheet below the chart (Figure 105). Figure 105. Study Analysis tab in Gene Study window. Gene Study Data Spreadsheet The data spreadsheet in the Gene Study window lists information about each target and sample in the Gene Study (Figure 105). -
Page 122: Gene Study Report Window
CFX96 and CFX384 Systems Manual Show Details Data Click the Show Details check box to show additional information (Figure 106). Figure 106. Show Details data in the Gene Study tab. The spreadsheet adds the information in the columns listed in Table 42. -
Page 123: Frequently Asked Questions
Gene Expression Analysis Table 43. Categories for a Gene Study report (continued) Category Option Description Inter-Run Calibration Inter-run calibration data 4. Fill in the text for the report by entering text and images in option panes (Figure 107). Figure 107. Example of Header and Logo options in a Gene Study report. 5. -
Page 124: Gene Expression Calculations
CFX96 and CFX384 Systems Manual A: This is where the CFX Manager software calculations differ from those outlined on the geNorm web site. In the example on that web site, the results are not scaled to the control until normalized expression is calculated. This is referred to as re-scaled normalized expression in the spreadsheet. - Page 125 Gene Expression Analysis The efficiency (E) in the efficiency formulas refers to the “efficiencies” as described by Pfaffl (2001) and Vandesompele et al. (2002). In these publications, an efficiency of 2 (perfect doubling with every cycle) is equivalent to 100% efficiency in this software. You have the option to convert your efficiency calculations to those used in the software by using the following mathematical relationships: •...
- Page 126 CFX96 and CFX384 Systems Manual Normalization Factor The denominator of the normalized expression equation is referred to as the normalization factor. The normalization factor is the geometric mean of the relative quantities of all the reference targets (genes) for a given sample, as described in this formula: -- - ×...
- Page 127 Gene Expression Analysis Standard Deviation for the Normalized Expression Re-scaling the normalized expression value is accomplished by dividing the standard deviation of the normalized expression by the normalized expression value for the highest or lowest individual expression levels, depending on the Scaling Option you choose. The standard deviation (SD) of the normalization factor is calculated with this formula: SD RQ SD RQ...
- Page 128 CFX96 and CFX384 Systems Manual Normalized Expression Scaled to Lowest Expression Level When the experiment does not include controls, scale the normalized expression (NE) for each target (gene) by dividing the expression level of each sample by the lowest level of expression in all the samples.
- Page 129 Gene Expression Analysis The standard error for the normalization factor in the normalized expression formula is shown here: SE RQ SE RQ SE RQ ⎛ ⎞ ⎛ ⎞ ⎛ ⎞ sample (Ref 1) sample (Ref 2) sample (Ref n) × ----------------------------------------------------- - ----------------------------------------------------- - …...
-
Page 130: Chapter 10. Users And Preferences
CFX96 and CFX384 Systems Manaul Users and Preferences Read this chapter to learn more about managing software users and their preferences: • Log in or Select User (below) • User Preferences window (page 122) • Configuring email notification (page 123) •... -
Page 131: User Preferences Window
Users and Preferences 5. To add a new user name and password, contact your software administrator. Change a Password Change a password by following these steps: 1. Select User > Change Password from the main software window menu to open the Change Password dialog box (Figure 110). -
Page 132: Email Tab
CFX96 and CFX384 Systems Manual TIP: Click the Restore Default button to restore all settings to the default settings shown in this image. Then click OK to save the settings, and close the window. Email Tab Select the Email tab (Figure 111) to enter the email addresses where you want to receive confirmation of the completion of the run. -
Page 133: Files Tab
Users and Preferences Data Files and/or Reports, you may want to test your server's ability to email attachments by checking the Test Attachment box, and setting the Attachment Size in MB with up to 5 megabytes (MB) or more. Files Tab Select the Files tab to list the default locations for opening and saving files. -
Page 134: Plate Tab
CFX96 and CFX384 Systems Manual • AutoWriter. Selects default settings that appear in the Protocol AutoWriter, including default Annealing Temperature for experiments that use iProof, iTaq, or Other polymerases and the default amplicon length Figure 114. Protocol Preferences tab in the User Preferences window. -
Page 135: Data Analysis Tab
Users and Preferences Figure 115. Plate tab in the User Preferences window. Data Analysis Tab Select the Data Analysis Tab in the User Preferences window to change the default settings for data that appear in the Data Analysis window. Figure 116. Data Analysis tab in the User Preferences window. For the quantification data, select the following settings:... -
Page 136: Gene Expression Tab
CFX96 and CFX384 Systems Manual • Analysis Mode. Select the default base lining method for the analysis mode. Choose Baseline Subtracted Curve Fit, No Baseline Subtraction, or Baseline Subtracted • C(t) Determination Mode. Select between Regression mode or Single Threshold mode to determine how C(t) values are calculated for each fluorescence trace •... -
Page 137: Qc Tab
Users and Preferences control, which is the default selection when no control sample is assigned in the Experiment Settings window • X-Axis. Graph the Target or the Sample on the x-axis • Y-Axis. Graph Linear, Log 2, or Log 10 scale on the y-axis •... -
Page 138: User Administration
CFX96 and CFX384 Systems Manual • Efficiency greater than XX. Input a reaction efficiency cut-off value that is calculated for the standard curve • Efficiency less than XX. Input a reaction efficiency cut-off value that is calculated for the standard curve •... - Page 139 Users and Preferences 4. Click OK to open a dialog box and confirm that you want to close the window. 5. Click Yes to close the dialog box and window. To remove a software user, follow these steps: 1. In the Manage Users pane, click the box in the Delete list for each software user you want to remove.
-
Page 140: Chapter 11. Resources
CFX96 and CFX384 Systems Manual Resources Read this chapter to learn more about resources for the CFX96 system or the CFX384 system: • Calibration Wizard (below) • Instrument maintenance (page 133) • Application Log (page 135) • Software Help tools (page 135) •... - Page 141 Figure 120. Dye Calibration window. Calibrating the CFX96 or CFX384 System To calibrate the CFX96 system or CFX384 system in the Dye Calibration window: 1. In the Calibrate New or Existing Fluorophores pane, select the fluorophore you want to calibrate from the pull-down list. If the fluorophore name is not included in the list, type the name in the box to add it to the list.
-
Page 142: Instrument Maintenance
Wet components can cause electrical shock when the thermal cycler is plugged in. Clean the CFX96 or CFX384 optical reaction module as soon as you discover debris, dirt, or contamination in the block or on the inner lid. Any dirt can interfere with the ability of the block to change temperature quickly and collect accurate fluorescent data. - Page 143 Resources WARNING! Never touch or allow solutions to touch the optical system that is located behind the heated plate holes in the inner lid (Figure 121). Never touch anything beyond these holes Block (96-well) Figure 121. Heating plate holes in the inner lid. TIP: For instructions on handling and cleaning radioactive or biohazardous materials, consult the guidelines for radiation safety and biosafety provided by your institution.
-
Page 144: Application Log
CFX96 and CFX384 Systems Manual WARNING! Never heat the block after adding a cleaning solution. Heating the block with cleaning solution will damage the block, reaction module, and thermal cycler base. • Clean the inner lid. Use a soft, lint-free cloth and water to remove debris and solutions from the inner lid surface. -
Page 145: Troubleshooting
Resources Troubleshooting Typically, software and instrument communication problems can be resolved by restarting your computer and the system. Be sure to save any work in progress before restarting. NOTE: Check that your computer has sufficient RAM and free hard drive space. The minimum RAM is 2 GB, and the minimum hard drive space is 20 GB. - Page 146 CFX96 and CFX384 Systems Manual Power Failure Options In a power failure, the instrument and computer will shut down. If the power failure is short, then the instrument will resume running a protocol, but the Application log will note the power failure.
-
Page 147: Instruments, Parts, And Accessories
Bio-Rad offers the 1000-series instruments, software, and accessories listed in Table 45. Table 45. 1000-series instruments, reaction modules, and accessories. Catalog Number Description Instruments and Reaction Modules 185-5096 CFX96 Real-Time PCR Detection System 185-5034 CFX384 Real-Time PCR Detection System 185-1096R C1000 Thermal Cycler With 96-Well Fast Reaction Module 185-1048R... -
Page 148: References
CFX96 and CFX384 Systems Manual Table 45. 1000-series instruments, reaction modules, and accessories. Catalog Number Description 170-8860 Supermix, 100 reactions 170-8880 SYBR® Green Supermix, 100 reactions *To prevent data loss, use a sufficiently shielded USB cable (catalog #184-8000) when connecting instruments to the computer or to another instrument. - Page 149 Resources...
-
Page 150: Index
CFX96 and CFX384 Systems Manual Index , 10 Tube strips Baseline , 27 Add Repeats , 74 Window Adding Baseline Subtracted , 37 Beep , 75 Curve Fit mode , 37 Extend , 75 Baseline Subtracted mode , 37 Increment... - Page 151 Well selector , 138 USB cable Data file , 97 CFX Manager Report , 20 Files Data report , 98 CFX96 system Creating , 37 Overview Delete Step button , 37 Changing Deleting a step , 74 , 12 Baseline...
- Page 152 CFX96 and CFX384 Systems Manual , 20 , 32 Gene Study Gradient Calculator , 20 Plate Guides , 20 , 11 Protocol Quick Guides , 20 , 11 Software Software Help , 27 Flash Block Indicator button , 46 Fluorophores...
- Page 153 , 42 , 37 Plate Loading Guide Protocol AutoWriter , 31 Power Protocol Editor Input Operation requirements Switch Overview of CFX96 system Protocol , 37 Block mode , 37 Calculated mode , 22 End point , 22, 23 Express load...
- Page 154 CFX96 and CFX384 Systems Manual , 38, 39 , 27 Annealing temperature Resume button , 37 , 27 Button Resuming a run , 39 Creating a protocol Reverse transcription , 39 , 138 Examples of protocol Reagents , 38 Run time...
- Page 155 Index , 45 , 45, 60 Color SYBR/FAM only , 45 Selected check box Selecting , 75 Analysis mode , 45 Fluorophores in plate Shipping , 92 List End Point , 102 Screw Gene Expression , 50, 107 , 89 Show Analysis Settings Melt Curve Data , 70, 72...
- Page 156 CFX96 and CFX384 Systems Manual Warning , iii Instruments , iii Labels , iii Labels, safety , ii List in manual , iii Risk of burning , iii Risk of explosion , iii Risk of harm , iii Safety , ii...
- Page 157 Index...
- Page 158 Bio-Rad Laboratories, Inc. Web site www.bio-rad.com USA 800 4BIORAD Australia 61 02 9914 2800 Austria 01 877 89 01 Belgium 09 385 55 11 Brazil 55 21 3237 9400 Life Science Canada 905 364 3435 China 86 21 6426 0808 Czech Republic 420 241 430 532 Denmark 44 52 10 00 Finland 09 804 22 00 France 01 47 95 69 65 Group Germany 089 318 84 0 Greece 30 210 777 4396 Hong Kong 852 2789 3300 Hungary 36 1 455 8800 India 91 124 4029300 Israel 03 963 6050 Italy 39 02 216091 Japan 03 6361 7000 Korea 82 2 3473 4460 Mexico 52 555 488 7670 The Netherlands 0318 540666 New Zealand 0508 805 500...
Need help?
Do you have a question about the CFX96 and is the answer not in the manual?
Questions and answers