
Related Manuals for Evolis tattoo rw


Summary of Contents for Evolis tattoo rw
-
Page 1: User Guide
USER GUIDE Evolis Card Printer © 2009. All rights reserved. July 2014 Ref. KU11E B1... -
Page 2: Copyright Notice
All the information contained in this document is subject to change without prior notice. Evolis Card Printer cannot be held liable for any errors that may be found in this manual, or for any loss or damage arising accidentally or as a result of dissemination or use of this manual. -
Page 3: Warranty Registration
As with all Evolis products, a great deal of care has been taken over this manual. Should you find an error, however, please let us know by emailing us at info@evolis.com. -
Page 4: Getting Started
Evolis dealer, who will tell you the procedure to follow. Evolis takes great care over the quality of its packaging and we ask that you keep this packaging somewhere clean and dry. -
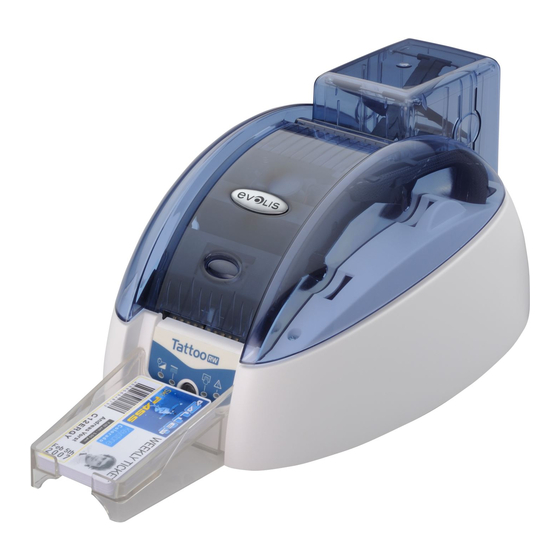
Page 5: Description Of The Printer And Its Functions
1-2 Description of the printer and its functions Card time Control Cover delay button open No cards Cleaning - Cover opening button - Card input feeder - Output hopper - Control panel... - Page 6 - Thermal print head - USB socket (standard) - Magnetic encoder (option) - RJ45 Ethernet socket (standard) - Control button - DB-9 connector (option) - Cleaning rollers - Identification label - Power socket...
-
Page 7: Installation
1-3 Installation 1-3a CONNECTING THE PRINTER Connection to the power supply ä The printer must be connected to a properly protected and earthed electrical installation. FI: Laite on liitettävä suojamaadoitus koskettimilla varustettuun pistorasiaan. NO: Apparatet må tilkoples jordet stikkontakt. SE: Apparaten skall anslutas till jordat uttag. Ê... -
Page 8: Card Types
1-3b CARDS For optimum quality, the cards used must be ISO 7810 certified. Use only the card types recommended by Evolis. Do not touch the printable surface of the cards in order to preserve print quality. Do not use cards that have been damaged, folded, embossed or dropped on the floor. -
Page 9: Loading The Cards
Loading the cards ä printer accepts PVC cards between 0.50 mm (20 mil) and 0.76 mm (30 mil) thick. For optimum quality, the cards used must meet the CR 80 standard. There is more than one way to load and collect the cards. The print driver must be matched your requirements and choices. Loading cards into the card feeder Cards are loaded into the feeder as follows: Ê... -
Page 10: Removing Printed Cards
Loading a card manually Ê Insert a card manually into the manual card feeder. The card will automatically eject after printing. Removing printed cards ä The printer is supplied with an output hopper with a capacity of 15 x 0.76 mm (30 mil.) cards. This hopper receives the cards once printed and must be fitted to the printer as follows:... -
Page 11: Adjusting Card Thickness
Cards can be collected in two different ways: Ê Automatic ejection mode (in this case, use of the detachable output hopper supplied with the printer is recommended) Ë Manual collection mode (the card needs to be retrieved after printing). Ê Ë... -
Page 12: Installing The Print Driver
It is therefore essential to proceed in stages, changing settings only when you are completely sure. Evolis offers the option to revert to the factory settings at any time if the adjustments made do not give the expected results. - Page 13 You will find more detailed information about the cards recommended by Evolis in the ‘Evolis Genuine Product’ list of consumables. Pay attention to the settings defined under the print driver Properties and do not hesitate to contact your Evolis dealer for any advice and assistance needed before making any changes.
- Page 14 “Graphics” tab ä Ribbon* or card types Front/back printing Choice of methods for feeding and collecting cards Card orientation, portrait or landscape Number of copies “Tools” tab ä Setting and testing magnetic encoding options Test card printing Cleaning the printer Dialogue interface with the printer We recommend that you print a test card when first using the printer, and keep it.
-
Page 15: Printing A Card
In Microsoft Word ® ä After having set the Evolis printer as the default: Start the MS-Word application Click on the File in the menu bar, then on Page Setup The Paper tab has a Paper Size option, select CR80 Card In the Margins tab, set all margins to ‘0’, then in the Orientation section, select Landscape. - Page 16 2-4 Connecting to a network (Ethernet) All Evolis printers have the benefit of a TCP/IP network connection mechanism. This feature is available as standard or as an option, depending on the model in the range. Out of the box, the printer comes configured in DHCP mode (Dynamic Host Configuration Protocol), which means that its IP address is supplied by the network.
-
Page 17: Maintenance
In addition, the use of Evolis brand ribbons (Evolis Genuine Ribbons) also ensures that your equipment operates properly. Use of ribbons not approved by Evolis may as a consequence affect the quality and reliability of print jobs, produce low quality printed output and even affect the printer’s operation. -
Page 18: Routine Printer Cleaning
Warranty invalid after: before warranty voided Printer (warning light steady) (warning light flashing) (warning light steady) Tattoo2 400 cards 100 cards 500 cards Tattoo RW 400 cards 100 cards 500 cards Pebble4 1000 cards 200 cards 1200 cards Dualys3 1000 cards... - Page 19 Follow the procedure below: Repeatedly running the cleaning card through the printer cleans the feed rollers, the cleaning rollers and the print head. Ê Remove the card feeder from the printer. Ë Remove any cards found in the feeder. Ì Insert the cleaning card into the feeder.
- Page 20 Î Open and then close the printer cover. Ï Hold down the control button on the control panel for one second. Cleaning starts. Ð The used cleaning card is ejected into the output hopper. Î Ï Ð Wait for 2 minutes after cleaning before using your printer.
-
Page 21: Servicing The Cleaning Roller(S)
3-3 Servicing the cleaning roller(s) In addition to routine printer cleaning, we suggest that you clean the cleaning roller(s) using the special wipes available from Evolis. The cleaning roller(s) remove(s) any dust or particles from the cards before printing. Recommended cleaning cycle: whenever the ribbon* is changed... - Page 22 Î Close the cover. Ï Remove the card feeder from the printer. Ð Clean the roller with the wipe. Ñ Press the card feeder back into the printer until it clicks. Î Ï Ð Ñ Wait for 2 minutes after cleaning before using your printer.
-
Page 23: Servicing The Print Head
However, to maintain the original print quality and to absorb surplus ink on the print head, we recommend that you regularly clean the print head (whenever the ribbon is changed) using the cotton buds supplied by Evolis. You must also protect the print head and its components from any discharge of static electricity. - Page 24 Follow the procedure below: Ê Take an Evolis cotton bud and press the middle of the tube until the end of the cotton bud is impregnated with alcohol. Ë Open the cover and find the print head. Ì Gently rub the cotton bud from left to right along the print head for a few seconds.
-
Page 25: Warnings And Diagnosis
Evolis technical support. 4-1 Warnings and diagnosis Although the Evolis printer was designed to work independently, keeping user involvement to a minimum, it may nonetheless prove useful to gain some familiarity with the main warnings. - Page 26 CARD TIME DELAY The card that has just been printed is hot Standard contrast not yet reached Still too soon to re-print the card If you re-print a card while it is still hot, there is a risk that it will not be fully erased.
- Page 27 Refer to Appendix C of this manual for further information. Press the control button for one second. The printer will restart the magnetic encoding cycle with a new card. If the problem persists, call your Evolis dealer for assistance. COOLING MODE The cooling system has been activated.
-
Page 28: Diagnosis Help
4-2 Diagnosis help In this section, you will find all the information you need to carry out a few simple checks that you may be asked to run by your Evolis dealer to help you as effectively as possible. 4-2a PRINTING A TEST CARD We recommend that you print a test card to ensure that your printer is working properly. -
Page 29: 4-2B Identifying Installed Software Versions
4-2b IDENTIFYING INSTALLED SOFTWARE VERSIONS As previously shown, you can easily identify the version of the software embedded in your printer (firmware number) by means of the test card. You can also identify the version of the print driver installed as follows: Ê... -
Page 30: Troubleshooting
4-3 Troubleshooting Do not attempt to use tools or other items to repair your printer in the event of problems, in case major damage is caused. 4-3a PRINTING PROBLEMS Nothing prints ä Ê Check the power supply Check that the power cable is correctly connected both to the printer and to a working mains socket. The printer is on. -
Page 31: Blank Card Ejected
Check that the ribbon is not finished or damaged. Replace it or re-install it if necessary. Ë The print head may be damaged Print a test card. If the test card does not print, contact an Evolis dealer for technical support or visit the website at www.evolis.com. * does not apply to rewriteable printers... - Page 32 Use of incompatible cards. Check that the cards used match the specifications. We recommend that you obtain your cards from an Evolis dealer. Use of cards obtained elsewhere is liable to adversely affect print quality and/or damage the print head.
- Page 33 Inadequate print quality ä Ê The print and erase settings need to be altered Lack of contrast: increase the contrast in the print driver configuration. Partial erase: adjust the temperature in the print driver configuration. Quality still inadequate: adjust the print quality in the print driver configuration. Please note that this setting alters the print speed.
-
Page 34: Partial Or Incorrect Printing
Partial or incorrect printing ä Ê Check the settings defined for the print run Check that no element in your card layout is outside the print margins. Check the orientation of the selected document in the print driver configuration (Landscape or Portrait) Ë... -
Page 35: 4-3B Freeing Jammed Cards
4-3b FREEING JAMMED CARDS Control panel displays: MECHANICAL Print jobs are interrupted. PROBLEM Do not turn your printer off, as this cancels pending print jobs in the printer’s memory. Remove the card as follows: Ê Open the printer cover. Ë Press the control button to turn the card transport rollers. -
Page 36: 4-3C Replacing The Cleaning Rollers
Should your cleaning roller start to work less effectively despite regular maintenance, it is advisable to replace it in order to avoid dirt accumulating on the print head, resulting in permanent damage (See section 3 – Maintenance). The cleaning roller is available as a consumable from your Evolis dealer. Roller replacement procedure: Ê... - Page 37 Î Remove the card feeder as shown. Ï Remove any cards found. Ð Locate the worn cleaning roller, remove it and fit the new one. Ñ Replace the cards in the card input feed. Put it back in the printer. Î...
-
Page 38: 4-3D Replacing The Print Head
Evolis has designed a unique device enabling users to undertake such replacement with no tools needed, simply by following the instructions very carefully. Before doing anything else, please contact your Evolis dealer in order to check the advisability of replacing the print head. The dealer will supply a new print head if need be. - Page 39 To exchange the print head, please proceed as follows: Before changing the print head, please unplug the power cable. Step 1 - Removing the defective print head ä Ê Open the printer cover. Ë Locate the print head. Ì Press on the metal part found at the bottom as shown on the diagram, in order to free the lugs from the holding fork, then remove the lugs from their slots.
-
Page 40: Step 2 - Installing The New Print Head
Step 2 - Installing the new print head ä Ê Note the code shown on the white label stuck on the print head. You will be asked for this code in Step 3. Ë Pick up the new print head and turn it towards you, with the white connector visible. Ì... -
Page 41: Step 4 - Cleaning The Printer
Step 3 - Configuring the new print head ä Ê Power up the printer and check that it is properly connected to a computer on which the printer’s print driver is installed. Ë Under the print driver’s Properties, click on the “Tools” tab. Ì... -
Page 42: 4-3E Updating The Firmware (Under Windows)
Updating the firmware is a simple operation but one which, if not properly completed, can result in your printer breaking down. Before any update, please contact your Evolis dealer who will be able to guide you on the advisability or otherwise of carrying out an upgrade. - Page 43 Updating the print driver is a task that is required in order to fix malfunctions or gain the benefit of new options. Before any update, please contact your Evolis dealer who will be able to guide you on the advisability or otherwise of carrying out an upgrade.
-
Page 44: Technical Support
Evolis will pass on the contact details of your nearest Evolis dealer. When calling an Evolis dealer, you do need to be close to your computer and ready to provide the following information: Ê... -
Page 45: A1 - Technical Specifications
Appendix A A1 - Technical specifications This section presents your printer’s technical printing properties. General technical features ä 300 dpi resolution for premium quality printing (11.8 dots/mm) USB and Ethernet connections 16 MB RAM Detachable 100-card feeder (0.76 mm) Detachable 15-card output hopper (0.76 mm) 1 button and 4 LED control panel White casing and brilliant blue cover Encoding options... -
Page 46: Card Format
Card format ä CR-80 – ISO 7810 (53.98 mm x 85.60 mm) Card type ä Rewritable thermo-chromic material: Mitsubishi blue and black Ricoh upon request Other materials on request and approval Rewritable card thickness ä From 0.5 mm to 0.76 mm (20 to 30mil) Operating systems ä... -
Page 47: Warranty
Storage humidity: from 20 to 70% non-condensing Operating ventilation: air cooled. Warranty ä Two years (printer and print head), limited to 15,000 cards inserted Warranty subject to strict compliance with specific usage and maintenance conditions and the use of Evolis consumables. -
Page 48: B1 - Compliance Statements
Pursuant to Part 15.21 of the FCC Rules, any changes or modifications made to this equipment Full name: Serge Olivier without the express, written consent of Evolis Card Printer may cause harmful interference and void the FCC authorisation to operate this equipment. -
Page 49: C1 - Encoding Options
C1a - MAGNETIC STRIP ENCODING A printer fitted with a magnetic encoder works in exactly the same way as a basic card printer. The Evolis encoder encodes the magnetic strips in a single pass then runs a data check. -
Page 50: Card Positioning
Card positioning ä Magnetic strip cards must be placed in the card feeder so that the magnetic strip is facing upwards as shown below: Ê Remove the card feeder from the printer as shown. Ë Lower the spring system as shown and insert a maximum of 100 x 0.76 mm magnetic cards. Ì... -
Page 51: Configuring The Windows Print Driver
Configuring the Windows print driver ä When first installing the Windows print driver, the magnetic encoder functions need to be configured. The magnetic encoder functions are found in the print driver’s Tools dialogue box by clicking on the Encoding Settings button. “Magnetic Encoder”... -
Page 52: So 7811 Magnetic Encoding Standards
SO 7811 magnetic encoding standards ä Track number Separator Density Character set Number of characters Alphanumeric Track 1 210 ppp (ASCII 20-95) Numeric Track 2 75 ppp (ASCII 48-62) Numeric Track 3 210 ppp (ASCII 78-62) bits per inch Except for the “?” character Including the Start, Stop and LRC characters which are automatically handled by the magnetic encoder... -
Page 53: C1B - Contactless Smartcard Encoding
Evolis printers may be equipped with an encoding device for contactless smartcards (RFID). This consists of an encoding module and sometimes a detachable antenna. Integration of such a module must be carried out by specialist. The Evolis product catalogue has printers equipped with a built-in encoder for contactless chips. -
Page 54: Computer Connection
A card is moved from the feeder towards the antenna and is positioned nearby. The chip is programmed via the computer’s serial (or USB) interface connecting the built-in encoder and the computer. Refer to the Evolis printer Programming Guide for further details on programming contactless smartcards.
Need help?
Do you have a question about the tattoo rw and is the answer not in the manual?
Questions and answers