Table of Contents
Advertisement
Advertisement
Table of Contents

Related Manuals for Sitecom Greyhound AC2600


Summary of Contents for Sitecom Greyhound AC2600
- Page 1 Greyhound User Manual...
-
Page 2: Table Of Contents
Addendum B: Declaration of Conformity ................90 Addendum C: GNU/GPL Information................92 Revision 1.0 © Sitecom Europe BV 2016 Note: All the information contained in this manual was correct at the time of publication. However, as our engineers are always updating and improving the product, your device’s software may have a slightly different appearance or modified functionality than presented in this manual. -
Page 3: Introduction
1.4 GHz Dual-Core Qualcomm® Internet Processor supporting combined Wi-Fi speeds of up to 2600 Mbps, the Sitecom Greyhound AC2600 Wi-Fi Router delivers smooth Ultra HD video streaming, lag-free online gaming and handles demanding tasks like no other. Thanks to Qualcomm®... -
Page 4: Technical Specifications
Technical Specifications... - Page 5 * Theoretical wireless signal rate based on IEEE standard of 802.11a, b, g, n, ac chipset used. Actual throughput may vary. Network conditions and environmental factors lower actual throughput rate. All specifications are subject to change without notice.
-
Page 6: Package Contents
Package Contents Open the package carefully, and make sure that none of the items listed below are missing. Do not discard the packing materials, in case of return; the unit must be shipped back in its original package. -
Page 7: Cautions
Cautions This router’s design and manufacturer has your safety in mind. In order to safely and effectively use this router, please read the following before usage. Usage Cautions The user should not modify this router. The environmental temperature should be within +5 ~ +35 degrees Celsius. -
Page 8: Product Layout
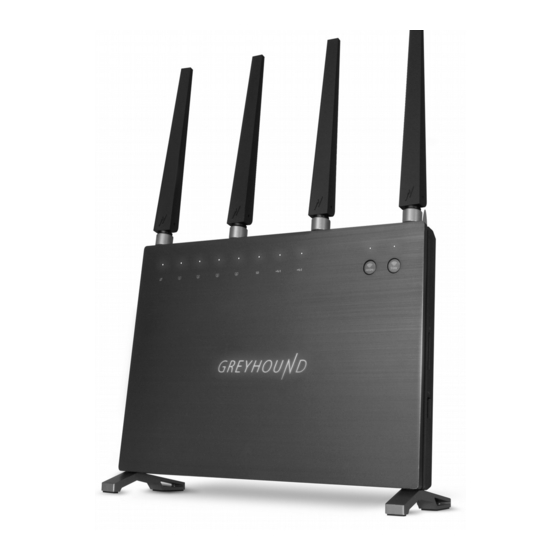
Product Layout Port Description S/PDIF connector Connect an optical TOSLINK cable for audio output 3.5mm connector Connect a 3.5mm audio jack cable for audio output USB Port Connect a USB device to this port LAN (Black Connect your PCs or network devices to these ports WAN (Grey) Connect your ADSL/Cable modem to this port Power button... - Page 9 Backlabel and Network Details Folder The Network Details Folder describes the IP address, login details, network name, security code and OPS button functionality. Button Description OPS button Press for 2 seconds for WPS/OPS mode Press for 2 seconds or until the Greyhound logo on the front Reset button starts flashing.
- Page 10 LED Definition As shown from the top to the bottom. Port Description Power Shows the device is turned on. Shows the WAN cable is connected. Shows the cable is connected. Shows the cable is connected. Shows the cable is connected. Shows the cable is connected.
- Page 11 Network and System Requirements To begin using the router, make sure you meet the following as minimum requirements: Network Requirements An Ethernet-based broadband modem Computer with the following: Windows®, Macintosh, or Linux-based operating system Web-based Configuration An installed Ethernet adapter or wireless adapter Supported Browsers: Internet Explorer 9 or higher Firefox...
-
Page 12: Setup Your Router
Setup your Router You can place the router on a desk or other flat surface, or you can mount it on a wall. For optimal performance, place your router in the center of your home (or your office) in a location that is away from any potential source of interference, such as a metal wall or microwave oven. -
Page 13: Setup Your Computer
Click on the icon for wireless connectivity. This is usually located in the System Tray, next to the clock. Select the Sitecom network. The correct network name can be found on the sticker on bottom of the router, or in the Network Details Folder. ... - Page 14 Click on the icon for wireless connectivity. This is usually located in the System Tray, next to the clock. Select the Sitecom network. The correct network name can be found on the sticker on bottom of the router, or in the Network Details Folder. ...
- Page 15 Click on the icon for wireless connectivity. This is usually located in the System Tray, next to the clock. Select the Sitecom network. The correct network name can be found on the sticker on bottom of the router, or in the Network Details Folder. ...
-
Page 16: Login To Your Router
Login to your Router LOGIN procedure • OPEN your browser (e.g. Internet Explorer). • Type http://sitecom.router in the address bar and press [Enter]. Alternatively, type http://192.168.0.1 in the address bar and press [Enter] . You’ll see the following screen: •... -
Page 17: Configure Your Internet Connection
Configure your Internet connection From the menu, select “Advanced Mode”. From the top menu, select “Interfaces” and then “WAN” for configuring IPv4 connections. - Page 18 Depending on the chosen setting, you may need to enter your user name and password, MAC address or hostname in the following window. After you have entered the correct information, click Save & Apply.
- Page 19 IPv6 Configuration The IPv6 (Internet Protocol version 6) section is where you configure your IPv6 Connection type. From the top menu, select “Interfaces” and then “WAN6” for configuring IPv6 connections. IPv6 Connection Type There are several connection types to choose from: Static IPv6, Autoconfiguration, 6RD and Link-local only.
-
Page 20: Configure Your Router - Basic Mode
Configure your Router – Basic Mode This is the page you see when first logging in to the web interface. It contains easily accessible buttons that allow you to look at or modify the most commonly used features, laid out in a simple page. - Page 21 Wi-Fi settings On this page you can see the network name (SSID) and password for both the 2.4GHz and 5GHz. By clicking the ‘Edit’ button you can enable or disable the Wi-Fi signal and security, change the network name and change the password. Click ‘Apply’ to save the modifications.
- Page 22 Guest Network Settings The Guest network is a separate network that only allows an internet connection. There is no interaction between devices connected on the Guest network, as well as between the Guest network and the regular Wi-Fi network. On this page you can see the network name (SSID) and password for both the 2.4GHz and 5GHz Guest network.
- Page 23 OPS Activation On this page you can activate the OPS/WPS function of the router. By pushing either of the buttons, the router starts transmitting the WPS beacon. You can also activate the function by pushing the physical buttons on the router as described a couple of pages back. After clicking the button you can connect your client to the network without entering a password.
- Page 24 Storage USB/SD On this page you can activate the various functions for the USB and/or SD card connections that are present on the Greyhound router. ‘Storage Settings’ shows the devices that are connected to the USB and/or SD Card connections. By clicking the various options you can enable or disable the feature. Sharing : By selecting this feature you enable the SMB server.
- Page 25 USB ports on the Greyhound router. Doing this results in the printer becoming a network device, so every client device on the network can print to this printer. The Sitecom USB Control Center software is used for this, which is described further down in this manual.
- Page 26 Audio / Music Player On this page you can configure the built-in audio stream functionality. The Greyhound supports both Apple AirPlay and DLNA. After enabling the feature, you can assign a device name. This is the name that will be shown in the list of available output devices on an AirPlay/DLNA compatible player.
- Page 27 StreamBoost Technology On this page you can modify the StreamBoost settings. StreamBoost is automatic network bandwidth management / traffic shaping technology. It intelligently manages network bandwidth and latency, giving each application the bandwidth it needs for the best possible user experience. When the page is opened for the first time, StreamBoost tries to detect the speed of the internet connection by running a speedtest.
- Page 28 Firmware update On this page you can view the current firmware version that’s installed in the router. It will also show the available version on our update server. The ‘View Changelog’ button shows the changes that have been made in the firmware version that’s available on our update server.
-
Page 29: Configure Your Router - Advanced Mode
Configure your Router – Advanced Mode By clicking the ‘Advanced Mode’ button you’ll enter this mode. The Advanced Mode allows for a more extensive configuration of the various features of the router. Home The System status section allows you to monitor the current status of your router, the UP time, hardware information and serial number as well as firmware version information is displayed here. -
Page 30: Wi-Fi Settings
Wi-Fi Settings You can set parameters that are used for the wireless stations to connect to this router for the 2.4 GHz radio or 5 GHz radio. The parameters include Mode, ESSID, Channel Number and Associated Client, amongst others. Wi-Fi Overview On this page you can enable or disable the Wireless radios separately, including the Guest network. - Page 31 Wi-Fi settings – Device Configuration • Green Mode: This mode dynamically adjusts the system's Wi-Fi transmit power depending on the distance between the router and the client device. • Band Steering: Band steering is a technology that detects whether or not the wireless client is dual-band capable, and if it is, it will push the client to connect to the less congested 5GHz network.
- Page 32 • DTIM Period: DTIM stands for Delivery traffic indication map or message and is an additional message added after the normal beacon broadcast by your router or access point. Depending on the timing set for your router, the router “buffers” broadcast and multicast data and lets clients know when to “wake up”...
- Page 33 Wi-Fi settings – Interface Configuration • ESSID: This is the name of the wireless signal which is broadcasted. All the devices in the same wireless LAN should have the same SSID. • Hide ESSID: Hides the network name (SSID) from being broadcast publicly. •...
- Page 34 Disable When you choose to disable encryption, it is very insecure to use the router. When you select 64-bit or 128-bit WEP key, you have to enter WEP keys to encrypt data. You can generate the key by yourself and enter it. You can enter four WEP keys and select one of them as a default key.
- Page 35 Group Key Update Interval: Enter the amount of time before the group key used for broadcast and multicast data is changed (3600 is default). Passphrase: Enter a Wi-Fi password (key/passphrase). The password must be between 8- 63 characters. WPA-/WPA2-/WPA Mixed-Enterprise Wi-Fi Protected Access (WPA) is an advanced security standard.
- Page 36 MAC Filter This wireless router supports MAC Address Control, which prevents unauthorized clients from accessing your wireless network. • Enable wireless access control: Enables the wireless access control function. You can choose between ‘Allow listed only’ or ‘Allow all except listed’. •...
- Page 37 Wi-Fi - Guest Network Guest Network Access provides secure Wi-Fi access for guests to share your home or office network. When you have visitors in your house, apartment, or workplace, you can enable the guest network for them. You can set different access options for Guest Network users, which is very effective to ensure the security and privacy of your main network.
- Page 38 WiFi – OPS One Push Setup (OPS) is the simplest way to establish a connection between the wireless clients and the wireless router. You don’t have to select the encryption mode and fill in a long encryption passphrase every time when you try to setup a wireless connection. You only need to press a button on both wireless client and wireless router, and OPS will do the rest for you.
- Page 39 • OPS via PIN: You can fill-in the PIN code of the wireless device and press the button to start the OPS process. The router will wait for the OPS/WPS request from the wireless device within 2 minutes.
-
Page 40: Interface Settings
Interface Settings Interfaces – Overview On this page you can see the various wired connections of your router. You can also connect and disconnect the WAN port to troubleshoot your internet connection. By clicking ‘Edit’ you’ll enter the settings page. - Page 41 DHCP lends an IP address to your LAN clients. The DHCP will change your LAN client’s IP address when this time threshold period is reached. • Domain Name: You can specify a Domain Name for your LAN or just keep the default (sitecom.router).
- Page 42 Static DHCP IP If you want a client to always have the same IP address assigned, you can create a DHCP reservation. The router will assign the IP address only to that client. This IP address must be within the DHCP IP Address Range specified above, under DHCP Server. Click the + sign to add a client to the list.
- Page 43 Interfaces – WAN Depending on the chosen setting, you may need to enter your user name and password, MAC address or hostname in the following window. After you have entered the correct information, click Save & Apply.
- Page 44 Interfaces – WAN6 IPv6 Connection Type There are several connection types to choose from: Static IPv6, Autoconfiguration, 6RD and Link-local only. If you are unsure of your connection method, please contact your IPv6 Internet Service Provider. Static IPv6 Mode This mode is used when your ISP provides you with a set IPv6 addresses that does not change. The IPv6 information is manually entered in your IPv6 configuration settings.
- Page 45 Interfaces – Switch A VLAN is a switched network that is logically segmented by function, project team, or application, without regard to the physical locations of the users. VLANs have the same attributes as physical LANs, but you can group end stations even if they are not physically located on the same LAN segment.
- Page 46 Interfaces – Routes Static routing is a form of routing that occurs when a router uses a manually-configured routing entry, rather than information from a dynamic routing traffic. Unlike dynamic routing, static routes are fixed and do not change if the network is changed or reconfigured. ...
-
Page 47: Streamboost
StreamBoost StreamBoost is automatic network bandwidth management / traffic shaping technology. It intelligently manages network bandwidth and latency, giving each application the bandwidth it needs for the best possible user experience. StreamBoost – Priorities You can select the priority of each device on your local network. The priority control buttons are the arrows within the boxes to the left of each icon representing a device. - Page 48 StreamBoost – Up Time Here you can view the Active Time (in minutes) and see what applications are being used. You can select the time frame from the drop-down menu. Choose from last month, last week, or last day.
- Page 49 StreamBoost – Downloads Here you can view the type of traffic that is mostly used on your network, including the consumed bandwidth.
- Page 50 StreamBoost – Consumption Per Device Here you can view the bandwidth consumption per device. You can click on the device to highlight it. You can select the time frame from the drop-down menu.
- Page 51 StreamBoost – Consumption per Flow Here you can view the bandwidth consumption per traffic type. You can click on traffic type to highlight it. You can select the time frame from the drop-down menu.
-
Page 52: File System Settings
File System Settings File Systems – Mount Points On this page you will find all the storage points that the OpenWRT operating system uses. Under the ‘Mount Points’ section you’ll find the attached USB storage devices. - Page 53 File Systems – FTP On this page you can configure the users that have access to the FTP server. The default admin user already has access. Add User: Click here to add a new user. You can enter a username and a password and choose to assign ‘Read’, ‘Read/Write’, ‘Read/Delete’...
- Page 54 File Systems – Network Shares On this page you can edit the settings for the SMB server. Server name: Enter a name for the network share. Workgroup: If you wish to add the share to your workgroup enter the workgroup name here.
- Page 55 File Systems – Transmission On this page you can edit the settings for the Bittorrent client Transmission. Transmission has its own web interface that can be opened via the ‘Open Web Interface’ button. Preallocation: Whether to fill the space for chunks not yet downloaded with "0" (helps avoiding fragmentation).
- Page 56 Peer port: The fixed port transmission listens to incoming connections. Alternative speed enabled: Whether transmission should use two speed limit settings. RPC authentication required: Whether transmission-daemon should be remote controlled by a GUI on a host machine.
-
Page 57: App Settings
App Settings This page allows you to install OpenWRT packages. With this unique feature you can easily add or remove functionality to your router, just like installing and uninstalling applications on your computer. For more information on this, please go to https://wiki.openwrt.org/doc/packages. You can add packages by typing in the URL into the ‘Download and install package’... -
Page 58: Firewall Settings
Firewall Settings Firewall – Enable The router provides extensive firewall protection by restricting connection parameters, thus limiting the risk of hacker attacks, and defending against a wide array of common Internet attacks. However, for applications that require unrestricted access to the Internet, you can configure a specific client/server as a Demilitarized Zone (DMZ). - Page 59 Firewall – DMZ If you have a client PC that cannot run an Internet application (e.g. Games) properly from behind the NAT firewall, then you can open up the firewall restrictions to unrestricted two-way Internet access by defining a DMZ Host. The DMZ function allows you to re-direct all packets going to your WAN port IP address to a particular IP address in your LAN.
- Page 60 Firewall – DoS The Broadband router's firewall can block common hacker attacks, including Denial of Service, Ping of Death, Port Scan and Sync Flood. If Internet attacks occur the router can log the events. Ping of Death: Protection from Ping of Death attacks ...
- Page 61 Firewall – Access You can restrict users from accessing certain Internet applications/services (e.g. Internet websites, email, FTP etc.). Access Control allows users to define the traffic type permitted in your LAN. You can control which PC client can have access to these services. ...
- Page 62 Firewall – URL block You can block access to some Web sites from particular PCs by entering a full URL address or just keywords of the Web site. Enable: URL Blocking Enable/disable URL Blocking Add URL/keyword: Fill in “URL/Keyword” and then click “Add”. You can enter the full URL address or the keyword of the web site you want to block.
- Page 63 Firewall – Virtual Server Use the Virtual Server function when you want different servers/clients in your LAN to handle different service/Internet application type (e.g. Email, FTP, Web server etc.) from the Internet. Computers use numbers called port numbers to recognize a particular service/Internet application type.
- Page 64 Firewall – ALG An application gateway is an application program that runs on the router. When a client program establishes a connection to a destination service, it connects to an application gateway, or proxy. The client then negotiates with the proxy server in order to communicate with the destination service.
-
Page 65: Task Manager
Task manager System Logs On this page you can find the system log. If you’re using an external logging server you can enable the ‘Remote Log’ functionality and enter the IP Address of the server in the appropriate field. - Page 66 Kernel log Here you can view the messages the kernel puts out. Processes Here you can see the running processes. There are 3 buttons to alter the functionality of the process. Hang up: This signal is used to report the termination of the controlling process on a terminal to jobs associated with that session;...
- Page 67 Kill: Used to cause immediate program termination. It cannot be handled or ignored, and is therefore always fatal. It is also not possible to block this signal. Realtime Load On this page you can view the actual load on the entire network. The page shows 3 graphs in 3 different colors.
- Page 68 Initscripts On this page you can see the scripts controlling the various functions of the router. There are 4 buttons available. Enable/Disable: You can choose whether you want the service to be automatically started during bootup. Start: Start the service. ...
- Page 69 Scheduled Tasks This window allows you to edit the crontab file. This contains the schedule of cron entries to be run at specified times. The commands that can be used are standard Unix commands.
-
Page 70: Administration
Administration Administration – Time Zone The Time Zone allows your router to base its time on the settings configured here, which will affect functions such as Log entries and Firewall settings. You can choose to set the time manually or via a NTP server. ... - Page 71 Administration – Administration You can change the password required to log into the router's system web-based management. Passwords can contain 0 to 12 alphanumeric characters, and are case sensitive. Administrator Username: By default this is ‘admin’. Current Password: Fill in the current password to allow changing to a new password. ...
- Page 72 Administration – Backup/Flash Firmware Use the "Generate archive" button to save the current configuration to a file on your PC. You can then use the "Restore backup" button to restore the saved configuration to the router. Alternatively, you can use the "Reset to Factory Defaults” button to force the router to perform a power reset and restore the original factory settings.
- Page 73 Administration – SSH SSH is a cryptographic (encrypted) network protocol to allow remote login and other network services to operate securely over an unsecured network. Interface: Select the interface on which you want the SSH service to be active. ...
- Page 74 Administration – LED Configuration On this page you can switch the LEDs on the router on or off. Power: This switches of the lighting behind the Greyhound logo. LAN: This switches of all 4 LAN LEDs. WLAN-2.4GHz: This switches off the 2.4GHz WLAN LED. ...
-
Page 75: Toolbox Settings
Toolbox Settings Toolbox – DDNS DDNS allows you to map the static domain name to a dynamic IP address. You must get an account, password and your static domain name from the DDNS service providers. This router supports DynDNS, no-ip and other common DDNS service providers. ... - Page 76 Toolbox – UPnP With UPnP, all PCs in your network will discover this router automatically, so you don’t have to configure your PC and it can easily access the Internet through this router. UPnP Feature: You can enable or Disable the UPnP feature here. After you enable the UPnP feature, all client systems that support UPnP, like Windows, can discover this router automatically and access the Internet through this router without having to configure anything.
- Page 77 Toolbox – Remote Access The remote management function allows you to designate a host in the Internet the ability to configure the Broadband router from a remote site. Enter the designated host IP Address in the Host IP Address field. ...
-
Page 79: Addendum A: Netusb
Addendum A: NetUSB The netUSB functionality of your router requires additional software to work with your computer. The following section will describe how the software can be installed and used. Windows Insert the CD-ROM that was included with your router and select install utility from the cd- menu. - Page 80 Enter your username and organization if applicable and click Next to continue. Choose a folder where the software should be installed or keep it to default and click Next to continue. The software is now ready to be installed, Click Install to continue.
- Page 81 Once the installation is finished the software will inform you. If “Launch Sitecom USB Device Server” checked the software will automatically be launched after you clicked Finish.
- Page 82 MacOS Insert the CD-ROM that was included with your router and select “Install” from the cd-menu. Click Install to continue installation. Enter your Mac username and password and click OK to continue. Once the installation is finished the software will inform you and requires to restart the system.
- Page 83 Connect & Disconnect “NetUSB” allows you to use USB printers when they’re actually connected to the Sitecom USB server. The “connect” operation is a software operation that simulates an actual USB device plug-in. Therefore, when you do a “connect” operation in the Control Center, the PC can detect a USB device’s plug-in, although actually you do not plug in any USB device to your PC.
- Page 84 Connect the USB device to the USB port of the router. Run the Control Center. In the “USB MFP Server List” window, you can see the host names and IP addresses all of the Sitecom servers (in blue) on the network, as shown below. ...
- Page 85 PC will automatically detect that the USB device is plugged-in. On the right side of the Windows Task Bar, you can see the information of the new device. Continue to follow the user manual of the USB device to do the rest jobs of installation, until the driver installation has finished.
- Page 86 NetUSB Printing using Auto-Connect Printer After the driver is installed, you can see a newly created printer in the Control Panel. Follow the steps below to perform NetUSB printing. In the Control Center, click the MFP server that has the desired printer (or MFP) attached.
- Page 87 Note: Under the “Auto-Connected Printer” setting, it is not necessary to manually press the “Connect” button when printing. If you press the “Connect” button for printing, please make sure to click “Disconnect” button after you finish the printing. Otherwise, other users cannot print properly.
- Page 88 NetUSB Scanning using Network Scanning In the Control Center, click the MFP server that has the desired MFP attached. Click the desired MFP. Click the “Network Scanner” button. Then you can see that the Control Center will automatically do a “connect” operation.
- Page 89 Follow the usual steps to do scanning.
-
Page 90: Addendum B: Declaration Of Conformity
Addendum B: Declaration of Conformity... -
Page 92: Addendum C: Gnu/Gpl Information
Addendum C: GNU/GPL Information Parts of the firmware of the Greyhound Wireless Broadband Router are subject to the GNU general public license. Licensing Information This product includes third-party software licensed under the terms of the GNU General Public License. You can modify or redistribute this free software under the terms of the GNU General Public License. - Page 93 etherwake http://ftp.debian.org/debian/pool/main/e/etherwake 1.09 GPL V2 ethtool http://sourceforge.net/projects/gkernel/ 3.4.1 GPL V2 Expat http://expat.sourceforge.net/ 2.0.1 GPL V2 Fcgi http://www.fastcgi.com/dist/ 2.4.0 GPL V2 fdk-aac http://downloads.sourceforge.net/opencore-amr/ 0.1.1 GPL V2 ffmpeg http://ffmpeg.org/releases/ 1.0.1 GPL V2 file ftp://ftp.astron.com/pub/file/ 5.11 GPL V2 freetype http://www.freetype.org/ 2.4.8 GPL V2 http://gcc.gnu.org/ 4.6.3 GPL V2...
- Page 94 libgpg-error http://www.gnupg.org/related_software/libgpg-error/ GPL V2 libid3tag http://sourceforge.net/projects/mad/files/libid3tag/ 0.15.1b GPL V2 libiwinfo https://dev.openwrt.org/browser/trunk/package/ GPL V2 Libjpeg http://www.ijg.org/files/ GPL V2 Libmad http://www.underbit.com/products/mad/ 0.15.1b GPL V2 libnetfilter_conntrack http://www.netfilter.org/projects/libnetfilter_conntrack/ 0.9.1 GPL V2 libnfnetlink http://netfilter.org/projects/libnfnetlink/ 1.0.0 GPL V2 libnl-tiny https://github.com/sabotage-linux/libnl-tiny GPL V2 Libogg http://sourceforge.net/projects/libogg 1.1.4 libpcap http://www.tcpdump.org/release/ 1.1.1 GPL V2...
- Page 95 mtd-utils http://processors.wiki.ti.com/index.php/MTD_Utilities 1.4.5 GPL V2 mysql http://dev.mysql.com/ 5.1.53 GPL V2 ncurses (terminfo) http://www.gnu.org/software/ncurses/ GPL V2 netatalk http://netatalk.sourceforge.net 2.2.1 netifd git://nbd.name/luci2/netifd.git 2013/7/16 GPL V2 ngrep http://ngrep.sourceforge.net 1.45 ntfs-3g http://www.tuxera.com/community/ntfs-3g-download 2011.4.12 GPL V2 odhcp6c https://github.com/sbyx/odhcp6c.git 2014/12/10 GPL V2 opencore-amr http://sourceforge.net/projects/opencore-amr/ 0.1.3 Apache2 openssl http://www.openssl.org/source/ 1.0.2a...
-
Page 96: Availability Of Source Code
CD/DVD that is shipped with your product. To get a copy of the software, please send an e-mail to gpl-request@sitecom.com or write to Sitecom Europe B.V., P.O. Box 12040, 3004GA Rotterdam, The Netherlands. Please specify the device type and version number when contacting us to ensure smooth handling of your request. - Page 97 Version 2, June 1991 Copyright (C) 1989, 1991 Free Software Foundation, Inc. 59 Temple Place - Suite 330, Boston, MA 02111-1307, USA Everyone is permitted to copy and distribute verbatim copies of this license document, but changing it is not allowed. Preamble The licenses for most software are designed to take away your freedom to share and change it.
- Page 98 any part thereof, to be licensed as a whole at no charge to all third parties under the terms of this License. c) If the modified program normally reads commands interactively when run, you must cause it, when started running for such interactive use in the most ordinary way, to print or display an announcement including an appropriate copyright notice and a notice that there is no warranty (or else, saying that you provide a warranty) and that users may redistribute the program under these conditions, and telling the user how to view a copy of this License.
-
Page 99: End Of Terms And Conditions
7. If, as a consequence of a court judgment or allegation of patent infringement or for any other reason (not limited to patent issues), conditions are imposed on you (whether by court order, agreement or otherwise) that contradict the conditions of this License, they do not excuse you from the conditions of this License. -
Page 100: Sitecom Europe Bv
Revision 1.0 © Sitecom Europe BV 2016 Note: All the information contained in this manual was correct at the time of publication. However, as our engineers are always updating and improving the product, your device’s software may have a slightly different appearance or modified functionality than presented in...
Need help?
Do you have a question about the Greyhound AC2600 and is the answer not in the manual?
Questions and answers