Table of Contents
Advertisement
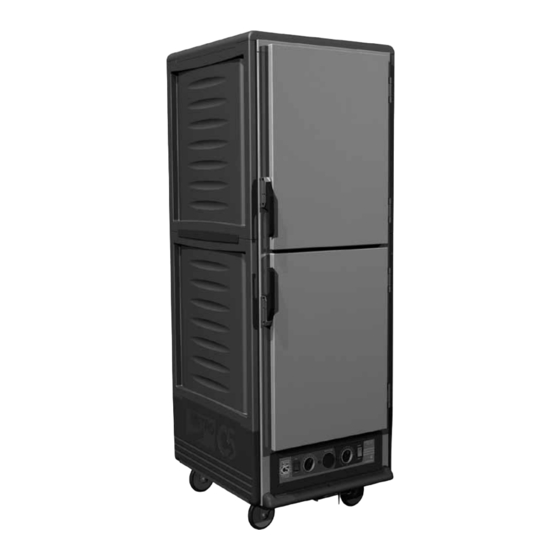
3 Series
InterMetro Industries Corporation
Wilkes-Barre, PA 18705
1-800-992-1776 www.metro.com
1 Series
3 Series
1 Series
Heated
Cabinets
INSTRUCTIONS
FOR USE
Differences on voltage, amps or
wattage are listed with bold text in
replacement part descriptions.
This manual covers both 120V
and 220-240V cabinets, confirm
voltage before selecting and
ordering parts.
Metro Heated Cabinets are for
Hot Food Holding applications only
TM
Advertisement
Table of Contents

Related Manuals for Metro DataVac C5 1 Series


Summary of Contents for Metro DataVac C5 1 Series
- Page 1 3 Series 1 Series Heated Cabinets INSTRUCTIONS FOR USE Differences on voltage, amps or wattage are listed with bold text in replacement part descriptions. This manual covers both 120V and 220-240V cabinets, confirm voltage before selecting and ordering parts. 3 Series 1 Series Metro Heated Cabinets are for Hot Food Holding applications only...
- Page 2 3 & 1 SERIES BASIC CABINET SETUP Refer to DATA PLATE for electrical requirements. Cabinets rated at 120V 1440W must be plugged into either a 15 amp or 20 amp 125VAC receptacle. Cabinets rated at 120V 2000W must be plugged into a 20 amp 125VAC receptacle and used on an individual branch circuit.
- Page 3 Table of ConTenTS SECTION PAGE I. Basic Operating Guidelines ..Inside Front Cover II. Safety Instructions ..........1 III. Identifying Your Cabinet ........2 IV. Installation & Set-up ........... 3 V. Product Features ..........7 VI. Operating Instructions ........8 VII. Care & Maintenance .......... 10 VIII.
- Page 4 IDenTIfYInG YoUR CabIneT For future reference, record the cabinet model number & manufactured date found on the date plate located at rear of cabinet. Also record the module serial number located inside the cabinet on module right-hand corner. Model number: Cabinet manufactured date: Module serial number: Module manufactured date:...
- Page 5 MoDUle SeRIal nUMbeR label Front Bumper Stainless Steel Drip Trough Plastic Water pan Drip Pan InSTallaTIon anD SeT-UP 1. Check for Shipping Damage: Check the packaging and cabinet for shipping damage after unloading the unit, and after removing all the packaging. 2.
- Page 6 InSTallaTIon anD SeT-UP (continued) SlIDe InSTallaTIon The universal rack uprights or lip load slides have been installed at the factory. If removed for cleaning, reinstall by hanging them on the shoulder rivets on the side walls of the cabinet. TOP VIEW SlIDe PoSITIon To MaXIMIZe 3"...
- Page 7 InSTallaTIon anD SeT-UP (continued) CoRReCT oRIenTaTIon of lIP loaDeD SlIDe RaCKS Full Height 3/4 Height 1/2 Height Full Height 2-piece Construction 1-piece Construction 1-piece Construction 1-piece Construction Part No: C5-13-L-9D Part No: C5-13-L-7 Part No: C5-13-L-5 Part No: C5-13-L-9F (For Dutch Door Units) (For Full Height Door Units) CoRReCT oRIenTaTIon of fIXeD WIRe SlIDeS Full Height...
- Page 8 ReVeRSInG THe DooRS The door on your cabinet can be reversed to accommodate a right- or left-hand opening. The cabinet has been shipped with the hinges mounted on the right-hand side. To reverse, follow the instructions listed below: 1. With the door in the closed position, remove the hinge pin by driving it out using a hammer and a drive pin or small diameter screwdriver.
- Page 9 PRoDUCT feaTUReS • The module has been placed at the base of the cabinet for easy accessibility and efficient operation. • Clearly-marked control panel for easy viewing allows climate adjustments without opening the door. • Removable stainless steel water pan (located inside cabinet).
-
Page 10: Operating Instructions
InSTRUCTIonS Power-Up & Pre-Heat Your C5 1 SerieS or 3 SerieS Cabinet maY be equipped with Several different moduleS: C5 1 SERIES C5 3 SERIES COMBINATION PROOF & HOLD MODULE COMBINATION PROOF & HOLD MODULE HOLDING MODULE HOLDING MODULE... - Page 11 • Your C5 1 Series or 3 Series cabinet is capable of creating some humid air. As you operate the cabinet and open and close the door(s), condensation may form on the inside surfaces of the cabinet. Some dripping of water may occur to the outside of the cabinet particularly at the door seals.
- Page 12 CaRe & MaInTenanCe Cleaning The Cabinet Warning: Unplug the cabinet before cleaning or servicing. Do not wash the cabinet with a water jet or high-pressure water. Warning: Allow the unit to cool before cleaning, as the interior of the cabinet may be hot enough to burn. Also, allow the water in the pan to cool before removal.
- Page 13 baSIC TRoUbleSHooTInG Module operation basics: When the power switch is on, the blower is always energized, circulating air, and the digital thermometer is always displaying the cabinet temperature. A thermostat controls whether an element will be energized depending on the thermostat setting and the air temperature it is sensing. The control knob is used to change the thermostat setting.
- Page 14 baSIC TRoUbleSHooTInG (continued) i. Blower wiring is faulty or disconnected. ii. Blower needs replacing. Check blower. iii. The thermostat or blower may have failed and the thermal overload device is controlling the temperature. Stop using the cabinet immediately and contact a factory-approved service agent. 3.
- Page 15 SeRVICe and RePlaCeMenT PaRTS C5 1 & 3 SeRIeS CabIneTS (boTH 120V & 220-240V) Replacement Replacement ITEM # Part No. Description ITEM # Part No. Description CABINET BODY OUTSIDE POLY PANELS ON C5 3 SERIES CABINETS RPC5-19-FCDR COMPLETE FULL HEIGHT CLEAR DOOR RPC3-TPNL-BU BLUE TOP PANEL —...
- Page 16 SeRVICe and RePlaCeMenT PaRTS (continued) foR C5 1 & 3 120V CabIneT MoDUleS* MOISTURE MODULE TYPE: COMBO HOLDING PROOFER COMBO HOLDING HOLDING MODULE ELECTRICAL RATING: 2000W 2000W 1440W 1440W 1440W 2000W ITEM# PART # DESCRIPTION RPC13-375 POWER SWITCH (RED) RPC13-128 SELECTOR SWITCH (WHITE) RPC06-913 THERMOSTAT KNOB...
- Page 17 SeRVICe and RePlaCeMenT PaRTS (continued) foR C5 1 & 3 SeRIeS 220-240V CabIneT MoDUleS* MOISTURE MODULE TYPE: COMBO HOLDING PROOFER HOLDING ITEM# PART # DESCRIPTION RPC13-375 POWER SWITCH (RED) RPC13-128 SELECTOR SWITCH (WHITE) RPC06-913 THERMOSTAT KNOB RPC13-234 THERMOSTAT RPC09-213 THERMOSTAT MOUNTING CUP RPC13-246 AMBER INDICATOR LIGHT 36** RPC13-248...
- Page 18 SeRVICe and RePlaCeMenT PaRTS (continued) C5 1 Series Cabinet Replacement Parts Diagram (both 120V & 220-240V) Plastic Drip Pan FOR RETURN CABINET PACKAGING (Goes Under Cabinet SEE ITEM #57, PAGE 13. Bumper/Drip Trough) *Refer to Pages 4 & 5 for slide identification. All slides sold in pairs.
- Page 19 SeRVICe and RePlaCeMenT PaRTS (continued) C5 3 Series Cabinet Replacement Parts Diagram (both 120V & 220-240V) NOTE: Replacement panels are ordered by color. See chart on page 13. FOR RETURN CABINET PACKAGING SEE ITEM #57, PAGE 13. Plastic Drip Pan (Goes Under Cabinet Bumper/Drip Trough) *Refer to Pages 4 &...
- Page 20 SeRVICe and RePlaCeMenT PaRTS (continued) (For 120V parts see Page 14 & for 220-240V parts see Page 15) COMBO MODULE INTAKE COVER STRAIGHT PLUG CORD SHOWN HEAT THERMOSTAT BULB & THERMOMETER SENSOR AIR DISCHARGE COVER MODULE CHASIS CONTROL PANEL STAINLESS STEEL WATER PAN BOTTOM COVER...
- Page 21 SeRVICe and RePlaCeMenT PaRTS (continued) (For 120V parts see Page 14 & for 220-240V parts see Page 15) HOLDING MODULE STRAIGHT PLUG CORD SHOWN AIR INTAKE COVER HEAT THERMOSTAT BULB & THERMOMETER SENSOR AIR DISCHARGE MODULE COVER CHASIS CONTROL PANEL STAINLESS STEEL WATER PAN BOTTOM...
- Page 22 SeRVICe and RePlaCeMenT PaRTS (continued) (For 120V parts see Page 14 & for 220-240V parts see Page 15) PROOFING MODULE STRAIGHT PLUG AIR INTAKE CORD SHOWN COVER HEAT THERMOSTAT BULB & THERMOMETER SENSOR AIR DISCHARGE COVER MODULE CHASIS CONTROL PANEL STAINLESS STEEL WATER PAN BOTTOM...
- Page 23 SeRVICe and RePlaCeMenT PaRTS (continued) (For 120V parts see Page 14 & for 220-240V parts see Page 15) MOISTURE HOLDING MODULE STRAIGHT PLUG CORD SHOWN AIR INTAKE COVER HEAT THERMOSTAT BULB & THERMOMETER SENSOR MODULE AIR DISCHARGE CHASIS COVER CONTROL PANEL STAINLESS STEEL WATER PAN...
- Page 24 SeRVICe and RePlaCeMenT PaRTS (continued) WIRING DIAGRAM — COMBO MODULE STRAIN RELIEF POWER CORD WIRE NUT GROUND THERMOMETER SENSOR BLACK GREEN HEAT THERMOSTAT BULB WHITE BLOWER WIRE NUT 34" BLACK 26" BLACK THERMAL CUT-OUT 1360 OR 1950 W ELEMENT 675 W ELEMENT AIR DUCT 30"...
- Page 25 SeRVICe and RePlaCeMenT PaRTS (continued) WIRING DIAGRAM — HOLDING MODULE STRAIN RELIEF POWER CORD WIRE NUT GROUND BLACK GREEN WHITE WIRE NUT THERMOMETER SENSOR BLOWER HEAT THERMOSTAT BULB THERMAL CUT-OUT 25" BLACK 1360 OR 1950 WATT ELEMENT 19" BLACK 30" 30"...
- Page 26 SeRVICe and RePlaCeMenT PaRTS (continued) WIRING DIAGRAM — PROOFING MODULE POWER CORD GRN GROUND SCREW STRAIN RELIEF GREEN BLACK WHITE THERMOMETER SENSOR BLOWER MOTOR HEAT THERMOSTAT BULB THERMAL CUT-OUT 10" BLACK 675 W ELEMENT 30" BLACK 27" BLACK AIR DUCT 25"...
- Page 27 SeRVICe and RePlaCeMenT PaRTS (continued) WIRING DIAGRAM — MOISTURE HOLDING MODULE POWER CORD GRN GROUND SCREW STRAIN RELIEF WIRE NUT GREEN BLACK WHITE WIRE NUT THERMOMETER SENSOR BLOWER HEAT THERMOSTAT BULB THERMAL CUT-OUT 27" BLACK 30" BLACK 27" BLACK 1360 W ELEMENT AIR DUCT 25"...
- Page 28 InterMetro Industries Corporation (hereinafter referred to as “Seller”) warrants to the 09/13...
- Page 29 Thank you for purchasing a Metro C5 Controlled Temperature Cabinet. We are certain you will be more than satisfied with its quality and performance. Please fill in the warranty information space below so we may register your warranty. Also, so that we may learn more about our customers and hopefully be of continued service in the future, please take a moment to fill in the customer information space below.
- Page 30 Staple Here...
- Page 32 L01-430 InterMetro Industries Corporation Rev. J 09 North Washington Street, Wilkes-Barre, PA 18705 Information and specifications are subject to change without notice. Please confirm at time of order. For product information call: 1-800-992-1776 Visit our web Site: www.metro.com...
Need help?
Do you have a question about the C5 1 Series and is the answer not in the manual?
Questions and answers