Table of Contents
Advertisement
Quick Links
®
Sprint PCS
Service
Sprint PCS Vision
SM
Smart Device
Treo™ 650 by palm
www.sprint.com
© Sprint Nextel. All rights reserved. No reproduction in whole
or in part without prior written approval. Sprint, the "Going
Forward" logo and other trademarks are trademarks of Sprint
Nextel.
Printed in the U.S.A.
PN: 406-10149-02
Advertisement
Table of Contents

Related Manuals for Palm 650


Summary of Contents for Palm 650
- Page 1 Sprint PCS Service Sprint PCS Vision Smart Device Treo™ 650 by palm www.sprint.com © Sprint Nextel. All rights reserved. No reproduction in whole or in part without prior written approval. Sprint, the "Going Forward" logo and other trademarks are trademarks of Sprint Nextel.
-
Page 3: Table Of Contents
Connecting Your Treo 650 to Your Computer ........ - Page 4 Using Dial-up Networking on Your Treo 650 ........
- Page 5 2D. Managing Applications ..........123 Synchronizing Contacts and Other Information .
- Page 6 3B. Sprint PCS VisionSM—The Basics ........179 Getting Started With Sprint PCS Vision .
- Page 7 Upgrading from Another Palm Powered Device ........
- Page 8 Owner’s Record ..............326 User’s Guide Proprietary Notice .
-
Page 9: Welcome To Sprint
Vision Smart Device through simple, easy-to-follow instructions. Go to Section 1: Getting Started to set up your new device and Sprint PCS Service, then get ready to explore all the advanced features of your Sprint PCS Vision Smart Device Treo™ 650 by Palm. Welcome and thank you for choosing Sprint. -
Page 10: How To Use This Guide
Section 2: Your Sprint PCS Vision Smart Device shows you the basics of your device and service with quick, easy-to-follow instructions. This section also guides you through using the built-in, full-featured, Palm Powered™ organizer that gives you instant access to your Calendar, Tasks, Memos, RealPlayer®, Calculator, and more. -
Page 11: Where To Learn More
Treo 650. While using your Treo 650: Tips for getting the most out of your Treo 650 are available in many of the built- in applications. To view these tips, open an application, open the menus select Options, and then select Tips. - Page 12 Online forums let you consult online user discussion groups to swap information and learn about areas you may not find elsewhere. Visit for details. www.palm.com Sprint Customer Service is where you go with questions about your mobile account or Sprint PCS Service and to contact Sprint for the latest information and help.
-
Page 13: Section 1: Getting Started
Section 1 Getting Started... -
Page 15: Setting Up Your Sprint Pcs Vision
Setting Up Your Sprint PCS Vision Treo™ 650 by Palm In This Section What You Need Inserting the Battery Charging the Battery Section 1A: Setting Up Software ® Software Installation CD S e c ti o n 1 A Smart Device... -
Page 16: What You Need
What You Need You should have received all of the following components in the Treo 650 box: Hardware Treo handset AC adapter charger USB sync cable Headset Sprint® charger adapter Documentation Before You Start Using Your Sprint PCS Vision Smart Device User’s Guide (this book) -
Page 17: Inserting The Battery
Inserting the Battery Press the Battery Door Release button and slide the battery door downward to remove it from your Treo 650. Align the metal contacts on the battery with the contacts inside the battery compartment. Insert the battery into the compartment at a 45 degree angle, and then press it into place. -
Page 18: Charging The Battery
Charging the Battery You must charge your Treo 650 fully before using it. It may not turn on at all when you first remove it from the box. Plug the AC charger into a wall outlet. Connect the charger cable to the bottom of the Treo device. Make sure the arrow on the connector is facing up, towards your Treo screen. - Page 19 Check the indicator light to make sure your Treo 650 is charging. If the battery is fully drained, it may take a few moments for the indicator light to turn on while charging.
- Page 20 Sprint PCS 1900 MHz band. Talk time is slightly lower when roaming on the cellular 800 MHz band. If the battery drains to the point where your Treo 650 doesn’t turn on, the Treo device stores your information safely until you recharge the battery. To avoid draining the battery, we recommend that you charge and synchronize your Treo 650 every day, especially if you use the wireless features of your device often.
- Page 21 Palm OS® applications, keep an eye on the battery level and charge when necessary. If you don’t plan to use the wireless features on your Treo 650 for awhile, you may want to turn off your device (see “Turning Your Device’s Phone On and Off”...
- Page 22 Section 1A: Setting Up Software...
-
Page 23: Setting Up Service
This section walks you through the necessary steps to unlock your device, set up your voicemail, establish passwords, and contact Sprint for assistance with your Sprint PCS Service. Section 1B: Setting Up Service S e c ti o n 1 B Smart Device Treo™ 650 is quick... -
Page 24: Getting Started With Sprint Pcs Service
Getting Started With Sprint PCS Service Determining if Your Device’s Phone is Already Activated If you received your device in the mail or purchased it at a Sprint Store, it probably has already been activated. All you need to do is unlock it. If your phone is not activated, please call Sprint at 1-888-211-4PCS (4727). -
Page 25: Setting Up Your Voicemail
Setting Up Your Voicemail All unanswered calls to your Sprint PCS Vision Phone are automatically transferred to your voicemail, even if your phone is in use or turned off. Therefore, you will want to set up your voicemail and personal greeting as soon as your device’s phone is activated. -
Page 26: Sprint Pcs Account Passwords
Sprint PCS Account Passwords As a Sprint PCS customer, you enjoy unlimited access to your personal account information, your voicemail account, and your Sprint PCS Vision account. To ensure that no one else has access to your information, you will need to create passwords to protect your privacy. -
Page 27: Getting Help
Getting Help Visit Our Website You can get up-to-date information on Sprint PCS Services and Options by signing onto our Website at www.sprint.com When you visit us online, you can Review coverage maps Learn how to use voicemail Access your account information Purchase accessories Add additional options to your service plan Check out frequently asked questions... - Page 28 Receiving Automated Invoicing Information For your convenience, your phone gives you access to invoicing information on your Sprint PCS Account. This information includes balance due, payment received, invoicing cycle, and the number of minutes used since your last invoicing cycle. (Normal airtime usage will apply.) To access automated invoicing information: Press , and then press Phone/Send...
- Page 29 To access Sprint PCS Operator Services: Press , and then press Phone/Send For more information or to see the latest in products and services, visit us online www.sprint.com. Note: Sprint PCS Operator Services may not be available in all Affiliate areas. Section 1B: Setting Up Service...
- Page 30 Section 1B: Setting Up Service...
-
Page 31: Connecting To Your Computer
Connecting to Your Computer In This Section Preparing Your Computer Connecting Your Treo 650 to Your Computer Installing the Synchronization Software on Your Computer Section 1C: Connecting to Your Computer S e c t i o n 1 C... -
Page 32: Preparing Your Computer
Palm® Desktop software or in Microsoft Outlook and then efficiently transfer that information to your Sprint PCS Vision Treo™ 650. At the same time, changes you make on the Treo 650 are transferred to Palm Desktop or to Microsoft Outlook. Even if you manage all your contacts on your Treo 650, synchronization is a great way to back up your information. - Page 33 Available USB port USB sync cable (included with your Treo 650) Mac computers Mac OS X 10.2 –10.3* 128MB of total memory (RAM) 190MB of free hard disk space CD drive Available USB port USB sync cable (included with your Treo 650)
-
Page 34: Connecting Your Treo 650 To Your Computer
Connect the sync cable to the Multi-connector on the bottom of your Treo 650 with the HotSync® button facing up. Do not press the HotSync button until you are instructed to do so. Section 1C: Connecting to Your Computer... - Page 35 Connect the charger cable to the Multi-connector on the sync cable. Multi-connector Section 1C: Connecting to Your Computer...
-
Page 36: Installing The Synchronization Software On Your Computer
Exit any applications that are currently running on your computer, including those running in the background. Insert the Software Installation CD that came with your Treo 650 into the CD drive on your computer. (If you are installing on a Mac, double-click the CD icon on the desktop, and then double-click the palmOneSoftware.pkg icon.) - Page 37 HotSync Button Section 1C: Connecting to Your Computer...
- Page 38 Section 1C: Connecting to Your Computer...
-
Page 39: Section 2: Your Sprint Pcs Vision Smart Device
Section 2 Your Sprint PCS Vision Smart Device... -
Page 41: Learning The Basics
Learning the Basics In This Section Your New Sprint PCS Vision Smart Device Turning Your Device’s Phone On and Off Moving Around the Treo 650 Screen Using the Keyboard Opening Applications Section 2A: Learning the Basics S e c ti o n 2 A... -
Page 42: Your New Sprint Pcs Vision Smart Device
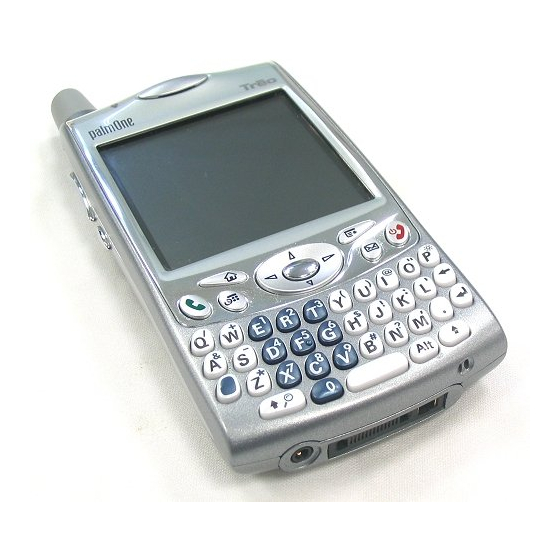
Button 8. Phone/Send Button 7. Calendar Button Indicator Light provides status information for your Treo 650 based on the color of the light and the blink state. Earpiece serves as the handset speaker on your Treo 650. 5-way Navigator lets you move around the Treo 650 screen and select options. - Page 43 Messaging Button opens the Messaging application. If you downloaded and installed Business Connection, this button opens Business Connection. Microphone serves as the mouthpiece on your device’s phone. Calendar Button opens the Calendar application. Phone/Send Button opens the Phone application and dials when a phone number is selected.
- Page 44 Alarm Camera Lens enables you to take pictures using the built-in camera (if included). There are two models of the Treo™ 650: one comes with a camera and the other does not come with a camera. The packaging for your Treo 650 identifies whether a camera is included.
-
Page 45: Speakerphone Feature
Speaker plays ringtones and alarms and serves as the speaker for the speakerphone feature. Note: The Treo 650 speaker includes a large magnet, so be sure not to store your Treo device near credit cards or other items that could become demagnetized. Section 2A: Learning the Basics... - Page 46 Your Device’s Features: Top View 18. Ringer Switch 22. Stylus Ringer Switch controls the ringer setting. See “System Sound Settings” on page 145 for details on changing the settings. Silencing the ringer turns off all system sounds, including alarms. Infrared (IR) Port uses infrared technology to transmit information to and receive information from other infrared-enabled devices that use compatible software.
-
Page 47: Turning Your Device's Phone On And Off
Turning Your Device’s Phone On and Off You can use the Palm OS® features of your Treo 650 independently of the wireless features and applications. Therefore, the screen phone and device are designed to be turned off and on separately. - Page 48 Waking Up the Screen To use the Palm OS features when your phone is off, you need to wake up the screen. You can also turn off your device’s screen without turning off your device’s wireless features. Press Power/End Press Power/End...
-
Page 49: Moving Around The Treo 650 Screen
Moving Around the Treo 650 Screen To move around the Treo 650 screen, you can use the 5-way navigator items on the screen with the stylus. With use, you will find your own favorite way to scroll, highlight, and select menu items. - Page 50 Scrolling Through Screens As on a computer, you scroll on the Treo 650 to move from field to field, or page to page, or in some cases, to highlight an item or option in a list. There are several methods of scrolling:...
- Page 51 Drag the slider of an onscreen scroll bar. Highlighting Items The 5-way lets you highlight items before opening or selecting them. Experiment with using the 5-way to highlight different screen elements. When an onscreen button (OK, Cancel, etc.) or pick list is highlighted, the button acquires a glow around its border.
- Page 52 These menus are usually hidden from view, but they appear when you press Menu . To get the most out of your Treo 650, it’s a good idea to familiarize yourself with the additional features available through the various application menus.
- Page 53 Tip: Menu shortcuts appear next to the commands in most menus. To use a menu shortcut, press menu item to use the menu shortcut. Selecting Options in a Pick List A range of options is often presented in a type of menu called a pick list, which can be identified by a downward-pointing arrow to the left of the currently selected choice.
-
Page 54: Using The Keyboard
Using the Keyboard When using the keyboard, most people find it easiest to hold the Treo 650 with two hands and use the tips of both thumbs to press the keys. Applications Option Shift/Find Using the Keyboard Backlight The Treo 650 includes a keyboard backlight for low light conditions. The keyboard backlight activates automatically when the screen turns on. - Page 55 To enter an uppercase letter, press Shift/Find then enter a letter. You don’t need to press and hold Shift while entering uppercase letters. To turn Caps Lock on, press Shift/Find off, press Shift/Find symbol appears in the lower right: Entering Numbers, Punctuation, and Symbols that Appear Above the Letters on the Keys Press Option , and then press the key with the desired character shown...
- Page 56 Press Center to insert the character, or just continue entering the next character. Tip: In many applications you can view a list of all the alternate characters. Open the Edit menu, and then select grouped according to their similarity to the corresponding key. For example, the alternate characters available for the e key are é, è, ë, ê...
- Page 57 Other Symbols and Accented Characters Enter … …then press select… á à ä â ã å æ Á À Ä Â Ã Å Æ b or B ß ç ¢ © ^ ˆ Ç ¢ © ^ ˆ † ‡ †...
- Page 58 Enter … …then press select… Ò Ó Ö Ô Œ Õ Ø p or P % ¶ r or R ® ß š § ß Š § t or T ~ ™ † ‡ ù ú ü û Enter … Section 2A: Learning the Basics …then press select…...
-
Page 59: Opening Applications
Opening Applications There are three application buttons on the front of the Treo 650. The fourth button turns your device on and off, wakes up the screen, and controls the keyguard. Each application button can be used to open two applications. To access a button’s primary application, simply press the button. - Page 60 To access applications through the Applications view: Press Applications Use the 5-way navigator Press Center to open the selected application as described in “Moving Around the Treo 650 Screen” on page 37. Secondary Application VersaMail Keyguard to highlight the application you want to open.
- Page 61 In Applications, you can also do any of the following: Press Applications repeatedly to cycle through different categories of applications. Enter the first few letters of the application’s name to highlight it. For example, if you enter “p,” the device highlights Phone; if you then enter “r,” it highlights Prefs.
- Page 62 Section 2A: Learning the Basics...
-
Page 63: Using Your Device's Phone Features
Controlling Your Roaming Experience Internal Phone Book Defining Favorite Buttons Using a Phone Headset Connecting to Devices With Bluetooth® Wireless Technology Using Dial-up Networking on Your Treo 650 Section 2B: Using Your Device’s Phone Features S e c ti o n 2 B... -
Page 64: Making Calls
Making Calls Your Sprint PCS Vision phone calls. As you get familiar with your Treo 650, you’ll find the method you prefer. Important: Before making a call, make sure your device is on (see steps on page 35). If No Service appears in the upper-left, you are out of a wireless coverage area. - Page 65 Tip: You can also paste numbers directly into the Dial Pad view. Copy a number from another application, and then switch to Dial Pad view. Open the Edit menu, and then select Paste . Press Phone/Send to dial. Dialing With the Keyboard Press Phone/Send Using the numbered keys on the keyboard, start dialing a phone number.
- Page 66 First initial and last name First name Last name Select the number you want to call and press Phone/Send Tip: To see more details about a contact, highlight the name and press Center select Dialing With a Favorite Button Favorite buttons can be used as shortcuts for dialing phone numbers and performing other common tasks.
- Page 67 The Treo 650 recognizes most phone numbers that appear in email, text, and Picture Mail messages. If you can’t use the 5-way or stylus to highlight and dial a phone number from a message, it means that the Treo 650 does not recognize it as a phone number.
- Page 68 Redialing the Last Number You Called From the Main view in the Phone application, press and hold Phone/Send –or– To display a list of your most recently dialed numbers, press Phone/Send select the number you want to call, and then press Phone/Send to dial.
-
Page 69: Receiving Calls
Receiving Calls To receive calls, your device’s phone must be on. This is different from having just the screen turned on (see “Turning Your Device’s Phone On and Off” on page 35). Answering Calls To answer a call, do one of the following: Press Phone/Send –or–... - Page 70 The music continues playing, but you won’t hear it during your call. To pause the music, press the Side button on the side of your Treo 650. Power/End to ignore a call waiting alert; this hangs up (see “System Sound Settings”...
-
Page 71: Signal Strength And Phone Status
Signal Strength and Phone Status You can monitor the status of your device’s signal strength and several other items, using icons at the top of the Phone screen. Phone Status Icons Sprint Network Displays name Sprint PCS Network. Displays Roaming if you roam outside the Nationwide Sprint PCS Network. - Page 72 5% of its capacity, the device beeps and the icon changes from red to clear. Appears when your Treo 650 battery is charging. The lightening bolt turns from red to green when the battery is fully charged and your device remains connected to the AC charger.
- Page 73 Finding Your Phone Number Make sure your device’s phone is on (see “Turning Your Device’s Phone On and Off” on page 35). Press Phone/Send Open the menus Select Options, and then select Phone Info. (If your phone number isn’t listed, consult Sprint to confirm your device is activated.
-
Page 74: Managing Active Calls
Managing Active Calls When you make or receive a call, the Active Call view appears. To toggle between the Active Call view and the Main view, press Phone/Send Use the 5-way navigator manage an active call. The following screen appears on your device during an active call: Caller’s name and... - Page 75 See “Creating a Speed Dial Favorite Button” on page 72 for details on creating a Speed Dial favorite button. Mutes the Treo 650 microphone so that you cannot be heard. Tip: To avoid accidentally pressing onscreen buttons while holding the device to your ear, you can disable the screen’s touch-sensitive feature during...
- Page 76 Returning to an Active Call From Another Application You can use many other applications on your Treo 650 while holding a phone conversation, including the organizer and text messaging features. You cannot browse the Web or send and receive email while on an active call.
- Page 77 Tip: Active Call view now includes two status lines, each representing one of the calls. You can join the two calls in a conference call, but you cannot switch between the two calls. Section 2B: Using Your Device’s Phone Features...
-
Page 78: Controlling Your Roaming Experience
When you roam outside the Nationwide Sprint PCS Network, the Roaming icon appears at the top of the screen. Additional charges may apply if you use your Treo 650 while roaming. To learn more about roaming, visit Setting Your Device’s Roam Mode... -
Page 79: Internal Phone Book
Palm Powered™ devices, Contacts replaces the Address Book on previous devices. If you have several contacts to enter, it’s more efficient to use Palm® Desktop software or Microsoft Outlook on your computer and then synchronize information between the Treo 650 and your computer. For more information, see “Synchronizing Contacts and Other Information”... - Page 80 To add a Caller ID picture that displays when that person calls, select the Picture box. Select Photos to add an existing picture to this contact entry, or if your device includes a camera, you can also select Camera to take a picture and add it to this contact entry when you save the picture.
- Page 81 Deleting a Contact Open the contact you want to delete. Open the menus Select Record, and then select Delete Contact. Select OK. Saving Phone Numbers After you complete an incoming call from a number (with Caller ID) that is not in your Contacts list, you are prompted to add the number to your Contacts list.
- Page 82 Create a new contact using the information on your business card. From Contact Edit view, open the menus Select Record, and then select Select Business Card. Now you can beam your business card to other Palm Powered devices. In any Phone view, open the menus Business Card.
-
Page 83: Defining Favorite Buttons
Defining Favorite Buttons The Treo 650 provides approximately 70 programmable favorite buttons for quick access to the following common tasks: Dialing a phone number (speed dial). Accessing your Call Log. Accessing the onscreen Dial Pad. Opening an application. Accessing a Web page. - Page 84 Creating a Speed Dial Favorite Button Press Phone/Send Use the 5-way navigator Select a blank button. Tip: If there are no blank favorite buttons on the current Favorites page, press Select the Types pick list and select Speed Dial. Enter a label for the favorite. If the entry is for an existing contact, select Lookup.
- Page 85 (Optional) Select More, and then select advanced options: Extra Digits lets you define additional digits to dial, such as a password or extension. Dial Extra Digits Automatically dials pre- defined Extra Digits immediately after dialing the phone number, when checked. Select OK.
- Page 86 (Optional) Enter a Quick Key. (When you are in the Main, Dial Pad, or Favorites view of the Phone application, press and hold the Quick Key to instantly open the favorite.) Select OK. Editing or Deleting an Existing Favorite Button You can edit or delete most favorite buttons.
-
Page 87: Using A Phone Headset
Using a Phone Headset You can connect a phone headset for hands-free operation. If you need to use your device while driving and this is permitted in your area, we recommend using a phone headset (sold separately). You can press the headset button to perform any of the following tasks: Answer an incoming call or a call-waiting call. - Page 88 Active Call screen. Headset Specifications Your Treo 650 uses a 2.5 mm, 3-pin headset connector. In addition to the headset that came with your Treo, you can use other third-party headsets that are designed for this type of connector. When in doubt, ask the third-party headset manufacturer if their product is compatible with Treo smart devices.
-
Page 89: Connecting To Devices With Bluetooth® Wireless Technology
Connecting to Headset or Car Kit With Bluetooth Wireless Technology Go to Applications Bluetooth Select On. Enter a Device Name for your Treo 650. (This is the name other devices with Bluetooth wireless technology see when they connect to your Treo 650.) - Page 90 If you’re using a handsfree device with Bluetooth wireless technology, the Treo 650 automatically routes all calls to that device. When a call comes in, your Treo 650 rings and the headset beeps. However, even if you pick up the call on your Treo, the call goes to the headset.
- Page 91 After you set up a Bluetooth wireless connection with your computer or other accessory devices, you may want to set up other trusted devices, such as a friend’s handheld. When your Treo 650 recognizes a trusted device, it automatically accepts communication, bypassing the discovery and authentication process.
- Page 92 Some devices with Bluetooth wireless technology have a built-in passkey; others let you select the passkey. In either case you must use the same passkey on both the other device and your Treo 650. See the documentation for the device with Bluetooth wireless technology for additional information.
- Page 93 Go to Applications Select On. If you already created a trusted pair with the other device, your Treo 650 is ready to receive the information. If you do not have a trusted pair with the other device, select the Discoverable pick list and select Yes.
-
Page 94: Using Dial-Up Networking On Your Treo 650
“Accessing the Internet From Your Computer” on page 85 Creating a Trusted Pair Between Your Treo 650 and Your Computer After creating the trusted pair, you can use your Treo 650 as a modem any time it is within range of your computer, bypassing the discovery and authentication process. - Page 95 If your computer is not enabled with Bluetooth wireless technology, you may be able to purchase a wireless Bluetooth adapter accessory for your computer. On your Treo 650, go to Applications Select On if it is not selected, and then select Setup Devices. Select Trusted Devices.
- Page 96 Bluetooth adapter to enable DUN. Enabling DUN on Your Treo 650 You must enable DUN on your Treo 650 each time you wish to use your device as a wireless modem. Go to Applications Select the Dial-up Networking pick list, and then select On.
- Page 97 Double-click the icon or option representing your Treo 650. Your computer connects to your Treo 650 and shows that DUN services are available. Double-click the DUN service icon. Leave the username and password fields blank.
- Page 98 Bluetooth network icon. Note: Keeping DUN enabled drains your Treo 650’s battery more quickly. Be sure to turn off DUN on your Treo 650 when your Internet session is finished. Tip: You may need to use a virtual private network (VPN) to access corporate email.
-
Page 99: Using Your Device's Organizer Features
Using Your Device’s Organizer Features In This Section Calendar Tasks Memos Listening to Music World Clock Calculator Looking Up Contacts and Other Information Beaming Information Section 2C: Using Your Device’s Organizer Features S e c t i o n 2 C... -
Page 100: Calendar
Calendar Calendar is a powerful organizer application that helps you manage your schedule. Displaying Your Calendar Do any of the following: Press the Calendar the various views: Agenda View shows your daily schedule and any items on your Tasks list that are overdue or due today. - Page 101 Creating an Event You can enter events on your device. However, if you have several appointments to enter, it’s more efficient to use Palm® Desktop software or Microsoft Outlook on your computer and then synchronize information between your Treo 650 and your computer.
- Page 102 Important: If you use Palm Desktop software, do not add time zones to your events. Palm Desktop does not support time zones. If you use Microsoft Outlook, you can use the time zone feature, but you must install the conduit that came with your Treo 650 (or a subsequent update) on all the computers you synchronize your device with.
- Page 103 Adding an Alarm to an Event In Calendar, select the event. Select Details. Number of time units Check the Alarm box, and then select the number of minutes, hours, or days before the event you would like to receive the alarm. Note: The alarm for untimed events (see “Creating an Untimed Event”...
- Page 104 Press Calendar Press Left and Right Make sure nothing is highlighted. Enter a description for the event. Diamond indicates an untimed event Scheduling a Repeating Event Create an event, and then select it. Select Details. Select the Repeat pick list and select a repeat interval. (If the interval you need doesn’t appear on the list, select Other to define a custom interval.) Select OK.
- Page 105 Color-Coding Your Schedule Use color-coding to quickly spot different types of events. For example, make your appointments with family green, work blue, and friends yellow. From Day view, select the event description. Select Details. Select the Category pick list and select Edit Categories. Select New, or select a category and then select Edit.
- Page 106 Tip: To save memory, you can purge your old events. Open the Record menu and select Purge . Select the Delete events older than pick list and select a timeframe. Select OK . In addition to the settings covered earlier in this chapter, you can also change any of the following settings: Date and Time displays when the event takes place.
- Page 107 Select the Agenda box and set any of the following Agenda view options: Default View sets which view appears when you open Calendar. Show Due Tasks displays tasks that are due today and tasks that are overdue. Show Messages displays the number of read and unread email messages.
- Page 108 See “Working With Microsoft Exchange ActiveSync®” on page 204. Your contacts, tasks, and memos synchronize with Palm Desktop software or Microsoft Outlook, depending on which desktop application you use.
- Page 109 Selecting Alarm Tones Press Calendar until you are in Day view. Open the menus Select Options, and then select Sound Preferences. Select the Volume box. Select each pick list and select an Alert Volume and Vibrate setting. Select the Tones box. Select tones from any of the following pick lists: Alarm Sound sets the tone played the first time your alarm goes off.
- Page 110 Tip: You can also preview, delete, and send sounds on your device. From the Sounds & Alerts screen, select Tones, and then select Manage. To play a sound, select it and press Center. To delete a sound, select it and press Backspace, and to send a sound, select it, and then select Send.
-
Page 111: Tasks
Tasks You can use Tasks as a reminder of tasks you need to complete and to keep a record of complete tasks. You can also display your tasks in your calendar. See “Customizing Display Options for Your Calendar” on page 94 for details. Adding a Task Go to Applications Select New to create a new task. - Page 112 Set any of the following: Priority sets the Priority number for this task (1 is most important). You can arrange your tasks later based on their importance. Category assigns the task to a specific category. Due Date sets the due date for the task. Select the Due Date pick list and select a due date.
- Page 113 Category displays tasks that are assigned to the selected category. Select the pick list in the upper-right to select a different category. Tip: Overdue tasks have an exclamation point (!) next to the due date. Deleting a Task Select the task you want to delete. Open the menus Select Delete Task on the Record menu.
- Page 114 Customizing Tasks The Preferences dialog box enables you to control the appearance of the Tasks list screen. In the Tasks list screen, open the menus Select Options, and then select Preferences. Set any of the following preferences: Sort by indicates the order in which your tasks appear in the list.
-
Page 115: Memos
Memos Memos are a great way to store notes on your Treo. Each memo can include 4,096 characters of text. Creating a Memo Go to Applications Enter the text you want to appear in the memo. (Press Return to move down to new lines in the memo.) Select Done. -
Page 116: Listening To Music
If you want to download songs from the Real® Music Store (additional fees may apply), you need to download and install a special version of RealPlayer for Palm that is compatible with Real Music Store files. To download this special version, visit www.real.com... - Page 117 To download songs from your computer to your Treo 650: Connect your Treo 650 to your computer with the USB sync cable. Insert an expansion card into your Treo 650. Do one of the following: Windows. Drag and drop the file(s) or folder onto the palmOne Quick Install icon on the Windows desktop.
- Page 118 RealPlayer desktop application onto your Windows computer. You must install this software from the Software Installation CD that came with your Treo 650 even if you already have a version of RealPlayer installed on your computer. After you install the software, follow these steps to transfer music to your device.
- Page 119 Go to Applications Connect your device and your computer to the USB sync cable. In RealPlayer on your computer, click Burn/Transfer. If necessary, select palmOne Handheld from the Current Burn/Transfer Device list. Drag the song files you want from the My Library window on the left into the palmOne Handheld window on the right.
- Page 120 To adjust the volume during playback, press the volume button. Progress indicator Tip: You can customize your Treo 650 so that pressing and holding the button on the side of your Treo 650 opens Settings” on page 151 for details.
- Page 121 RealPlayer continues playing until it reaches the end of your list, until you select Stop, or until you turn off your device. Music continues to play even if you switch to another application or turn off your screen. Remember to stop the music if you switch to another audio application, such as recording a voice memo.
- Page 122 Do any of the following: To delete a song from the playlist, select the song, and then select Remove. To add a song, select Add, check a song’s box, and then select Done. To move a song up or down one slot, select a song, and then select the up or down arrow.
-
Page 123: World Clock
World Clock World Clock displays the day and time in your home city and in two other cities around the globe. Whether you’re travelling or at home, it’s easy to keep track of the best time to reach your business associates, friends, and family in far away places. - Page 124 Selecting Remote Cities In addition to your home city, you can display the day and time for two other cities anywhere around the globe. These other cities are called remote cities. Select a pick list in the lower part of the World Clock screen, and then select the city closest to the city you want to display.
- Page 125 World Clock Tips World Clock does not automatically update the system time for Daylight Savings Time (DST). Run your stylus over the map to see the time in other cities. The shadow over the map represents nighttime moving across the globe. Section 2C: Using Your Device’s Organizer Features...
-
Page 126: Calculator
Calculator Your Treo 650 includes a basic calculator, plus an advanced calculator with scientific, financial, and conversion functions. You can tap the screen or use the keyboard to input numbers. Switching Between Basic and Advanced Calculator Modes Go to Applications Open the menus Select Options, and then select Advanced Mode or Basic Mode. - Page 127 Selecting Functions in Advanced Calculator Mode Switch to Advanced Calculator mode (see above). Open the menus Select Options, and then select the function you want to use: Math provides advanced mathematical functions, such as exponents, roots, and logarithms. Trig provides trigonometric functions, such as sine, cosine, tangent, and variants.
- Page 128 Select Pref, and then select the decimal display format: Float, Fixed x), Sci (x), or Eng (x). Open the menus Select Pref, and then select the number display format: Degrees, Radians, or Grads. Tip: To access a list of mathematical constants, such as Avogadro’s number or the speed of light, select Storing and Recalling Numbers in Advanced Mode To store a number in one of ten memory slots, select Sto.
-
Page 129: Looking Up Contacts And Other Information
Lookup enables you to dial your Contacts by name. It locates people’s phone numbers when you’re in the Phone or messaging applications. Find searches through the text in all the applications on your Treo 650, always starting with the current application. - Page 130 Applications , select Contacts , and then try step 2 again. To set your Treo 650 to search from the Main view of the Phone application, go to that view, open the Options menu, and then select General Preferences .
- Page 131 Select OK to start the search. In the search results, select the text you want to review, or select Find More to search additional applications. Tip: To search by company for a person’s name you can’t remember, open Find , and enter the name of the company. Section 2C: Using Your Device’s Organizer Features...
-
Page 132: Beaming Information
Your Treo 650 is equipped with an IR (infrared) port that lets you beam information to another Palm Powered™ device with an IR port. The IR port is located on the top of your Treo 650, between the ringer switch and the antenna, behind the small dark shield. - Page 133 Beam Category sends all entries in the current category. When the Beam Status dialog box appears, point the IR port on your Treo 650 directly at the IR port of the receiving device. Wait for the Beam Status dialog box to indicate that the transfer is complete before you continue using your Treo.
- Page 134 Turn on your screen. Point the IR port on your Treo 650 directly at the IR port of the transmitting device to open the Beam Status dialog box. When the Beam dialog box appears, select a category or expansion card.
-
Page 135: Managing Applications
Managing Applications In This Section Synchronizing Contacts and Other Information Installing Applications Removing Applications Viewing Application Information Using Expansion Cards Section 2D: Managing Applications Sec tion 2D... -
Page 136: Synchronizing Contacts And Other Information
(your device or your computer) is automatically updated in the other. No need to enter information twice. We strongly recommend that you synchronize your Treo 650 and computer frequently to keep your information up-to-date (and backed up) in both locations. - Page 137 Press the HotSync® button on the USB sync cable. HotSync Button Wait for your Treo 650 to display a message indicating that the process is complete. If nothing happens, make sure that you installed the synchronization software and that it is running on your computer. If you installed Palm Desktop software, the HotSync Manager the lower-right corner of your computer screen.
- Page 138 See “Working With Microsoft Exchange ActiveSync®” on page 204. Your contacts, tasks, and memos synchronize with Palm Desktop software or Microsoft Outlook, depending on which desktop application you use.
-
Page 139: Installing Applications
Installing Applications Your Treo 650 comes with several applications built-in and ready to use. You can also install any of the bonus software included on the Software Installation CD as well as more than 16,000 third-party Palm OS® applications for use on your Treo 650, such as business software, games, and other applications. - Page 140 You can install Palm OS applications directly from the Internet, using the Web browser. When you download an application, it automatically installs on your Treo 650. Remember: Palm OS applications have .prc or .pdb at the end of their filenames.
- Page 141 Select your username from the list, and then click OK. Synchronize your device with your computer to install the application(s) on your Treo 650. Getting Help With Third-Party Applications If you encounter a problem with a third-party application (such as an error message), contact the application’s author or vendor.
-
Page 142: Removing Applications
If you decide that you no longer need an application or you want to free up memory on your Treo 650, you can remove applications from your Treo device or an expansion card. You can remove only applications, patches, and extensions that you install;... - Page 143 Windows: C:\Program Files\Palm\username. Mac: Mac HD\Applications\Palm\Users\username. If you upgraded from a previous version of Palm Desktop, your backup folder may be located in the Palm or Handspring folder. If you find a .prc or .pdb file for the application you just removed, delete the file from the Backup folder.
-
Page 144: Viewing Application Information
Viewing Application Information The Info screens display basic statistics about the applications on your Treo 650. Go to Applications Open the menus Select Info on the App menu. At the bottom of the screen, select the type of information you want to view: Version displays the version numbers of applications on your Treo 650. -
Page 145: Using Expansion Cards
Using Expansion Cards The expansion slot on your Treo 650 enables you to add Secure Digital (SD) cards and MultiMediaCard cards to extend the storage capacity of your Treo device. Although SD cards are faster than MultiMediaCard cards for reading and writing... - Page 146 After you feel the expansion slot eject the dummy card, remove the card from the expansion slot. Hold your Treo 650 with the screen facing you and the card with the label facing you. (The notch on the card should be in the lower-left next to the antenna.)
- Page 147 Insert the card into the expansion slot until you feel the card lock into place and you hear the confirmation tone. Notch When you’re done using the expansion card, repeat steps 1 and 2 to remove the expansion card. Reinsert the dummy card to keep the expansion slot clean. Section 2D: Managing Applications...
- Page 148 Select the icon for the application you want to open. Press Center to open the application. Copying Applications to an Expansion Card You can copy applications between your Treo 650 and your expansion card. Note: Before you copy an application to an expansion card, make sure that the application is compatible with Palm OS version 5.4 or higher.
- Page 149 Select Copy on the App menu. Select the Copy To pick list and select the destination: card name or Phone. Select the From pick list and select the location of the application you want to copy: card name or Phone. Highlight the application you want to copy.
- Page 150 Insert the expansion card into the expansion slot. (The Applications view automatically appears.) Select Card Info Open the menus Select Rename Card on the Card menu. Enter a new name for the card. Select OK. Formatting an Expansion Card Formatting an expansion card is similar to formatting a diskette on a computer. When you format an expansion card, you erase all the information stored on the card and return it to a blank state.
-
Page 151: Customizing Your Device
Customizing Your Device In This Section Phone Settings System Sound Settings Applications Settings Button Settings Date and Time Settings Power Preferences Locking Your Device and Information Additional Features Accessories for Your Device Section 2E: Customizing Your Device Sec tion 2E... -
Page 152: Phone Settings
Phone Settings Customize the Phone settings on your Treo 650 to match the way you make calls. You can select ring and alert tones, adjust call volume, assign a Caller ID picture to a contact, and even select wallpaper for the Phone application screen, and more. - Page 153 Roaming Tone for incoming calls when you’re outside your home mobile network. Voicemail Tone to alert you of a new voicemail. Service Tone to warn you of a service change, such as moving into and out of a mobile network coverage area. Select Done.
- Page 154 When a call or music are not in progress, press the volume button on the side of your Treo 650 to adjust the ringer volume, and then press Center to confirm the change. Slide the ringer switch to Sound Mode Off ringer immediately.
- Page 155 Select the picture you want to assign to this contact. Select Done. Assigning a Caller ID Ringtone Press Phone/Send Highlight the favorite button you want to give a caller ID ringtone. Open the menus Select Edit Favorites Button on the Record menu. Select the Ringtone pick list and select ringtone for this contact.
- Page 156 Selecting Wallpaper for the Phone Screen If you have images stored on your Treo 650 (see “Taking a Picture” on page 234), you can select different wallpaper for the Phone screen. Press Phone/Send Open the menus Select Options, and then select General Preferences.
-
Page 157: System Sound Settings
Calendar alerts, and system sounds. If the ringer switch is set to no sound, the ringer setting overrides the sound settings and all sounds are turned off. This does not, however, mute the earpiece or speakerphone on your Treo 650 during a phone call. - Page 158 Setting System Volume Levels The system volume settings apply only when the ringer switch is set to the on position. Go to Applications Select the Application pick list and select General. Select the System Volume and Game Volume pick lists and select the volume levels.
-
Page 159: Display And Appearance
Display and Appearance Adjusting the Brightness Depending on the lighting conditions in which you’re using your Treo 650, you may need to adjust the brightness of the screen. Press Option , and then press Press Left and Right Select Done. -
Page 160: Follow The Onscreen Instructions
Aligning the Screen Occasionally, your Treo 650 screen may need to be readjusted. If it is out of alignment, you may see the wrong feature being activated when you tap the screen. To fix the problem, you can realign the screen any time. -
Page 161: Applications Settings
Applications Settings You can change the Applications settings on your Treo 650 so that you can easily access the applications you use most often. You can arrange and display your applications by category, reassign the buttons on your Treo device, and select default applications for specific tasks. - Page 162 Displaying Applications by Category Do one of the following: Press Applications Select the category pick list at the top of the screen and select the category you want to display. Selecting the Applications Display By default, the Applications view displays each application as an icon. As an alternative, you can view a list of applications.
-
Page 163: Button Settings
Buttons Preferences enable you to select which applications are associated with the buttons on the front of your Treo 650 and the HotSync® button on the USB sync cable. You can also change the applications associated with these buttons when they... - Page 164 Setting Default Applications Sometimes, one application looks for another application to handle information (for example, a mail application might open a browser when you select a link in an email message). Default Apps Preferences enable you to designate a specific application as the default handler for a particular type of information.
-
Page 165: Date And Time Settings
Date & Time Preferences let you set the time, date, time zone, and daylight savings setting for your Treo 650. By default, your device synchronizes the date and time with the Nationwide Sprint PCS Network when your device is on and you are inside a coverage area. - Page 166 For example, in the United Kingdom, time often is expressed using a 24-hour clock. In the United States, time is expressed using a 12-hour clock with an AM or PM suffix. All the built-in applications on your Treo 650 use the Format Preferences settings.
-
Page 167: Power Preferences
Power Preferences Power Preferences enable you to set the auto shutoff interval and the beam receive feature for your Treo 650. Go to Applications Select Power. Set any of the following preferences: Auto-off After conserves battery power by automatically turning off your device’s screen after the specified time period elapses. -
Page 168: Locking Your Device And Information
Your Treo 650 includes several features that help you protect your device from inadvertent use and keep your information private. The built-in security software enables you to use your Treo 650 for emergency calls, even if the handset is locked. Keyguard manually disables all buttons and the screen’s touch-sensitive feature to prevent accidental presses in your briefcase or pocket. - Page 169 Auto-Keyguard and Touchscreen Lockout Auto-Keyguard lets you automatically lock the keyboard after a period of inactivity. Go to Applications Select Keyguard. Set any of the following preferences: Auto-Keyguard sets the period of inactivity that passes before the keyboard automatically locks. Disable touchscreen when sets the conditions that disable the screen’s touch-sensitive feature.
- Page 170 System Password Lock To protect your personal information, you can lock the system so that you need to enter your password to access any of your information or use other features of your Treo 650. Phone Lock On phone power off .
- Page 171 At a preset time locks your Treo 650 at a specific time of day. After a preset delay locks your Treo 650 after a period of inactivity.
- Page 172 You can use Owner Preferences to record information that you want to associate with your Treo 650, such as your name, company name, and phone number. If you system lock your device, the Owner Preferences information appears on the screen that requests your password to unlock it.
- Page 173 If you define a password, you must enter it to display private entries. If you do not define a password, you (or anyone else) can reveal private entries without a password. To make an entry private: Display the entry that you want to mark private. Select Details.
- Page 174 Go to Applications Select the Password box. Select the Lost Password box. Select Yes. If you want additional security for Palm Desktop files, you may wish to purchase a third-party solution. and select Security Section 2E: Customizing Your Device...
-
Page 175: Additional Features
Additional Features Location Your Sprint PCS Vision Smart Device is equipped with a Location feature for use in connection with location-based services which may be available in the future. Currently the location information is used to help identify your longitude and latitude position during an emergency call in areas where E-911 service is available. - Page 176 (VPN) on your Treo 650. A VPN enables you to log in to your corporate server through the company’s firewall (security layer). Without a VPN, you cannot break through the firewall to gain access to the server.
-
Page 177: Accessories For Your Device
USB Sync Cable Provides an extra cable for quick USB synchronization of information between your Treo 650 and PC or Mac computer using a USB port. USB Docking Cradle Provides a convenient and elegant desktop solution for synchronizing info, charging your device with any USB-enabled PC or Mac computer, and charging a second battery. - Page 178 Stereo Headphone Adapter Converts a mini-stereo phone connector to a 2.5mm connector so that it is compatible with the headset jack on your device. This enables you to listen to MP3 files on your Treo with your own stereo headphones. Stylus Provides a replacement or spare stylus for your device.
-
Page 179: Section 3: Sprint Pcs Service Features
Section 3 Sprint PCS Service Features... -
Page 181: Sprint Pcs Service Features-The Basics
Sprint PCS Service Features—The Basics In This Section Using Voicemail Call Waiting Call Forwarding Three-Way Calling Sprint PCS Voice Command TTY Use With Sprint PCS Service Section 3A: Sprint PCS Service Features—The Basics S e c ti o n 3 A... -
Page 182: Using Voicemail
Using Voicemail Setting Up Your Voicemail Your voicemail number is preset when you activate your device. The first time you call voicemail, you are prompted to enter your voicemail password. If necessary, please contact Sprint for your password and enter it as prompted. Turn on your device, as described in “Turning Your Device’s Phone On and Off”... - Page 183 Follow the system prompts. Tip: Enter your voicemail password using the Treo 650 keyboard, or select Extra Digits if you defined this option. See “Editing or Deleting an Existing Favorite Button” on page 74 for information on editing favorite buttons.
-
Page 184: Call Waiting
Call Waiting When you are on an active call, you can receive a second call. When the second call comes in, the Call Waiting dialog box appears, giving you the following options for handling the second call: To put your first call on hold and answer the second call, press Phone/Send or use the 5-way navigator To continue your first call and send the second call to voicemail, use the 5-way... -
Page 185: Call Forwarding
Call Forwarding Call Forwarding lets you forward your calls to another number. You can still make calls from your device while this is activated. There is a per-call charge for this service. Press Phone/Send Open the menus Select Options, and then select Phone Preferences. Select the Call Forwarding pick list. -
Page 186: Three-Way Calling
Three-Way Calling Talking with two different people at the same time is made easy with Three-Way Calling. Enter a number you wish to call, and then press Phone/Send After you establish the connection, place a second call (see “Making a Second Call”... -
Page 187: Sprint Pcs Voice Command
Sprint PCS Voice Command If you subscribe to the Sprint PCS Voice Command service, you can call a number just by saying a name. (There is a monthly charge for Sprint PCS Voice Command service.) To activate Sprint PCS Voice Command: Press , and then press Phone/Send Get Started by Setting Up Your Personal Address Book... -
Page 188: Tty Use With Sprint Pcs Service
TTY Use With Sprint PCS Service A TTY (also known as a TDD or Text Telephone), is a telecommunications device that allows people who are deaf or hard of hearing, or who have speech or language disabilities, to communicate by telephone. Your device is compatible with select TTY devices. - Page 189 Select OK. A red T appears at the top of the Phone screen whenever TTY is enabled. Important Sprint recommends that TTY users make emergency calls by other means, including Telecommunications Relay Services (TRS), analog Notice: cellular, and landline communications. Wireless TTY calls to 911 may be corrupted when received by public safety answering points (PSAPs), rendering some communications unintelligible.
- Page 190 Section 3A: Sprint PCS Service Features—The Basics...
-
Page 191: Sprint Pcs Visionsm-The Basics
Sprint PCS Vision In This Section Getting Started With Sprint PCS Vision Sprint PCS Vision Features Accessing Sprint PCS Vision Section 3B: Sprint PCS Vision—The Basics —The Basics S e c ti o n 3 B... -
Page 192: Getting Started With Sprint Pcs Vision
Getting Started With Sprint PCS Vision To sign up for Sprint PCS Vision services or to access complete instructions, visit . For information on charges associated with features that use a www.sprint.com Sprint PCS Vision connection, refer to your Sprint PCS Service Plan. Opening Sprint PCS Vision Make sure your device is turned on, as described in “Turning Your Device’s Phone On and Off”... -
Page 193: Sprint Pcs Vision Features
With Sprint PCS Vision services, you have access to additional features, better performance, faster Web connections, and a wider variety of online services. Features such as Web access, graphically-enriched games, and sending/receiving digital images are available on your Treo 650 through the Nationwide Sprint PCS Network. Sprint PCS Picture Mail Take digital pictures and movies with the built-in camera (if included) and send them to email addresses or other Sprint PCS Vision phones. - Page 194 Screen Savers Download unique images to use as wallpaper, or make it easy to tell who’s calling by assigning specific images to numbers in your speed dial favorite buttons. Experience full-color graphic versions of popular Websites. Sprint PCS Business Connection Secure, real-time access to your Microsoft Outlook or Lotus Notes company email, calendar, business directory, and personal contacts.
-
Page 195: Accessing Sprint Pcs Vision
Accessing Sprint PCS Vision Once your device is activated, you are signed in and ready to connect to Sprint PCS Vision services at any time. Sprint PCS Vision User Name Your Sprint PCS Vision User Name is automatically assigned to you. Your user name, which resembles an email address (for example, used with Sprint PCS Mail and Messaging services. - Page 196 Connected and voice calls can be sent and received when the arrows are gray. Sprint PCS Vision Billing Information See your service plan for details on Sprint PCS Vision billing. Section 3B: Sprint PCS Vision—The Basics...
-
Page 197: Sending And Receiving Email
If you’ve activated Sprint PCS Vision, you’re ready to set up the VersaMail® application on your Treo 650. You can use the VersaMail account with your Sprint email account, as well as with other email accounts, such as Yahoo! or Earthlink. You can also use VersaMail with a corporate account. -
Page 198: Setting Up An Account
Setting Up an Account Before you can use VersaMail with a given email account, you need to set up the account in VersaMail. If you have multiple email accounts, you must set up a VersaMail account for each one. You have three setup options: On a Windows computer, if the email account is already set up on your computer—for example, if you use Outlook Express on your computer to access your Earthlink account—you can transfer the account settings to your... - Page 199 From the final screen of the Software Installation CD, select the option to set up your email software. Or select Start > Programs > Palm > VersaMail Setup. Select your username from the first drop-down list, and then select the option to create a new VersaMail email account.
- Page 200 From the final screen of the Software Installation CD, select the option to set up your email software. Or select Start > Programs > Palm > VersaMail Setup. Select your username from the first drop-down list, and then select the option to create a new VersaMail email account.
- Page 201 Setting Up an Account on Your Device Go to Applications Open the menus Select Accounts, and then select Account Setup. Select New. In the Account Name field, enter a descriptive name. Select the Mail Service pick list, and then select your email provider.
- Page 202 Tip: To set more options for incoming and outgoing messages select Advanced on the Account setup complete screen. Select Next, and then select Done. Section 3C: Sending and Receiving Email...
-
Page 203: Creating And Sending Messages
Creating and Sending Messages From the Inbox, select New. Begin entering the addressee’s email address, first name, or last name. (If the information matches one or more entries in Contacts, VersaMail displays the matching contacts. To accept a suggestion, select the correct contact. To send to a different address, keep entering the email address or name.) Tip:... - Page 204 Outbox puts the message in the Outbox to send later. Drafts saves the message and continue working on it at another time. Attaching Pictures and Videos Create the message to which you want to attach the picture or video. On the New Message screen, tap the paper clip icon in the upper-right.
- Page 205 Attaching Ringtones Create the message to which you want to attach the ringtone. On the New Message screen, tap the paper clip icon Select Sounds from the Type pick list. Select the ringtone you want, and then select Insert. Select Done. Note: Ringtones that are copy protected appear in the Sounds application with a lock icon.
- Page 206 Attaching Other Types of Files Create the message to which you want to attach the item. On the New Message screen, tap the paper clip icon Select the type of file to attach—for example, Address, Appointment, or Memo/Text—from the Type pick list. Select the file you want from the list in the Type box.
-
Page 207: Receiving And Viewing Messages
Receiving and Viewing Messages Make sure your device is turned on (see “Turning Your Device’s Phone ON” on page 35). From any mailbox, select Get or Get & Send. From the Inbox, select the message you want to view. If a large incoming message is truncated, select More Select Done. -
Page 208: Viewing Attachments
Viewing Attachments There are a number of attachment types you can open with the built-in software on your Treo 650 (for example, Microsoft Word, Excel, and PowerPoint files; ringtones; and photos). From any folder, open the message with the attachment you want to view. -
Page 209: Managing Your Messages
Managing Your Messages The status icons that appear next to each message in your Inbox indicate the following: Part or all of a message text is downloaded. The message includes an attachment. This message is high priority. You can rearrange the VersaMail list to make it easier to find and view messages. In the Inbox, select Sort, and then select one of the following: Sort by Date, Sort by Name, Sort by Subject. - Page 210 Select Delete on the Message menu. If a confirmation message appears, select OK to confirm deletion. Tip: To empty (or purge) the Trash folder, open the select Deleting Messages by Date You can quickly delete a group of messages by selecting a range of dates. Open the menus Select Delete Old on the Message menu.
-
Page 211: Customizing Your Email Settings
Customizing Your Email Settings You can customize the VersaMail settings for each individual email account on your Treo. The preferences you set apply only to the email account you are currently viewing. If you have multiple accounts, configure each account separately. - Page 212 Select the days you want the schedule to be active. You can choose any number of days, but you can set up only one schedule for each email account. Select OK, and then select Get Mail. (Performing a manual Get Mail ensures that only new messages are retrieved during your next Auto Sync retrieval.) Selecting alert tones When you schedule Auto Sync for a given account, you can choose a sound—such...
- Page 213 Setting preferences for getting messages From any mailbox screen, open the menus Select Options, and then select Preferences. Select Delivery Options. Set any of the following preferences. Get indicates whether to get message subjects only or entire messages. Ask Every Time indicates if you want to see a dialog box for choosing subjects only or entire messages each time you retrieve email.
- Page 214 Mail from last gets messages sent within the number of days you specify (default is 7). Download Attachments allows files attached to email to be automatically downloaded to your device. Attachments that exceed the maximum message size cannot be downloaded. Maximum Message Size sets the maximum size limit, in kilobytes (KB), of an incoming email message.
- Page 215 Attaching a signature to a message You can attach a personal signature, with info like your company's address and fax and telephone numbers, to the bottom of all messages you send. From any mailbox screen, open the menus Select Options, and then select Preferences. Select Signature.
-
Page 216: Working With Microsoft Exchange Activesync
Exchange server; information does not synchronize with the desktop software application on your computer, such as Microsoft Outlook or Palm Desktop software. Other information, such as contacts, tasks, and memos, continues to synchronize with your desktop software. -
Page 217: Sprint Pcs Business Connection
Sprint PCS Business Connection You can install the optional Sprint PCS Business Connection application for secure, real-time access to your Microsoft Outlook or Lotus Notes company email, calendar, business directory, and personal contacts. For more information and to sign up, visit www.sprint.com Go to Applications Follow the onscreen instructions to download and install the software. - Page 218 Section 3C: Sending and Receiving Email...
-
Page 219: Messaging
Messaging In This Section Creating and Sending Messages Receiving Messages Chatting With Messaging Managing Your Messages Customizing Your Messaging Settings Section 3D: Messaging Sec tion 3D... -
Page 220: Creating And Sending Messages
Creating and Sending Messages You can exchange brief text messages with other wireless phones that have text messaging capability. You can also send Sprint PCS Picture Mail messages (including images, videos, voice memos, and text) to other users. Both text messages and Sprint PCS Picture Mail messages can also be sent to email addresses. - Page 221 If the recipient is in your Contacts list, select Lookup in Contacts, and then start entering the first few letters of the recipient’s first or last name. Highlight the recipient’s mobile number or email address, and then press Center. If the recipient’s name is not in the pick list or your Contacts list, enter the full mobile number or email address.
- Page 222 MPEG4 Videos Text memo The first time you share a picture or video, you are prompted to establish a Sprint PCS Picture Mail Website account and password. Enter a four- to eight- digit, alpha-numeric password and press Center. Once you receive confirmation, you may continue to send or upload pictures and videos.
- Page 223 Select Add. Select one or more of the following: Picture icon lets you insert one or more pictures. You can take the pictures with the built-in camera (if included) or insert an existing picture. Video icon lets you insert one or more videos. You can capture a video with the built-in camera (if included) or insert an existing video clip.
- Page 224 Messaging Tips You can address messages to multiple recipients by separating the addresses with a comma. When entering a message, you can insert emotive symbols by pressing Center and selecting emoticons, or insert predefined QuickText phrases by selecting QuickText and then selecting a phrase. To add a new phrase, select Edit QuickText from the list.
-
Page 225: Receiving Messages
Receiving Messages When your device is on and in a wireless coverage area, you automatically receive an alert when a new message is ready for you to view. You can configure the alerts to use a ringtone and vibration or simply an onscreen alert. The new message alert may include any of the following buttons: OK dismisses the alert and places the message in your Inbox. - Page 226 Using Links in Messages The Messaging application is designed to recognize links within a message and to give you quick access to them. When you receive a message that contains a recognizable telephone number, email address, or URL, you can dial the number, send an email message, or go to the Web page directly from the message.
-
Page 227: Chatting With Messaging
Chatting With Messaging When you exchange more than one text message with a single contact, those messages are automatically grouped into a chat session, also known as a “thread.” The upper part of the Chat view displays all text messages you’ve exchanged with this address, and the lower part provides a text entry area where you can continue the conversation. -
Page 228: Managing Your Messages
Managing Your Messages The status icons that appear next to each message in the Inbox and Outbox folders indicate the following: A text message. Unread messages appear in bold; messages you’ve read appear in plain text. Urgent messages appear with a red exclamation point (!). - Page 229 Deleting Messages You can also delete several messages at once from any folder using the Purge command. From list view, open the menus Select Purge on the Message menu. Select the Purge pick list and select an option. Select OK. Section 3D: Messaging...
-
Page 230: Customizing Your Messaging Settings
Customizing Your Messaging Settings Open the menus Select Options, and then select Preferences. Set any of the following Messages preferences for your individual messages: Create new messages as determines whether a blank text or Sprint PCS Picture Mail message appears when you create a new message. - Page 231 Label color sets the label color for your messages in the Chat view. Use color for sets whether both the chat partner’s name and message appear in a different color, or only the name. Select OK. Selecting Alert Tones Open the menus Select Options, and then select Alerts.
- Page 232 Section 3D: Messaging...
-
Page 233: Browsing The Web
(Flash, Shockwave, etc.) or Java applets. Some secure sites require specific browsers and may not work with the Web browser on your device. To use your Treo 650 to browse the Web, you must first activate Sprint PCS Vision data services. -
Page 234: Viewing Web Pages
Viewing Web Pages The Blazer® Web browser uses patent-pending technology to optimize Web pages for your device. By default, the browser reformats Web pages into a single column and resizes images on your screen. This way, you can see most content without scrolling left or right. - Page 235 To switch between Optimized view (where content is optimized for your device) and Wide Page view (where content is formatted as it is on your computer and may require horizontal scrolling), select To scroll through the page in Optimized view, press Up In Wide Page view, press Up in all directions.
- Page 236 Saving a Page The Web browser lets you save single pages for offline viewing. This feature saves the page’s text and images onto your Treo 650, so you don’t need an Internet connection to view the page’s content later. Go to the page you want to save.
- Page 237 Copying Text From a Web Page You can copy text from a Web page and paste it in other applications. Use the stylus to highlight the text you want to copy. Open the menus Select Edit, and then select Copy. Go to the application in which you want to paste and position the cursor where you want to paste the text.
- Page 238 Using the History List The History list stores the addresses of the most recent pages you visited in the Web browser. If you want to go back to a page you remember visiting, but did not bookmark the page, you can use the History list to jump directly to that page. Items in the History list are sorted chronologically.
-
Page 239: Working With Bookmarks
Working With Bookmarks Creating a Bookmark Bookmarks let you instantly access a Web page, without needing to enter the address every time. The Web browser can store up to 100 bookmarks or saved pages, allowing you to open your favorite Web pages quickly. Remember, a Web browser bookmark is different from a favorite button (see “Defining Favorite Buttons”... - Page 240 Viewing Bookmarks or Saved Pages Bookmarks and saved pages both appear in Bookmarks view. Saved pages are indicated by a small triangle in the upper-right corner of the bookmark. Select the Bookmarks view icon Select the bookmark or saved page you want to view.
- Page 241 Arranging Bookmarks and Saved Pages The Web browser includes ten pages so that you can arrange bookmarks and saved pages in a logical fashion. For example, you can store travel links on one page, stock links on another, and business links on a third page. You can arrange bookmarks and saved pages as you create them, or you can come back and arrange them later.
-
Page 242: Customizing Your Web Browser Settings
Customizing Your Web Browser Settings Open the menus Select Options, and then select Preferences. Select Page and set any of the following preferences: Start With determines which view displays every time you open the Web browser. Home Page sets the Web page that appears when you select the Home Restore Default selects the original Sprint PCS Vision home page if you changed it. - Page 243 Disable Javascript bypasses Javascript elements on the Web pages you view. Disable Cookies determines if Websites can store personalized information on your Treo 650. Some sites do not work properly if you select this option. Tap and Drag determines if dragging the stylus selects text or scrolls through the content of the page.
- Page 244 Section 3E: Browsing the Web...
-
Page 245: Using Your Device's Built-In Camera
Using Your Device’s Built-in Camera In This Section Taking Pictures and Videos Viewing Pictures and Videos Organizing Pictures and Videos Customizing Your Camera Settings Using Your Online Album Viewing Pictures and Videos on Your Computer Section 3F: Using Your Device’s Built-in Camera S e c ti o n 3 F... -
Page 246: Taking Pictures And Videos
Taking Pictures and Videos If your Treo 650 does not include a camera, then the sections in this chapter about taking photos and videos do not apply to you. Even if your phone does not include a camera, you can still receive and view photos and videos, send photos and videos to other people as attachments or Sprint PCS Picture Mail, and use photos to personalize your device (such as wallpaper or photo caller ID). - Page 247 To take a picture: Go to Applications Select the album pick list in the lower-right corner and select the album where you want to save the picture. (Optional) Adjust the zoom and resolution settings. Using your device screen as a viewfinder, aim the lens on the back of your Treo at the subject you want to photograph.
- Page 248 Recording a Video Go to Applications Camcorder Select the album pick list in the lower-right corner and select the album where you want to save the video. (Optional) Adjust the resolution setting. Point the lens on the back of your Treo at the subject you want to record.
- Page 249 Select Upload album. (See “Uploading Pictures to Your Online Album” on page 244 for details.) Tip: The video recording screen displays the approximate recording time you have left based on the space available on your device or expansion card. Actual recording time may vary depending on how fast you are moving, how many colors you are recording, and so on.
-
Page 250: Viewing Pictures And Videos
Viewing Pictures and Videos Viewing a Picture From the Camera view, select Gallery Select the picture you want to view. Press Up and Down If the picture has a voice caption, select Audio Select Done. Viewing a Video From the Camera view, select Gallery Select the video you want to view. - Page 251 Tips for Viewing Pictures and Videos You can also access the Gallery by going to Applications and selecting Pics & Videos To change the Gallery display format, select Thumb and List To view a different album, select the album pick list in the upper-right and select the album you want to view.
-
Page 252: Organizing Pictures And Videos
Organizing Pictures and Videos Arranging Albums After you take pictures and record videos, you can use the Gallery to organize them. From the Gallery, select the album pick list in the upper-right and select the album you want to organize. Select Organize Select a picture or video to add to or to remove it from the album. - Page 253 Tip: To copy an entire album, open the Media menu and select Copy Album to Card or Copy Album to Device. Select the album you want, and then select Copy . Deleting a Picture or Video From Your Device From the Gallery, select the picture you want to delete. Open the menus Select Delete from the Media menu.
-
Page 254: Customizing Your Camera Settings
Customizing Your Camera Settings While taking pictures or videos, you can adjust several camera settings. From the Still or Video view, open the menu Set any of the following settings: Effects sets the color palette for the current picture or video. You can’t change an item’s palette after you take the picture or video. - Page 255 Review photos/videos determines whether you can review pictures or videos before saving them and how long you to review them before they are automatically saved. Auto naming assigns a name to a series of pictures to be captured, such as Seattle001, Seattle002, etc. Select OK.
-
Page 256: Using Your Online Album
Using Your Online Album Uploading Pictures to Your Online Album Your Sprint PCS Picture Mail account includes an online album on the Sprint PCS Picture Mail Website. You can use your online album to store and view pictures from your device or from a computer with Internet access. Note: The first time you upload a picture to your online album, you are prompted to create a password. - Page 257 Album List lists all the albums in your Sprint PCS Picture Mail account. New Album lets you create a new album. Tip: You can also download and play videos from your online album, and you can listen to voice captions that are attached to pictures too. Section 3F: Using Your Device’s Built-in Camera...
-
Page 258: Viewing Pictures And Videos On Your Computer
You can also view, download, and manage your pictures and videos on your computer at Windows. Refer to the Palm Desktop Online Help for information about using the Palm™ Media desktop application. To find all synchronized images, look in: C:\Program Files\Palm\<User folder>\Photos\offline copy location... -
Page 259: Section 4: Help
Section 4 Help... -
Page 261: Help
Help In This Section Getting Help Upgrading from Another Palm Powered Device Resetting Your Treo 650 Replacing the Battery Troubleshooting Errors Making Room On Your Treo 650 Voice Quality Section 4A: Help S e c ti o n 4 A... -
Page 262: Getting Help
This section presents answers to the questions and issues you are most likely to have while using your Treo 650. Opening the Quick Tour Your Treo 650 includes a built-in tutorial to teach you the basics. Open it any time, anywhere. Go to Applications Follow the instructions and learn all about your Treo 650. -
Page 263: Upgrading From Another Palm Powered Device
Palm® OS software version 5.4 on your new Treo 650. Quarantined files are not installed on your smart device nor are they deleted; these files are placed in a new folder on your computer. - Page 264 (Mac users only) If you have pictures on your old device, copy them from your old device to an expansion card or beam them to your new Treo 650 device. Section 4A: Help...
- Page 265 If any third-party applications are quarantined during the installation, do not manually install any of the quarantined files. Contact the third-party developer for software updates and information about compatibility with your Treo 650. What’s New on Your Treo 650 After upgrading, there are a few things you need to know about your new device.
- Page 266 If you have trouble connecting to the Internet, you may need to contact Sprint and ask them to re-provision your Treo 650 for Sprint PCS Vision.
- Page 267 C:\Program Files\Palm\Treo Pictures\(user name) Trouble Upgrading? If you experience problems with your Treo 650 after performing the upgrade steps in the previous section, you may have incompatible applications or settings that were not quarantined during the installation process. These files reside in your Backup subfolder.
- Page 268 Delete all files from the original backup subfolder. Perform a hard reset on your Treo 650. See “Resetting Your Treo 650” on page 258 for instructions.
- Page 269 If you want to continue using these types of applications, please contact the third-party developer for software updates and information about compatibility with your Treo 650. Visit the Knowledge Library at information about transferring information from your previous Palm Powered device to your Treo 650. Section 4A: Help http://www.palm.com/us/support/...
-
Page 270: Resetting Your Treo 650
Treo 650. System Reset A system reset, also called a safe or warm reset, tells your Treo 650 to stop what it’s doing and start over again without loading any system extras. If your Treo 650 loops or freezes during a soft reset, a system reset may help. Performing a system... - Page 271 Never perform a hard reset without first trying a soft and system reset. You can restore previously synchronized information the next time you synchronize. A hard reset can tell you if a problem stems from your Treo 650 or from an application installed on it. If you do not experience the problem after you perform a hard reset, the problem may be related to software you installed.
- Page 272 Treo 650. Continue pressing and holding Power/End with a progress bar, and then the circular Palm Powered logo appears. When the circular Palm Powered logo appears, release Power/End When the “Erase all data?” prompt appears, press Up hard reset.
-
Page 273: Replacing The Battery
Replacing the Battery Your Treo 650 comes with a replaceable battery. Be sure to use a Sprint-approved battery that is compatible with Treo 650. Press Power/End Press the Battery Door Release button and slide the battery door downward to remove it from your Treo 650. - Page 274 Wait for your Treo 650 to turn on, and then enable the network time or set the date and time when prompted. Battery Door Release Notch Battery Contacts Phone Contacts Section 4A: Help...
-
Page 275: Troubleshooting
Troubleshooting Desktop Software Installation The software included with your Treo 650 installs the drivers that let you synchronize with Palm® Desktop software or Microsoft Outlook for Windows. If you're having difficulty installing the desktop software, please perform the following steps: Restart your computer. - Page 276 (see “Adjusting the Brightness” on page 147). If that doesn’t work, perform a soft reset (see “Soft Reset” on page 258). If that doesn’t work, connect the Treo 650 to the AC charger (see “Charging the Battery” on page 6) and perform a soft reset again.
-
Page 277: Network Connection
There’s a Blinking Symbol at the Top of the Screen The blinking asterisk at the top of the screen is the Alert Manager symbol. It appears when you have alarms or messages that you haven't acknowledged. Press and hold Center or tap the Alert Manager symbol with your stylus. A list of pending alarms or messages appears. - Page 278 However, if the Treo 650 can’t determine if your device’s phone was on before the reset, it does not automatically turn on the phone (see “Turning Your Device’s Phone On and Off”...
- Page 279 The Bluetooth application screen is closed. The Treo 650 Won’t Connect to the Internet Your Treo 650 supports Sprint PCS Vision, a way to connect to the Internet that is persistent, faster, and more reliable than a regular dial-up connection. All Sprint customers can connect to the Internet, but to avoid high per-minute charges, we recommend that you subscribe to a Sprint PCS Vision plan.
- Page 280 35). Confirm that the DUN setting is turned off in the Bluetooth application (see “Using Dial-up Networking on Your Treo 650” on page 82). Contact Sprint to verify that your service plan includes the appropriate messaging services, that these services are correctly activated, and that messaging services are currently available at your location.
-
Page 281: Dial-Up Networking
Re-create the trusted pair between your Treo 650 and your computer (see “Creating a Trusted Pair Between Your Treo 650 and Your Computer” on page 82). Make sure that the Bluetooth DUN setting on your Treo 650 is on (see “Enabling DUN on Your Treo 650” on page 84). Synchronization (HotSync®) Synchronization lets you back up your Treo 650 information onto your computer. - Page 282 Local USB is checked. If you don’t see the HotSync Manager icon Palm, and then select HotSync Manager. Mac. Find the Palm folder on your Mac hard drive. Double-click the HotSync Manager icon panel, set Local Setup Port to Palm USB.
- Page 283 Reinstall the Software Installation CD that came with your Treo 650. Synchronization Starts But Stops Without Finishing If you upgraded from a previous Palm Powered device or received a system error, such as Sys0505, there may be conflicts with software on your device. As you complete the following steps, synchronize after each step.
- Page 284 Reboot your computer. Reinstall the Palm Software Installation CD that came with your Treo 650. Tip: The HotSync Log can tell you when and why synchronization stopped. Right-click the HotSync Manager icon in your Windows System Tray, and then select View Log .
- Page 285 If you’re using Microsoft Outlook, consider the following: With the included software, your Treo 650 can synchronize with the root folders of Contacts, Calendar, Tasks, and Notes. If you want to synchronize the addresses from a global Exchange Address Book, you must copy the addresses to your local Contacts list in Outlook (right- click the addresses, and then select Add to Personal Address Book).
- Page 286 My Appointments Show Up in the Wrong Time Slot After I Sync If you're using Microsoft Outlook: Make sure that you installed the Microsoft Outlook conduit that came with your Treo 650. If you're not sure whether this software is installed, reinstall it. Open Microsoft Outlook and correct the wrong entries.
- Page 287 In the Calendar conduit dialog box, and select Synchronize the files. To avoid this problem in the future, do not assign time zones to your events. Palm Desktop software does not support time zones. Email I Have Problems Using My Account Occasionally you may experience problems using an email account after you set it up.
- Page 288 mail for an extended period of time, check with your ISP or email service provider to verify that the service is working properly. Auto Sync Is Not Working If Auto Sync is occurring and you turn your device off or the connection to your email service provider is disconnected, the Auto Sync fails.
- Page 289 My vCard or vCal Email Attachment Isn’t Forwarding Correctly Palm Desktop software provides several features that work with email client software on a Windows computer. For these features to work correctly, the email client software must be properly set up. Follow these steps to check the settings: Click Start on your computer, and then select Settings.
- Page 290 Flash, Shockwave, Java applets, VBScript, WML script, and media plug-ins. Some Websites automatically redirect you to their true home page (for example, http://www.palm.com/support http://support.palmOne.com/esupport/html/start.jsp observe the redirect, you can use a desktop browser to see the true home page’s address, and enter that address in the Web browser.
- Page 291 189 for details.) Camera and Sprint PCS Picture Mail If your Treo 650 does not include a camera, then the information in this section about taking photos does not apply to you. The Sprint PCS Picture Mail application takes pictures at Small picture size (160x120 pixels) and Large picture size (640x480 pixels, or 0.3 megapixel).
-
Page 292: Third-Party Applications
Remember, when you synchronize, your Sprint PCS Picture Mail images are stored in the My Pictures/Palm Photos folder on your computer (see “Viewing Pictures and Videos on Your Computer” on page 246). The Camera Preview Image Looks Strange Some third-party applications overwrite the Treo 650’s color settings with their... - Page 293 If you recently installed an application and your Treo 650 seems to be stuck, try the following: Perform a soft reset (see “Soft Reset” on page 258). If the problem persists, perform a system reset (see “System Reset” on page 258).
- Page 294 Getting More Help Contact the author or vendor of any third-party software if you require further assistance. Sprint does not provide technical support for applications that are not built into your Treo 650. Section 4A: Help...
-
Page 295: Errors
To manually establish a new Sprint PCS Vision session, open the Web browser. Sometimes you might want to know more about an error. The Treo 650 uses a special interface to show error messages in greater detail. Press the Phone/Send Press Center, and then select Dial Pad. - Page 296 Fixing an Error 67 Message Press the Phone/Send From the Dial Pad, dial ##data. Open the menus Select Update Vision Profile from the Options menu. Select Now. button. Section 4A: Help...
-
Page 297: Making Room On Your Treo 650
Making Room On Your Treo 650 If you store a large number of entries, or install many third-party applications, the internal memory on your Treo 650 may fill up. Here are some common ways to clear space on your Treo device: Sprint PCS Picture Mail. -
Page 298: Voice Quality
Voice Quality Is the Other Person Hearing an Echo? Try decreasing the volume on your Treo smartphone to avoid coupling or feedback on the other person’s end. This applies to both the speakerphone and the built-in earpiece. Position the handset closer to your ear to prevent sound leaking back into the microphone. -
Page 299: Glossary
: A keyboard key. Enter a letter on the keyboard, and then press to access variations such as international characters and symbols. Applications: The screen on your Treo 650 from which you can open all applications. Auto-off interval: The time of inactivity that passes before the screen on your Treo 650 turns off. - Page 300 Treo 650. Palm OS®: The operating system of your Treo 650. Palm OS is known for its simplicity of use and for the large number of applications that can be added to your Treo 650.
- Page 301 Palm™ Quick Install: The component on your Windows computer that enables you to install Palm OS applications and other information on your Treo 650. Phone: The application on your Treo 650 that provides quick access to the most commonly used applications on your Treo device.
- Page 302 You can also manage your videos online. Username: The name associated with your Treo 650 that distinguishes it from other Palm Powered™ devices. When you first synchronize your Treo 650, you are asked to give it a username. Section 4B: Glossary...
-
Page 303: Section 5: Safety And Terms And Conditions
Section 5 Safety and Terms and Conditions... -
Page 305: Safety
Safety In This Section Getting the Most Out of Your Reception Maintaining Safe Use of and Access to Your Device Caring for the Battery Acknowledging Special Precautions and the FCC Notice Consumer Information on Wireless Phones Using Your Phone with a Hearing Aid Device Owner’s Record User’s Guide Proprietary Notice Part of getting the most out of your Sprint PCS Vision Smart Device is learning how the... -
Page 306: Getting The Most Out Of Your Reception
Getting the Most Out of Your Reception Keeping Tabs on Signal Strength The quality of each call you make or receive depends on the signal strength in your area. Your phone informs you of the current signal strength by displaying a number of bars next to the signal strength icon. - Page 307 August 1996, the FCC adopted hybrid standard consisting of the existing ANSI/IEEE standard and the guidelines published by the National Council of Radiation Protection and Measurements (NCRP). Maintaining Your Phone’s Peak Performance There are several simple guidelines to operating your phone properly and maintaining safe, satisfactory service.
-
Page 308: Maintaining Safe Use Of And Access To Your Device
Maintaining Safe Use of and Access to Your Device FAILURE TO FOLLOW THE INSTRUCTIONS OUTLINED MAY LEAD TO SERIOUS PERSONAL INJURY AND POSSIBLE PROPERTY DAMAGE Using Your Phone While Driving Talking on your phone while driving (or operating the phone without a hands-free device) is prohibited in some jurisdictions. - Page 309 Following Safety Guidelines To operate your phone safely and efficiently, always follow any special regulations in a given area. Turn your phone off in areas where use is forbidden or when it may cause interference or danger. Using Your Phone Near Other Electronic Devices Most modern electronic equipment is shielded from radiofrequency (RF) signals.
- Page 310 Turn your phone off when you're in any area that has a potentially explosive atmosphere. Although it's rare, your phone and accessories could generate sparks. Sparks can cause an explosion or fire, resulting in bodily injury or even death. These areas are often, but not always, clearly marked.
-
Page 311: Caring For The Battery
Caring for the Battery Protecting Your Battery The guidelines listed below help you get the most out of your battery’s performance. Use only Sprint-approved batteries and desktop chargers. These chargers are designed to maximize battery life. Using other batteries or chargers voids your warranty and may cause damage. - Page 312 Disposal of Lithium Ion (LiIon) Batteries For safe disposal options of your LiIon batteries, contact your nearest Sprint-authorized service center. Special Note: Be sure to dispose of your battery properly. In some areas, the disposal of batteries in household or business trash may be prohibited. Note: For safety, do not handle a damaged or leaking LiIon battery.
-
Page 313: Acknowledging Special Precautions And The Fcc Notice
Acknowledging Special Precautions and the FCC Notice FCC Notice This equipment has been tested and found to comply with the limits for a Class B digital device, pursuant to part 15 of the FCC Rules. These limits are designed to provide reasonable protection against harmful interference in a residential installation. - Page 314 A Palm brand body-worn accessory that has been tested for SAR compliance and is intended for use with this product. An accessory that contains NO metal (snaps, clips, etc.) and provides AT LEAST 1.5 cm of separation between the users body and the unit.
- Page 315 FCC Radiofrequency Emission This phone meets the FCC Radiofrequency Emission Guidelines and is certified with the FCC as FCC ID number: O8FMADECA. More information on the phone's SAR can be found from the following FCC Website: https://gullfoss2.fcc.gov/prod/oet/cf/eas/reports/GenericSearch.cfm. Section 5A: Safety...
-
Page 316: Consumer Information On Wireless Phones
(The following information comes from a consumer information Website jointly sponsored by the U.S. Food and Drug Administration (FDA) and the Federal Communications Commission (FCC), entitled “Cell Phone Facts: Consumer Information on Wireless Phones.” The information reproduced herein is dated July 29, 2003. For further updates, please visit the Website: http://www.fda.gov/cellphones/qa.html.) - Page 317 How is radiofrequency energy used? Probably the most important use of RF energy is for telecommunications. Radio and TV broadcasting, wireless phones, pagers, cordless phones, police and fire department radios, point-to-point links and satellite communications all rely on RF energy. Other uses of RF energy include microwave ovens, radar, industrial heaters and sealers, and medical treatments.
- Page 318 Very high levels of electromagnetic energy, such as is found in X-rays and gamma rays can ionize biological tissues. Ionization is a process where electrons are stripped away from their normal locations in atoms and molecules. It can permanently damage biological tissues including DNA, the genetic material.
- Page 319 The FCC guidelines for human exposure to RF electromagnetic fields are derived from the recommendations of two expert organizations, the National Council on Radiation Protection and Measurements (NCRP) and the Institute of Electrical and Electronics Engineers (IEEE). In both cases, the recommendations were developed by scientific and engineering experts drawn from industry, government, and academia after extensive reviews of the scientific literature related to the biological effects of RF energy.
- Page 320 Why has the FCC adopted guidelines for RF exposure? The FCC authorizes and licenses products, transmitters, and facilities that generate RF and microwave radiation. It has jurisdiction over all transmitting services in the U.S. except those specifically operated by the Federal Government. While the FCC does not have the expertise to determine radiation exposure guidelines on its own, it does have the expertise and authority to recognize and adopt technically sound standards promulgated by other expert agencies and organizations, and has done so.
- Page 321 not exclusions from compliance, but, rather, exclusions from routine evaluation. The FCC's policies on RF exposure and categorical exclusion can be found in Section 1.1307(b) of the FCC's Rules and Regulations [(47 CFR 1.1307(b)]. How can I obtain the Specific Absorption Rate (SAR) value for my wireless phone? The FCC requires that wireless phones sold in the United States demonstrate compliance with human exposure limits adopted by the FCC in 1996.
- Page 322 information available on their own Websites. In addition, some non-government Websites provide SARs for specific models of wireless phones. However, the FCC has not reviewed these sites and makes no guarantees of their accuracy. Finally, phones certified by the Cellular Telecommunications and Internet Association (CTIA) are required to provide SAR information to consumers in the instructional materials that come with the phones.
- Page 323 What are wireless telephone base stations? Fixed antennas used for wireless telecommunications are referred to as cellular base stations, cell stations, PCS (“Personal Communications Service”) stations or telephone transmission towers. These base stations consist of antennas and electronic equipment. Because the antennas need to be high in the air, they are often located on towers, poles, water tanks, or rooftops.
- Page 324 shaped, like a piece of pie. As with all forms of electromagnetic energy, the power decreases rapidly as one moves away from the antenna. Therefore, RF exposure on the ground is much less than exposure very close to the antenna and in the path of the transmitted radio signal. In fact, ground-level exposure from such antennas is typically thousands of times less than the exposure levels recommended as safe by expert organizations.
- Page 325 Does the FCC routinely monitor radiofrequency radiation from antennas? The FCC does not have the resources or the personnel to routinely monitor the emissions for all the thousands of transmitters that are subject to FCC jurisdiction. However, the FCC does have measurement instrumentation for evaluating RF levels in areas that may be accessible to the public or to workers.
- Page 326 fadb.html. Entry points into the various databases include frequency, state/county, latitude/ longitude, call-sign and licensee name. For further information on the Commission's existing databases, you can contact Donald Campbell at dcampbel@fcc.gov or 202-418-2405. Can local and state governmental bodies establish limits for RF exposure? Although some local and state governments have enacted rules and regulations about human exposure to RF energy in the past, the Telecommunications Act of 1996 requires the Federal Government to control human exposure to RF emissions.
- Page 327 could require the manufacturers of wireless phones to notify users of the health hazard and to repair, replace or recall the phones so that the hazard no longer exists. Although the existing scientific data do not justify FDA regulatory actions, FDA has urged the wireless phone industry to take a number of steps, including the following: Support needed research into possible biological effects of RF of the type emitted by wireless phones;...
- Page 328 What kinds of phones are the subject of this update? The term “wireless phone” refers here to hand-held wireless phones with built-in antennas, often called “cell,” “mobile,” or “PCS” phones. These types of wireless phones can expose the user to measurable radiofrequency energy (RF) because of the short distance between the phone and the user's head.
- Page 329 What research is needed to decide whether RF exposure from wireless phones poses a health risk? A combination of laboratory studies and epidemiological studies of people actually using wireless phones would provide some of the data that are needed. Lifetime animal exposure studies could be completed in a few years.
- Page 330 assessment of additional research needs in the context of the latest research developments around the world. What steps can I take to reduce my exposure to radiofrequency energy from my wireless phone? If there is a risk from these products--and at this point we do not know that there is--it is probably very small.
- Page 331 What about wireless phone interference with medical equipment? Radiofrequency energy (RF) from wireless phones can interact with some electronic devices. For this reason, FDA helped develop a detailed test method to measure electromagnetic interference (EMI) of implanted cardiac pacemakers and defibrillators from wireless telephones.
- Page 332 devices, television sets, microwave ovens, laser products and sunlamps. The CDRH established a product performance standard for microwave ovens in 1971 limiting the amount of RF leakage from ovens. However, the CDRH has not adopted performance standards for other RF-emitting products. The FDA is, however, the lead federal health agency in monitoring the latest research developments and advising other agencies with respect to the safety of RF-emitting products used by the public, such as cellular and PCS phones.
- Page 333 but final guidelines were never adopted by the agency. NIOSH conducts safety-related RF studies through its Physical Agents Effects Branch in Cincinnati, Ohio. The NTIA is an agency of the U.S. Department of Commerce and is responsible for authorizing Federal Government use of the RF electromagnetic spectrum. Like the FCC, the NTIA also has NEPA responsibilities and has considered adopting guidelines for evaluating RF exposure from U.S.
- Page 334 In addition, if the cell phone presents a risk of injury to the user, FDA may also take regulatory action. The most important post-grant test, from a consumer's perspective, is testing of the RF emissions of the phone.
- Page 335 (that is, the risks from using a cell phone for many years). If new information leads FDA to believe that a change to FCC's measurement policy may be appropriate, FDA will contact FCC and both agencies will work together to develop a mutually-acceptable approach.
-
Page 336: Using Your Phone With A Hearing Aid Device
Trying the phone with your hearing device is the best way to evaluate it for your personal needs. Should you experience interference when using your Treo 650 with your hearing device, Sprint suggests you promptly return the phone to the store. With the Sprint 14-day Risk-Free Guarantee you may return the phone within 14 days of purchase for a full refund. - Page 337 Hearing devices may also be measured for immunity to this type of interference. Your hearing aid device manufacturer or hearing health professional may help you find results for your hearing device. The more immune your hearing aid is, the less likely you are to experience interference noise from wireless phones.
-
Page 338: Owner's Record
Record the serial number in the space provided below. This will be helpful if you need to contact us about your phone in the future. Model: Sprint PCS Vision Serial No.: Smart Device Treo™ 650, by Palm Section 5A: Safety... -
Page 339: User's Guide Proprietary Notice
User’s Guide Proprietary Notice CDMA Technology is licensed by QUALCOMM Incorporated under one or more of the following patents: 4,901,307 5,109,390 5,267,262 5,416,797 5,506,865 5,544,196 5,657,420 5,101,501 5,267,261 5,414,796 5,504,773 5,535,239 5,600,754 5,778,338 5,228,054 5,337,338 5,710,784 5,056,109 5,568,483 5,659,569 5,490,165 5,511,073 User’s Guide template version 3D (04-08-04) Section 5A: Safety... - Page 340 Section 5A: Safety...
-
Page 341: Terms And Conditions
Terms and Conditions In This Section Terms and Conditions of Services Specifications Section 5B: Terms and Conditions S e c ti o n 5 B... -
Page 342: Terms And Conditions Of Services
Terms and Conditions of Services Effective September 1, 2005 Thanks for choosing Sprint. These terms and conditions are part of your agreement with Sprint for PCS (CDMA) Services. Separate terms apply for any iDEN products or services. Please note these terms may not be the most current version. You can get a current version of the terms on our Website at 211-4PCS. - Page 343 government calculations may increase or decrease on a monthly basis, and that this paragraph does not apply to any increases in such taxes, Universal Service fees or other charges. Activating Service. Before activation, we may check your credit and verify your identity. You must have and maintain satisfactory credit to receive and continue to receive Services.
- Page 344 Termination of Services. Consistent with this Agreement: (a) we may terminate Services at any time with notice to you and, in certain instances, without notice; and (b) you may terminate Services at any time with prior notice to us. Except as otherwise provided in this TERM SERVICE PLAN Agreement, IF YOU TERMINATE YOUR EARLY, OR WE DO SO FOR GOOD...
- Page 345 delays (e.g., dropped calls, blocked calls, etc.) in the coverage areas we identify. Actual coverage and quality of Services may be affected by conditions within or beyond our control, including network problems, software, signal strength, your equipment, structures (including buildings in which you may be located), atmospheric, geographic, or topographic conditions.
- Page 346 other intervals. In certain instances, you may not know that your session has not ended. As long as your device is connected to our network, you will incur data usage charges. You will be charged for all data directed to the internet address (or “IP address”) assigned to your device, regardless of who initiates the activity or whether your device actually receives the data.
- Page 347 suspension of your account. If you agree to any auto-payment option through banking or credit account, we may initiate payment from the account for all amounts we invoice you without additional authorization or notice. Based on your credit or payment history, we may require certain forms of guaranteed payment as a condition of maintaining Services.
- Page 348 Other Sprint PCS Vision Terms. You will not receive voice calls while using Vision. Vision is not available for use with server devices or host computer applications, other systems that drive continuous heavy traffic or data sessions, or as substitutes for private lines or frame relay connections.
- Page 349 mailbox icons, may not always provide an up to date indication of new messages and you may at times need to manually reset or clear your mailbox indicator. Legitimate messages may be interrupted by software aimed at prevention of SPAM or similar messages. Caller ID.
- Page 350 found to be responsible to you for monetary damages relating to the Services (including wireless devices), you agree that any such damages will not exceed the pro-rated monthly recurring charge for your Services during the affected period. NO CONSEQUENTIAL OR OTHER DAMAGES. UNDER NO CIRCUMSTANCES ARE WE LIABLE FOR ANY INCIDENTAL, CONSEQUENTIAL, PUNITIVE OR SPECIAL DAMAGES OF ANY NATURE WHATSOEVER ARISING OUT OF OR IN CONNECTION WITH PROVIDING OR FAILING TO...
- Page 351 A single arbitrator engaged in the practice of law will conduct the arbitration. The arbitration will be filed with and the arbitrator will be selected according to the rules of either JAMS or the National Arbitration Forum (“NAF”), or, alternatively, as we may mutually agree.
- Page 352 © 2005 Sprint Nextel. All rights reserved. No reproduction in whole or in part without prior written approval. Sprint, the “Going Forward” logo, the NEXTEL name and logo, and other trademarks are trademarks of Sprint Nextel. iDEN is a trademark of Motorola, Inc. Section 5B: Terms and Conditions...
-
Page 353: Specifications
Intel PXA270 312MHz processor Expansion SD/MultiMediaCard/SDIO card slot Battery Rechargeable Lithium Ion 4 hours full charge time Palm OS version Palm OS® 5.4 Camera (if included) VGA resolution (640x480), 0.3 megapixel Automatic light balance Size/ weight 4.4" x 2.3" x 0.9" without antenna (11.3 cm x 5.9 cm x 2.3 cm) - Page 354 Included software Phone (including Palm OS Contacts, Favorites, Dial Pad) Sprint PCS Picture Mail (camera/ messages) Web browser (Internet) Sprint PCS Business Connect VersaMail Calendar Tasks System requirements Windows 2000 or XP with USB port Mac OS 10.2–10.3.x with USB port...
-
Page 355: Index
Dial Pad 52, 63 email 182, 205 Favorites list 54 invoicing information 16 messages 13 online album 244 Palm OS applications 48 personal accounts 14, 15 personal information 158 Phone Book 67 Picture Mail Gallery 238, 240 Sprint PCS Directory Assistance 16... - Page 356 categories 149 cities to World Clock 112 contacts 67, 72 events 89, 91, 92 favorite buttons 71–74 memos 103 passwords 14, 159, 161 private entries 161 QuickText phrases 212 songs to playlists 110 tasks 99 trusted pairs 79 voice captions to pictures 235 add-on applications 37 Address Book 175 See also Contacts application...
- Page 357 221 application buttons 36, 47, 151 Application favorite buttons 73 application icons 149 application preferences 149–150, 152 applications accessing Palm OS 48 arranging 149, 150 associating with buttons 151 backing up information in 124 beaming 122 copying 136 customizing 149...
- Page 358 audio player. See RealOne Player Auto Lock Device box 159 Auto naming pick list 243 auto shutoff intervals 155 Auto-Keyguard preference 157 automated invoicing information 16 automatic resets 283 auto-off interval 287 Auto-off setting 9, 155 back view (Sprint PCS device) 32 Background check box 95 backgrounds 95 backing up information 20, 124...
- Page 359 turning on and off 59 viewing status of 59 Bluetooth headsets 63, 75, 76, 78 Bluetooth technology 77 bookmarks 120, 227–229 Bookmarks view 227, 228 Bookmarks view icon 228 books iii brightness (screen) 9, 147 browser. See Web browser built-in applications 127, 130 built-in camera.
- Page 360 Calendar application See also calendar changing screen fonts for 147 color-coding events with 93 defining custom intervals for 92 displaying current event in 60 managing events with 88–94 opening 31, 47 selecting views 88 setting display options in 94 setting sound preferences 97 viewing event status for 60 Calendar button 31, 47, 88 call forwarding 59, 173...
- Page 361 characters accessing international 287 displaying alternate 44 displaying hexadecimal 115 entering from keyboard 42, 43 maximum in notes 103 maximum in text messaging 208 messages and invalid 212 Quick Keys and 71 searching on 117, 118 typing accented 43 charge indicators 60 charger adapter 7 charger cable 6, 8 chargers (optional) 165...
- Page 362 connectivity 341 constants 116 Consumer Information on Wireless Phones 304 Contact Edit view 67–68, 70 contacts adding 67, 72 addressing messages to 209, 210 assigning pictures to 142 changing information for 68 deleting 69 dialing by 53 entering multiple 67 looking up 117, 160 marking as private 68 masking 160...
- Page 363 messages 191, 208, 210 passwords 14, 159, 161 photo albums 245 playlists 109 private entries 161 QuickText phrases 212 tasks 99 trusted pairs 79 current events 60 Current Privacy pick list 161 Customer Service iv, 14, 15 customizing application buttons 151 applications 149–150 calendar 94–96 camera 242...
- Page 364 events 94 favorite buttons 74 memos 103 messages 217, 218 pending alerts 170 pictures 241 playlists 110 tasks 101 Details button 39 Device name field 77 Dial dialog box 55 Dial Extra Digits Automatically option 73 Dial Pad 52, 63 Dial Pad buttons 63, 73 dialing 52–55, 63, 64, 225 dialing shortcuts 72...
- Page 365 tips iii unread messages 60, 95 video clips 238, 239, 246 Web pages 222, 224, 226 disposing of battery 300 disputed charges 335 docking cradle 165 documentation i, ii, iii, 4 arrow icons in 37 downloading applications 127, 224 files 224 images 182 pictures 224 ringtones 181...
- Page 366 switching accounts for 198 taking digital pictures for 181 troubleshooting 275–278, 279 viewing attachments in 196 Email buttons 73 email providers 186, 187, 188, 189 emergency calls 157, 163, 177 emoticons 212 emotive symbols 212 Empty battery icon 7 Enable Background Playback check box 109 Enable Digital Roaming preference 66 Enable Local Network Time box 111, 153...
- Page 367 FAQs 15 favorite buttons assigning images to 182 assigning ringtones to 143 defining 71–74 dialing with 54 Favorites list 54 Favorites pages 74 features 40, 163, 181 files 136, 162, 194, 224 financial calculator 115 Find dialog box 118 Find Text on Page command 226 finding contact information 117, 160 phone numbers 61...
- Page 368 headphone adapter 166 headphones 104 headset connector 76 headsets 33, 75, 76 See also Bluetooth headsets hearing-impaired services 176, 177, 337 help iii, 15, 129, 250, 282 hexadecimal characters 115 Hide Records setting 161 hiding private entries 160, 161 highlighting applications 49 highlighting screen items 39 hints 159 History command 226...
- Page 369 Infrared port. See IR port infrared-enabled devices 34 inserting battery 5, 32 inserting expansion cards 134 installing applications 127–129, 281, 285 Palm Desktop 263 RealPlayer 104 synchronization software 20, 24 interference 301 international characters 287 international clock 111, 154 international travel adapters 165...
- Page 370 letters. See characters liability 337 light. See indicator light lightning bolts 7 Li-Ion battery. See battery Li-Ion technology 288 links. See Web links list screens 38, 39 list view 150 listening to music 104, 108–110 listening to voice captions 238, 245 lists 41 Lithium Ion technology 288 locating...
- Page 371 purging events and conserving 94 setting cache 231 Memos application 103, 124, 147 Memos icon 103 Menu button 40 menu shortcuts 41 menus 40 Message buttons 73 Message Tone pick list 219 messages accessing 13 adding Web links to 214 addressing 73, 208, 210, 212 chat sessions and 215 checking status of 60, 95, 216...
- Page 372 mouthpiece 31 MP3 files 76, 104 MPEG4 formats 246 Multi-connector icon 22 Multi-connector port 33 multimedia messages 181, 209–211 MultiMediaCard cards 34, 133 multi-phone accounts 14 multiple addresses 73 multiple alerts 213 multiple recipients 212 music adjusting volume for 142 answering calls and 58 Bluetooth devices and 79 changing playlists for 109...
- Page 373 162 installing 24, 263 securing files for 162 setting up synchronization for 20–21 synchronizing information with 124, Palm Desktop application 288 Palm Desktop, entering time zones with 90 Palm OS (defined) 288 Palm OS applications See also applications accessing 48...
- Page 374 120 installing synchronization software for 20 upgrading from 22, 251, 263 Palm OS version 341 palmOne Treo™ 650. See Sprint PCS Vision Smart Device palmOneSoftware.pkg icon 24 paper clip icon 196 Partial battery icon 7 passkeys 80...
- Page 375 roaming and 66 running applications and 64 safety guidelines for 295, 297, 298 selecting ringtone for 72 setting passwords for 14 setting up call forwarding for 173 setting up call waiting for 172 silencing ringer for 58 specifications for 341 text messaging and 212 turning on 30 unlocking 158...
- Page 376 opening 181 organizing pictures and videos 240 overview 234 recording video clips with 236 setting up Web account for 210 taking pictures from 235 troubleshooting 268, 279 Picture Mail icon 181 Picture Mail message icons 216 Picture Mail Website 244, 246 Picture message icon 60 picture thumbnails 95, 244 pictures...
- Page 377 privacy status icon 59 Private box 161 private contacts 68 private entries 160–162 processor 341 programmable buttons 71 Prompt sound pick list 242 prompts 69 protecting personal information 14, 156, proxy servers 231 punctuation 43 purchasing accessories 15, 165 purchasing Premium Services 14 Purge command 94, 101, 217 Purge pick list 217 purging events 94...
- Page 378 remote cities 112 removing. See deleting Rename Card command 138 renaming expansion cards 137 Repeat Alarm pick list 97 repeat intervals (calendar) 92 Repeat pick list 92 repeating events 92, 96 repeating tasks 100 replacement batteries 7 replacement stylus 166 replacing battery 165, 261 rescheduling events 94 resetting smart device 258–260...
- Page 379 moving around in 37–39 realigning 148 selecting items on 40 selecting wallpaper for 144, 182, 241 specifications for 341 troubleshooting problems with 264 turning on and off 30, 35, 155, 159 waking up 36, 64 screen fonts 147 screen savers 182 Screen Savers icon 182 scroll arrows 38 scroll bars 39...
- Page 380 monitoring strength 59, 60, 294 searching for 9 sending and receiving 34, 294 signal strength icon 60 silencing ringer 58, 142, 145 silent alarm 145 slide shows 238 slider (scroll bars) 39 SMS (Short Messaging Service) 289 SMS message icon 60 soft resets 258 software 4, 24, 127, 342 Software bookmark 224...
- Page 381 Sprint PCS Vision Service 11, 176, 180, Sprint PCS Vision sessions 283 Sprint PCS Vision Smart Device accessories for 165 activating 12 additional resources for iii backing up information on 124 caring for 293 caution for unauthorized accessories and 7 changing color scheme for 148 charging battery for 6–7, 9 components shipped 4...
- Page 382 14 support iv, 14, 15 symbols 43, 212, 287 sync connector 33 synchronization defined 20 installing Palm software and 24 recommendations for 8, 20, 124 removing applications and 131 troubleshooting 269–273 upgrades and 252 synchronization software 20, 24, 252 system clock 113 system errors 283–284...
- Page 383 251 transferring calls to voicemail 13 transferring information 20, 120, 124 Trash folder 197 travel adapters 165 Treo™ 650. See Sprint PCS Vision Smart Device trigonometric functions 115 troubleshooting 250, 263 trusted pairs 78, 79...
- Page 384 TTY devices 176 TTY Mode pick list 176 TTY/TDD Mode icon 59 turning Bluetooth devices on and off 59 turning off beeps and alarms 34 turning off keyboard backlight 42 turning Sprint PCS device on and off 35 tutorial iii, 250 Typing starts contacts search option 118 unanswered calls 13 unauthorized accessories 7...
- Page 385 saving 236 uploading 210 video formats 246 Video icon 211 Video Mail 181, 290 Video Mail icon 181 video recording screen 237 Video view 242 View By pick list 150 viewfinder 235 viewing alternate characters 44 applications 149, 150 attachments 196 available applications 49 calendar 47, 88 clock 47...
- Page 386 volume levels 146 VPN clients 164 VPNs (virtual private networks) 164 waking up screen 36, 64 wallpaper 144, 182, 241 warm resets 258 warranty 7, 133 Web browser beaming from 120 connecting to Sprint PCS Vision home page from 180 customizing 230–231 dialing from 225 downloading files with 224...
- Page 387 Welcome screen 35 Wide Page view 223, 279 Windows operating systems displaying PictureMail with 246 entering passwords and 162 installing applications from 128 removing applications and 131 system requirements for 20 transferring music from 105 wireless coverage 9, 52 wireless devices 332 wireless handsets 302 wireless services 35, 336 Word files 193...
- Page 388 Index...
Need help?
Do you have a question about the 650 and is the answer not in the manual?
Questions and answers