Table of Contents
Advertisement
Advertisement
Table of Contents

Related Manuals for Libelium waspmote plug & sense


Summary of Contents for Libelium waspmote plug & sense
- Page 1 Waspmote Plug & Sense! Technical Guide...
-
Page 2: Table Of Contents
Index Document version: v5.8 - 01/2016 © Libelium Comunicaciones Distribuidas S.L. INDEX 1. General and safety information ......................6 2. Important: Read before use ........................ 7 3. Waspmote vs Waspmote Plug & Sense! ..................... 8 4. General view ............................9 4.1. - Page 3 Index 10. ON / OFF Button ..........................51 10.1. External led ....................................52 11. Resetting Waspmote plug & sense! with an external magnet ............. 53 12. USB ..............................55 12.1. External SIM socket ................................57 13. Internal solar panel ......................... 59 14.
- Page 4 Index 22. Uploading code ..........................99 23. Over the air programming – OTA ....................105 23.1. Overview ....................................105 23.2. Benefits .....................................105 23.3. Concepts ....................................105 23.4. OTA with 802.15.4/ZigBee modules ..........................108 23.4.1. OTA Step by Step..............................108 23.4.2. OTA Shell .................................. 111 23.5.
- Page 5 Index 27. Energy Consumption........................151 27.1. Consumption tables ................................151 27.2. Energy system ..................................151 27.2.1. Concepts .................................. 151 27.2.2. Sleep mode ................................152 27.2.3. Deep sleep mode ..............................152 27.3. Lifetime of the sensors................................153 28. Recommendations ........................154 29. Documentation Changelog ......................155 30.
-
Page 6: General And Safety Information
“External solar panel connector”. • If a software failure occurs, contact Libelium technical support before doing any action by yourself. • Do not place equipment on trees or plants as they could be damaged by its weight. -
Page 7: Important: Read Before Use
Do not expose Waspmote Plug & Sense! to temperatures below -10ºC or above 50ºC. • Do not power Waspmote with other power sources than the original provided by Libelium. Voltage and current maximum ratings can be exceeded, stopping Waspmote working and voiding warranty. -
Page 8: Waspmote Vs Waspmote Plug & Sense
Waspmote vs Waspmote Plug & Sense! 3. Waspmote vs Waspmote Plug & Sense! Waspmote is the original line in which developers have a total control over the hardware device. You can physically access to the board and connect new sensors or even embed it in your own products as an electronic sensor device. The new Waspmote Plug &... -
Page 9: General View
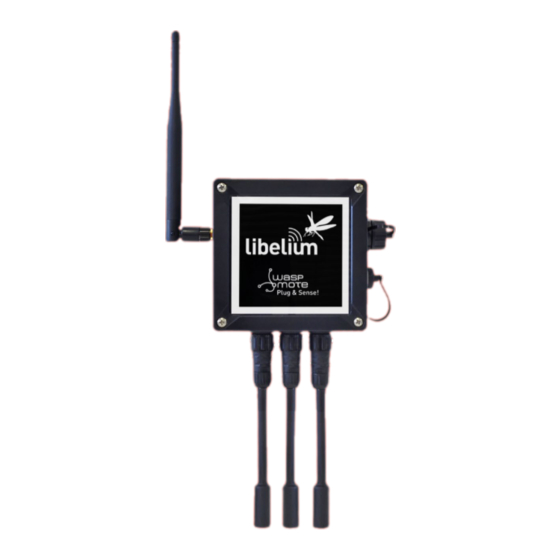
General view 4. General view This section shows main parts of Waspmote Plug & Sense! and a brief description of each one. In later sections all parts will be described deeply. 4.1. Specifications Material: polycarbonate • Sealing: polyurethane • Cover screws: stainless steel •... - Page 10 General view Figure : Control side of the enclosure Figure : Control side of the enclosure for GPRS or 3G models Figure : Sensor side of the enclosure -10- v5.8...
- Page 11 General view Figure : Antenna side of the enclosure Figure : Front view of the enclosure Figure : Back view of the enclosure -11- v5.8...
-
Page 12: Parts Included
General view Figure : Warranty stickers of the enclosure Important note: Do not handle black stickers seals of the enclosure (Warranty stickers). Their integrity is the proof that Waspmote Plug & Sense! has not been opened. If they have been handled, damaged or broken, the warranty is automatically void. 4.2. -
Page 13: Identification
General view 4.3. Identification Each Waspmote model is identified by stickers. Next figure shows front sticker. Model identification colour Enclosure model Figure : Front sticker of the enclosure There are many configurations of Waspmote Plug & Sense! line, all of them identified by one unique sticker. Next image shows all possibilities. - Page 14 General view Moreover, Waspmote Plug & Sense! includes a back sticker where it is shown identification numbers, radio MAC addresses, etc. It is highly recommended to annotate this information and save it for future maintenance. Next figure shows it in detail. Enclosure serial number Radio 1 MAC adress Battery type...
-
Page 15: Sensor Probes
So please see corresponding section about where to connect each probe. Always be sure you connected probes in right socket, otherwise they can be damaged. Never connect a sensor not provided by Libelium to any of the sensor connectors. Electronic inside can be damaged and warranty will be automatically void. - Page 16 Besides that, there is a locking nut which should be screwed till the connector is completely fixed to the enclosure. Figure : Connecting a sensor probe to the enclosure Please use sensors officially provided by Libelium. Any other sensor can damage Waspmote Plug & Sense! and void the warranty. -16-...
-
Page 17: Sensor Probes Types
5.1. Sensor probes types Libelium provides many different sensor probes depending on what is going to be measured. This section describes main features of each type. If further information is required, please refer for the corresponding sensor board guide available on Libelium website. - Page 18 Sensor probes Humidity and temperature (Sensirion) probe This probe is designed to avoid sunlight effects and prevent from water and rain, but allowing humidity measurement. Only the temperature + humidity (Sensirion) sensor includes this special protection. Figure : Humidity and temperature (Sensirion) probe Luminosity - LDR probe This probe is designed to allow sunlight go thought a transparent protection.
- Page 19 Sensor probes Liquid level probe This probe is designed to measure liquid levels. Figure : Liquid level probe Liquid flow probe This probe is designed to measure liquid flow through a pipe. Figure : Liquid flow probe Hall effect probe This probe is designed to control the opening of doors, windows, etc.
- Page 20 Sensor probes Solar radiation probe This probe is designed to measure solar radiation. Figure : Solar radiation probe Soil temperature probe This probe is designed to be buried into the ground to measure its temperature. Figure : Soil temperature probe Soil moisture probe This probe is designed to be buried into the ground to measure its moisture.
- Page 21 Sensor probes Dendrometer probe This probe is designed to measure trunk, stem and fruit diameter of vegetables. Figure : Dendrometer probe Leaf wetness probe This probe is designed to measure wetness on vegetable leafs. Figure : Leaf wetness probe -21- v5.8...
- Page 22 Sensor probes Weather Station WS-3000 probe This probe is designed to measure wind direction, wind speed and rain. Figure : Weather Station WS-3000 probe Linear displacement probe This probe is designed to measure small linear displacements. Figure : Linear displacement probe -22- v5.8...
- Page 23 Sensor probes Current sensor probe This probe is designed to measure the current which goes through a cable. Figure : Current sensor probe Liquid Presence probe (line) This probe is designed to allow placing the sensor near its application. Figure : Liquid Presence probe (line) -23- v5.8...
- Page 24 Sensor probes Directionable Type This type of probe is only for some sensors. Sensor is placed inside a plastic modular hose that allows us to point them where we want to measure with it. Figure : Configurations of directionable sensor probes -24- v5.8...
- Page 25 Sensor probes Sensor probes of this type are: • Presence - PIR directionable probe This probe is designed to allow infrared light trough a lens, necessary for presence applications. Figure : Presence (PIR) directionable probe Ultrasound sensor directionable probe • This probe is designed to measure distances using ultrasonic waves.
-
Page 26: Extension Cord
Sensor probes 5.2. Extension cord This element is used when one sensor needs to be placed far from the node. Two lengths are available: 1.5 and 3m. Next picture shows an extension cord. Figure : Extension cord accessory Extension cord has a female and a male connector. The first one (female) should be connected to sensor probe. Next picture shows it. - Page 27 Sensor probes Moreover, the male connector should be connected to the enclosure as shown below. Figure : Connecting an extension cord to the enclosure -27- v5.8...
-
Page 28: Internal Sensors
3 axes (X,Y,Z). The integration of this sensor allows the measurement of acceleration on the 3 axes (X,Y,Z), establishing 2 kind of events: Free Fall and Direction Detection Change. Figure : Axis direction in Waspmote Plug & Sense! Complete information can be found in the document called Accelerometer Programming Guide, available in the Development section of Libelium website. -28- v5.8... -
Page 29: Radios
Radios 7. Radios Waspmote Plug & Sense! may integrate many radio modules for communication in the ISM (Industrial Scientific Medical) bands. Model Protocol Frequency txPower Sensitivity Range * XBee-802.15.4-Pro 802.15.4 2.4GHz 100mW -100dBm 7000m XBee-ZB-Pro ZigBee-Pro 2.4GHz 50mW -102dBm 7000m XBee-868 868MHz 315mW... - Page 30 Extra information about the encryption systems in 802.15.4 and ZigBee sensor networks can be accessed reading “Security in 802.15.4 and ZigBee networks” document located in Development section of Libelium website. Common topology in 802.15.4 Networks is Star topology, where nodes send directly the sensor data to the Gateway. Figure : Star topology -30- v5.8...
- Page 31 Tx XBee-PRO 10dBm 12dBm 14dBm 16dBm 18dBm Figure : Transmission power values Figure : XBee-PRO TX Power All information about their programming and operation can be found in the 802.15.4 Networking Guide available at Development section of Libelium website. -31- v5.8...
-
Page 32: Zigbee Pro
The topologies in which these modules can be used are star and tree. Figure : Star topology Figure : Tree topology All information about their programming and operation can be found in the ZigBee Networking Guide available at Development section of Libelium website. -32- v5.8... -
Page 33: Digimesh
XBee DigiMesh modules are based on the standard IEEE 802.15.4 that supports functionalities enabling mesh topology use. All information about their programming and operation can be found in the DigiMesh Networking Guide available at Development section of Libelium website. -33- v5.8... -
Page 34: 868Mhz
Radios 7.4. 868MHz Module Frequency Transmission Power Sensitivity Channels Distance XBee 868 869,4 – 869,65MHz 315mW -112dBm 12km The frequency used is the 869MHz band (Europe), using 1 single channel. The use of this module is only allowed in Europe. See certification section to obtain more information. -
Page 35: 900Mhz
Radios Figure : XBee TX Power All information about their programming and operation can be found in the 868MHz Networking Guide available at Development section of Libelium website. 7.5. 900MHz Module Frequency Tx Power Sensitivity Channels Distance XBee 900 902-928MHz... -
Page 36: Lorawan
Receiver: purchase your own base station or use networks from LoRaWAN • Figure : LoRaWAN module operators All the information about their programming and operation can be found in the LoRaWAN Networking Guide available at Development section of Libelium website. -36- v5.8... -
Page 37: Sigfox
APIs to automate the device management and implement the data integration. All the information about their programming and operation can be found in the Sigfox Networking Guide available at Development section of Libelium website. -37- v5.8... -
Page 38: Lora
Receiver/Central node: Meshlium LoRa, special Gateway LoRa (SPI) or another Waspmote or Plug & Sense! unit This is the radio with the best range performance, thanks to the excellent receiver sensitivity that the LoRa™ technology offers. Besides, Libelium has developed a library which enables addressable, reliable and robust communications with ACK, re-tries or time-outs strategies. - Page 39 The topology for this type of network is a star topology, as the nodes can establish point to point connections with brother nodes, normally with the central one. Figure : Star topology All information about their programming and operation can be found in the SX1272 LoRa Networking Guide available at the Development section of the Libelium website. -39- v5.8...
-
Page 40: Wifi
All information about their programming and operation can be found in the WiFi Networking Guide available at Development section of Libelium website. 7.9.1. WiFi Topologies 7.9.1.1. Access Point Sensor nodes may connect to any standard WiFi router which is configured as Access Point (AP) and then send the data to other devices in the same network such as laptops and smartphones. - Page 41 As pointed before the WiFi module can join any standard WiFi router, however the connection may also be performed using Meshlium instead of a standard WiFi router. Meshlium is the multiprotocol Gateway designed by Libelium which is specially recommended for outdoor applications as it is designed to resist the hardest conditions in real field deployments.
- Page 42 WiFi Mesh node (dual band 2.4GHz-5GHz) • a WiFi to 3G/GPRS router • a Bluetooth scanner and analyzer • a GPS-3G/GPRS real time tracker • a SmartPhone scanner (detects iPhone and Android devices) For more information about Meshlium go to: http://www.libelium.com/meshlium -42- v5.8...
-
Page 43: Gprs
Note: The SIM card can be installed by the user thanks to the External SIM socket, keeping the warranty valid. All information about their programming and operation can be found in the GSM/GPRS Networking Guide available at Development section of Libelium website. -43- v5.8... -
Page 44: Gprs+Gps
Note: The SIM card can be installed by the user thanks to the External SIM socket, keeping the warranty valid. All information about their programming and operation can be found in the GPRS+GPS Networking Guide available at the Development section of Libelium website. -44- v5.8... -
Page 45: Gprs
Note: The SIM card can be installed by the user thanks to the External SIM socket, keeping the warranty valid. All information about their programming and operation can be found in the 3G/GPRS Networking Guide available at the Development section of Libelium website. -45-... -
Page 46: Bluetooth Low Energy
Radios 7.13. Bluetooth Low Energy The Waspmote Bluetooth Low Energy module is also available for the Waspmote Plug & Sense! platform. BLE modules use the 2.4GHz band (2402MHz – 2480 MHz). It has 37 data channels and 3 advertisement channels, with a 2MHz spacing and GFSK modulation. -
Page 47: Internal Storage
All information about their programming and operation can be found in the SD Card Programming Guide available at the Development section of Libelium website. Note: Waspmote must not be switched off or reset while there are ongoing read or write operations in the SD card. Otherwise, the SD card could be damaged and data could be lost. -
Page 48: Gps
9. GPS Waspmote can integrate a GPS receiver which allows to know the exact outside location of the mote anytime. In this way the position of the mote can be obtained and even the current time and date, to synchronize the Waspmote internal clock (RTC) with the real time. - Page 49 SD card and enable them to be loaded later. All information about their programming and operation can be found in the GPS Programming Guide available at the Development section of Libelium website. All the documentation is located in the Development section in the Libelium website. -49- v5.8...
-
Page 50: On / Off Button
ON / OFF Button 10. ON / OFF Button This button is used to turn ON or OFF Waspmote. It is a latch type button with two static positions as shown below. In ON position, the button remains a bit lower than the LED ring. Figure : On / Off button at off position Figure : Turning On Waspmote Note: The ON / OFF button can now be in ON or OFF position to charge the battery. -
Page 51: External Led
ON / OFF Button 10.1. External led ON / OFF button includes a red ring LED, which can be managed by software using dedicated functions described below. This LED can be used for instance to know that Waspmote is ON, or for debugging purposes at developing phase. By default, Waspmote Plug &... -
Page 52: Resetting Waspmote Plug & Sense! With An External Magnet
Figure : Moving the magnet away from the node. The magnet is made of neodymium. It is a special, high-power magnet. We only advise to use the magnet Libelium provides. The user must be careful because the magnet is so powerful that it can get stuck to metal objects. Besides, the magnet must be kept away from electronic devices like PCs, batteries, etc, since they could be damaged or information could be deleted. - Page 53 Resetting Waspmote plug & sense! with an external magnet It is not mandatory, but highly recommended to consider this feature when designing the project. Every Plug & Sense! node comes with the hardware to allow the contacless reset, but the magnet is optional, an accessory. It is highly recommended to purchase one magnet (one unit is enough for many nodes).
-
Page 54: Usb
12. USB This connector is used to upload code into Waspmote with a male to male USB cable provided by Libelium. Just connect one side of the cable to this connector, removing protection cap and connect the other side to a PC to upload a code or to charge the battery in case your model has a rechargeable battery. - Page 55 Figure : Connecting USB charger For indoor deployments the nodes can be recharged using the USB charger. Important: Use the USB charger just with the models which includes rechargeable battery. Figure : Charging the mote by USB -55- v5.8...
-
Page 56: External Sim Socket
12.1. External SIM socket On November 2013, Libelium released the new External SIM socket. The External SIM socket replace the USB socket in two devices: Waspmote Plug & Sense! devices with GPRS or GPRS+GPS module or 3G module • •... - Page 57 The micro-SIM card connector allows now the user to connect the SIM card he likes from the outside. It is no longer necessary to send a SIM card to Libelium for proper installation. You can ask your telecommunication provider for a micro-SIM card.
-
Page 58: Internal Solar Panel
Internal solar panel 13. Internal solar panel Libelium provides two choices for the solar panel, internal and external. The internal solar panel is embedded in the front of the enclosure, occupying almost all Waspmote front surface. Internal solar panel features Max power: 1.3 W... -
Page 59: External Solar Panel
In the next picture a typical installation with external solar panel is shown. Notice that the enclosure is placed just under the solar panel, using it as a protection against sun and rain. Libelium provides special brackets in order to install it correctly. -59-... - Page 60 External solar panel Figure : Typical installation of the external solar panel -60- v5.8...
-
Page 61: Vent Plug / Pressure Compensator
Vent plug / Pressure Compensator 15. Vent plug / Pressure Compensator The purpose of the Vent Plug is to avoid condensation by compensating external / internal pressure. Do not try to connect anything to this element and also do not modify its position or any of its parts. Figure : Vent plug of Waspmote Plug &... -
Page 62: Antenna
Antenna 16. Antenna By default Waspmote Plug & Sense! has one external antenna of 5dBm with a standard reverse polarized SMA connector. This connector allows to connect the RF antenna. Figure : Antenna connector of the enclosure To ensure good RF coverage, be sure antenna points to the sky and also be sure antenna is screwed completely to the connector. To connect the antenna, just align it with the connector and screw it carefully. - Page 63 Figure : Recommended tape Figure : Ensure antenna remains in the right position Do not try to connect other kind of antennas which do not match with SMA RP standard connector and also other antennas not provided by Libelium. -63- v5.8...
-
Page 64: Sensor Protection
Libelium provides two kind of solar shields which can be used as an optional protection for some external sensors. The main function of a solar shield is to protect a sensor from solar radiation which can heat and damage the sensor. Libelium recommends its usage if sensors are going to be placed under directly influence of sun or for specific delicate sensors. - Page 65 Sensor protection 60mm Figure : Big solar shield dimensions Figure : Small solar shield size -65- v5.8...
- Page 66 Sensor protection Solar shield installation steps The installation of this element is quite simple. Follow the next steps to ensure your installation is done correctly. Note: The usage of a solar shield requires that each sensor probe should be used with an extension cord. Otherwise the sensor probe will be too short to be connected to the solar shield and the enclosure at the same time.
- Page 67 Sensor protection Step 3: Placing sensors inside Sensor probed must be inside the solar shield cavity. Depending on the solar shield, the number of sensor probes that can be introduced vary. It is only necessary to introduce the sensor part of the sensor probe, not the connector. Figure : Placing sensors inside the solar shield Remember to fix the sensor probes using cable ties (or similar) to avoid sensors can move and come out from the solar shield.
- Page 68 Sensor protection Step 5: Placing the solar shield When the sensor probes are inside the solar shield, then place it in its final location (street light, wall, etc) using the provided mounting bracket. Figure : Solar shield placed at its final location Step 6: Connect the extension cords to the enclosure The last step is to connect each extension cord in its corresponding enclosure socket.
- Page 69 Sensor protection Use the following guidelines for right usage of the solar shield. • It works best in a location with a steady breeze. Mount away from fences, buildings, trees, or other obstructions. • Do not install over or near sprinklers. It is not designed to protect the sensor from water sprayed upwards. •...
-
Page 70: Batteries
Batteries 18. Batteries Libelium provides two different battery option for Waspmote Plug & Sense! • Rechargeable 6600mAh • Non rechargeable 26Ah Waspmote has a control and safety circuit which makes sure the battery charge current is always adequate. The following images show battery discharging for a typical load and for a specific case. -
Page 71: Models
Models 19. Models There are some defined configurations of Waspmote Plug & Sense! depending on which sensors are going to be used. Waspmote Plug & Sense! configurations allows connecting up to six sensor probes at the same time. Each model takes a different conditioning circuit to enable the sensor integration. For this reason each model allows to connect just its specific sensors. -
Page 72: Smart Environment
The main applications for this Waspmote Plug & Sense! configuration are city pollution measurement, emissions from farms and hatcheries, control of chemical and industrial processes, forest fires, etc. Go to the application section in the Libelium website for a complete list of services. Figure : Smart Environment Waspmote Plug & Sense! model -72- v5.8... - Page 73 OH, NH 9236 Alcohol derivates: CH OH, H , CO, CH 9237 Figure : Sensor sockets configuration for Smart Environment model Note: For more technical information about each sensor probe go to the Development section in Libelium website. -73- v5.8...
-
Page 74: Smart Environment Pro
Models 19.2. Smart Environment PRO The Smart Environment PRO model has been created as an evolution of Smart Enviroment. It enables the user to implement pollution, air quality, industrial, environmental or farming projects with high requirements in terms of high accuracy, reliability and measurement range as the sensors come calibrated from factory. - Page 75 Particle Matter (PM1 / PM2.5 / PM10) - Dust 9387-P Temperature, Humidity and Pressure 9370-P Figure : Sensor sockets configuration for Smart Environment PRO model Note: For more technical information about each sensor probe go to the Development section in Libelium website. -75- v5.8...
-
Page 76: Smart Security
Models 19.3. Smart Security The main applications for this Waspmote Plug & Sense! configuration are perimeter access control, liquid presence detection and doors and windows openings. Figure : Smart Security Waspmote Plug & Sense! model Note: The probes attached in this photo could not match the final location. See next table for the correct configuration. -76- v5.8... - Page 77 The sensor can be focused directly to the point we want. Figure : Configurations of the Presence sensor probe (PIR) Note: For more technical information about each sensor probe go to the Development section in Libelium website. -77- v5.8...
-
Page 78: Smart Water
), Cupric (Cu ), Iodide (I ), Lead (Pb ), Silver (Ag and pH. Take a look to the Smart Water Ions line in the next section. Refer to Libelium website for more information. Figure : Smart Water Plug&Sense! model -78- v5.8... - Page 79 9255 (included by default) Dissolved Oxygen (DO) 9327 Conductivity 9326 Turbidity 9353 Figure : Sensor sockets configuration for Smart Water model Note: For more technical information about each sensor probe go to the Development section in Libelium website. -79- v5.8...
-
Page 80: Smart Water Ions
The Smart Water line is complementary for these kinds of projects, enabling the control of parameters like turbidity, conductivity, oxidation-reduction potential and dissolved oxygen. Take a look to the Smart Water line in the previous section. Refer to Libelium website for more information. -
Page 81: Single
9350 (included by default) Soil/Water Temperature 9255 (included by default) Figure : Sensor sockets configuration for Smart Water Ions model, single variant Note: For more technical information about each sensor probe go to the in Libelium website. Development section -81- v5.8... -
Page 82: Double
9351 (included by default) Soil/Water Temperature 9255 (included by default) Figure : Sensor sockets configuration for Smart Water Ions model, double variant Note: For more technical information about each sensor probe go to the Development section in Libelium website. -82- v5.8... -
Page 83: Smart Cities
The main applications for this Waspmote Plug & Sense! model are noise maps (monitor in real time the acoustic levels in the streets of a city), air quality, waste management, structural health, smart lighting, etc. Refer to Libelium website for more information. - Page 84 Noise sensor (dBA) 9259 Linear displacement 9319 * Ask Libelium Sales Department for more information. Figure : Sensor sockets configuration for Smart Cities model As we see in the figure below, thanks to the directionable probe, the ultrasound sensor probe may be placed in different positions.
-
Page 85: Smart Parking
Figure : Smart Parking enclosure Sensor sockets are no used for this model. There are specific documents for parking applications at Libelium website. Refer to Smart Parking Technical guide to see typical applications for this model and how to make a good installation. -
Page 86: Smart Agriculture
The main applications for this Waspmote Plug & Sense! model are precision agriculture, irrigation systems, greenhouses, weather stations, etc. Refer to Libelium website for more information. Two variants are possible for this model, normal and PRO. Next section describes each configuration in detail. -
Page 87: Normal
Soil moisture 9248 Leaf wetness 9249 Soil moisture 9248 * Ask Libelium Sales Department for more information. Figure : Sensor sockets configuration for Smart Agriculture model Note: For more technical information about each sensor probe go to the Development section in Libelium website. -
Page 88: Ambient Control
Models 19.9. Ambient Control This model is designed to monitor main environment parameters in an easy way. Only three sensor probes are allowed for this model, as shown in next table. Figure : Ambient Control Waspmote Plug & Sense! model -88- v5.8... - Page 89 The sensor can be focused directly to the light source we want to measure. Figure : Configurations of the Luminosity sensor probe (luxes accuracy) Note: For more technical information about each sensor probe go to the Development section in Libelium website. -89- v5.8...
-
Page 90: Radiation Control
The rest of the other sensor sockets are not used. Figure : Radiation Control Waspmote Plug & Sense! model Sensor sockets are not used for this model. Note: For more technical information about each sensor probe go to the Development section in Libelium website. -90- v5.8... -
Page 91: First Steps
First steps 20. First steps Waspmote Plug & Sense! comes from factory with a program which lets you check the right operation of the node. Refer to chapter Programming → Compilaton where all details are explained in detail. -91- v5.8... -
Page 92: Programming
Development section: www.libelium.com/development/plug-sense/sdk_applications/ 21.1. Code generator To make it easier to start with Waspmote Plug & Sense!, Libelium provides a code generator to help in the first steps of development. This code generator is available at the Development section on Libelium website. - Page 93 Programming Step 2: Select the sensors connected to each socket Be sure you have selected the sensors in each socket in the same way as you physically connect the sensor probes to Waspmote Plug & Sense!. Figure : Selecting the used sensor probes Step 3: Select the sleeping time Waspmote will sleep the specified time each loop.
- Page 94 Programming Step 4: Select communication module Select the corresponding radio module for your model and include the necessary networking parameters, as MAC address, etc. Figure : Selecting communication module Step 5: Additional information If you are using accelerometer or GPS, select the corresponding check box to collect this data. Also a mote identifier can be set here.
- Page 95 Waspmote Plug & Sense!. Figure : Generating the code For further information and questions about codes for Waspmote Plug & Sense!, please refer to Libelium website and ask in the dedicated forum.
-
Page 96: Real Time Clock - Rtc
Programming 21.2. Real time Clock - RTC Waspmote Plug & Sense! has a built in Real Time Clock – RTC, which keeps it informed of the time. This allows to program and perform time-related actions such as: “Sleep for 1h 20 min and 15sec, then wake up and perform the following action” Or even programs to perform actions at absolute intervals, e.g.: “Wake on the 5th of each month at 00:20 and perform the following action”... -
Page 97: Interruptions
• Liquid level The sensors are mainly connected to Waspmote through the microprocessor’s analog and digital inputs. Libelium has developed several sensor integration boards which facilitate their connection with the processing unit. Each one of these sensor boards has several pins used to manage the generation and capture of interruptions. -
Page 98: Uploading Code
Uploading code 22. Uploading code Using the USB connector, a new code can be uploaded to Waspmote without opening Waspmote Plug & Sense!. Just connect one side of the USB cable to this connector, removing protection cap if necessary and connect the other side to a PC. Remember that Waspmote must be ON to allow uploading a new code. - Page 99 Uploading code Step 2: Connect the USB cable to Waspmote Plug & Sense! Connect one side of the provided male-to-male USB cable to the USB connector. For models with GPRS or 3G modules, a micro- USB is supplied. Figure : Connecting the USB cable to Waspmote Plug & Sense! Step 3: Connect the USB cable to PC Connect the other side of the USB cable to your PC.
- Page 100 Development section Libelium website to download the latest version ; there is a dedicated guide to help in the process: “Waspmote IDE: User Guide”. If it is the first time you plug a Waspmote Plug & Sense! on your PC and you are unable to see the proper USB port, maybe you should install the latest FTDI drivers: http://www.ftdichip.com/Drivers/D2XX.htm...
- Page 101 Build your own code for your model using the online code generator provided by Libelium at the Development section Libelium website (see corresponding section for details about how to use the code generator). Download and open it in Waspmote IDE.
- Page 102 Uploading code Step 8: Select the USB port Select the corresponding serial port by going to tools/serial port. If you are unable to see the proper USB port maybe you should install the latest FTDI drivers. Figure : Selecting the USB port for Waspmote Plug & Sense! Note: the name of the USB ports depends on the OS and the particular PC you have.
- Page 103 Uploading code Step 10: Upload the code Now, press the upload button and see messages coming out from IDE. During a while you will see message “uploading to I/O board”. Figure : Uploading a code for Waspmote Plug & Sense! Wait a few seconds until the process ends and check there are no error messages, just “Done uploading”...
-
Page 104: Over The Air Programming - Ota
802.15.4 and ZigBee. Besides, Libelium provides a new OTA method based on FTP transmissions to be used with GPRS, 3G and WiFi modules. Note that the concept of OTA may have some other names such as: Over the air →... - Page 105 Over the air programming – OTA OTA with 802.15.4/ZigBee modules The idea is simple. When the programmer (normally the Gateway) sends a new program it is stored in the SD card. A second command “start_new_program” is needed in order to make them start. Then, the nodes copy the program from the SD card to the Flash memory and start the new program.
- Page 106 Over the air programming – OTA OTA with 3G/GPRS/WiFi modules via FTP The reprogramming process in this type of OTA is initiated by Waspmote and it is supported by an FTP server. Steps: • Waspmote queries the FTP server for a new program version •...
-
Page 107: Ota With 802.15.4/Zigbee Modules
Over the air programming – OTA 23.4. OTA with 802.15.4/ZigBee modules 23.4.1. OTA Step by Step Locate the node or nodes to upgrade • Using the ‘scan_nodes’ function we can search for a specific node or send a global query looking for any node which is ready to be reprogrammed with the OTA process. - Page 108 Over the air programming – OTA Send the new program • We can use the ‘send’ command with the unicast, multicast or broadcast option depending on how many nodes we want to reprogram at the same time. Figure : Sending new program via OTA Each node which receives the program sends a message to the Gateway to inform of the success of the process.
- Page 109 Over the air programming – OTA Reboot and start with the new program • In order to make the nodes start executing the new program, the Gateway needs to send the ‘start_new_program’ command. Figure : OTA Gateway commands some Waspmotes to start a new program Each node which receives this packet will copy the program from the SD to the Flash memory and will start running the new binary.
-
Page 110: Ota Shell
A powerful command line application called ‘OTA Shell’ has been developed in order to manage all the features of OTA. The environment needed to execute OTA Shell comes already preinstalled in Meshlium (the Linux router developed by Libelium which acts as the ZigBee Gateway of the sensor network). Although it can also be executed in a Linux, Windows and Mac OS system. -
Page 111: Setting The Ftp Server Configuration
Over the air programming – OTA Figure : OTA steps via FTP protocol 23.5.2. Setting the FTP server configuration The FTP server that Waspmote connects to needs a specific configuration so as to OTA work properly. There are two ways to set up the FTP server: Extern user’s FTP server: The user sets up an FTP server following the specific settings which are described within OTA Guide. -
Page 112: Encryption Libraries
Encryption Libraries 24. Encryption Libraries The new Encryption Libraries are designed to add to the Waspmote sensor platform the capabilities necessary to protect the information gathered by the sensors. To do so two cryptography layers are defined: • Link Layer: In the first one all the nodes of the network share a common preshared key which is used to encrypt the information using AES 128. - Page 113 Encryption Libraries Figure : Waspmote frame on OSI stack for communication Figure : Waspmote frame structure for communication Note: For more information read the “Encryption Programming Guide” in the Waspmote Development section -113- v5.8...
-
Page 114: Interacting With Waspmote Plug & Sense
Interacting with Waspmote Plug & Sense! 25. Interacting with Waspmote Plug & Sense! 25.1. Receiving XBee frames with Waspmote Gateway 25.1.1. Waspmote Gateway This device allows the collection of data which flows through the sensor network into a PC or device with a standard USB port. Waspmote Gateway will act as a ”data bridge or access point”... -
Page 115: Linux Receiver
Figure : LEDs in Waspmote Gateway 25.1.2. Linux receiver When using Linux it is possible to use various applications to capture the input from the serial port. Libelium recommends to use the ‘Cutecom’ application. Once the application is launched the speed and the USB where Waspmote has been connected must be configured. -
Page 116: Windows Receiver
Interacting with Waspmote Plug & Sense! Figure : Cutecom application capturing Waspmote’s output 25.1.3. Windows receiver If Windows is used, the application ‘Hyperterminal’ can be used to capture the output of the serial port. This application can be found installed by default in ‘Start/Programs/Accessories/Communication’ , but if it is not available it can be downloaded from: http://hyperterminal-private-edition-htpe.en.softonic.com/ Once this application is launched the connection must be configured. - Page 117 Interacting with Waspmote Plug & Sense! The next step is to specify the port on which Waspmote has been connected, in this case the system recognizes it as ‘COM9’ , (this will vary on each computer): Figure : Step 2 of establishing connection The next step is to specify the speed and configuration parameters: Figure : Step 3 of establishing connection Once these steps have been performed connection with Waspmote has been established, and listening to the serial port begins.
-
Page 118: Mac-Os Receiver
Interacting with Waspmote Plug & Sense! Figure : HyperTerminal application capturing Waspmote’s output. 25.1.4. Mac-OS receiver If MAC OS X is used (version later than 10.3.9) the application ‘ZTERM’ can be used to capture the serial port output. This application can be downloaded from: http://www.dalverson.com/zterm/ This application is configured automatically, establishing the USB on which Waspmote has been connected and the speed. -
Page 119: Meshlium
WiFi or Bluetooth interfaces. The idea is to be able to measure the amount of people and cars which are present in a certain point at a specific time, allowing the study of the evolution of the traffic congestion of pedestrians and vehicles. More info: http://www.libelium.com/meshlium 25.2.1. What can I do with Meshlium? •... -
Page 120: How Do They Work Together
Interacting with Waspmote Plug & Sense! 25.2.2. How do they work together? Meshlium receives the sensor data sent by Waspmote using its wireless radios. Then 4 possible actions can be performed: Store the sensor data in the Meshlium Local Data Base (MySQL) Store the sensor data in an External Data Base (MySQL) Send the information to the Internet using the Ethernet or WiFi connection Send the information to the Internet using the 3G/GPRS connection... -
Page 121: Capturing And Storing Sensor Data In Meshlium From A Waspmote Sensor Network
Interacting with Waspmote Plug & Sense! 25.2.3. Capturing and storing sensor data in Meshlium from a Waspmote sensor network When you buy a kit containing Waspmotes, Gateway and Meshlium, the Waspmotes come already configured to send frames to the Gateway. Later, once the user has developed the code for transmitting to Gateway, he can switch to Meshlium. Meshlium will receive the sensor data sent by Waspmote using the wireless radio and it will store the frames in the Local Data Base. - Page 122 Now you can open your browser and access to the Meshlium Manager System: • URL: http://10.10.10.1/ManagerSystem • user: root • password: libelium Figure : Meshlium Manager System Login screen Now we go to the “Sensor Networks” tab. Figure : Sensor Networks tab -122- v5.8...
- Page 123 Interacting with Waspmote Plug & Sense! There are 6 different XBee models can be configured: Figure : XBee / LoRa radio models Depending the kind of XBee model the parameters to be configured may vary. Complete list: Network ID: Also known as PAN ID (Personal Arena Network ID) •...
- Page 124 Interacting with Waspmote Plug & Sense! These parameters must be also configured in the Waspmote sensor nodes. Access to all the information related to Waspmote at: http://www.libelium.com/waspmote Figure : XBee parameters configuration To discover the MAC address of the XBee module just press the “Load MAC” button.
- Page 125 Interacting with Waspmote Plug & Sense! Both process (“Load MAC” and “Check status”) require the ZigBee capturer daemon to be stopped. This means no frames will be received while executing this actions. Be patient this can take up to 1 minute to finish. Figure : XBee parameters configuration Note: When you buy a Waspmote Developer kit with Meshlium and with the XBee ZB as ZigBee radio both the Waspmote GW and Meshlium come configured as Coordinator of the network.
- Page 126 Interacting with Waspmote Plug & Sense! • Capturing and storing sensor data As said before, in a kit containing Waspmotes, Gateway and Meshlium, the Waspmotes come already configured to send frames to the Gateway. Later, once the user has developed the code for transmitting to Gateway, he can switch to Meshlium. Meshlium will receive the sensor data sent by Waspmote using the radio and it will store the frames in the Local Data Base.
- Page 127 Interacting with Waspmote Plug & Sense! We can perform three different storage options with the frames captured: • Local Data Base • External Data Base Figure : Meshlium Storage options You can also send the information received to the Internet using the Ethernet, WiFi and 3G/GPRS interfaces. Figure : Meshlium Connection options -127- v5.8...
- Page 128 Interacting with Waspmote Plug & Sense! Local Data Base Meshlium has a MySQL data base up and running which is used to store locally the information captured. In the “Local Data Base” tab you can see the connection parameters. Database: MeshliumDB •...
- Page 129 Interacting with Waspmote Plug & Sense! Steps: 1. Pressing the “Show sql script” you will get the code needed to create the data base along with the table and the right privileges. Figure : External Database tab - showing SQL Script 2.
- Page 130 Interacting with Waspmote Plug & Sense! Figure : External Database tab - checking connection 5. Set the check box “Store frames in external database”, you can defined the interval how often to synchronize the local database with external database and press the “Save” button. From this time Meshlium will automatically perform Scans and will store the results in the External Data Base each .
- Page 131 Interacting with Waspmote Plug & Sense! You can also choose to sync when you want. Just press the “Synchronize Now” button. Figure : External Database tab - last “x” records stored -131- v5.8...
- Page 132 Interacting with Waspmote Plug & Sense! At any time you can see the last “x” records stored. Just set how many insertions you want to see and press the “Show data” button. Figure : Show me now! tab -132- v5.8...
- Page 133 Interacting with Waspmote Plug & Sense! Show me now! In the “Show me now!” tab you can see in real time the Scans captured. You can specify if you want the information to be updated periodically with the defined interval just checking the “Use the Defined Interval”...
- Page 134 Interacting with Waspmote Plug & Sense! Advanced Database In the “Advanced” tab you can see information about the state in which they are databases. It displays information about the Loca and Externall database, showing the following information: • Local and External Database names •...
- Page 135 Interacting with Waspmote Plug & Sense! Figure : Advanved Tab – Remove data In addition can display a log of the date of the last synchronization between the local database and external database was successful. Figure : Advanved Tab – Synchronization log -135- v5.8...
-
Page 136: Capturer Logs
Interacting with Waspmote Plug & Sense! 25.2.4. Capturer logs Inside “Sensor Networks” exist the section Logs, in this section you can see the last frames received on Meshlium. Figure : Sensor log First show the “sensor log”, in this logs shows the frames are stored after being processed. ASCII-35690399-N1-253-198-,STR:XBee frame,BAT:93,IN_TEMP:31.50 secondly shown “Frame Log”, in this logs shows the frames stored as the arrive to Meshlium. -
Page 137: Sensors
25.2.5. Sensors In section “Sensor List”, the user can add new sensors or delete sensors. By default Meshlium recognize all Libelium official sensors frames. All sensors frames that Meshlium can capture and store must be specified in an XML file. -
Page 138: Sending Frames From Meshlium To Waspmote
Important: If you want to create a “ZigBee sending” daemon that is executed each time Meshlium starts you have to deactivate the “ZigBee Capturer” daemon (/etc/init.d/ZigbeeScanD.sh) as the ZigBee radio has to be used by one process at a time. You will find support in the Libelium Forum at: http://www.libelium.com/forum -138- v5.8... -
Page 139: Interacting With 3Rd Party Cloud Platforms
25.2.7. Interacting with 3rd party Cloud platforms Libelium has partnered with the best Cloud software solution providers to offer you all the necessary components to deploy Internet of Things (IoT), machine-to-machine (M2M) or Smart Cities projects with minimum time-to-market. Meshlium is ready to send sensor data to many Cloud software platforms. -
Page 140: Installation
26.1. Parts Mounting feet Libelium provides four mounting feet accessories to allow easy fixing Waspmote Plug & Sense! to walls, etc. Mounting feet come already fixed to the enclosure using a screw, as shown in figures below. Figure : Mounting feet accessory The mounting feet come assembled in vertical position. - Page 141 Installation Moreover, Libelium provides some extra screws and wall plugs to fix the node to a wall. See next sections for more details. Be sure you fix firmly all of the four mounting feet, otherwise the node can fall down due to wind effects, vibrations or other causes.
- Page 142 Installation Solar panel bracket The solar panel brackets are used to achieve 45 degrees of inclination when a solar panel is used. Solar panel Figure : Solar panel bracket Waspmote Plug & Sense! accessories can vary depending on which configuration is acquired. See text and figure below to know which accessories are provided with each of the three options.
-
Page 143: Street Light Installation
26.2. Street Light installation The node can be fixed to a street light using the PVC coated stainless steel cable ties provided by Libelium. Always be sure that the enclosure is firmly tied and environmental elements (like wind) do not modify its position. Next pictures show examples of typical installation processes using external or internal solar panel in combination with the provided accessories. - Page 144 Installation Step 3: Secure the solar panel bracket to the external solar panel Use provided screws to secure the solar panel bracket to the external solar panel. Be sure you place screws in the right bracket holes, as shown in the figure below. Figure : Preparing the external solar panel Figure : Adding cable ties to the external solar panel -144-...
- Page 145 Installation Step 4: Secure Waspmote Plug & Sense! to the street light Place Waspmote Plug & Sense! on street light tightening firmly the metal cable ties. Be sure that the node remains completely tied to street light to avoid it could fall down. Figure : Placing Waspmote Plug &...
-
Page 146: Internal Solar Panel
Installation 26.2.2. Internal solar panel If the node has an internal solar panel, it should be placed in 45º angle to optimize the solar panel efficiency, using the solar panel bracket. Step 1: Secure the mounting feet to Waspmote Plug & Sense! Use provided screws to firmly mount the feet to the node as shown in step 1 of previous section. - Page 147 Installation Step 3: Securing Waspmote to the street light Place Waspmote Plug & Sense! with the solar panel bracket on street light tightening it firmly using the provided metal cable ties. Be sure that the node remains completely tied to the street light to avoid it could fall down. Figure : Securing Waspmote to the street light -147- v5.8...
-
Page 148: Wall
Installation 26.3. Wall Another typical installation of Waspmote Plug & Sense! is on the walls. Using the mounting feet accessory, the node can be tied using provided screws and wall plugs. Next pictures show examples of typical installation processes using the external or internal solar panel in combination with provided accessories. -
Page 149: Internal Solar Panel
Installation Figure : Placing the external solar panel above Waspmote 26.3.2. Internal solar panel Moreover, if the node has an internal solar panel, it should be placed in 45º angle to optimize the solar panel efficiency, using the solar panel bracket. Step 1: Secure the mounting feet to Waspmote Plug &... -
Page 150: Energy Consumption
Energy Consumption 27. Energy Consumption 27.1. Consumption tables Waspmote 15 mA Sleep 55 uA Deep sleep 55 uA Waspmote modules SLEEP Sending Receiving XBee 802.15.4 PRO 56,68 mA 0,12 mA 0 μA 187,58 mA 57,08 mA Bee ZigBee PRO 45,56 mA 0,71 mA 0 μA 105 mA... -
Page 151: Sleep Mode
OFF: By using digital switches controlled by the microcontroller the module is switched off completely. This mode has been implemented by Libelium as an independent layer of energy control, so that it can reduce consumption to a minimum (~0μA) without relegating to techniques implemented by the manufacturer. -
Page 152: Lifetime Of The Sensors
27.3. Lifetime of the sensors Libelium sensor probes are designed to increase lifetime of sensors when they are used outdoors. However, each sensor has a different lifetime depending on environmental conditions, usage and many other factors that Libelium cannot control. -
Page 153: Recommendations
Recommendations 28. Recommendations Libelium gives some recommendations to improve performance and efficiency of Waspmote Plug & Sense!, enlarging useful life of all of its elements. • Try placing Waspmote Plug & Sense! and its sensors out of the sun. It is known that sun rays accelerates plastic elements deterioration. -
Page 154: Documentation Changelog
Documentation Changelog 29. Documentation Changelog From v5.7 to v5.8: • It is noted that the 4 black mounting feet come already screwed and in vertical position From v5.6 to v5.7: • References to the new LoRaWAN module • Smart Metering models were discontinued From v5.5 to v5.6: •... - Page 155 Documentation Changelog From v4.6 to v4.7: • Changed Weather Meters name to Weather Station WS-3000 From v4.5 to v4.6: • Added section for Meshlium Cloud Connector • Added references to the External SIM socket • Added new Liquid Presence sensor From v4.4 to v4.5: •...
-
Page 156: Certifications
Certifications 30. Certifications 30.1. CE In accordance with the 1999/05/CE directive, Libelium Comunicaciones Distribuidas S.L. declares that the Waspmote device conforms to the following regulations: EN 55022:1998 EN 55022:1998/A1:2000 EN 55022:1998/A2:2003 EN 61000-4-3:2002 EN 61000-4-3/A1:2002 EN 61000-4-3:2006 UNE-EN 60950-1:2007 Compliant with ETSI EN 301 489-1 V1.6.1, EN 300 328, Date: March 26, 2009 If desired, the Declaration of Conformity document can be requested using the contact section at: http://www.libelium.com/contact... -
Page 157: Fcc
Certifications 30.2. FCC Waspmote models: Model 1- FCC (XBee PRO series 1 OEM) FCC ID: XKM-WASP01 comprising - FCC ID: OUR-XBEEPRO Model 2- FCC (XBee PRO ZB series 2) FCC ID: XKM-WASP02 comprising - FCC ID: MCQ-XBEEPRO2* Model 3 - FCC (XBee 900MHz) FCC ID: XKM-WASP03 comprising - FCC ID: MCQ-XBEE09P Installation and operation of any Waspmote model must assure a separation distance of 20 cm from all persons, to... -
Page 158: Use Of Equipment Characteristics
Certifications 30.3. IC Waspmote models: Model 1- IC (XBee PRO series 1 OEM) IC: 8472 A-WASP 01 comprising - IC: 4214A-XBEEPRO Model 2- IC (XBee PRO ZB series 2) IC: 8472 A-WASP 02 comprising - IC: 1846A-XBEEPRO2 Model 3- IC (XBee 900MHz) IC: 8472 A-WASP 03 comprising - IC: 1846A-XBEE09P The term “IC:”... - Page 159 Important: It is the responsibility of the installer to find out about restrictions of use for frequency bands in each country and act in accordance with the given regulations. Libelium Comunicaciones Distribuidas S.L does not list the entire set of standards that must be met for each country.
-
Page 160: Maintenance
Maintenance 31. Maintenance • Although Waspmote is a highly resistant product, please handle with care in order to enjoy a longer useful life. • Handle Waspmote Plug & Sense! with care, do not allow it to drop or move roughly. •... -
Page 161: Disposal And Recycling
Disposal and recycling 32. Disposal and recycling • When Waspmote Plug & Sense! reaches the end of its useful life it must be taken to a recycling point for electronic equipment. • The equipment should be disposed of separately from solid urban waste, please dispose of correctly. •... -
Page 162: Resources
Resources 33. Resources You can find complete information and support in the next sections in the Libelium Website: • Development: http://www.libelium.com/development/plug_&_sense • Forum: http://www.libelium.com/forum/ -162- v5.8...
Need help?
Do you have a question about the waspmote plug & sense and is the answer not in the manual?
Questions and answers