Advertisement
Table of Contents
WARNING
Read and follow all safety rules and instructions in this manual before attempting to operate this
machine. Failure to comply with these instructions may result in personal injury. Save these
instructions. This unit is equipped with an internal combustion engine and may spark resulting in fire
or explosion if used near combustible material or fluid. Only use when the engine's exhaust system is
equipped with a spark arrester meeting applicable local or state laws (if any). The spark arrester shall
be maintained in effective working order by operator.
Questions, problems, missing parts? If you have questions about engine and need
technical support, call engine manufacturer at 1-877-274-2214. Questions about the unit and
need technical support, call our customer service department at 1-800-791-9458.
TWO STAGE GAS SNOW THROWER
1
MODEL #DB7659
Advertisement
Table of Contents

Related Manuals for Powersmart DB7659


Summary of Contents for Powersmart DB7659
- Page 1 TWO STAGE GAS SNOW THROWER MODEL #DB7659 WARNING Read and follow all safety rules and instructions in this manual before attempting to operate this machine. Failure to comply with these instructions may result in personal injury. Save these instructions. This unit is equipped with an internal combustion engine and may spark resulting in fire or explosion if used near combustible material or fluid.
-
Page 2: Table Of Contents
TABLE OF CONTENTS Important Safe Operation Practices ....................3 Know Your Snow Thrower ......................7 Assembling Your Snow Thrower ....................11 Preparing and Adjusting Your Snow Thrower ................13 Operating Your Snow Thrower ..................... 17 Maintaining & Servicing Your Snow Thrower ................ -
Page 3: Important Safe Operation Practices
IMPORTANT SAFE OPERATION PRACTICES WARNING This symbol points out important safety instructions which, if not followed, could endanger the personal safety and/or property of yourself and others. Read and follow all instructions in this manual before attempting to operate this machine. Failure to comply with these instructions may result in personal injury. - Page 4 IMPORTANT SAFE OPERATION PRACTICES Safe handling of gasoline To avoid personal injury or property damage use extreme care in handling gasoline. Gasoline is extremely flammable and the vapors are explosive, Serious personal injury can occur when gasoline is spilled on yourself or your clothes which can ignite, wash your skin and change clothes immediately.
- Page 5 IMPORTANT SAFE OPERATION PRACTICES Never operate machine at high transport speeds on slippery surfaces. Look down and behind and use care when backing up. If the machine should start to vibrate abnormally, stop the engine, disconnect the spark plug wire and ground it against the engine .Inspect thoroughly for damage .Repair any damage before starting and operating.
-
Page 6: Safety Symbols
IMPORTANT SAFE OPERATION PRACTICES Do not modify engine To avoid serious injury or death, do not modify engine in any way. Tampering with the governor setting can lead to a runaway engine and cause it to operate at unsafe speeds. Never tamper with factory setting of engine governor. -
Page 7: Know Your Snow Thrower
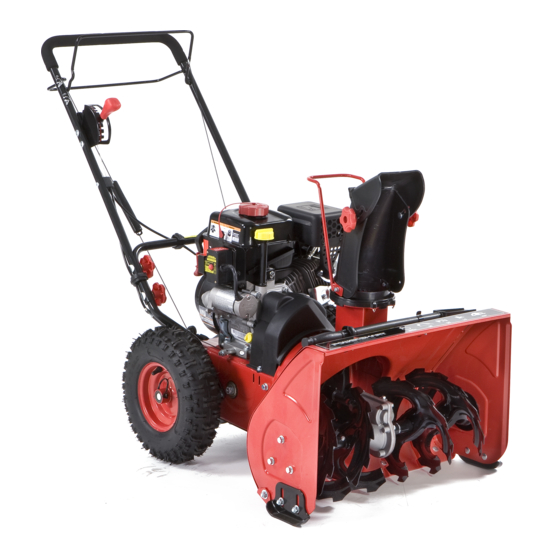
KNOW YOUR SNOW THROWER TECHNICAL SPECIFICATIONS Working Width: 22 inches (560 mm) Working Height: 16 inches (400 mm) 4 Forward and 2 Reverse Engine Displacement: 208 cc, 4 stroke... - Page 8 KNOW YOUR SNOW THROWER A. Upper handle B. Auger control The auger control is adjacent to the upper handle. Squeeze the auger control against the upper handle to engage the augers; release to disengage the augers. WARNING: Never make adjustments to the chute assembly unless both auger and drive controls are disengaged and the operator is standing beside the unit.
- Page 9 KNOW YOUR SNOW THROWER 1. Release both the Auger Control and the Drive Control. 2. Stop the engine by flipping Rocker Switch to STOP position removing the safety key switch from the engine. 3. Remove the clean-out tool from the clip which secures it to the rear of the auger housing. 4.
- Page 10 KNOW YOUR SNOW THROWER 2. Engine RUN/STOP Rocker Switch The Engine Rocker Switch enables and disables the ignition system. Turn the engine switch to the RUN position to start the engine. Turn the Engine Rocker Switch to the STOP position to stop the engine.
-
Page 11: Assembling Your Snow Thrower
Assembling Your Snow Thrower Contents of Carton Check to make sure that the carton includes all of the following: One Snow Thrower Two Replacement Auger Shear Pins One Chute Assembly One Snow Thrower Operator’s Manual One Engine’s Manual Lower and Upper Handle Assembly 1. - Page 12 Assembling Your Snow Thrower Discharge Chute Assembly 4. Loosen and remove the three sets of locknuts and washers on the discharge chute. 5. Hold the discharge chute so that the holes align with the holes on the chute base. Insert the washers and locknuts removed previously.
-
Page 13: Preparing And Adjusting Your Snow Thrower
Preparing and Adjusting Your Snow Thrower Shear pins A pair of replacement auger shear pins and nylon locknuts is included with your snow thrower. Store them in a safe place until needed. Chute Clean-out Tool The chute clean-out tool is fastened to the top of the auger housing with a mounting clip and a cable tie at the factory. - Page 14 Preparing and Adjusting Your Snow Thrower Checking Oil Level CAUTION The engine is shipped without oil in the engine. You must fill enough oil and check the oil level prior to operating the snow thrower. Running the engine with insufficient oil can cause serious engine damage and void the engine warranty.
- Page 15 Preparing and Adjusting Your Snow Thrower Discharge chute 1. The chute deflector on the top of the discharge chute controls the height of the snow stream. Loosen both chute deflector knobs to raise or lower the deflector to the desired height of snow you wish you to throw. Tighten the knobs to secure the deflector.
- Page 16 Preparing and Adjusting Your Snow Thrower • Allow the auger to remain engaged for approximately 10 seconds before releasing the auger control. Repeat this several times. • With the engine running in the ON position and the auger control in the disengaged “up” position, walk to the front of the machine.
-
Page 17: Operating Your Snow Thrower
Operating Your Snow Thrower BEFORE STARTING THE ENGINE (fig. 1) Before starting the Engine, carefully note the following: • Allow Engine To Warm Up for approximately 30 seconds before rotating Choke Knob to Run Position. • If inconsistent engine speeds are experienced when Choke Knob is rotated to Run Position: 1. - Page 18 Operating Your Snow Thrower CAUTION Do not hold the electric starter button down for more than 5 seconds. Wait at least 1 minute before additional starting attempts. IMPORTANT: After engine starts, unplug the cord from the starter adaptor. WARNING If additional extension cord is needed, make sure to use a three-wire cord. Do not exceed extension cord length provided by Equipment Manufacturer.
-
Page 19: Maintaining & Servicing Your Snow Thrower
Maintaining & Servicing Your Snow Thrower General Recommendations • Always observe safety rules when performing any type of maintenance. • The warranty on this snow thrower does not cover items that have been subjected to operator abuse or negligence. To receive full value from the warranty, operator must maintain the snow thrower as instructed in this manual. - Page 20 Maintaining & Servicing Your Snow Thrower Servicing Augers The augers are secured to the spiral shaft with four shear pins and nylon locknuts. If you hit a foreign object or ice jam. The snow thrower is designed so that the pins may shear. If the augers do not turn, check if the pins have sheared.
-
Page 21: Troubleshooting
Troubleshooting Problem Possible Causes Remedy Engine Fails to 1. Choke not in START position 1. Move choke to START position Start 2. Spark plug wire disconnected 2. Connect wire to spark plug 3. Fuel tank empty or stale fuel 3. Fill tank with clean, fresh gasoline 4. -
Page 22: Warranty
WARRANTY TWO YEAR WARRANTY For two years from date of retail purchase within U.S.A., the manufacturer will, at its option, repair or replace, for the original purchaser, free of charge, any part or parts found to be defective in material or workmanship.
Need help?
Do you have a question about the DB7659 and is the answer not in the manual?
Questions and answers