Table of Contents
Advertisement
Quick Links
HT-R518_En.book Page 1 Tuesday, March 11, 2008 11:31 AM
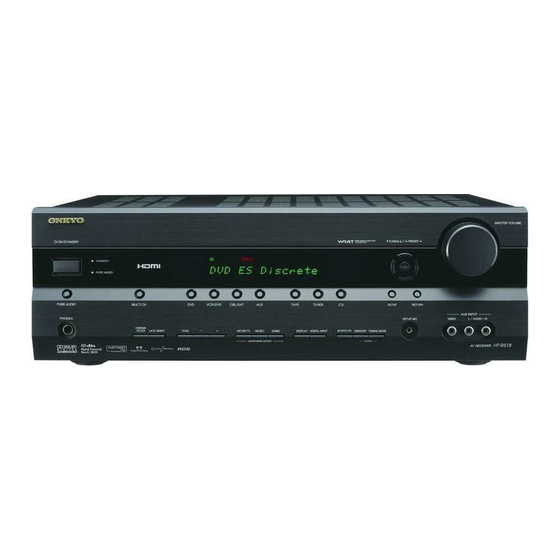
AV Receiver
HT-R518
Instruction Manual
Thank you for purchasing an Onkyo AV Receiver.
Please read this manual thoroughly before making
connections and plugging in the unit.
Following the instructions in this manual will enable
you to obtain optimum performance and listening
enjoyment from your new AV Receiver.
Please retain this manual for future reference.
Contents
Introduction ..................................... 2
Connection..................................... 13
Turning On & First Time Setup ..... 33
Basic Operation
Playing your AV components ....... 39
Listening to the Radio .................. 43
Enjoying the Listening Modes ..... 48
Advanced Operation ..................... 55
Troubleshooting ............................ 73
E
n
Advertisement
Table of Contents

Related Manuals for Onkyo HT-R518


Summary of Contents for Onkyo HT-R518
- Page 1 HT-R518_En.book Page 1 Tuesday, March 11, 2008 11:31 AM AV Receiver HT-R518 Instruction Manual Thank you for purchasing an Onkyo AV Receiver. Please read this manual thoroughly before making connections and plugging in the unit. Following the instructions in this manual will enable you to obtain optimum performance and listening enjoyment from your new AV Receiver.
-
Page 2: Important Safety Instructions
HT-R518_En.book Page 2 Tuesday, March 11, 2008 11:31 AM WARNING: TO REDUCE THE RISK OF FIRE OR ELECTRIC SHOCK, DO NOT EXPOSE THIS APPARATUS TO RAIN OR MOISTURE. CAUTION: TO REDUCE THE RISK OF ELECTRIC SHOCK, DO NOT REMOVE COVER (OR BACK). NO USER-SERVICEABLE PARTS INSIDE. -
Page 3: Precautions
5. Never Touch this Unit with Wet Hands —Never handle this unit or its power cord while your hands are wet or damp. If water or any other liquid gets inside this unit, have it checked by your Onkyo dealer. 6. Handling Notes •... -
Page 4: Supplied Accessories
We, ONKYO EUROPE ELECTRONICS GmbH LIEGNITZERSTRASSE 6, 82194 GROEBENZELL, GERMANY declare in own responsibility, that the ONKYO product described in this instruction manual is in compliance with the corresponding technical standards such as EN60065, EN55013, EN55020 and EN61000-3-2, -3-3. GROEBENZELL, GERMANY... -
Page 5: Table Of Contents
Connecting a CD Player or Turntable ...29 Connecting a Cassette, CDR, MiniDisc, or DAT Recorder ...30 Connecting an RI Dock ...31 Connecting Onkyo Components ...32 Connecting the Power Cord ...32 Turning On the AV Receiver ...33 Turning On and Standby ...33 First Time Setup ...34... -
Page 6: Connection
DTS logos, Symbol and DTS 96/24 are trademarks of DTS, Inc. ©1996-2007 DTS, Inc. All Rights Reserved. *3 Music Optimizer™ is a trademark of Onkyo Corporation. HDMI, the HDMI logo and High Definition Multimedia Inter- face are trademarks or registered trademarks of HDMI Licens- ing, LLC. -
Page 7: Getting To Know The Av Receiver
DIGITAL INPUT button (37) Used to assign digital inputs to input selectors. RT/PTY/TP button (47) Used with RDS (Radio Data System). See “Using RDS” on page 46. MASTER VOLUME PRESET ENTER RETURN AUX INPUT SETUP MIC VIDEO AUDIO HT-R518 AV RECEIVER... -
Page 8: Display
HT-R518_En.book Page 8 Tuesday, March 11, 2008 11:31 AM Getting to Know the AV Receiver —Continued For detailed information, see the pages in parentheses. MEMORY button (45) Used when storing or deleting radio presets. TUNING MODE button (43) Selects the Auto or Manual tuning mode for AM and FM radio. -
Page 9: Rear Panel
REMOTE CONTROL This (Remote Interactive) jack can be con- nected to the Onkyo component for remote and system control. To use , you must make an analog audio connec- tion (RCA) between the AV receiver and the other component, even if they are connected digitally. - Page 10 HT-R518_En.book Page 10 Tuesday, March 11, 2008 11:31 AM Getting to Know the AV Receiver —Continued VCR/DVR IN/OUT A video component, such as a VCR or DVR, can be connected here for recording and playback. There are S-Video and composite video input and output jacks for connecting the video signal, and there are analog audio input jacks for connecting the audio signal.
-
Page 11: Remote Controller
DISPLAY button (44) Displays information about the band, frequency, preset number, and so on. CH +/– button (45) Selects radio presets. Note: • An Onkyo cassette recorder connected via also be controlled in Receiver mode (see page 71). ] and ENTER buttons... -
Page 12: Installing The Batteries
HT-R518_En.book Page 12 Tuesday, March 11, 2008 11:31 AM Remote Controller —Continued Installing the Batteries To open the battery compartment, press the small lever and remove the cover. Insert the two supplied batteries (AA/R6) in accordance with the polarity diagram inside the battery compartment. -
Page 13: Connecting Your Speakers
You can enjoy DVDs featuring Dolby Digital or DTS. With analog or digital TV, you can enjoy Dolby Pro Logic II, DTS Neo:6, or Onkyo’s original DSP listening modes. - Page 14 HT-R518_En.book Page 14 Tuesday, March 11, 2008 11:31 AM Connecting Your Speakers —Continued Speaker Configuration For 5.1-channel surround-sound playback, you need five speakers and a powered subwoofer. The following table shows which channels you should use based on the number of speakers you have. Number of speakers: ✓...
-
Page 15: Speaker Connection Precautions
HT-R518_En.book Page 15 Tuesday, March 11, 2008 11:31 AM Connecting Your Speakers —Continued Speaker Connection Precautions Read the following before connecting your speakers: • You can connect speakers with an impedance of between 8 and 16 ohms. If you use speakers with a lower impedance, and use the amplifier at high volume levels for a long period of time, the built-in amp pro- tection circuit may be activated. -
Page 16: Connecting Antennas
HT-R518_En.book Page 16 Tuesday, March 11, 2008 11:31 AM Connecting Antennas This section explains how to connect the supplied indoor FM antenna and AM loop antenna, and how to connect commercially available outdoor FM and AM antennas. The AV receiver won’t pick up any radio signals without any antenna connected, so you must connect the antenna to use the tuner. -
Page 17: Connecting An Outdoor Fm Antenna
HT-R518_En.book Page 17 Tuesday, March 11, 2008 11:31 AM Connecting Antennas —Continued Connecting an Outdoor FM Antenna If you cannot achieve good reception with the supplied indoor FM antenna, try a commercially available out- door FM antenna instead. Notes: • Outdoor FM antennas work best outside, but usable results can sometimes be obtained when installed in an attic or loft. -
Page 18: Connecting Your Components
HT-R518_En.book Page 18 Tuesday, March 11, 2008 11:31 AM Connecting Your Components About AV Connections • Before making any AV connections, read the manuals supplied with your other AV components. • Don’t connect the power cord until you’ve completed and double-checked all AV connections. Optical Digital Jacks The AV receiver’s optical digital jacks have shutter-type covers that open when an optical plug is inserted and... -
Page 19: Video And Audio Connection Formats
HT-R518_En.book Page 19 Tuesday, March 11, 2008 11:31 AM Connecting Your Components —Continued Connecting Audio and Video Signals to the AV Receiver By connecting both the audio and video outputs of your DVD player and other AV components to the AV receiver, you can switch the audio and video signals simultaneously simply by changing the input source on the AV receiver. -
Page 20: Connecting A Tv Or Projector
HT-R518_En.book Page 20 Tuesday, March 11, 2008 11:31 AM Connecting Your Components —Continued Connecting a TV or Projector Step 1: Video Connection Choose a video connection that matches your TV ( , Step 2: Audio Connection Choose an audio connection that matches your TV ( , •... -
Page 21: Connecting A Dvd Player
HT-R518_En.book Page 21 Tuesday, March 11, 2008 11:31 AM Connecting Your Components —Continued Connecting a DVD player Step 1: Video Connection Choose a video connection that matches your DVD player ( , You must connect the AV receiver to your TV with the same type of connection. Step 2: Audio Connection Choose an audio connection that matches your DVD player ( , •... - Page 22 HT-R518_En.book Page 22 Tuesday, March 11, 2008 11:31 AM Connecting Your Components —Continued Hooking Up the Multichannel Input If your DVD player supports multichannel audio formats such as DVD-Audio and SACD, and it has a multichannel analog audio output, you can connect it to the AV receiver’s multichannel input. Use a multichannel analog audio cable, or several normal audio cables, to connect the AV receiver’s DVD IN FRONT L/R, CENTER, SURR L/R, and SUBWOOFER jacks to the 5.1-channel analog audio output on your DVD player.
-
Page 23: Connecting A Vcr Or Dvr For Playback
HT-R518_En.book Page 23 Tuesday, March 11, 2008 11:31 AM Connecting Your Components —Continued Connecting a VCR or DVR for Playback With this hookup, you can use the tuner in your VCR or DVR to listen to your favorite TV programs Hint! via the AV receiver, which is useful if your TV has no audio outputs. -
Page 24: Connecting A Vcr Or Dvr For Recording
HT-R518_En.book Page 24 Tuesday, March 11, 2008 11:31 AM Connecting Your Components —Continued Connecting a VCR or DVR for Recording Step 1: Video Connection Choose a video connection that matches your VCR or DVR ( source to be recorded must be connected to the AV receiver via the same type of connection. Step 2: Audio Connection Make the audio connection Connection... -
Page 25: Connecting A Satellite, Cable, Or Terrestrial Set-Top Box Or Other Video Source
HT-R518_En.book Page 25 Tuesday, March 11, 2008 11:31 AM Connecting Your Components —Continued Connecting a Satellite, Cable, or Terrestrial Set-top box or Other Video Source With this hookup, you can use your satellite or cable receiver to listen to your favorite TV programs Hint! via the AV receiver, which is useful if your TV has no audio outputs. -
Page 26: Connecting Components With Hdmi
The AV receiver uses HDCP (High-bandwidth Digital Content Protection), so only HDCP-compatible components will display a picture. The AV receiver’s HDMI interface is based on the following standard: HT-R518: Pass-thru About Copyright Protection The AV receiver supports HDCP (High-bandwidth Digital Content Protection), video signals. -
Page 27: Making Hdmi Connections
HT-R518_En.book Page 27 Tuesday, March 11, 2008 11:31 AM Connecting Your Components —Continued Making HDMI Connections If you have an HDMI-compatible player, you can connect it to the AV receiver with an HDMI cable. Step 1: Connect your HDMI-compatible TV to the AV receiver’s HDMI OUT jack. Step 2: Connect your HDMI-compatible player to the AV receiver’s HDMI IN 1, 2, or 3 jack. -
Page 28: Connecting A Camcorder, Game Console, Or Other Device
HT-R518_En.book Page 28 Tuesday, March 11, 2008 11:31 AM Connecting Your Components —Continued Connecting a Camcorder, Game Console, or Other Device Step 1: Make the video connection Step 2: Make the audio connection MASTER VOLUME TUNING PRESET ENTER SETUP RETURN AUX INPUT SETUP MIC VIDEO... -
Page 29: Connecting A Cd Player Or Turntable
HT-R518_En.book Page 29 Tuesday, March 11, 2008 11:31 AM Connecting Your Components —Continued Connecting a CD Player or Turntable ■ CD Player or Turntable (MM) with Built-in Phono Preamp Step 1: Choose a connection that matches your CD player ( , phono preamp. -
Page 30: Connecting A Cassette, Cdr, Minidisc, Or Dat Recorder
HT-R518_En.book Page 30 Tuesday, March 11, 2008 11:31 AM Connecting Your Components —Continued Connecting a Cassette, CDR, MiniDisc, or DAT Recorder Step 1: Choose a connection that matches your recorder ( , COAXIAL DIGITAL IN (CBL/SAT) (DVD) COAXIAL (CBL/SAT) OPTICAL (VCR/DVR) OPTICAL (CD) -
Page 31: Connecting An Ri Dock
REMOTE CONTROL CBL/SAT If you have an Onkyo DS-A1 RI Dock, connect its video output jack to the AV receiver’s CBL/SAT IN S jack. Notes: • Enter the appropriate remote control code before using the AV receiver’s remote controller for the first time (see page 65). -
Page 32: Connecting Onkyo Components
Connecting Your Components —Continued Connecting Onkyo Components Step 1: Make sure that each Onkyo component is connected to the AV receiver with an analog audio cable (RCA). Step 2: Make the necessary connections (see illustration below). Step 3: If you’re using an MD, CDR, or RI DOCK component, change the Input Display (see page 38). -
Page 33: Turning On The Av Receiver
If you did, see “HDMI Input Setup” on page 36, “Component Video Input Setup” on page 37, or “Digital Input Setup” on page 37 respec- tively. ■ Did you connect an Onkyo MD recorder, CD recorder, or RI Dock? If you did, see “Changing the Input Display” on page 38. -
Page 34: First Time Setup
MASTER VOLUME TUNING PRESET ENTER VCR/DVR CBL/SAT TAPE TUNER SETUP RETURN AUX INPUT SETUP MIC VIDEO AUDIO MOVIE/TV MUSIC GAME DISPLAY DIGITAL INPUT RT/PTY/TP MEMORY TUNING MODE CLEAR HT-R518 AV RECEIVER SETUP MIC... -
Page 35: Error Messages
HT-R518_En.book Page 35 Tuesday, March 11, 2008 11:31 AM First Time Setup —Continued Press [ENTER]. The automatic speaker setup starts. You can cancel the automatic speaker setup at any point in this procedure simply by discon- necting the setup microphone. A test tone is output by each speaker in turn, as the Audyssey 2EQ function determines which speakers are connected. -
Page 36: Using A Powered Subwoofer
HT-R518_En.book Page 36 Tuesday, March 11, 2008 11:31 AM First Time Setup —Continued To Retry the Automatic Speaker Setup Press the [ENTER] button. Make sure speakers that cannot be detected are connected properly. Changing the Speaker Settings Manually If you wish to make changes to the settings found during the automatic speaker setup, follow the directions on pages 59–63. -
Page 37: Component Video Input Setup
MASTER VOLUME TUNING PRESET ENTER TAPE TUNER SETUP RETURN AUX INPUT SETUP MIC VIDEO AUDIO DISPLAY DIGITAL INPUT RT/PTY/TP MEMORY TUNING MODE CLEAR AV RECEIVER HT-R518 2, 3 COAX1 OPT1 COAX2 - - - - - - - - OPT2... -
Page 38: Changing The Input Display
Changing the Input Display If you connect an -capable Onkyo MiniDisc recorder, CD recorder, or RI Dock to the TAPE IN/OUT jacks, or connect an RI Dock to the CBL/SAT jacks, for to work properly, you must change this setting. -
Page 39: Playing Your Av Components
Select a listening mode and enjoy! See “Using the Listening Modes” on page 48. MASTER VOLUME TUNING PRESET ENTER TUNER SETUP RETURN AUX INPUT SETUP MIC VIDEO AUDIO DIGITAL INPUT RT/PTY/TP MEMORY TUNING MODE CLEAR HT-R518 AV RECEIVER... -
Page 40: Common Functions
VIDEO AUDIO display when the sleep timer has been TUNING MODE CLEAR AV RECEIVER HT-R518 set, as shown. The specified sleep time appears on the display for about 5 sec- onds, then the previous display reap- pears. SLEEP indicator To cancel the sleep timer, press the [SLEEP] button repeatedly until the SLEEP indicator disappears. -
Page 41: Using Headphones
HT-R518_En.book Page 41 Tuesday, March 11, 2008 11:31 AM Common Functions —Continued Using Headphones For private listening, you can connect a pair of stereo headphones (1/4-inch phone plug) to the AV receiver’s PHONES jack. Notes: • Always turn down the volume before connecting your headphones. -
Page 42: Specifying The Digital Signal Format
Auto (default): The format is detected automatically. If no digital input signal is present, the corresponding analog input is used instead. MASTER VOLUME TUNING PRESET ENTER SETUP RETURN AUX INPUT SETUP MIC AUDIO VIDEO TUNING MODE CLEAR HT-R518 AV RECEIVER... -
Page 43: Listening To The Radio
SETUP RETURN AUX INPUT Press and hold the TUNING Up or SETUP MIC VIDEO AUDIO HT-R518 AV RECEIVER Down [ ]/[ ] button. TUNING The frequency stops changing when you release the button. Press the button repeatedly to change the frequency one step at a time. - Page 44 DISPLAY display the available information. Band Frequency Listening mode DISPLAY MASTER VOLUME TUNING PRESET ENTER TAPE TUNER SETUP RETURN AUX INPUT SETUP MIC VIDEO AUDIO DISPLAY DIGITAL INPUT RT/PTY/TP MEMORY TUNING MODE MUSIC GAME CLEAR AV RECEIVER HT-R518 Preset #...
-
Page 45: Presetting Am/Fm Stations
TONE SETUP RETURN AUX INPUT SETUP MIC VIDEO AUDIO AV RECEIVER HT-R518 CH +/– To select a preset, use the PRE- PRESET SET [ remote controller’s CH [+/–] but- ton. You can also use the remote con- troller’s number buttons to select a preset directly. -
Page 46: Using Rds
HT-R518_En.book Page 46 Tuesday, March 11, 2008 11:31 AM Listening to the Radio —Continued Using RDS RDS only works in areas where RDS broadcasts are available. When tuned to an RDS station, the RDS indi- cator appears. RDS indicator ■ What is RDS? RDS stands for Radio Data System and is a method of transmitting data in FM radio signals. -
Page 47: Displaying Radio Text (Rt)
RETURN AUX INPUT SETUP MIC VIDEO AUDIO When a station you want to listen AV RECEIVER HT-R518 to is found, press [ENTER]. ENTER If no stations are found, the message “Not Found” appears. Listening to Traffic News (TP) ON/STANDBY STANDBY... -
Page 48: Using The Listening Modes
RETURN AUX INPUT ■ [GAME] button SETUP MIC VIDEO AUDIO TUNING MODE CLEAR AV RECEIVER HT-R518 This button selects the listening modes intended for use with video games. ■ [STEREO] button This button selects the Stereo listening mode. STEREO GAME... -
Page 49: Listening Modes Available For Each Source Format
HT-R518_En.book Page 49 Tuesday, March 11, 2008 11:31 AM Using the Listening Modes —Continued Listening Modes Available for Each Source Format Analog and PCM Sources Source format Button Listening Mode [PURE AUDIO] Pure Audio Mono Dolby PLII Movie Neo:6 Cinema *2 *3 MonoMovie [MOVIE/TV]... - Page 50 HT-R518_En.book Page 50 Tuesday, March 11, 2008 11:31 AM Using the Listening Modes —Continued Dolby Digital Sources Source format Button Listening Mode [PURE AUDIO] Pure Audio Mono DolbyDigital Dolby PLII Movie Neo:6 Cinema [MOVIE/TV] MonoMovie TV Logic AllChStereo FullMono Pure Audio Direct Stereo DolbyDigital...
- Page 51 HT-R518_En.book Page 51 Tuesday, March 11, 2008 11:31 AM Using the Listening Modes —Continued DTS Sources Source format Button Listening Mode [PURE AUDIO] Pure Audio Mono DTS, DTS 96/24 Dolby PLII Movie Neo:6 Cinema *1 *2 [MOVIE/TV] MonoMovie *1 *2 TV Logic AllChStereo FullMono...
-
Page 52: About The Listening Modes
HT-R518_En.book Page 52 Tuesday, March 11, 2008 11:31 AM Using the Listening Modes —Continued About the Listening Modes The AV receiver’s listening modes can transform your listening room into a movie theater or concert hall, with high fidelity and stunning surround sound. The illustration shows which speakers are active in each listening mode with 5.1 channel speaker sys- tem. - Page 53 HT-R518_En.book Page 53 Tuesday, March 11, 2008 11:31 AM Using the Listening Modes —Continued Onkyo Original DSP Modes Mono Movie This mode is suitable for old movies and other mono sources. The center speaker outputs the sound as it is, while reverb is applied to the sound output by the other speakers, giving presence to even mono material.
-
Page 54: Recording
HT-R518_En.book Page 54 Tuesday, March 11, 2008 11:31 AM Recording This section explains how to record the input source and how to record audio and video from separate sources. Notes: • The surround sound and DSP listening modes cannot be recorded. •... -
Page 55: Adjusting The Listening Modes
HT-R518_En.book Page 55 Tuesday, March 11, 2008 11:31 AM Adjusting the Listening Modes Using the Audio Adjust Settings With the Audio Adjust functions and settings, you can adjust the sound and listening modes as you like. Press the [RECEIVER] button fol- lowed by the [SETUP] button. - Page 56 HT-R518_En.book Page 56 Tuesday, March 11, 2008 11:31 AM Adjusting the Listening Modes —Continued ■ Center Width With this setting, you can adjust the width of the sound from the center speaker when using the Dolby Pro Logic II Music listening mode. Normally, if you’re using a cen- ter speaker, the center channel sound is output by only the center speaker.
-
Page 57: Using The Audio Settings
HT-R518_En.book Page 57 Tuesday, March 11, 2008 11:31 AM Adjusting the Listening Modes —Continued Using the Audio Settings You can change various audio settings by pressing the [AUDIO] button. Press the [RECEIVER] button fol- lowed by the [AUDIO] button. Use the Up and Down [ ]/[ ] buttons to select an item. -
Page 58: Speaker Levels
HT-R518_En.book Page 58 Tuesday, March 11, 2008 11:31 AM Adjusting the Listening Modes —Continued Speaker Levels You can adjust the volume of each speaker while listen- ing to an input source. These temporary adjustments are cancelled when the AV receiver is set to Standby. ■... -
Page 59: Advanced Setup
HT-R518_En.book Page 59 Tuesday, March 11, 2008 11:31 AM Advanced Setup Speaker Setup This section explains how to check the speaker settings and how to set them manually, which is useful if you change a speaker after performing the automatic speaker setup. -
Page 60: Crossover Frequency
HT-R518_En.book Page 60 Tuesday, March 11, 2008 11:31 AM Advanced Setup —Continued Note: • If the Front setting in step 4 is set to Small, the Large option cannot be selected. Continue with step 7 of the “Crossover Frequency” setting. Note: •... -
Page 61: Speaker Distance
HT-R518_En.book Page 61 Tuesday, March 11, 2008 11:31 AM Advanced Setup —Continued Speaker Distance These settings are set automatically by the Automatic Speaker Setup function (see page 34). With these settings, you can specify the distance from each speaker to the listening position. Measure and make a note of the distance from each speaker to the listening position. - Page 62 HT-R518_En.book Page 62 Tuesday, March 11, 2008 11:31 AM Advanced Setup —Continued Speaker Levels These settings are set automatically by the Automatic Speaker Setup function (see page 34). You can set the volume level of each speaker so that all speakers can be heard equally at the listening position.
-
Page 63: Equalizer Settings
HT-R518_En.book Page 63 Tuesday, March 11, 2008 11:31 AM Advanced Setup —Continued Equalizer Settings These settings are set automatically by the Automatic Speaker Setup function (see page 34). Here you can adjust the tone of individual speakers. To set the volume of individual speakers, see page 62. Press the [RECEIVER] REMOTE MODE button, followed by the [SETUP] button. -
Page 64: Controlling Other Components
You do not need to enter a remote control code to control these components. For details on controlling these components, see the pages indicated. Onkyo DVD player (page 66) Onkyo CD player (page 69) Onkyo cassette recorder with Onkyo RI Dock with Entering Remote Control Codes You’ll need to enter a code for each component that you... -
Page 65: Resetting The Remote Controller
Press the REMOTE MODE button, point the remote controller at the AV receiver, and operate the component. If you want to control an Onkyo component by pointing the remote controller directly at it, or you want to control an Onkyo component that’s not connected via the following remote control codes: •... -
Page 66: Controlling A Dvd Player, Or Dvd Recorder
(HD DVD, Blu-ray, or TV/DVD combination), you can control your player with the following buttons. The [DVD] REMOTE MODE button is preprogrammed with the remote control code for controlling an Onkyo DVD player. For details on entering a remote control code for a differ- ent component, see page 64. -
Page 67: Controlling A Vcr Or Pvr
HT-R518_En.book Page 67 Tuesday, March 11, 2008 11:31 AM Controlling Other Components —Continued PLAY MODE button Selects play modes on components with selectable play modes. CLR button Cancels functions and clears entered numbers. Controlling a VCR or PVR By pressing the REMOTE MODE button that’s been programmed with the remote control code for your VCR (TV/VCR, PVR, DBS/PVR combination or cable/PVR combination), you can control your video recorder with... -
Page 68: Controlling A Satellite Receiver Or Cable Receiver
HT-R518_En.book Page 68 Tuesday, March 11, 2008 11:31 AM Controlling Other Components —Continued Controlling a Satellite Receiver or Cable Receiver By pressing the REMOTE MODE button that’s been programmed with the remote control code for your sat- ellite receiver, cable receiver, or DVD recorder (DBS/PVR combination or cable/PVR combination), you can control your player with the following buttons. -
Page 69: Controlling A Cd Player, Cd Recorder, Or Md Player
CD recorder, or MD player, you can control your player with the following buttons. The [CD] REMOTE MODE button is preprogrammed with the remote control code for controlling an Onkyo CD player. For details on entering a remote control code for a differ- ent component, see page 64. -
Page 70: Controlling An Ri Dock
ON/STANDBY button Turns the iPod on or off. Notes: • This button does not turn the Onkyo DS-A2 or DS-A2X RI Dock on or off. • Your iPod many not respond the first time you press this button, in which case you should press it again. -
Page 71: Controlling A Cassette Recorder
The [TAPE] REMOTE MODE button is preprogrammed with the remote control code for controlling an Onkyo cassette recorder when used with an For details on entering a remote control code for a differ- ent component, see page 64. -
Page 72: Controlling A Tv
HT-R518_En.book Page 72 Tuesday, March 11, 2008 11:31 AM Controlling Other Components —Continued Controlling a TV By pressing the [TV] REMOTE MODE button that’s been programmed with the remote control code for your TV (TV/DVD combination or TV/VCR combination), you can control your TV with the following buttons. For details on entering a remote control code for a differ- ent component, see page 64. -
Page 73: Troubleshooting
Onkyo dealer. If you can’t resolve the issue yourself, try resetting the AV receiver before contacting your Onkyo dealer. To reset the AV receiver to its factory defaults, turn it on and, while holding down the [VCR/DVR] button, press the [ON/STANDBY] button. - Page 74 HT-R518_En.book Page 74 Tuesday, March 11, 2008 11:31 AM Troubleshooting —Continued There’s no sound with a certain signal format • Check the digital audio output setting on the source component. On some game consoles, such as those that can play DVDs, the default setting is off. •...
- Page 75 • With some AV components, certain buttons may not work as expected, and some may not work at all. • To control an Onkyo component that’s connected via , point the remote controller at the AV receiver. Be sure to enter the appropriate remote control code first (page 65).
-
Page 76: Video Outputs
7_Appendix_En Page 76 Tuesday, March 11, 2008 12:50 PM Specifications HT-R518 Amplifier Section Rated Output Power × 7 ch 130 W at 8 ohms, 1kHz, 1 ch driven (IEC) 210 W (3 Ω , Front) (1 ch driven) Dynamic Power 190 W (4 Ω... - Page 77 HT-R518_En.book Page 77 Tuesday, March 11, 2008 11:31 AM Memo...
- Page 78 HT-R518_En.book Page 78 Tuesday, March 11, 2008 11:31 AM Memo...
- Page 79 HT-R518_En.book Page 79 Tuesday, March 11, 2008 11:31 AM Memo...
- Page 80 Unit 1&12, 9/F, Ever Gain PlazaTower 1, 88, Container Port Road, Kwai Chung, N.T., HONG KONG Tel: 852-2429-3118 Fax: 852-2428-9039 http://www.ch.onkyo.com/ SN 29344662 (C) Copyright 2008 ONKYO CORPORATION Japan. All rights reserved. HOMEPAGE http://www.onkyo.com/ I0803-1 * 2 9 3 4 4 6 6 2 *...
Need help?
Do you have a question about the HT-R518 and is the answer not in the manual?
Questions and answers