
Related Manuals for Toro 71246


Summary of Contents for Toro 71246
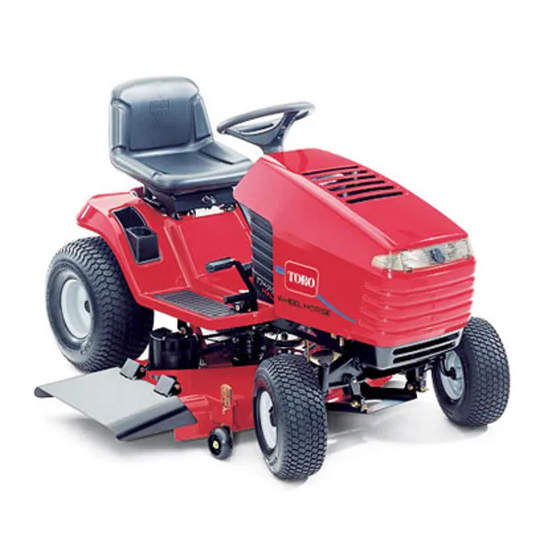
- Page 1 Form No. 3352-794 Wheel Horse XL 380H Lawn Tractor Model No. 71246—Serial No. 250000001 and Up Operator’s Manual Register your product at www.Toro.com Original Instructions (EN)
-
Page 2: Table Of Contents
Starting the Engine ......Dealer or Toro Customer Service and have the model and Stopping the Engine . -
Page 3: Safety
• Keep in mind that the operator or user is responsible for accidents or hazards occurring to other people or their Model No. property. • Do not carry passengers. Serial No. • All drivers should seek and obtain professional and practical instruction. -
Page 4: Maintenance And Storage
Operation – change into neutral and set the parking brake; – stop the engine and remove the key. • Do not operate the engine in a confined space where dangerous carbon monoxide fumes can collect. • Disengage drive to attachments, stop the engine, and disconnect the spark plug wire(s) or remove the ignition •... -
Page 5: Toro Riding Mower Safety
Toro Riding Mower Safety The following paragraph contains safety information specific to Toro products that is not included in the CEN standard. Use only Toro-approved attachments. The warranty may be voided if you use the tractor with unapproved attachments. Sound Pressure This unit has a maximum sound pressure level at the operator’s ear of 88 dBA, based on measurements of... -
Page 7: Slope Chart
Slope Chart Align this edge with a vertical surface (Tree, Building, Fence post, pole, etc.) -
Page 9: Safety And Instruction Decals
Safety and Instruction Decals Safety decals and instructions are easily visible to the operator and are located near any area of potential danger. Replace any decal that is damaged or lost. 92-5730 1. Choke 3. Continuous variable setting 2. Fast 4. - Page 10 93-6677 99-2986 1. Warning—do not operate the mower with the deflector up or 1. Crushing/dismemberment hazard of bystanders—do not turn removed; keep the deflector in place. the key while children are present; keep children a safe 2. Cutting/dismemberment hazard of hand or foot, mower distance from the machine.
- Page 11 100-7449 1. Pull the lever out to push 3. Read the instructions the machine. before servicing or performing maintenance. 2. Push the lever in to ride on the machine. 4. Do not tow the machine. 107-4922 1. Warning—to avoid tipping the tractor, do not drive across slopes greater than 5 degrees, up slopes greater than 10 degrees, or down slopes greater than 15 degrees.
-
Page 12: Gasoline And Oil
Gasoline and Oil Using Stabilizer/Conditioner Use a fuel stabilizer/conditioner in the tractor to provide the Recommended Gasoline following benefits: • It keeps gasoline fresh during storage for up to 90 days. Use unleaded regular gasoline suitable for automotive use For longer storage, drain the fuel tank. (85 pump octane minimum). -
Page 13: Operation
Operation Setting the Parking Brake 1. Push the brake pedal (Fig. 3) down and hold it. Note: Determine the left and right sides of the tractor from the normal operating position. Controls Become familiar with the controls (Fig. 2) before you start the engine and operate the tractor. -
Page 14: Using The Headlights
Using the Headlights A dash-mounted On/Off switch (Fig. 2) controls the Approximately headlights. The lights only shine while the engine is 1-1/2 in. (38 mm) running and the switch is On. 2 in. (51 mm) 2-1/2 in. (64 mm) Operating the Blade Control 3 in. -
Page 15: Stopping The Engine
Using the Safety Interlock System Caution If the safety interlock switches are disconnected or damaged, the tractor could operate unexpectedly, causing personal injury. m-1859 Figure 8 • Do not tamper with the interlock switches. • Check the operation of the interlock switches 1. -
Page 16: Testing The Safety Interlock System
A red light on the front console (Fig. 11) turns on, Danger indicating that the interlock is disabled. You could back over a child or bystander while the mower blades or other attachment is engaged and cause serious injury or death. •... -
Page 17: Pushing The Tractor Manually
Driving Forward or Backward 4. Shift the blade control (PTO) to Disengage, move the traction control pedal to Neutral, set the parking brake, and start the engine. While the engine is running, shift The throttle control regulates the engine speed as measured the blade control (PTO) switch to Engage and move the in RPM (revolutions per minute). -
Page 18: Side Discharge Or Mulch Grass
Installing the Discharge Cover Caution To convert from a side discharge to a mulching mower, install the discharge cover into the opening at the side of Children or bystanders may be injured if they the mower. move or attempt to operate the tractor while it is unattended. -
Page 19: Operating Tips
Operating Tips • For the best performance, operate the engine at the maximum speed. The mower requires air to thoroughly cut grass clippings, so do not set the height-of-cut too low or completely surround the mower in uncut grass. Always leave one side of the mower free from uncut grass to allow the air to be drawn into the mower. -
Page 20: Maintenance
Maintenance Note: Determine the left and right side of the tractor from the normal operating position. Recommended Maintenance Schedule Maintenance Service Maintenance Procedure Interval • Check the engine oil level. • Check the safety system. Each use • Clean the mower housing. •... -
Page 21: Servicing The Engine Oil
Servicing the Engine Oil Check the oil level daily or after every 8 hours. Change the oil after the first 5 operating hours and every 50 operating hours thereafter. Note: Change the oil more frequently when operating conditions are extremely dusty or sandy. Oil Type: Detergent oil (API service SF, SG, SH, SJ, or higher) Crankcase Capacity: 48 oz. -
Page 22: Servicing The Battery
Servicing the Battery 5. Stop the engine, remove the key, and wait for all moving parts to stop before leaving the operating position. Always keep the battery clean and fully charged. Use a paper towel to clean the battery and battery box. If the 6. -
Page 23: Adding Water To The Battery
3. If the electrolyte is low, add the required amount of Warning distilled water; refer to Adding Water to the Battery on page 23. Incorrectly routing the battery cable could damage Danger the tractor and cables, causing sparks. Sparks can cause the battery gasses to explode, resulting in personal injury. -
Page 24: Servicing The Parking Brake
Important Always keep the battery fully charged (1.260 specific gravity), especially when the temperature is .015 in. (0.38 mm) below 32°F (0°C) to prevent battery damage. 1. Remove the battery from the chassis; refer to Removing the Battery on page 22. 2. -
Page 25: Greasing And Lubricating The Tractor
Greasing and Lubricating the 3. Open the hood. Tractor 4. Clean around the air cleaner to prevent dirt from getting into the engine and causing damage. Grease the tractor with a general-purpose grease after every 5. Pull up on the air cleaner cover handle and rotate it 25 operating hours or once a year, whichever occurs first. -
Page 26: Servicing The Spark Plug
Cleaning the Foam and Paper Elements 2. Stop the engine, remove the key, and wait for all moving parts to stop before leaving the operating Foam Element: position. 1. Wash the foam element in liquid soap and warm water. 3. Open the hood. When the element is clean, rinse it thoroughly. -
Page 27: Cleaning The Cooling System
Installing the Spark Plug 2. Disengage the PTO and set the parking brake. 3. Stop the engine, remove the key, and wait for all 1. Install the spark plug and metal washer. moving parts to stop before leaving the operating Note: Make sure that the air gap is set correctly. -
Page 28: Servicing The Transaxle Fluid
Servicing the Transaxle Fluid Check the fluid level after every 100 hours or yearly, whichever occurs first. Always keep the fluid level at the full level when the transaxle is cold. Note: The transaxle is factory sealed and does not require oil changes. -
Page 29: Servicing The Blades
m-1875 Figure 32 1. Bulb 3. Bulb holder 2. Metal pins 4. Slots Figure 33 1. Cutting edge 3. Wear/slot forming 2. Curved area Installing the Bulb 3. Inspect the blades, especially the curved area (Fig. 33). 1. Align the metal pins on the side of the bulb base with the slots in the bulb holder. -
Page 30: Removing The Mower
Sharpening the Blades Note: Use the spring tool provided with the machine. 1. Use a file to sharpen the cutting edge at both ends of each blade (Fig. 35). Maintain the original angle. The blade retains its balance if you remove the same amount of material from both cutting edges. -
Page 31: Installing The Mower
15. Remove the mower belt from the lower engine pulley (Fig. 41). m-4630 Figure 39 1. Pivot mount bracket 3. Locknut 1890 2. Bolt 5/16 x 2-1/2 in. Figure 41 Top View 9. Remove the hairpin cotter and washer from the end of 1. - Page 32 4. Install the mower pivot mount brackets onto the front axle with the bolts and locknuts (Fig. 42). 1805 Figure 44 1. Hairpin cotter and thick 4. Mower mount m-4630 washer 5. Hairpin cotter and thin 2. Long rod washer Figure 42 3.
-
Page 33: Replacing The Blade Drive Belt
15. Hook the lift assist spring between the mower right side lift bracket and the retaining bolt (Fig. 46). Note: Use the spring tool provided with the machine. 90° m-1890 Figure 47 Top View 1. Pulley cover 3. Mower belt 2. -
Page 34: Adjusting The Front-To-Rear Blade Slope
2. Disengage the PTO and set the parking brake. 10. Check the front-to-rear blade slope; refer to Adjusting the Front-to-Rear Blade Slope on page 34. 3. Stop the engine, remove the key, and wait for all moving parts to stop before leaving the operating Adjusting the Front-to-Rear position. -
Page 35: Washing The Underside Of The Mower
9. Check the front-to-rear slope by measuring between the 13. When the front-to-rear slope is correct, tighten the pivot bottom of the mower (front center and rear center) and plate mounting bolts (Fig. 52). the flat surface (Fig. 51). If the front is not within a 14. -
Page 36: Cleaning And Storage
B. Run engine for 5 minutes to distribute conditioned Warning fuel through the fuel system. C. Stop the engine, allow it to cool, and drain the fuel A broken or missing washout fitting could expose tank; refer to Draining the Fuel Tank on page 27. you and others to thrown objects or to blade D. -
Page 37: Wiring Diagram
Wiring Diagram... -
Page 38: Troubleshooting
Troubleshooting Problem Possible Causes Corrective Action The starter does not crank. 1. The blade control (PTO) is 1. Disengage the blade control engaged. (PTO). 2. The parking brake is not on. 2. Set the parking brake. 3. The battery is dead. 3. - Page 39 Problem Possible Causes Corrective Action The engine overheats. 1. The engine load is excessive. 1. Reduce the ground speed. 2. The oil level in the crankcase is 2. Add oil to the crankcase. low. 3. The cooling fins and air 3.