Table of Contents
Advertisement
Advertisement
Table of Contents

Related Manuals for Icy Box IB-NAS4220


Summary of Contents for Icy Box IB-NAS4220
- Page 1 Version 1.8.2...
-
Page 2: Table Of Contents
RAID 1 (Mirroring) ..................9 Spann or NRAID or Linear mode ............... 9 JBOD ......................10 Package content ....................10 Take a look at the IB-NAS4220-B ..............11 Front ......................11 Rear ......................11 Assembly ......................12 How to access the management interface ............13 DHCP controlled Network with automatic DNS update ........... - Page 3 Set up NFS access rights................52 Printer Server ....................54 System settings ....................55 LAN Settings....................55 Time Setting ....................56 Restart or turn off the IB-NAS4220-B remotely ............ 56 System Information ..................57 Disk Usage ..................... 57 Network Service ....................58 DHCP Server....................59 Automatic DHCP configuration ................
-
Page 4: Introduction
The ICY BOX IB-NAS4220-B has chosen to offer the HDD space in the way common operating systems are expecting it. This means it uses the same principles (protocols) to offer HDD-Storage as common file servers are doing it but with less noise, lower power consumption and in a much simpler way. -
Page 5: Ftp
IP-Addresses (host addresses). More than a NAS But the IB-NAS4220-B is more. You can print via Network or if you want to access to your music, pictures or video files by using your network at home the UPnP-AV protocol offers a communication mechanism for your network media player to access all media files on the IB-NAS4220. -
Page 6: Print Server
Manual IB-NAS4220-B Print Server Network You can attach your printer via USB to your IB-NAS4220-B and use it with several other PCs at the same time. UPnP-AV Network The included Twonky Media Server (30 days trial version) adapts this standard to as... -
Page 7: Bonjour And Itunes Support
Bonjour and iTunes Support Network The IB-NAS4220 is able to assign its services via Bonjour, so that MAC computer can easily be connected to the server functions of the IB-NAS4220-B. Due to the iTunes support, multimedia files can be accessed via iTunes from anywhere in the network. -
Page 8: Bittorrent Protocol Support
Network The IB-NAS4220-B has an integrated BitTorrent protocol client. So you can download data via the peer to peer Network without a running PC. The IB-NAS4220-B consumes much less electricity compared to a conventional PC. This protects the environment and saves money. -
Page 9: Raid 1 (Mirroring)
Manual IB-NAS4220-B no speed increase on the IB-NAS4220-B because other limitation factors are responsible for the network performance than the drive access. RAID 1 (Mirroring) Disc 2 Disc 1 In RAID 1 mode all data is written identically on both discs. So if one disc fails the other contains all data again. -
Page 10: Jbod
Manual IB-NAS4220-B disks are added to one big disk. Because RAID 0 does not offer a real speed increase Spann should be preferred. JBOD JBOD is short for “Just a Bunch Of Disks”. Like Spann it is not really a RAID mode. This means that both discs are integrated as separate hard drives with its own content, independent from each other. -
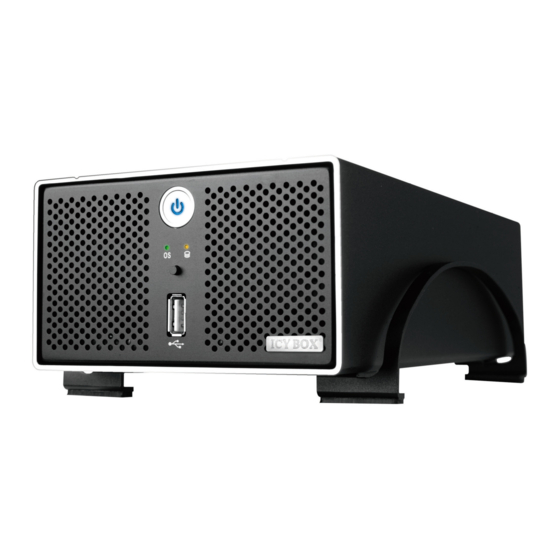
Page 11: Take A Look At The Ib-Nas4220-B
One Touch Backup USB 2.0 Interface On the front side of the IB-NAS4220-B there is the switch for turning it on and off. Also in the front are the indicator LEDs located, indicating power state and hard disk access. Furthermore there is a USB 2.0 Interface to attach of mass storage like USB-Sticks or USB hard drives. -
Page 12: Assembly
Manual IB-NAS4220-B Assembly Attention: Please remove all cabling from outside of the IB-NAS4220-B, before you open the chassis. 1. Remove the four screws from the 4. Mount the drive with two screws on bottom of the case. each side. 2. Push the inner enclosure out, and 5. -
Page 13: How To Access The Management Interface
The NAS modus is controlled by a web based interface which could be accessed by using a standard web browser. In a normal network environment this is simply done by entering “http://IB-NAS4220-B” in the address line of the web browser. But whether that works is determined by the configuration of the network environment. -
Page 14: Dhcp Controlled Network Without Automatic Dns Update
“http://IB-NAS4220-B” will not work because the DNS server has no information about the actual IP Address of the IB-NAS4220-B. To find out the IP Address you can turn on the UPnP Support in Windows or use the “SearchNAS.exe”... -
Page 15: Not Configured Network / Direct Attachment
Manual IB-NAS4220-B Not configured Network / Direct Attachment If the IB-NAS4220-B is attached to a not configured network where no DHCP server provides the IP configuration (or the IB-NAS4220-B is directly attached to the computer) and the computers are configured to use DHCP (which is default setting) the IB-NAS4220-b will activate its own DHCP Server with the default IP Address 192.168.0.1... - Page 16 Manual IB-NAS4220-B IB-NAS4220-B is found The actual IP Address configuration of the IB- NAS4220-B is displayed Click on “OK” to continue Enter the password of the IB-NAS4220-B. Default password is “admin” Click on “OK” The current IP Settings are displayed Select “Set IP...
- Page 17 Manual IB-NAS4220-B Select your time zone Set the date and time manually or … … select a time server (requires an internet connection) Click on “Next” Click on “Save” Click on “OK” Click on “Exit”...
-
Page 18: Using The Management Interface
After the procedure, the IB-NAS4220-B could be accessed by typing “http://192.168.1.100” in the address line of the web browser. Continue with point “Using the management interface” for setting up the IB-NAS4220-B on page 18. Using the management interface When entering the URL as mentioned in the points above in the address line of the web browser, for example “http://192.168.1.100”... -
Page 19: Management Interface Structure
Chosen items are highlighted in white color when selected. Hard disk initialization The first step in the setup of the IB-NAS4220-B should be the initialization of the hard disk. This is necessary because the IB-NAS4220-B saves some settings in specialized system partitions on the hard disk. -
Page 20: Choosing The Appropriate Raid Level
“Disk Utility” dialogue, described on page 23. Choosing the appropriate RAID level As described in point “What is RAID?” on page 8 the IB-NAS4220 is able to organize its discs in different RAID levels. These RAID level can provide more security, flexibility or more disc space. -
Page 21: Jbod Setup
“RAID Setting” on page 27. Choosing the appropriate file system In opposite to many other SOHO NAS products at the IB-NAS4220-B you can choose the file system the IB-NAS4220-B uses. The File systems have different pros and contras. Yo have the ability to choose and adapt the IB-NAS4220-B best to your purposes. -
Page 22: File System Limits
Manual IB-NAS4220-B File system Features EXT2 • write protection • archive bit • user level access control EXT3 • write protection • archive bit • user level access control • quota FAT32 • write protection • archive bit • Unicode file names File system limits max. -
Page 23: Disk Utility
Command button for refreshing the display Each row in the table above represents one disk mounted in the IB-NAS4220-B. The disk attached to the connector P1 will be displayed as “hdb” and the disk attached to P2 will be displayed as “hda”. - Page 24 The “Refresh” button causes a refresh of the displayed data if the display should not be actualized automatically. At least one disk needs to be initialized in order to let the IB-NAS4220-B appropriately as NAS. The disc formatted first by using the “Disk Utility” dialogue becomes the system disk.
- Page 25 Manual IB-NAS4220-B Click on “OK” The Status changes to “formatting” When the formatting process is completed, the IB-NAS4220-B needs to restart. Please, do not interrupt this process!
- Page 26 Manual IB-NAS4220-B After the restart it is necessary to log in again Enter “admin” as Username Enter “admin” as Password (default setting) Click on “Login” Select “Control Panel” The sub menu column has now several new items, which are not displayed as long as the hard disk hasn’t been...
-
Page 27: Raid Setting
The second disc can be formatted using the same procedure as describes above. RAID Setting To find out which RAID level is suitable to your application of the IB-NAS4220-B pleas check point “What is RAID?” on Page 8. Creating a RAID array... - Page 28 Manual IB-NAS4220-B computer. For details see point “Choosing the appropriate file syst em” on page 21. Attention: If you choose RAID 0 or Span, the content of the discs can not be read when directly attached to a computer again.
- Page 29 Manual IB-NAS4220-B When the creation process of the RAID array has been finished, the IB-NAS4220-B needs to reboot. Enter “admin” as Username Enter “admin” as Password (default setting) Click on “Login” Select Control Panel Maintenance RAID Setting The RAID array has been...
-
Page 30: Removing A Raid Array
RAID 1 provides security against data loss if one of the two hard disks fails. The defect hard disk can be replaced by a new disk. The auto rebuild function of the IB-NAS4220-B will copy all data on the new disk again and reestablish the RAID array. - Page 31 Manual IB-NAS4220-B The defect HDD is displayed with an exclamation mark Please note which hard disk is defect. “hda” is the disk connected to P2 and “hdb” is the disk connected to P1 connector on the main board of the IB-NAS4220-B.
- Page 32 P2 and “hdb” is the disk connected to P1 connector on the main board of the IB-NAS4220-B. If you have finished to exchange the defect hard disk, you can turn on the IB-NAS4220-B and log in again. If you return now the...
-
Page 33: Manually Exchanging A Hard Disk In Raid 1
P2 and “hdb” is the disk connected to P1 connector on the main board of the IB-NAS4220-B. If you have finished to exchange the chosen hard disk you can turn on the IB-NAS4220-B and log in again. If you return now the... -
Page 34: Changing The Admin Password
Managing users and groups In order to be able to control the Network access on the NAS, the IB-NAS4220-B is able to setup access restrictions user and group definitions. A user is a personal identifier authenticated by a password. A user can be part of one or more groups. So access rights... -
Page 35: User Management
Manual IB-NAS4220-B User Management The user management could be found selecting: Control Panel Users and Groups User Management List of existing users Field for user name Field for password Field for a description Checkmark inducing to create a private folder... -
Page 36: Create A New User
Manual IB-NAS4220-B Create a new user To create a new user simply fill out the form and click the “Save” Button. The next example shows a procedure setting up a new user with the user name “testuser” and the password “test”. The user should also have a private folder, which is a special folder just for his private use, which is only accessible or even displayed by the one who identifies with that particular username and password. -
Page 37: Change User Settings
Manual IB-NAS4220-B Change user settings To Change a user setting open the “User Management” form: Control Panel Users and Groups User Management Then all detailed settings of the user are displayed and can be changed. Select an existing user The entry in the “Password”... -
Page 38: Assign A Single User To One Or More Groups
Manual IB-NAS4220-B Assign a single user to one or more groups As you have seen the “User Management” form has a button called groups. If you select a user in the “Existing Users” list and click on that button a form for adding the selected user to all existing groups is opened. -
Page 39: Remove A Single User From One Or More Groups
Manual IB-NAS4220-B Select the group to be added to. If you want to select more than one hold the <CTRL> key pressed while selecting Click on “<<Add” button Click on “Save” button to save changes Remove a single user from one or more groups... - Page 40 Manual IB-NAS4220-B Select the group the user should be removed from. If you want to select more than one hold <CTRL> key pressed while selecting Click on the “Remove>>” button to remove the user from selected groups Click on “Save” button to...
-
Page 41: Group Management
Manual IB-NAS4220-B Group Management The group management could be found selecting: Control Panel Users and Groups Group Management List of existing groups Field for group name Control button to delete group Control button to change to members form Control button to reset... -
Page 42: Delete A Group
Manual IB-NAS4220-B The group is created and added to the “Existing Groups” list Delete a group To delete one or more groups, mark them in the “Existing Groups” list and click on the “Delete Group” button. Select the group to be deleted. -
Page 43: Add One Or More Users To A Single Group
Manual IB-NAS4220-B Add one or more users to a single group To add one ore more users to a group you do not need to open each user one by one to add them to a group. When you select the group you want the users to be added to in the “Existing Groups”... -
Page 44: Remove One Or More Users From A Single Group
Manual IB-NAS4220-B Remove one or more users from a single group To remove one or several user from a particular group you also just have to select the group you want the users to be deleted from in the “Existing Groups” list and the “Group Members”... -
Page 45: File Server, Share And Printer Management
In this section it explains, how the disk space is provided to the network how a printer is attached to the IB-NAS4220-B, and how this is controlled. The Web interface divides this management into three logical parts. Global server settings, share orientated settings and printer server settings. -
Page 46: Windows Setting
Manual IB-NAS4220-B Windows Setting As described in point “Samba (Windows)” (page 4) the Samba server provides the storage for Windows clients, also MAC OS and Linux computers are able to use network storage via this service. It has the most complex structure and provides the most features. -
Page 47: Guest Access Setting
Guest Access. The reason why the default setting is enabled is to ensure that the IB-NAS4220-B is readily accessible when used the first time. In addition to enabling and disabling that feature a quota for that account could be defined for restricting the quantity of disk used by users accessing the IB-NAS4220-B via guest settings. -
Page 48: Share Management
Manual IB-NAS4220-B Share Management In this section of the web management surface is defined how the HDD storage is offered to the network. Here you can create folders, so called shares, and define the access rights for the different users or groups towards it. For each folder created here the Windows (Samba), FTP and NFS Access can be defined and restricted. -
Page 49: Creating A New Share
Enter a comment Click on the “Save” button to save changes How to set up your computer to access a share on the IB-NAS4220-B is described in point “Mapping shares and Printers” on page 72. Deleting a share To delete a share select the share in the “Existing Shares” list and click on the “Delete Share”... -
Page 50: Set Up Windows, Ftp Access Restrictions For A Share
Manual IB-NAS4220-B Set up Windows, FTP access restrictions for a share To set up the Windows and FTP access restrictions for a share, select the share you wish to restrict in the “Existing Shares” list and change to the Windows and FTP access form. - Page 51 Manual IB-NAS4220-B To grant rights on user level select the user or group you want to give rights in the “No Access” list and whether click on the “<< Read Only” button to give him or it read only rights or click on the “<<Writable” button to give him or it all rights.
-
Page 52: Set Up Nfs Access Rights
“Remove>>” button Click on the “Save” button to save changes How to set up your computer to access a share on the IB-NAS4220-B is described in point “Mapping shares and Printers” on page 72. Set up NFS access rights To access the “NFS Access” form for the NFS access management select the share to be managed in the “Existing Shares”... - Page 53 Manual IB-NAS4220-B Select the „Allow for all“ check button to grant NFS access to any host Click on the “Save” button to save changes To allow access to a special IP Address or a Subnet select the referring radio button, enter the values and click on the “Save”...
-
Page 54: Printer Server
Click on the “Save” button to save changes How to set up your computer to access a share on the IB-NAS4220-B is described in point “Mapping shares and Printers” on page 72. Printer Server The IB-NAS4220-B is able to share an attached printer to all computers in the local network. -
Page 55: System Settings
SearchNAS.exe tool. These settings can also be done via the web surface. The web surface also offers some tools to turn off or restart the IB-NAS4220-B on remote and gather some system information, also described in this section. -
Page 56: Time Setting
“Save” button Restart or turn off the IB-NAS4220-B remotely In some cases it might be necessary to restart or even turn off the IB-NAS4220-B. This could be done via the web interface. To access the referring form, please select:... -
Page 57: System Information
Manual IB-NAS4220-B System Information To display some basic system information, please select: Control Panel System Information Some system information is displayed Disk Usage To get a quick overview of the used and free space please select: Control Panel System Disk Usage For a brief overview on the usage of the complete disk, select “Summery”... -
Page 58: Network Service
Network Service The IB-NAS4220 offers a variety of other Network services such as sharing Pictures, Music and Videos to the local network, DHCP or Downloading/Sharing files over the internet. The following Table gives you a quick overview:... -
Page 59: Dhcp Server
BOX, if there is already a DHCP server in the same subnet. Automatic DHCP configuration When the IB-NAS4220-B is configured to automatically obtain an IP-Address by DHCP and it can’t find a DHCP server when starting up, the IB-NAS4220-B assigns itself the IP-Address 192.168.1.1 with a subnet mask 255.255.255.0. -
Page 60: Manual Dhcp Configuration
Description Subnet Mask If the subnet mask should be different to the one of the one assigned to the IB-NAS4220-B in point “Network configured on fix IP-Addresses” on page 15 or in point “LAN Setting” on page 55. Default Gateway IP-Address of the default gateway. -
Page 61: Bonjour (Including Itunes Support)
Manual IB-NAS4220-B DHCP Setting Description DHCP IP Address End End of the IP-Address range. Maximum Lease Time Maximum period of time in which the distributed IP-Address is valid. Clients normally try to update the IP- Address at half of this time. The longer this period is the more likely it is that the DHCP server runs short with addresses. -
Page 62: Bittorrent Protocol Support
Manual IB-NAS4220-B BitTorrent protocol support The BitTorrent protocol is used to share files over the Internet. A lot of scientific and open source projects are using this service to distribute files in the internet. The settings for the BitTorrent protocol support can be found selecting:... - Page 63 Manual IB-NAS4220-B Click on “Browse…” to open a dialogue where you can select the torrent file on your local computer Select the torrent file Click on “Open” Click on “Add” to add the torrent for download...
- Page 64 Manual IB-NAS4220-B Click on “Start” to start the download Place of downloads Stop download Delete download Refresh display It is possible to have several downloads running at the same time. These downloads can be controlled via the control buttons in the last table column. The description of the other...
-
Page 65: Twonky Media
IB-NAs4220-B, such as music, pictures or video. Install Twonky Media The Twonky Media server is not part of the firmware of the IB-NAS4220-B. So it has to be installed on the IB-NAS4220-B first. The reason why Twonky Media needs to be installed on the IB-NAS4220-B is, that Twonky Media will be updated several times a year. -
Page 66: Using Twonky Media
Using Twonky Media At the beginning Twonky Media will scan your complete IB-NAS4220-B for media content, such as music, pictures or video files. Twonky is preset to work instantly out of the box. For details on activating, licensing or how to use Twonky Media, pleas visit Twonky Visions (Manufacturer of Twonky Media) Homepage: http://www.twonkyvision.com... -
Page 67: Maintenance
Manual IB-NAS4220-B To purchase a license click here. To visit Twonky Visions homepage for details on the usage of the Twonky Media server click here Symbol Description Information on Server Status Link to Twonky Vision homepage for details on Twonky... -
Page 68: Firmware Upgrade
Manual IB-NAS4220-B Firmware Upgrade The IB-NAS4220-B is constructed to allow a complete upgrade of the firmware. The firmware upgrade form can be found selecting: Control Panel Maintenance Firmware upgrade The upgrade starts by selecting the upgrade file, which has to be located on the local hard disk. -
Page 69: Save And Restore Configuration
After the restart, it is necessary to log in again Save and restore configuration The IB-NAS4220-B offers an opportunity to save all settings been made to disk and restore them if necessary. Save configuration You will find the form for saving the configuration by selecting:... -
Page 70: Restore Configuration
Click on the “Restore” button to start the restore process. Resetting to factory settings To reset the IB-NAS4220-B to all default settings and factory presets you can find the referring form by selecting: Control Panel Maintenance Factory Reset Attention: A factory reset may destroy all data on the disk. -
Page 71: Usb-Sticks And Usb Hard Discs
So the USB mass storage device, which is attached first will become the share “usb1” and the second “usb2”. How to set up your computer to access a share on the IB-NAS4220-B is described in point “Mapping shares and Printers” on page 72. -
Page 72: Mapping Shares And Printers
Manual IB-NAS4220-B Mapping shares and Printers Mapping Windows shares in Windows To access the IB-NAS4220-B shares in windows proceed as described below: Right click on “My Computer” Click on “Explore” Enter “\\ib-nas4220-b” in the address line of the Windows Explorer, where... - Page 73 Enter the referring password defined while creating a new user here Click on “OK” All shares offered by the IB-NAS4220-B are now listed here To map this share now permanently to the local computer, right click on...
- Page 74 Manual IB-NAS4220-B Click on “Map Network Drive…” Select the letter you want to map the share to Click on “Finish” to complete the mapping From now on you can find and access the share here via the Letter assigned to...
-
Page 75: Mapping The Printer In Windows
Manual IB-NAS4220-B Mapping the printer in Windows To map the printer in Windows go Click on “Start” and selec t “Printers and Faxes”. Select “Add a printer” Click on “Next >”... - Page 76 Manual IB-NAS4220-B ect “A network printer, or a printer attached to another computer” Click on “Next” Select “Connect to this printer…” Enter “\\ib-nas4220-b\lp”, where ib-nas422 0-b is the name of the Select “Next >” Click on “Yes” Click on “OK”...
- Page 77 Manual IB-NAS4220-B Select a printer from the dialogue or … … select “Have Disk…” to select a driver from a disc Click on “OK” Click on “Finish” Now the printer is installed and can be uses as directly attached to the computer. Repeat...
-
Page 78: Mapping Windows Shares On Mac Os X
Mapping Windows shares on Mac OS X To map Windows shares on Mac OS X proceed as described below: Open the Finder Select “Network” The IB-NAS4220-B is displayed with its name Double click on “ICYBOX”, where ICYBOX it the name of theIB-... -
Page 79: Mapping The Printer On Mac Os X
Manual IB-NAS4220-B The share is now accessible on the desk Mapping the Printer on Mac OS X Open the “Printer Setup Utility” by selecting the Menu “Go” and than “Utilities”: Open „Printer Setup Utility“ Click on “Add” Click on “OK”... - Page 80 Select “Windows Printing” Select the workgroup name of the IB-NAS4220-B, default: “WORKGROUP” Select “IB-NAS4220-B” where IB-NAS4220-B is the name of your IB-NAS4220-B Select the printer model Click on “Choose” Enter user name and password of a user defined for the IB-NAS4220-B Click on “OK”...
-
Page 81: Mounting Windows Shares In Linux
Mounting Windows shares in Linux To mount the Windows shares in Linux open a shell and type (<IP Address>= IP Address of the IB-NAS4220-B, <share>=Windows share of the IB-NAS4220-B, <user>=username, <pass>= password, <mountpoint>= path of the mount directory): mount –t smbfs //<IP Address>/<share> <mountpoint>... -
Page 82: Benchmark Conditions Raidsonic Ib-Nas1000, Ib-Nas4220-B, Ib-Nas2000 Firmware
NAS4220-B, IB-NAS2000 Firmware You may conduct internal benchmark testing of the firmware of the models IB-NAS1000, IB-NAS4220-B and IB-NAS2000. You may disclose the results of any benchmark test of the of the firmware of the models IB-NAS1000, IB-NAS4220-B and IB-NAS2000,...
Need help?
Do you have a question about the IB-NAS4220 and is the answer not in the manual?
Questions and answers