Technicolor TG582n Quick Setup Manual
Hide thumbs
Also See for TG582n:
- Cli reference manual (864 pages) ,
- Setup and user manual (94 pages) ,
- Quick start manual (16 pages)
Advertisement
Table of Contents
- 1 Table of Contents
- 2 Step 1: Unpack Contents
- 3 Step 2: Connect Power Cable
- 4 Step 3: Connecting DSL Cable to Modem & Socket
- 5 Step 4: Activate Wireless Connection
- 6 Step 5: Choose Your Wireless Network
- 7 Step 6: Network Security Key
- 8 Step 7: Modem Settings
- 9 Step 8: Broadband Connection
- 10 Step 9: User Name & Password
- 11 Step 10: Internet Connection Status
- 12 Troubleshooting Wifi Connection
- 13 Troubleshooting Poor Wifi Performance
- 14 Internet Safety & Parental Controls
- 15 Contact Details
- Download this manual
Advertisement
Table of Contents
Troubleshooting

Related Manuals for Technicolor TG582n


Summary of Contents for Technicolor TG582n
-
Page 2: Table Of Contents
Contents Step 1: Unpack Contents Page Step 2: Connect Power Cable Page Step 3: Connecting DSL Cable to Modem & Socket Page Step 4: Activate Wireless Connection Page Step 5: Choose your Wireless Network Page Step 6: Network Security Key Page Step 7: Modem Settings Page... -
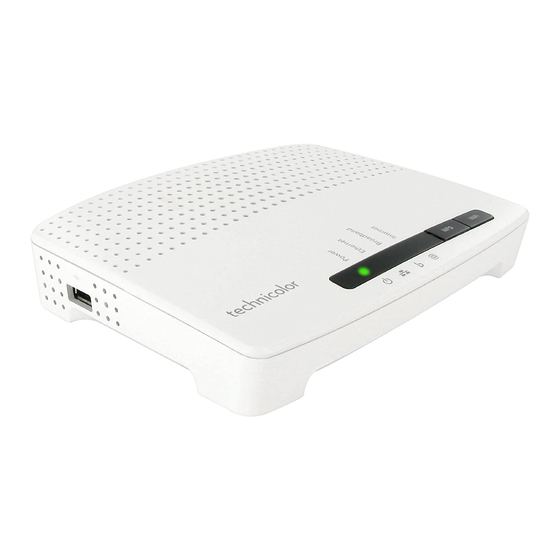
Page 3: Step 1: Unpack Contents
• You will find the following items are included in your new Wireless Broadband Pack A. 1 x Wireless Modem B. 1 x 12v DC Power Cable C. 1 x Ethernet Cable D. 1 x DSL Cable 1 x Splitter TG582n Quick Set Up Guide... -
Page 4: Step 2: Connect Power Cable
Step 2: Connect Power Cable • Connect the Power Cable (B) into the modem (A) and a suitable power socket • Then, press the power button on the rear of the modem... -
Page 5: Step 3: Connecting Dsl Cable To Modem & Socket
• If you have a Single port socket, connect the filter into the socket and connect the DSL cable into the side of the filter with a computer screen and your landline phone into the side with the picture of a phone. TG582n Quick Set Up Guide... - Page 6 • Wait for a couple of minutes for the Broadband light to go steady green. • If your Broadband light fails to go steady green, please check your cable connections and ensure that you have connected to the correct phone socket for your correct DSL enabled line.
- Page 7 • If you have the Two port socket, DO NOT connect in the filter into either port as this is now built into the Two Port socket and you will not get a solid broadband light TG582n Quick Set Up Guide...
-
Page 8: Step 4: Activate Wireless Connection
Step 4: Activate Wireless Connection • From your desktop, left click on the ‘Wireless Network Connection’ icon as shown above... -
Page 9: Step 5: Choose Your Wireless Network
Step 5: Choose your Wireless Network • On the back of your modem you will find ‘Network Name’ • Select your Technicolor ‘Network Name’ from the list on screen, this will typically begin with “TNCAPxxxxxx” • Then, click ‘Connect’ TG582n Quick Set Up Guide... -
Page 10: Step 6: Network Security Key
Step 6: Network Security Key • Enter the Security Key (This can be found on the back of your router - ‘Wireless Key’) • Please use CAPITAL LETTERS Note: WPS allows you to add new wireless clients to your local network without the need to enter any of your wireless setting. -
Page 11: Step 7: Modem Settings
(email, letter, or text message) into the correct spaces on the page. • Alternatively if you do not automatically see the mentioned Broadband username and password page, then please follow the following instructions. TG582n Quick Set Up Guide... -
Page 12: Step 8: Broadband Connection
Step 8: Broadband Connection • Type 10.0.0.138 into the address bar then press Enter • Under ‘Broadband Connection’ - please click on ‘Internet’... -
Page 13: Step 9: User Name & Password
• Type your user name and password exactly as provided in your welcome letter into the correct spaces on the page • Make sure the ‘Remember Password’ check box is ticked and click the ‘Connect’ button TG582n Quick Set Up Guide... -
Page 14: Step 10: Internet Connection Status
Step 10: Internet Connection Status • You will see this screen which will confirm that you are connected. Congratulations! You are now connected. Note: If you are still experiencing any difficulties, please feel free to contact our Technical Support Team on the number provided in your welcome pack. -
Page 15: Troubleshooting Wifi Connection
• Choose ‘Network and Internet’ • Choose ‘Network and Sharing’ • Then, choose ‘Change Adapter Setting’ • Right click ‘Wireless Network Connection’ • Select ‘Enable’ Note: Your computer setup and screen may differ from the one above TG582n Quick Set Up Guide... -
Page 16: Troubleshooting Poor Wifi Performance
Troubleshooting Poor WiFi Performance 1. Open your web browser and type into the address bar http://10.0.0.138 to open the Technicolor TG582n homepage. 2. Click on Home Network in the on the menu in Dark Grey box on the left side of the Page. If you do not have any options in the box click on Admin or Administrator in the top left hand corner of the homepage first. - Page 17 7. Click Apply to confirm the change. Then wait 60 - 120 seconds for your computer to automatically pick up the new settings and reconnect to your wifi network. IF there is no improvement, try the remaining channels 2-5 or 7-10 periodically until best performance is achieved. TG582n Quick Set Up Guide...
-
Page 18: Internet Safety & Parental Controls
Internet Safety & Parental Controls 6 months FREE F-Secure SAFE Internet Security for your whole family! All Digiweb customers can now avail of F-Secure SAFE, a new security service from our partner F-Secure. It combines their award-winning technologies into one unified security experience across all your devices. -
Page 19: Contact Details
Telephone: 1918 or 1890 940 400 Email: support@digiweb.ie Customer Care Telephone: 1918 or 1890 940 400 Email: customercare@digiweb.ie Sales Telephone: 1800 28 58 28 Email: sales@digiweb.ie Thank you for your custom. We hope you enjoy your new Digiweb Broadband service. TG582n Quick Set Up Guide...
Need help?
Do you have a question about the TG582n and is the answer not in the manual?
Questions and answers