Table of Contents
Advertisement
Owner's Manual
LP Gas & Charcoal Grill
Models 5650 and 5072
Patented
Keep your receipt with this manual for Warranty.
Customer serviCe
1-912-638-4724
service@CharGriller.com
5650/5072_OM_A1
Contents of this manual are Trademarked and Copyrighted by Char-Griller | A&J Manufacturing.
Using the information contained in this manual without consent of Char-Griller and/or A&J
Manufacturing is strictly prohibited.
Advertisement
Table of Contents

Related Manuals for Char-Griller 5650


Summary of Contents for Char-Griller 5650
-
Page 1: Customer Service
Keep your receipt with this manual for Warranty. Customer serviCe 1-912-638-4724 service@CharGriller.com 5650/5072_OM_A1 Contents of this manual are Trademarked and Copyrighted by Char-Griller | A&J Manufacturing. Using the information contained in this manual without consent of Char-Griller and/or A&J Manufacturing is strictly prohibited. - Page 2 Stateof California to cause cancer, birth defects, or other reproductive harm. This product and combustion by- products produced when using this product contain chemicals known to the State of California to cause cancer, birth defects, or other reproductive harm. 5650/5072_OM_A1...
- Page 3 Note: The use and installation of this product must conform to local codes or, in absence of local codes, the National Fuel Gas Code, ANSI Z223.1/NFPA54. imPortANt NotiCe: Read all instructions prior to assembly and use. Read and understand all warnings and precautions prior to operating your grill. 5650/5072_OM_A1...
- Page 4 The flexible tube should be changed whenever it is damaged or cracked or by expiration date printed on the tubing. Or, change tube every five (5) years. Always connect or replace cylinder in a well-ventilated area, and never in the presence of a flame, 5650/5072_OM_A1...
-
Page 5: If You Smell Gas
Do not store or use gasoline or other flammable liquids or vapors within 25 feet (9m) of this or any other appliance. An LP cylinder not connected should be stored a minimum of 10 feet (3m) away from the appliance. 5650/5072_OM_A1... - Page 6 Do not leave a lit grill unattended. Keep children and pets away from grill at all times. Do not place grill on any type of tabletop surface. Do not use grill in high winds. 5650/5072_OM_A1...
- Page 7 This grill is shipped from the factory for propane gas use only. Never use a propane cylinder with a damaged body, valve, collar or footing. Dented or rusted propane cylinders may be hazardous and should be checked by your propane gas supplier. 5650/5072_OM_A1...
- Page 8 CAUTION: Handles are Hot CUATION: Handles are Hot 5650/5072_OM_A1...
-
Page 9: Warranty Information
InFOrMaTIOn Char-Griller® Gas Grill Char-Griller® will repair or replace any defective part of its Grills for a period of up to one (1) year from the date of purchase. Char-Griller® will also repair or replace the charcoal grill body (lid and bottom half) and gas grill lid of its grillers/smokers if the metal is rusted through or burned through for a period up to five (5) years from date of purchase. -
Page 10: Parts List
ParTs lIsT Model 5650 5650/5072_OM_A1... - Page 11 LP Gas & Charcoal Grill ParTs lIsT Model 5072 5650/5072_OM_A1...
- Page 12 ParTs lIsT 5072 5650 5072 5650 Item Part name Item Part name GAS HOOD ASSEMBLY ACORN NUT SMOKESTACK SPRING CHARCOAL HOOD ASSEMBLY SIDE BURNER SPARKER TIP WARMING RACK BURNER TUBE/ FLARE UP SHIELD COOKGRATE - PORCELAIN GRATES SUPPORT (BACK) GRATE HANGER...
- Page 13 LARGE COTTER PIN ......2 PCS SMALL COTTER PIN ......3 PCS CENTER HINGE PIN ......1 PC SCREW ..........3 PCS #10-24 X 2/5” SCREW ......6 PCS HUB CAP ..........2 PCS CARRIAGE BOLT........1 PCS WING NUT..........1 PCS 5650/5072_OM_A1...
- Page 14 Attach the LEFT LEG WELDED ASSEMBLY and RIGHT LEG WELDED ASSEMBLY to FRONT & BACK CART BRACE ASSEMBLY using eight (8) ¼-20 x ½” HEX BOLTS, eight (8) ¼” LOCK WASHERS. Lock Washer Hex Bolt: Lock Washer Hex Bolt PARTS USED IN STEP: ½” Hex Bolts (8) Lock Washer (8) 5650/5072_OM_A1...
- Page 15 2 Attach FRONT & BACK CART BRACE to LEFT LEG WELDED ASSEMBLY and RIGHT LEG WELDED ASSEMBLY using four (8) ¼-20 x ½” HEX BOLTS. Hex Bolt Hex Bolt PARTS USED IN STEP: ½” Hex Bolts (8) EXPLODED VIEW 5650/5072_OM_A1...
- Page 16 AXLE through WHEELS and LEFT LEG WELDED ASSEMBLY, as shown below. Finish by attach- ing 2nd WASHER, COTTER PIN, and HUB CAP. Hub Cap Cotter Pin Flat Washer PARTS USED IN STEP: EXPLODED VIEW Hub Cap (2) Flat Washer 2/5-inch (2) Large Hair Cotter Pin (2) 5650/5072_OM_A1...
- Page 17 Attach CATCH PAN SLIDER BRACKETS and CATCH PAN STOPPER BRACKET to GAS GRILL BODY BOTTOM HALF using six (6) #10-24 x 2/5” SCREWS. Screws Catch Pan Slider Bracket Catch Pan Stopper Bracket VIEW: BOTTOM HALF OF GRILL (Flipped upside down) PARTS USED IN STEP: #10-24 x 2/5” Screw (6) 5650/5072_OM_A1...
- Page 18 Attach GRILL BODIES onto CART using eight (8) ¼-20 x ½” HEX BOLTS, eight (8) ¼” LOCK WASHERS, and eight (8) ¼” FLAT WASHERS. Hex Bolt Lock Washer Flat Washer PARTS USED IN STEP: ½” Hex Bolts (8) Lock Washer (8) 1/4” Flat Washer (8) 5650/5072_OM_A1...
- Page 19 LP Gas & Charcoal Grill step 6 Insert REMOVABLE CATCH PAN under GRILL BODY through CATCH PAN SLIDER BRACKETS, as shown below. EXPLODED VIEW DETAIL B Catch Pan Slider Bracket DETAIL C SCALE 1 : 2 SCALE 1 : 2 5650/5072_OM_A1...
- Page 20 WASHERS into the SIDE BURNER SIDE. Screw four (4) HEX BOLTS and four (4) LOCK WASHERS into the CONTROL PANEL Hex Bolt Lock Washer REVERSED VIEW Side Burner Lock Washer Hex Bolt PARTS USED IN STEP: ½” Hex Bolts (8) Lock Washer (8) 5650/5072_OM_A1...
- Page 21 (3) BURNER SCREWS, as shown below. The burner with the longer wire goes on the right side of the GRILL BODY. UNDERSIDE OF PARTS USED IN STEP: CONTROL PANEL Screws (3) EXPLODED VIEW End of Valve Burner Screw 5650/5072_OM_A1...
- Page 22 ¾” HEX BOLT, two (2) ¼” FLAT WASHERS, one (1) ¼” LOCK WASHER, and one (1) ¼-20 FLANGE HEX NUT, as shown below. Damper Circle CHARCOAL Flat Washer PARTS USED IN STEP: Flange Hex Nut 3/4” Hex Bolt (1) Hex Bolt 1/4” Flat Washer (2) Lock Washer (1) Lock Washer Hex Nut (1) Flat Washer 5650/5072_OM_A1...
- Page 23 Attach SIDE HANDLE to side of CHARCOAL GRILL BODY using two (2) ¼-20 x ½” HEX BOLTS and two (2) ¼” LOCK WASHERS Lock Washer Hex Bolt CHARCOAL PARTS USED IN STEP: 1/2” Hex Bolt (2) Lock Washer (2) 5650/5072_OM_A1...
- Page 24 Attach HOOD HANDLES to GAS GRILL HOOD and CHARCOAL GRILL HOOD with two (2) LOCK WASHERS and two (2) WING NUTS per handle. Then, attach THERMOMETER and BEZELS to GRILL HOODS. THERMOMETER inserts through BEZEL and then GRILL HOOD. Secure with a WING NUT. Model 5650 Bezel Thermometer Wing Nut...
- Page 25 Secure with cotter pin. Hinge Pin Small Cotter Pin Center Hinge Pin PARTS USED IN STEP: Hinge Pin (2) Center Hinge Pin (1) Small Cotter Pin (3) 5650/5072_OM_A1...
- Page 26 (4) ¼-20 x 3/4” HEX BOLTS, and twelve (12) ¼-20 FLANGE HEX NUTS. Flange Hex Nut 1 1/2” Hex Bolt 3/4” Hex Bolt PARTS USED IN STEP: 1 1/2” Hex Bolt (4) 3/4” Hex Bolt (4) Hex Nut (12) 5650/5072_OM_A1...
- Page 27 LP Gas & Charcoal Grill step 15 Continued EXPLODED VIEW EXPLODED VIEW 5650/5072_OM_A1...
- Page 28 Attach POT STAND to SIDE BURNER BODY, attach HEAT TENT over SIDE BURNER, and place ASHPAN in CHARCOAL GRILL BODY with FIRE GRATE HANGERS. Pot Stand Flame Tent Ash Pan step 17 Place COOKING GRATES in GRILL BODY. Cooking Grates 5650/5072_OM_A1...
- Page 29 LP Gas & Charcoal Grill step 18 Slide one (1) GREASE TRAY into place on guide rails underneath SIDE BURNER BODY and other GREASE TRAY underneath CATCH PAN. step 19 Attach UTENSIL HOOKS to SIDE BURNER using (3) “S” HOOKS. “S” Hooks 5650/5072_OM_A1...
- Page 30 Attach TANK SECURE BRACKET to front of GAS GRILL BODY. PARTS USED IN STEP: 1/2” Hex Bolt (2) Hex Nut (2) Wing Nut (1) Carriage Bolt (1) Hex Nut 1/2” Hex Bolt Tank Secure Bracket EXPLODED VIEW Wing Nut EXPLODED VIEW Carriage Bolt Tank Secure Bracket 5650/5072_OM_A1...
- Page 31 LP Gas & Charcoal Grill step 21 Unscrew IGNITER PUSH BUTTON and insert one (1) “AA” battery, negative side first. Then screw back IGNITER PUSH BUTTON. Battery Igniter Push Button 5650/5072_OM_A1...
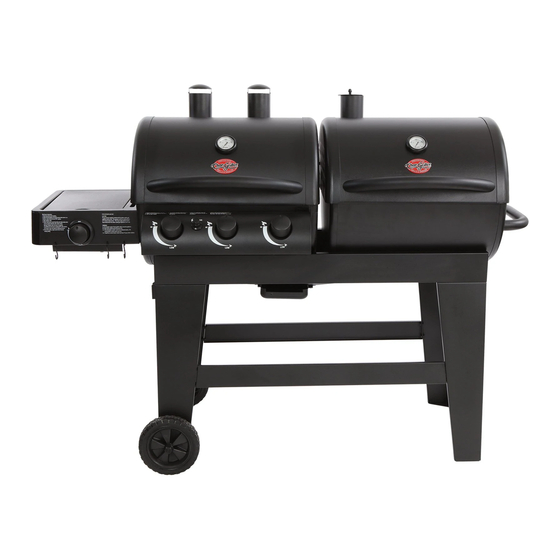
- Page 32 Fully assembled Model # 5650 Model # 5072 Caution: use only the regulator provided! If a replacement is necessary, please call our customer service department, 912- 638-4724. Do NOT use replacement parts that are not intended for this grill. Hint: The paper label that is affixed to the hood is more easily removed when the hood is warm.
-
Page 33: Connecting The Gas Cylinder To The Appliance
The hose used must conform to the relevant standard for the country of use. Worn or damaged hose must be replaced. Ensure that the hose is not obstructed, kinked, or in contact with any part of the barbecue other than at its connection. 5650/5072_OM_A1... - Page 34 Disconnect the regulator from the cylinder (according to the directions supplied with the regulator) when the appliance is not in use. The appliance must be used in a well ventilated area. Do not obstruct the flow of combustion air to the burner when in use. ONLY USE THIS APPLIANCE OUTDOORS. 5650/5072_OM_A1...
-
Page 35: Leak Test
4. Retest after fixing leak. 5. Turn gas off after testing. 6. If leakage is detected and cannot be rectified, please call Char-Griller customer service at 912- 638-4724 or email at Service@CharGriller.com. lighting Instructions Always open hood while igniting grill. If grill does not light, always wait 5 minutes for gas to clear before relighting. -
Page 36: Side Burner
2. Push in and rotate knob to HIGH position, and burner should light immediately. 3. Adjust knobs to desired cooking settings. observe Flame Height When Lit View burner flame through flame viewing hole. Flame should be blue and yellow in color, and approximately 1/2”-3/4” tall on HIGH setting. 5650/5072_OM_A1... - Page 37 122°F). Do not move grill while hot, and do not leave unattended during operation. Position gas cylinder next to device such that hose is not bent, twisted, subject to tension, or touching any hot parts of appliance. DO NOT place gas cylinder directly under burners. 5650/5072_OM_A1...
-
Page 38: Cleaning And Care
An uncoated interior will rust if not properly maintained with a regular coating of cooking oil on all bare metal surfaces inside the grill. You can use either vegetable spray or liquid vegetable oil applied using a paper towel on a cooled grill. 5650/5072_OM_A1... - Page 39 9. Inspect burner for any damage (cracks or holes). If damage is found, replace with new burner. To re-install burner, ensure that gas valve orifices are correctly position inside burner inlet (venture). Also check position of spark electrode. servicing Grill should be serviced annually by a licensed professional. 5650/5072_OM_A1...
- Page 40 Do not cook before briquettes have turned gray with ash. • WARNING! Accessible parts may be very hot. Use outdoors only. • WARNING! Do not use spirit or petrol when lighting or relighting. • WARNING! Keep children and pets away from appliance. 5650/5072_OM_A1...
-
Page 41: Troubleshooting
Check for bent or kinked hose Disengagement of burner to Re-engage burner and valve valve Insects in venturi (burner Clean venturi insert) Burner ports clogged or Clean burner ports blocked Sudden drop in gas flow or Out of gas Change propane tank reduced flame 5650/5072_OM_A1... - Page 42 Low gas pressure Change propane tank Excess flow valve tripped Refer to “Sudden drop in gas flow or reduced flame height” Flare-Up Grease buildup Clean grill Excessive fat in meat Trim fat before grilling 5650/5072_OM_A1...
- Page 43 Clean burner and/or burner tube(s)) dirty tubes Inside lid appears to be Baked on grease buildup has Clean inside of lid thoroughly. peeling (like paint peeling) turned to carbon and is flaking The lid is not painted on the inside. 5650/5072_OM_A1...
- Page 44 CuTs OF MeaT 5650/5072_OM_A1...
- Page 45 Grill with fire grate in high (hot) position with lid open or closed. Meat Marinade 1/2 cup vegetable or olive oil 1/3 cup soy sauce 1/4 cup red wine vinegar 2 tbsp lemon juice 1 tsp dry mustard 1 minced clove garlic 1 small minced onion 5650/5072_OM_A1...
- Page 46 Marinate beef in mixture a minimum of 4 hours. HOT DOGS: • Grill with lid up and fire grate in high (hot) position for approximately 6 minutes. • Turn every few minutes. HAMBURGERS: See Meat Marinade on page 40. 5650/5072_OM_A1...
- Page 47 Turn after 25 minutes (no need to turn if smoked). • Squeeze to check for doneness. SWEET CORN IN HUSKS: • Trim excess silk from end and soak in cold salted water 1 hour before grilling. • Grill 25 minutes – turning several times. 5650/5072_OM_A1...
- Page 48 4 hours or when you can’t hear the water simmering. Add water by moving meat over and pouring water through GRILL into WATER PAN. • IF THE SMOKE IS WHITE, THE FIRE’S RIGHT. IF THE SMOKE IS BLACK, ADD SOME DRAFT. 5650/5072_OM_A1...
- Page 49 Then place pieces on cooking grate directly above drip pan. • With the grate in the low position, cook with lid down for 55 to 60 minutes or until done. Do not use vegetable oil or salt and pepper if using marinade. 5650/5072_OM_A1...
- Page 50 Marinate in brine (1/4 cup dissolved in 1 qt of water) or marinate fish in 1 cup white wine, 1 cup soy sauce mixed with 1 cup lemon juice. • Marinate overnight in covered dish in refrigerator. • Let air on rack 20 minutes before placing on Pam-sprayed grill. • Smoke 25 minutes. 5650/5072_OM_A1...
- Page 51 Beau Monde seasoning (or substitute 1 teaspoon MSG and 1 teaspoon seasoned salt). • Allow meat to stand in marinade at room temperature for 2 hours or refrigerate up to 24 hours in a covered dish. • Bring meat to room temperature before cooking. 5650/5072_OM_A1...
- Page 52 1 cup soy sauce 1/2 cup brown sugar 1/2 cup vinegar 1/2 cup pineapple juice 2 teaspoons salt 1/2 teaspoon garlic powder • Mix ingredients and bring to a boil. • Marinate beef in mixture a minimum of 4 hours. 5650/5072_OM_A1...
- Page 53 Weather Resistant Keeps Food Warm Protects Grill Finish Cover Accommodates Side Shelf or Side Fire Box (Model #8080 for 5650 grill Model #8087 for 5072 grill) Side Fire Box #22424 For Charcoal Grilling Attaches to Grill in Minutes Rotisserie #5022...
- Page 54 For pricing or to order accessories visit: www.CharGriller.com Call: 912-638-4724 P.O. Box 30864 Sea Island, GA 31561 912-638-4724 www.CharGriller.com Service@CharGriller.com 5650/5072_OM_A1...
Need help?
Do you have a question about the 5650 and is the answer not in the manual?
Questions and answers