Table of Contents
Advertisement
Advertisement
Table of Contents

Related Manuals for Nab EFTPOS Ingenico


Summary of Contents for Nab EFTPOS Ingenico
- Page 1 NAB EFTPOS User Guide for Countertop & Mobile Terminals...
- Page 2 YOUR NAB EFTPOS TERMINAL NAB EFTPOS User Guide...
-
Page 3: Table Of Contents
TABLE OF CONTENTS Getting to know your NAB EFTPOS Ingenico terminal Contactless – Tap & Go Sale – Tap Sale – Insert/Swipe using PIN Sale – Insert/Swipe using Signature Sale with Cash-out Sale with Tip Cash Out Only Refunds Review details of the last transaction... - Page 4 1300 369 852 Email Merchant.Service.Centre@nab.com.au Before contacting the NAB Merchant Service Centre in regard to any error message, please write down all the error information as well as your merchant and terminal numbers so your query can be quickly resolved. For Authorisation...
-
Page 5: Getting To Know Your Nab Eftpos Ingenico Terminal
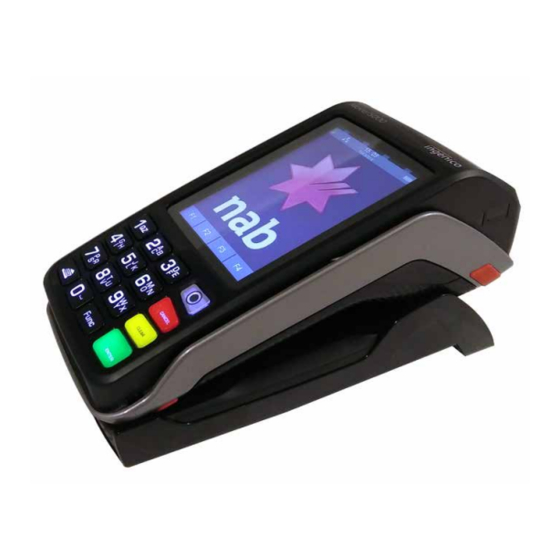
GETTING TO KNOW YOUR NAB EFTPOS INGENICO TERMINAL Contactless landing zone Swipe reader Terminal display/ touchscreen Menu key Cancel key Telephone-style keypad Clear key Enter/Power on key Feed Chip card reader NAB EFTPOS User Guide... -
Page 6: Using The Keypad
GETTING TO KNOW YOUR NAB EFTPOS INGENICO TERMINAL (CONTINUED) Using the Touch-screen The Ingenico terminal has a colour touch-screen. Navigating using the touch-screen is easy and intuitive for both you and your customers. Simply follow the prompts and press the option on the screen to make a selection. - Page 7 GETTING TO KNOW YOUR NAB EFTPOS INGENICO TERMINAL (CONTINUED) Navigating the Menu To access the Menu, press the Menu button. There are 4 main menu items To select a menu option: 1. Press F2 to scroll down and F3 to scroll up to the menu item, and press ENTER, or 2.
-
Page 8: Contactless Tap & Go
TAP & GO The NAB EFTPOS Ingenico terminal comes ready with the capability to accept Contactless credit card payments, commonly referred to as ‘tap and go’. Your customer’s chip card must have the following symbol in order to use the Contactless feature. -
Page 9: Sale Tap
Ensure your customer holds their card over the contactless logo until all four bars ‘light up’ and the terminal sounds a beep. This will only take a few seconds. NAB EFTPOS User Guide... - Page 10 SALE TAP (CONTINUED) Step 5 Press Yes to print the customer receipt if required NAB EFTPOS User Guide...
-
Page 11: Sale - Insert/Swipe Using Pin
Enter the sale amount directly from the home screen Ask customer to select their account and press ENTER Step 4 Step 2 Ask customer to enter their PIN and press ENTER Ask customer to INSERT or SWIPE their card NAB EFTPOS User Guide... - Page 12 INSERT/SWIPE USING PIN (CONTINUED) Step 5 Step 6 An acknowledgement displays once the sale has Press Yes to print the customer receipt if required been approved and the merchant receipt will print. Remove card from the terminal if inserted NAB EFTPOS User Guide...
-
Page 13: Sale - Insert/Swipe Using Signature
Ask customer to select an account Step 1 Enter the sale amount directly from the home screen and press ENTER Step 4 Ask customer to press ENTER Step 2 Ask customer to INSERT or SWIPE their card NAB EFTPOS User Guide... - Page 14 Remove card from the terminal Step 6 Ask customer to sign the receipt. You will need to verify your customer’s signature with the signature on the card. If this is correct, press Yes NAB EFTPOS User Guide...
-
Page 15: Sale With Cash-Out
A sale with cash-out transaction is shown as one total item in the settlement report and on the monthly merchant statement. Step 1 Enter the sale amount directly from the home screen and press ENTER Step 3 Ask customer to INSERT or SWIPE their card NAB EFTPOS User Guide... - Page 16 Ask customer to remove their card. Step 5 Ask customer to enter their PIN and press ENTER Step 7 Press Yes to print the customer receipt if required NAB EFTPOS User Guide...
-
Page 17: Sale With Tip
Step 1 Enter the sale amount directly from the home screen and press ENTER Step 4 Ask customer to TAP, SWIPE or INSERT their card Step 2 Enter the tip amount and press ENTER NAB EFTPOS User Guide... - Page 18 Remove card from the terminal if inserted Step 6 Ask customer to enter their PIN and press ENTER Step 8 Press Yes to print the customer receipt if required. NAB EFTPOS User Guide...
-
Page 19: Cash Out Only
Merchant Service Centre. Step 1 Press the Menu key Step 2 Press 1 to select Transactions Step 5 Ask customer to INSERT or SWIPE their card Step 3 Press 3 to select Cash Out NAB EFTPOS User Guide... - Page 20 Ask customer to remove their card. Step 7 Ask customer to enter their PIN and press ENTER Step 9 Press Yes to print the customer receipt if required. NAB EFTPOS User Guide...
-
Page 21: Refunds
Centre. Transaction and terminal refund limits apply. Step 1 Press the Menu key Step 2 Press 1 to select Transactions Step 5 Enter your refund password and press ENTER Step 3 Press 4 to select Refund NAB EFTPOS User Guide... - Page 22 Note: Even if a PIN is entered, a signed receipt will still be required Step 7 Ask customer to select an account Step 9 An acknowledgement displays once the refund has been approved and the merchant receipt with signature request will print Remove card from the terminal. NAB EFTPOS User Guide...
- Page 23 Press Yes to print the customer receipt if required The customer will receive the refund within 2 to 4 business days for Visa, MasterCard and EFTPOS transactions and up to 5 business days for UnionPay cards. NAB EFTPOS User Guide...
-
Page 24: Review Details Of The Last Transaction
Step 1 Press the Menu key Step 2 Press 3 to select Batch Step 5 Press F3 to select Info for further details about the transaction Step 3 Press 3 to select Review Batch NAB EFTPOS User Guide... -
Page 25: Re-Print Receipt For The Last Transaction
Press 1 to select Last A duplicate Customer receipt for the last transaction will print Step 1 Press the Menu key Step 2 Press 2 to select Print Step 3 Press 1 to select Transactions NAB EFTPOS User Guide... -
Page 26: Re-Print Receipt For Past Transactions With Invoice Number
Press the Menu key Step 2 Press 2 to select Print Step 5 Enter the invoice number and press ENTER Step 3 Press 1 to select Transactions Step 6 Press ENTER to print the duplicate customer receipt NAB EFTPOS User Guide... -
Page 27: Transaction Listing
Press 1 to select Audit Step 1 Press the Menu key Step 2 Press 2 to select Print The transaction list will begin printing Step 3 Press 2 to select Reports NAB EFTPOS User Guide... -
Page 28: Print Settlement Totals Pre-Settlement
A transaction list prints that lists all individual transactions. Step 1 Press the MENU button on the home screen Step 2 Press 3 to select Batch Step 3 Press 4 to select Batch Totals A pre-settlement receipt prints which lists the batch totals. NAB EFTPOS User Guide... -
Page 29: Print Settlement Totals Last Settlement
This function will reprint the total value of the transactions Step 3 by card type at Last Settlement Press 2 to select Last Settlement The last settlement receipt prints automatically. Step 1 Press the Menu key Step 2 Press 3 to select Batch NAB EFTPOS User Guide... -
Page 30: Manual Settlement
Step 1 Press the Menu key Step 2 Press 3 to select Batch Step 3 Press 1 to select Settle The settlement process commences, and when successfully processed, the settlement receipt will print. NAB EFTPOS User Guide... -
Page 31: Automatic Settlement Time Set-Up
Step 1 Press the Func key Step 4 Enter the new time in the 24 hour HH:MM format, and press ENTER Step 2 Enter 13 using the PINpad and press ENTER NAB EFTPOS User Guide... - Page 32 AUTOMATIC SETTLEMENT TIME SET-UP (CONTINUED) Step 5 The new settlement time displays Step 6 Press CANCEL to exit NAB EFTPOS User Guide...
-
Page 33: Pre-Authorisation
Approval Code from the receipt. Pre-Authorisations are available for credit cards only. Step 1 Press the Menu key Step 2 Step 4 Press 1 to select Transaction Enter the pre-authorisation amount and press ENTER NAB EFTPOS User Guide... - Page 34 Ask customer to enter their PIN and ENTER, or press ENTER to sign Step 8 Ask customer to sign the receipt if required. You will need to verify your customer’s signature with the signature on the card. Press Yes if the signature matches NAB EFTPOS User Guide...
- Page 35 PRE-AUTHORISATION (CONTINUED) Step 9 Press Yes to print the customer receipt if required. NAB EFTPOS User Guide...
-
Page 36: Pre-Authorisation Completion
The value amount is generally held for up to 7 days on pre-authorisation, depending on the cardholder’s financial institution. Step 1 Press the Menu key Step 2 Press 1 to select Transaction Step 4 Enter the pre-authorisation completion amount and press ENTER NAB EFTPOS User Guide... - Page 37 Press ENTER to confirm the pre-authorisation transaction retrieved by the terminal. If the pre-authorisation transaction is not found on the terminal, the customer’s credit card will be required. Proceed to Step 6a. Otherwise, proceed to step 7. NAB EFTPOS User Guide...
- Page 38 Remove card from the terminal. Proceed to Step 8. Step 6d Press ENTER to confirm the completion transaction. Step 7 Press ENTER to confirm the completion transaction. The merchant receipt will print automatically. NAB EFTPOS User Guide...
- Page 39 Ask customer to sign the receipt if required. You will need to verify your customer’s signature with the signature on the card. Press Yes if the signature matches Step 9 Press Yes to print the customer receipt if required. NAB EFTPOS User Guide...
-
Page 40: Surcharge
This can be done in many ways, including in-store notices or prominent messages on bills. Customers can choose whether to pay the card fee or to use another form of payment, for example cash. The customer will have the option on the terminal screen to not accept the surcharge and cancel the transaction. NAB EFTPOS User Guide... -
Page 41: Surcharge - Turn On/Off
Step 1 Step 4 Press the Menu key Press F1 to select Enable Step 2 Press 4 to select Terminal Step 5 Surcharging is enabled. Press CANCEL to exit Step 3 Press 4 to select Surcharging NAB EFTPOS User Guide... -
Page 42: Surcharge Card Acceptance Set-Up
Press the Menu key Press ENTER Step 2 Press 4 to select Terminal Step 5 Use the F2 and F3 buttons to scroll to the card issuer, and press ENTER Step 3 Press 4 to select Surcharging NAB EFTPOS User Guide... - Page 43 Press 1 to enter a Fixed Fee or 2 to enter a Percentage of the Total Step 8 Press ENTER to confirm the value entered Step 7 Enter the fixed fee amount or percentage of the total rate, and press ENTER NAB EFTPOS User Guide...
- Page 44 CARD ACCEPTANCE SET-UP (CONTINUED) Step 9 The value entered will display in the Select Issuer screen. Repeat steps 5 to 8 for each card or account type, to apply a surcharge value. Step 10 Press CANCEL to exit NAB EFTPOS User Guide...
-
Page 45: Moto
MOTO transactions can be processed on credit or charge cards only. Step 1 Press the Menu key Step 2 Press 1 to select Transaction Step 5 Commence entering the customer’s card number Step 3 Press 7 to select MOTO NAB EFTPOS User Guide... - Page 46 Enter the CCV number from the card and press ENTER and press ENTER Step 9 Step 7 Press the corresponding number to select type of order Enter the card expiry date in MMYY format and press ENTER NAB EFTPOS User Guide...
- Page 47 An acknowledgement displays once the sale has been frequency of transaction approved and the merchant receipt will print. Step 11 Step 13 Press ENTER to confirm the MOTO transaction Press Yes to print the customer receipt if required. NAB EFTPOS User Guide...
-
Page 48: Manual Key Entry
MANUAL KEY ENTRY The manual key entry function is only available if approved Step 2 by NAB. To submit a request for this function, contact the Commence entering the customer’s card number Merchant Service Centre. It is recommended that merchants do not manually enter card details without first attempting to swipe or insert the card in the card readers. - Page 49 Press ENTER to confirm the transaction press ENTER Step 7 Step 5 An acknowledgement displays once the sale has Enter the CCV number from the card and press ENTER been approved and the merchant receipt with signature request will print NAB EFTPOS User Guide...
- Page 50 Ask customer to sign the receipt. You will need to verify your customer’s signature with the signature on the card. If this is correct, press Yes Step 9 Press Yes to print the customer receipt if required. NAB EFTPOS User Guide...
-
Page 51: Void Last
Step 1 Press the Menu key Step 2 Press 3 to select Batch Step 4 Review the transaction details and press ENTER to confirm The merchant copy of the voided receipt will print automatically. NAB EFTPOS User Guide... - Page 52 VOID LAST (CONTINUED) Step 5 An acknowledgement will be displayed once the transaction has been voided Step 6 Press ENTER to print the customer receipt if required. NAB EFTPOS User Guide...
-
Page 53: Change Merchant Password
This password change feature will change your refund Press ENTER to change the password password only. Step 1 Press the Func key Step 4 Enter the current password and press ENTER Step 2 Enter 90 using the PINpad and press ENTER NAB EFTPOS User Guide... - Page 54 CHANGE MERCHANT PASSWORD (CONTINUED) Step 5 Step 7 Enter the new password and press ENTER A confirmation message displays Step 6 Enter the new password again and press ENTER NAB EFTPOS User Guide...
-
Page 55: Additional Pinpad Functions
View Batch Number View Transaction By Invoice Number Print Tip Report Reprint Last Statement Reprint Last Statement from Host Reprint Last Transaction Record Reprint Specific Transaction Record View Host Totals View Transaction List Display auto settlement time NAB EFTPOS User Guide... -
Page 56: Stationery Order Ordering Receipt Rolls
You will receive an order of 20 rolls within 2-5 business days. Step 1 Press the Func key Step 4 A message displays to confirm the order has been submitted Step 2 Enter 30 using the PINpad and press ENTER NAB EFTPOS User Guide... -
Page 57: Changing The Receipt Roll
Insert the paper roll into the compartment, as shown below If required, press the Feed key on the keypad to advance the paper Step 3 Pull the paper up towards the top of the terminal Step 4 Maintain the paper and close the cover NAB EFTPOS User Guide... -
Page 58: Common Error Messages
This is a terminal configuration issue Call the Merchant Services Centre for help to resolve the issue Contact the Merchant Services Centre to resolve any other error codes. The numbers to call are noted on page 5. NAB EFTPOS User Guide... -
Page 59: Electronic Fallback Procedure
ELECTRONIC FALLBACK PROCEDURE In the event of the terminal being unable to communicate with NAB, (example: no signal, no response error) it will default to a ‘fallback’ situation, i.e. stores transact offline and will be updated to the server at a later time. -
Page 60: Manual Backup Procedure
4. Retain your electronic transaction receipts and manual transaction vouchers for a period of not less than eighteen months If any of these conditions are not met, it is possible that the transaction may be invalid and the merchant account debited for the value of the disputed transaction. NAB EFTPOS User Guide... -
Page 61: Termination Of Eftpos Merchant Service
TERMINATION OF EFTPOS MERCHANT SERVICE Should you elect to terminate your EFTPOS merchant service with NAB, you will need to call the Merchant Service Centre to arrange for all terminals, printers, power packs and cabling to be picked up from you. You will also need to return your imprinter and any unused stationery. - Page 62 NOTES NAB EFTPOS User Guide...
- Page 63 NOTES NAB EFTPOS User Guide...
- Page 64 ©2016 National Australia Bank Limited ABN 12 004 044 937 AFSL and Australian Credit Licence 230686 A124156-0416...
Need help?
Do you have a question about the EFTPOS Ingenico and is the answer not in the manual?
Questions and answers