Chapters
Table of Contents

Related Manuals for Marmitek DOORGUARD 350

Summary of Contents for Marmitek DOORGUARD 350
- Page 1 DOORGUARD350 DoorGuard350 ™ USER MANUAL GEBRAUCHSANLEITUNG GUIDE UTILISATEUR MODO DE EMPLEO MANUALE D’ISTRUZIONI GEBRUIKSAANWIJZING 20390/ 20111115 • DOORGUARD350 ™ ALL RIGHTS RESERVED MARMITEK ©...
-
Page 3: Safety Warnings
In case of improper usage or if you have altered and repaired the product yourself, all guarantees expire. Marmitek does not accept responsibility in the case of improper usage of the product or when the product is used for purposes other than specified. -
Page 4: Table Of Contents
Step 3. Mounting the monitor onto the wall.........5 SETTING BRIGHTNESS, CONTRAST AND COLOUR ........6 FUNCTION....................6 EXTRA POSSIBILITIES WITH YOUR DOORGUARD350 ......7 Connecting an electric door opener ..........7 Connecting multiple monitors ............7 FREQUENTLY ASKED QUESTIONS ............8 TECHNICAL DATA ..................9 © MARMITEK... -
Page 5: Introduction
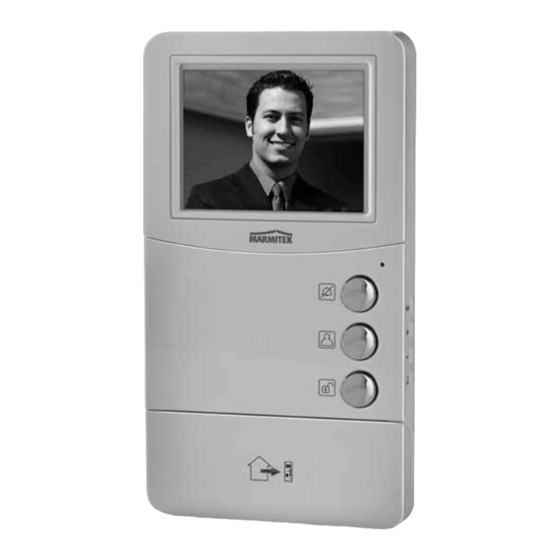
INTRODUCTION Congratulations on your purchase of the Marmitek DoorGuard350™. Using this video-door phone you can hear and see the visitor at the door (without the visitor being aware of it) before you decide to open it. The camera is concealed in the small doorbell and delivers high quality pictures, even in the dark. -
Page 6: Installation
11. screen 18. Menu button 12. Power ‘On’ LED 19. + button 13. Monitor button 20. – button 14. Intercom button 21. Ring tones button 15. Door-open button Connection contacts for camera cable (R1 thru R4) DC adapter connection © MARMITEK... -
Page 7: Step 1. Mounting The Doorbell Camera Onto The Door Frame
Step 1. Mounting the doorbell camera onto the door frame. Drill a hole (15mm) in the door frame at the height that you want to mount the doorbell camera. Pass the power cable through the hole in the rain cover and through the door frame. -
Page 8: Setting Brightness, Contrast And Colour
If you wish those outside to hear you, press the intercom button. You can switch off the monitor’s bell with the mute button. The on/mute button then changes from red to blue. Pressing the mute button again reconnects the bell. And the blue colour changes back to red. © MARMITEK... -
Page 9: Extra Possibilities With Your Doorguard350
- To open the door from the monitor. - The camera will provide the power for the door-opener - You need an electric door opener of 8 to 12 V DC. (Marmitek art nr 09774). - Connect the door opener to the 2-core cable supplied. The cable connector connects to the 2-core connector on the camera. -
Page 10: Frequently Asked Questions
Check if the connectors are properly fixed The image is hazy (clouds) Check if there are interferences in the surrounding area. For example a high voltage cable, electric appliances etc. Do you still have questions? Please check out www.marmitek.com for more information. © MARMITEK... -
Page 11: Technical Data
TECHNICAL DATA Monitor Resolution: 320 x 240 Power supply: 230V AC DC 15V Screen: 4"/ 10cm Bell sound: Ding-dong (adjustable volume) Power consumption: Max 5 Watt (without door opener) Door open switch: Max DC12V/1A. Dimensions: 220x120x25mm Camera Camera: CMOS Colour Lens and angle: 50°... - Page 12 © MARMITEK...
-
Page 13: Sicherheitshinweise
Temperaturen oder starken Lichtquellen aus. Bei einer zweckwidrigen Verwendung, selbst angebrachten Veränderungen oder selbst ausgeführten Reparaturen verfallen alle Garantiebestimmungen. Marmitek übernimmt bei einer falschen Verwendung des Produkts oder bei einer anderen Verwendung des Produktes als für den vorgesehenen Zweck keinerlei Produkthaftung. Marmitek übernimmt für Folgeschäden keine andere Haftung als die gesetzliche Produkthaftung. -
Page 14: Inhaltsverzeichnis
Schritt 3 Den Monitor an die Wand montieren......15 HELLE, KONTRAST UND FARBE EINSTELLEN......... 16 VERWENDUNG DER DOORGUARD350 ..........16 OPTIONALE MÖGLICHKEITEN MIT IHRER DOORGUARD350 ....17 Elektrischen Türöffner anschließen ..........17 Mehrere Monitore anschließen ............. 17 HÄUFIG GESTELLTE FRAGEN ..............18 TECHNISCHE DATEN ................19 © MARMITEK... -
Page 15: Einführung
EINFÜHRUNG Herzlichen Glückwunsch zum Erwerb der Marmitek DoorGuard350. Mit diesem Video-Türtelefon können Sie jederzeit (auch unbemerkt) zunächst einmal schauen und hören, wer an Ihrer Tür steht, bevor Sie sich entschließen die Tür zu öffnen. Die Kamera ist in der schmalen Türklingel angebracht und gibt eine gute... -
Page 16: Installation
16. Mute (Stumm) Taste 10. Lautsprecher 17. Volumentaste 11. Bildschirm 18. Menütaste 12. In Betrieb/ Mute LED 19. + Taste 13. Monitortaste 20. – Taste 14. Wechselsprechtaste 21. Klingeltontaste 15. Tür-Öffnungstaste Anschlusskontakte für Kamerakabel (R1 bis einschl. R4) DC Adapteranschluss © MARMITEK... -
Page 17: Schritt 1 Türrahmenmontage Der Türklingelkamera
Schritt 1 Türrahmenmontage der Türklingelkamera. Bohren Sie in der gewünschten Anbringungshöhe der Türklingelkamera ein 15 mm Loch durch den Türrahmen Schieben Sie nun das Kabel durch das Bohrloch im Regenschutz und durch den Türrahmen. Montieren Sie nun die Kamera und den Regenschutz mit den anliegenden Schrauben an den Türrahmen. -
Page 18: Helle, Kontrast Und Farbe Einstellen
Mit der Mute-Taste können Sie die Klingel des Monitors ausschalten. Die In Betrieb/Mute Taste wechselt dann von rot nach blau. Wenn Sie nochmals die Mute-Taste drücken, schaltet sich die Klingel wieder ein. Das Blau wechselt dann wieder nach Rot. © MARMITEK... -
Page 19: Optionale Möglichkeiten Mit Ihrer Doorguard350
Elektrischen Türöffner anschließen - Zum Öffner der Tür vom Monitor aus. Die Kamera sorgt für die Speisung des Türöffners. Sie benötigen einen 8 bis 12 V DC Türöffner. (Marmitek Art.-Nr. 09774) Schließen Sie den Türöffner an das enthaltene, zweiadrige Kabel an. -
Page 20: Häufig Gestellte Fragen
Ich empfange keinen Ton Überprüfen Sie, ob die Verbindungsstücke korrekt angeschlossen sind. Das Bild ist verschwommen (Schnee) Überprüfen Sie, ob Interferenz in Ihrer Nähe auftritt. Zum Beispiel durch ein Hochspannungskabel, elektrische Geräte usw Haben Sie noch immer Fragen? Besuchen Sie www.marmitek.com. © MARMITEK... -
Page 21: Technische Daten
TECHNISCHE DATEN Monitor Auflösung: 320 x 240 Speisung: 230V AC DC 15V Bildschirm: 4"/ 10cm Flat Tube Klingelzeichen: Ding-Dong (Lautstärke regelbar) Verbrauch: max. 5 Watt (Ohne Türöffner) Türöffnungsschalter: max. DC12V/1A. Abmessungen: 220x120x25mm Kamera Kamera: CMOS Farbbild Objektiv und Winkel: 50˚ Lichtempfindlichkeit: 0,1 LUX Nachtsicht:... - Page 22 © MARMITEK...
-
Page 23: Avertissements De Sécurité
élevées ou à des sources de lumières trop fortes. Toute utilisation impropre, toute modification ou réparation effectuée vous-même annule la garantie. Marmitek n’accepte aucune responsabilité dans le cas d’une utilisation impropre du produit ou d’une utilisation autre que celle pour laquelle le produit est destiné. - Page 24 Installer le moniteur au mur ............25 RÉGLAGE LUMINOSITÉ, CONTRASTE ET COULEURS......26 UTILISATION ................... 26 POSSIBILITÉS ADDITIONNELLES AVEC VOTRE DOORGUARD350..27 Brancher une commande électrique pour ouvrir la porte.... 27 Brancher plusieurs moniteurs ............27 FOIRE AUX QUESTIONS................28 CARACTÉRISTIQUES TECHNIQUES............29 © MARMITEK...
-
Page 25: Introduction
INTRODUCTION Merci d’avoir acheté le DoorGuard350™ de Marmitek. Avec ce téléphone de porte à vidéo vous pouvez voir et entendre (sans que le visiteur ne s’en aperçoive) qui est à votre porte avant de décider d’ouvrir. La caméra est intégrée dans la sonnette étroite et donne une image de bonne qualité, même dans l’obscurité. -
Page 26: Installation
12. LED en 17. Bouton Volume fonctionnement/Sourdine 18. Bouton Menu 13. Bouton de moniteur 19. Bouton + 14. Bouton intercom 20. Bouton – 21. Bouton Sonnerie Contacts de raccordement pour câble de caméra (R1 à R4) Raccordement d’adaptateur DC © MARMITEK... -
Page 27: Installer La Caméra De La Sonnette Sur L'encadrement
Installer la caméra de la sonnette sur l’encadrement Percez un trou (15 mm) dans l’encadrement, à la hauteur à laquelle vous voulez installer la caméra de la sonnette. Placez l’abri contre la pluie sur l’encadrement avec les vis livrées Fixez la caméra et l’abri contre la pluie sur l’encadrement avec les vis fournies. -
Page 28: Réglage Luminosité, Contraste Et Couleurs
En appuyant sur le bouton sourdine, vous pouvez couper la sonnette du moniteur. La couleur du bouton marche/sourdine changera de rouge en bleu. En appuyant de nouveau sur le bouton sourdine, vous remettez la sonnette en marche. La couleur bleu changera en rouge. © MARMITEK... -
Page 29: Possibilités Additionnelles Avec Votre Doorguard350
La caméra fournit l'alimentation pour la commande électronique de porte. Il vous faut une commande électronique de porte de 8 à 12 V DC. (Marmitek référence 09774) Vous connectez la commande électronique de porte au câble à deux conducteurs fourni. Vous branchez le connecteur du câble sur le connecteur à... -
Page 30: Foire Aux Questions
Contrôlez si les connecteurs sont bien branchés. L’image est floue Contrôlez s’il y a interférence dans les environs. Par exemple un câble à haute tension, un appareil électrique, etc. Vous avez d’autres questions? Allez sur le site www.marmitek.com. © MARMITEK... -
Page 31: Caractéristiques Techniques
CARACTÉRISTIQUES TECHNIQUES Moniteur Résolution : 320 x 240 Alimentation : 230V AC DC 15V Ecran : 4"/ 10cm Son de la sonnette : Ding-dong (volume réglable) Consommation : Max 5 Watt Commutateur d’ouverture de la porte : Max DC12V/1A. Dimensions : 220 x 120 x 25 mm Camera Camera:... - Page 32 © MARMITEK...
-
Page 33: Avisos De Seguridad
En caso de uso indebido o impropio, Marmitek no asume ninguna responsabilidad para el producto. Marmitek no asume ninguna responsabilidad para daños que resultan del uso impropio, excepto según la responsabilidad para el producto que es determinada por la ley. -
Page 34: Contenido
Paso 3 Montaje del monitor al muro (Ilustración 7)..... 35 AJUSTAR CLARIDAD, CONTRASTE Y COLOR ........36 EMPLEO ....................36 POSSIBILITÉS ADDITIONNELLES AVEC VOTRE DOORGUARD350..37 Conexión de un abridor de puertas..........37 Conexión de varios monitores............37 PREGUNTAS FRECUENTES..............38 ESPECIFICACIONES TECNICAS ..............39 © MARMITEK... -
Page 35: Introduccion
INTRODUCCION Felicidades por la compra del DoorGuard350™ de Marmitek. Gracias a este portero automático con vídeo sabrá quien está tras la puerta (sin que el visitante se de cuenta) antes de abrir. La cámara está integrada en el timbre y tiene una alta calidad de imagen, aún a oscuras. Esta es tan pequeña que puede montarse en todo bastidor, por lo que no se... -
Page 36: Instalacion
18. Botón de menú 13. Botón de monitor 19. Botón + 14. Botón para función 20. Botón – intercom 21. Botón de Ringtones Contactos de conexión para el cable de la cámara (R1 a R4) Ranura para bloquear la placa mural © MARMITEK... -
Page 37: Paso 1 Montaje De La Cámara De Timbre En El Bastidor
Paso 1 Montaje de la cámara de timbre en el bastidor. Taladre un agujero (15mm) en el bastidor a la altura en que quiere montar la cámara. Monte el protector contra la lluvia en el bastidor. Monte ahora la cámara y la tapa contra la lluvia en el marco, utilizando los tornillos suministrados. -
Page 38: Ajustar Claridad, Contraste Ycolor
Con el botón de ‘mute’ se puede apagar el timbre del monitor. El botón de encendido/mute cambia de rojo a azul. Cuando pulsa el botón de ‘mute’ otra vez, encenderá el timbre de nuevo. El color cambia de azul a rojo. © MARMITEK... -
Page 39: Possibilités Additionnelles Avec Votre Doorguard350
El abridor de puertas se alimenta por la cámara. Usted necesita un abridor de puertas eléctrico de 8 a 12 V DC (Marmitek no. de árticulo 09774). Conecte el abridor de puertas al cable de 2 hilos suministrado. Conecte el conector del cable al conector de 2 hilos de la cámara. -
Page 40: Preguntas Frecuentes
Compruebe si los conectores están bien enchufados. No hay sonido Compruebe si los conectores están bien enchufados. La imágen no es nítida (nieve) Compruebe si hay fuentes de interferencias, como por ejemplo cables de alta tensión, aparatos eléctricos etc. Para otras preguntas, consulte www.marmitek.com. © MARMITEK... -
Page 41: Especificaciones Tecnicas
ESPECIFICACIONES TECNICAS Monitor Resolución: 320 x 240 Alimentación: 230V AC DC 15V Panatalla: 4"/ 10cm Sonido de timbre: Ding-dong (volumen regulable) Consumo: 5 Watt a lo máximo Conmutador abridor de puertas: DC12V/1A como máximo Dimensiones: 220x120x25mm Cámara Cámara: CMOS color Lente y ángulo: 50˚... - Page 42 © MARMITEK...
-
Page 43: Precauzioni Di Sicurezza
Marmitek declina ogni responsabilità per i danni derivanti da un utilizzo non appropriato del prodotto o da utilizzo diverso da quello per cui il prodotto è stato creato. Marmitek declina ogni responsabilità per danni consequenziali ad eccezione della responsabilità civile sui prodotti. -
Page 44: Indice
3. Montaggio del monitor al muro (immagine 7)......45 REGOLARE LUMINOSITÀ, CONTRASTO E COLORI ........ 46 USO ......................46 FUNZIONI OPZIONALI DEL DOORGUARD350 ........47 Collegamento della serratura elettrica.......... 47 Collegamento di più monitor ............47 DOMANDE FREQUENTI................48 CARATTERISTICHE TECNICHE ..............49 © MARMITEK... -
Page 45: Introduzione
INTRODUZIONE Congratulazioni per l’acquisto del Marmitek DoorGuard350™. Con questo videocitofono potete vedere e sentire chi suona alla porta (senza che il visitatore se ne accorga) prima di decidere se aprire. La telecamera, che si trova nel campanello della porta di piccole dimensioni, fornisce immagini di buona qualità, anche al buio. -
Page 46: Installazione
12. operativo / Mute LED 19. Tasto + 13. Pulsante del monitor 20. Tasto – 14. Pulsante dell’Intercom 21. Tasto tono di chiamata 15. Pulsante della serratura Terminali di collegamento per cavo camera (R1 – R4) Collegamento adattore cc © MARMITEK... -
Page 47: Montaggio Della Telecamera Con Campanello Sullo Stipite
1. Montaggio della telecamera con campanello sullo stipite Praticare un foro (15 mm) attraverso lo stipite, all’altezza a cui si vuole appendere la telecamera con il campanello. Ora fare passare il cavo della telecamera attraverso il foro nel cappuccio e attraverso lo stipite. Ora montare la telecamera con parapioggia tramite le viti fornite in dotazione allo stipite. -
Page 48: Regolare Luminosità, Contrasto E Colori
Tramite il tasto mute potete disattivare la campanella del monitor. Poi il colore del tasto di funzionamento/mute cambia da rosso in blu. Premendo un’altra volta il tasto mute, si riattiva la campanella. Il colore blu si cambia di nuovo a rosso. © MARMITEK... -
Page 49: Funzioni Opzionali Del Doorguard350
Collegamento della serratura elettrica - Per aprire la porta dal monitor. La telecamera provvede all’alimentazione dell’apriporta. Richiede un apriporta elettrico da 8 a 12 V c.c. (Marmitek no. art. 09774) Collegare l’apriporta al cavo a 2 conduttori forniti in dotazione. -
Page 50: Domande Frequenti
L’immagine è sfuocata (effetto neve) Controllare se vi è un’interferenza nelle vicinanze. Per esempio, un cavo ad alta tensione, apparecchi elettrici e così via. Per quesiti a cui non trovate risposta qui sopra, vi invitiamo a visitare www.marmitek.com. © MARMITEK... -
Page 51: Caratteristiche Tecniche
CARATTERISTICHE TECNICHE Monitor Risoluzione: 320 x 240 Alimentazione: 230V AC DC 15V Schermo: 4”/10 cm Suono del campanello: Ding-dong (volume regolabile) Consumo: Max 5 Watt Interruttore serratura: Max 12V c.c./1A. Dimensioni: 220x120x25mm Telecamera Camera: CMOS a colori Obiettivo ed angolo: 50˚... - Page 52 © MARMITEK...
-
Page 53: Veiligheidswaarschuwingen
Stel de componenten van uw systeem niet bloot aan extreem hoge temperaturen of sterke lichtbronnen. Bij oneigenlijk gebruik, zelf aangebrachte veranderingen of reparaties, komen alle garantiebepalingen te vervallen. Marmitek aanvaardt geen productaansprakelijkheid bij onjuist gebruik van het product of door gebruik anders dan waarvoor het product is bestemd. -
Page 54: Inhoudsopgave
Stap 3 Monteren van de monitor aan de muur......55 HELDERHEID, CONTRAST EN KLEUR INSTELLEN........56 GEBRUIK ....................56 EXTRA MOGELIJKHEDEN MET UW DOORGUARD350......57 Elektrische deuropener aansluiten ..........57 Meerdere monitoren aansluiten............ 57 VEEL GESTELDE VRAGEN ............... 58 TECHNISCHE GEGEVENS ................ 59 © MARMITEK... -
Page 55: Inleiding
INLEIDING Gefeliciteerd met de aankoop van de Marmitek DoorGuard350™. Met deze video deurtelefoon kunt u (zonder dat de bezoeker het merkt) zien en horen wie er aan uw deur staat voordat u besluit om open te doen. De camera zit in de smalle deurbel en levert goede beeldkwaliteit, zelfs in het donker. -
Page 56: Installatie
17. Volume knop 11. Beeldscherm 18. MENU knop 12. In bedrijf/mute LED 19. + Knop 13. Monitor-knop 20. – Knop 14. Intercom-knop 21. Ring tones knop 15. Deuropener-knop Aansluit contacten voor camera kabel (R1 t/m R4) DC adapter aansluiting © MARMITEK... -
Page 57: Stap 1 Monteren Van De Deurbelcamera Aan Het Kozijn
Stap 1 Monteren van de deurbelcamera aan het kozijn. Boor een gat (15 mm) door het kozijn, ter hoogte van waar u de deurbelcamera wilt monteren. Schuif de kabel van de camera nu door het gat in de regenkap en door het kozijn. -
Page 58: Helderheid, Contrast En Kleur Instellen
Met de mute knop kunt u de bel van de monitor uit zetten. De in bedrijf/mute knop verandert dan van rood in een blauwe kleur. Door nogmaals op de mute knop te drukken schakelt u de bel weer in. De blauwe kleur wordt dan weer rood. © MARMITEK... -
Page 59: Extra Mogelijkheden Met Uw Doorguard350
De camera verzorgt de voeding voor de deuropener. U heeft een elektrische deuropener van 8 tot 12 V DC nodig. (Marmitek art nr 09774) U sluit de deuropener aan op de meegeleverde 2 aderige kabel. De connector van de kabel sluit u aan op de 2 aderige connector van de camera. -
Page 60: Veel Gestelde Vragen
Controleer of de connectors goed zijn aangesloten. Het beeld is wazig (sneeuw) Controleer of er interferentie in de buurt is. Bijvoorbeeld een hoogspanningskabel, elektrische apparatuur enz. Heeft u vragen die hierboven niet beantwoord worden? Kijk dan op www.marmitek.com. © MARMITEK... -
Page 61: Technische Gegevens
TECHNISCHE GEGEVENS Monitor Resolutie: 320 x 240 Voeding: 230V AC DC 15V Beeldscherm: 4"/ 10cm Belgeluid: Ding-dong (regelbaar volume) Verbruik: Max 5 Watt Zonder deurschakelaar Deuropen schakelaar: Max DC12V/1A. Afmetingen: 220 x 120 x 25 mm Camera Camera: ¼”CMOS kleur Lens en hoek: 50°... -
Page 62: Declaration Of Conformity
DECLARATION OF CONFORMITY Hereby, Marmitek BV, declares that this DOORGUARD350 is in compliance with the essential requirements and other relevant provisions of the following Directives: Directive 2004/108/ec of the european parliament and of the council of 15 December 2004 on the approximation of the laws of the Member States relating to... - Page 63 Par la présente Marmitek BV déclare que l'appareil DOORGUARD350 est conforme aux exigences essentielles et aux autres dispositions pertinentes de la directives: Directive 2004/108/ce du parlement européen et du conseil du 15 décembre 2004 relative au rapprochement des législations des États membres concernant la compatibilité...
- Page 64 Con ciò, Marmitek BV, dichiara che il DOORGUARD350 è conforme ai requisiti essenziali ed alter disposizioni relative alla Direttiva : Direttiva 2004/108/ce del parlamento europeo e del consiglio del 15 dicembre 2004 concernente il ravvicinamento delle legislazioni degli Stati membri relative alla compatibilità...
- Page 65 MARMITEK BV - P.O. BOX 4257 - 5604 EG EINDHOVEN – THE NETHERLANDS Copyrights Marmitek is a trademark of Pattitude B.V. DoorGuard350 is a trademark of Marmitek B.V. Copyright and all other proprietary rights in the content (including but not limited to model numbers, software, audio, video, text and photographs) rests with Marmitek B.V.
- Page 66 © MARMITEK...
- Page 67 DOORGUARD350...
Need help?
Do you have a question about the DOORGUARD 350 and is the answer not in the manual?
Questions and answers