Table of Contents
Advertisement
Advertisement
Table of Contents

Related Manuals for Vola 860HE


Summary of Contents for Vola 860HE
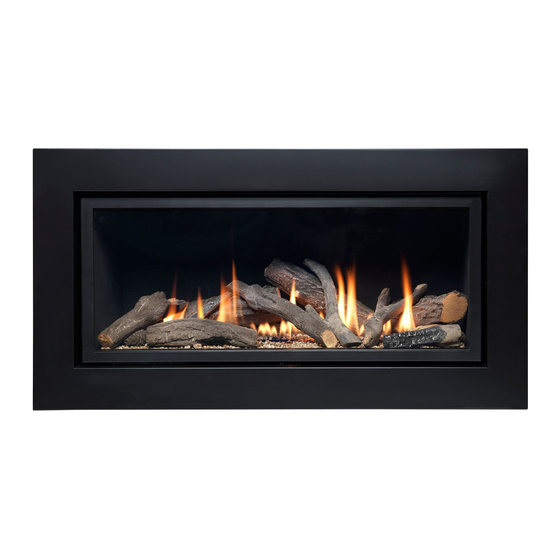
- Page 1 Vola 860HE Also known as Pinnacle 860 / Apex 860 Installation and User Instructions All instructions must be handed to user for safekeeping This is not a DIY product and must be installed by a Gas Safe registered installer Edition D 11/14...
-
Page 2: Installation Instructions
INSTALLATION INSTRUCTIONS These Notes Must Be Read Before Installation This appliance is an Inset Live Fuel Effect appliance that provides radiant or combined radiant and convected heat; it cannot and should not be used as the main heating source within a property. The appliance is designed to fit most types of fireplaces with a natural draught flue as listed in the Installation Requirements. - Page 3 OPENING THE APPLIANCE Stand the carton the right way up, open the box from the top. Read all the instructions before continuing to unpack or install this appliance. Remove the bags containing ceramic components such as coals or gravel etc. Remove the cardboard packing pieces, and any other bags or boxes containing fittings or other parts.
-
Page 4: Table Of Contents
INSTRUCTION CONTENT Section Contents Page No Important Notes Installation requirements Appliance Information Ventilation Site Requirements Pre-Fabricated Flue box Debris Space Installation of appliance Preparing the Opening Fitting the Burner Tray Fuel Bed Fitting The Outer Frame/ Trim Commissioning the Appliance 10.1 Spark Failure Setting Pressure... -
Page 5: Important Notes
Section 1: IMPORTANT NOTES This fire is an Inset Live Fuel Effect Gas Fire providing radiant warmth. It is designed to operate on Natural Gas. It is the LAW that all gas appliances and fittings are installed by a competent person such as a Gas Safe Registered fitter and in accordance with the Gas Safety (Installation and Use) Regulations 1998, the relevant British Standards for Installation, Codes of Practice and in accordance with the manufacturers’... -
Page 6: Installation Requirements
Section 2: INSTALLATION REQUIREMENTS This appliance MUST NOT be installed into a bathroom or shower room, or where steam may be present. An extractor fan must not be fitted in the same room or space as the appliance as this can affect the safety of the appliance. -
Page 7: Appliance Information
Section 3: APPLIANCE INFORMATION H.E Landscape Gas Group G20 Natural Gas CAT I2H Inlet Pressure 20 mbar Max Input (gross) Min Input (gross) Setting Pressure 20 mbar Gas Inlet connection 8mm Compression Overall Height Overall Width 1022 Overall Depth Recess Height Recess Width Recess Depth Air Vent... -
Page 8: Ventilation
Section 4: VENTILATION This Appliance does not normally require purpose provided ventilation. However, a second appliance operating within the same room or space must be taken into consideration when assessing ventilation. When commissioning the appliance spillage is detected, then amongst other problems there may be insufficient natural ventilation for correct operation of the flue. - Page 9 Opening Requirements Width 875-895mm Height 460-470mm Depth 300mm From Floor 300-450mm Section 5.1: PREFABRICATED FLUE BOXES These appliances can be fitted to a prefabricated flue system, can be fitted directly to the appliance via the flue adaptor. All will require a false chimney breast in which to be housed and will need to be constructed of a non- combustible material or any combustible material within 350mm must be clad with a non-combustible board.
-
Page 10: Pre-Fabricated Flue Box
to any back or infill panel. Section 6: DEBRIS SPACE In accordance with BS 5871 part 2, minimum debris collection volumes are required behind the installed appliance. CLAY/CEMENT LINES OR BLOCK FLUE WHICH IS NEW, UNUSED, OR PREVIOUSLY ONLY USED WITH A GAS FIRE. - Page 11 Next remove the screws in each corner and the one holding down the access panel, Next undo the nut connecting the burner to the isolation valve and tray will now lift free of the firebox. Section 7.1: PREPARING THE OPENING Before installing the fire, check the flue for correct operation using a smoke pellet, all of the smoke should be drawn up the flue and exit correctly from the terminal.
- Page 12 Next remove the top internal diverter plate from the top of the appliance by unscrewing the screws holding either side of the box keeping the panel in place. Remove the second plate, exposing the opening , at this point fix the fire box into place and pass the liner through the opening in the box, connect to the flue adaptor supplied, to the liner using self- tapping screws and aluminium sealing tape (not supplied) push back up into position and fix the plate into place.
-
Page 13: Preparing The Opening
Section 7.1: PREPARING THE OPENING Cont. Before running the gas supply into the opening, offer up the fire box to the fireplace to check the fit is good, ensure that it slides in correctly, the sealing face sits flat and square to the wall and that the base is level, apply the self-adhesive sealing strips around the edge of the rear of the firebox frame, approximately 5mm in from the edge. -
Page 14: Fitting The Burner Tray
Section 7.3: FITTING THE BURNER TRAY This process is a simple, reverse of the previous instructions on how to remove the burner tray. At this point if you have the slide contoled version then you can place the slide control piece inposition using the two scews supplied. -
Page 15: Fitting The Outer Frame/ Trim
Section 8: FUEL BED LAYOUT and LINING REPLACEMENT Please refer to the instructions supplied separately with each fuel bed option to remove the lining for colour change or replacement, simply with the tray removed the top place can be removed by the two brackets in place then gentle remove the side sections and the back to fit simply reverse the process. -
Page 16: Spark Failure
Section 10.1: OPERATING THE APPLIANCE (See Section 16: Users Instructions) Section 10.2: SPARK FAILURE The gap between the spark electrode and the pilot should be 3.5 - 4.5mm to produce a good spark. There should be no need to adjust this. If under any circumstances the electric spark fails, the pilot may be lit manually by proceeding with the ignition sequence as previously described, and after turning the control knob through the spark position, the knob should be held in and the pilot lit with a taper. -
Page 17: Testing For Spillage
If pilot disturbance is not the cause, then the ODS safety system may be in operation. Switch the appliance OFF, check the flue and carry out any remedial work required. Relight the fire and carry out a spillage test, DO NOT allow the appliance to be used if it continues to fail a spillage test. -
Page 18: Briefing The Customer
SECTION 14: BRIEFING THE CUSTOMER All instructions must be handed to the user for safekeeping. Show the customer how to light and operate the fire. After commissioning the appliance, the customer should be instructed on the safe use of the appliance and the informed for the need of regular servicing. -
Page 19: User Instructions
SECTION 16: USER INSTRUCTIONS IMPORTANT NOTES The installation of this fire MUST only be carried out by a competent person (such as a Gas Safe registered fitter) in accordance with the Gas Safety (Installation and Use) Regulations 1998, the relevant British Standards, Codes of Practice, the Building Regulations and the manufacturers’ instructions. - Page 20 SECTION 17: OPERATING THE APPLIANCE (Remote Control) The Remote Control with this appliance has already been paired at the Factory Quick start user instructions Fire Control This control is situated on your fire. The drawing shows the main features of the control. The control required 3 x AA size alkaline batteries to be inserted under the battery compartment cover.
- Page 21 The Valve and Handset Have Already Been Paired First set up the hand set, cup the handset the green unlock light will illuminate. Keep it held to keep the control unlocked, to enable operation of the buttons. 3) Setting the time the display will be as shown, as the time is not set yet and will progress automatically to the next screen shown below.
- Page 22 4) Setting the display for 12 or 24 Hour display As always when pressing the remote control buttons keep the control held to keep the green light on and therefore handset safety feature, unlocked. The H indicates that it is time to set the timer to either 24 hour display or 12 Hour (AM or PM) display.
- Page 23 Setting the temperature display to Celsius or Fahrenheit. Press and release the + or - button to toggle between C and F. When the display shows the desired symbol, press and releases the “SET” button to store. As the important settings above have now been done. Press and hold (not releasing straight away) the “SET”...
- Page 24 Mode In Range of the fire Man = Manual If missing out of Zzz = Snooze range or fire Therm = Thermostat switched off Timed Day of the Week Room Time (12 or 24hr) Temperature Fire Status Handset Battery Indicator Unlocked if RC = Handset Illuminated...
- Page 25 Operating instruction (Detailed) 1) Upon successful insertion of the batteries in the Handset (if the handset has not previously paired) the display will be as shown if it has been paired already then go to No 3. 1a) If display is not as above the handset may well need to be reset before pairing. Press and Hold “Set”...
- Page 26 Control and to enter to setup the time of day on the handset. N.B. If the display returns to the one shown above with the word “TESC” shown, then too much time has passed before pressing “SET” and so the handset has not paired yet. Simply repeat pairing again. Advanced settings Menu In the event that you may want to change the other pre-set settings of the control features.
-
Page 27: Troubleshooting Guide
2. Release the pressure and the pilot light should now be established (if this fails repeat step 1 and hold down for 20 seconds). 3. Slide the control to the left to increase the flame size to the desired effect. 4. - Page 28 Check ignition cable for If cable damaged, damage and listen and replace cable. Reset No Spark at watch for tracking out of error by performing Electrode (fire not spark to see if it is present a normal start cycle igniting pilot but not making it to the and try to start burner)
- Page 29 check/change all the power supply batteries or check breakdown during power adaptor. : Replace batteries / Reset and try again peak current Note always change power adaptor consumption all batteries together never only 1 or 2 error caused by Check the pressure external pressure Replace if necessary Reset and try again...
- Page 30 button (ON/OFF) is Check for Clean as necessary. Replace shorted to other contamination / switch panel as necessary if buttons either on damage and damaged or too contaminated. Reset and try TESC or on wired replace wired Disconnect wired control panel again control panel (if switch panel if...
-
Page 31: Cleaning The Coals
Thermocouple Check and correct Thermocouple doesn't reach final Reset and try Replace Pilot wiring. Replace thermocouple if current - damaged or again necessary aged Check and correct Thermocouple Reset and try Check pilot connections wiring. Replace thermocouple if again necessary Pilot pipe may be blocked Reset and try Clear pipe, replace pilot as necessary... -
Page 32: List Of Spares & Contact Details
GENERAL CLEANING Before carrying out any of the following operations, ensure that the fire is OFF and completely cold. Debris that may form on the fire bed should be periodically removed by a competent person. Large deposits could indicate deterioration of the flue. This should be repaired by a competent person, and the fire serviced before further use. - Page 33 Please ensure you have the following information at hand when you contact Sirocco; The full serial number which is located on the data badge of the appliance Your receipt of purchase showing the date and where purchased from ...
- Page 34 Nad Lasem 8, Zabia Wola 96-321 Zelechow Poland TECHNICAL HELP LINE Speak to a Sirocco trained engineer 0904 0843473 (0904 084 FIRE) This is a premium rate number charged at 1.00 plus vat per minute from BT lines Mon to Fri 9:00 to 17:00 WARRANTY AND SERVICE For warranty registration or for a home service call: www.siroccofires.com...
- Page 35 10. Any installation labour transportation or other related costs/expenses arising from defective parts/rapier replacement or otherwise of same will not be covered by this guarantee nor shall the company assume responsibility for same. Furthermore the company shall not be responsible for any indirect or consequential damages except as provided by law.
- Page 36 30 warranty in addition the flame failure devise or ODS and ceramics on some models will need to be replaced in the 3rd year service as part of the conditions of your 5 year warranty, these items are purchased from the Sirocco internet website “Spares shop” and are shown as 3 year service packs, the invoice for these items must be provided at the time of making the claim.
Need help?
Do you have a question about the 860HE and is the answer not in the manual?
Questions and answers
How much is a Vola 860 uint
The price of a Vola 860HE unit is £1,495.00 (sale price).
This answer is automatically generated