Table of Contents
Advertisement
Quick Links
User Manual
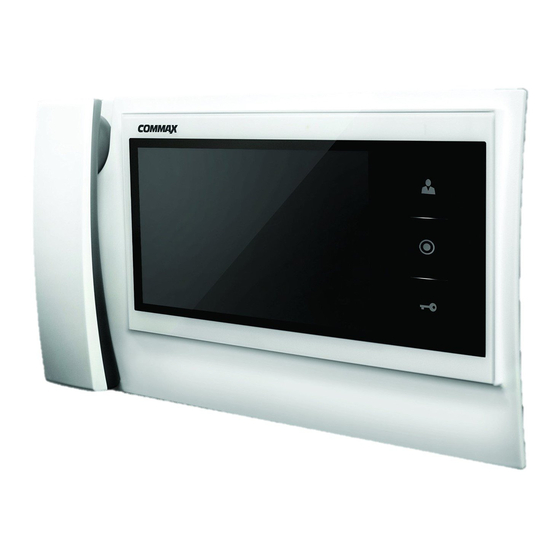
Color video door phone CDV-70K
• Thank you for purchasing COMMAX products.
• Thank you for purchasing COMMAX products.
• Please carefully read this User's Guide (in particular, precautions for safety) before using a product and follow
• Please carefully read this User's Guide (in particular, precautions for safety) before using a product and follow
instructions to use a product exactly.
instructions to use a product exactly.
• The company is not responsible for any safety accidents caused by abnormal operation of the product.
• The company is not responsible for any safety accidents caused by abnormal operation of the product.
Advertisement
Table of Contents

Summary of Contents for Commax CDV-70K
-
Page 1: Warnings And Caution
User Manual Color video door phone CDV-70K • Thank you for purchasing COMMAX products. • Thank you for purchasing COMMAX products. • Please carefully read this User’s Guide (in particular, precautions for safety) before using a product and follow • Please carefully read this User’s Guide (in particular, precautions for safety) before using a product and follow instructions to use a product exactly. -
Page 2: Table Of Contents
Greetings ● Thank you for choosing COMMAX. ● Please read this manual carefully before you use the product. Table of contents Greetings ........................1 Table of Contents .....................1 1. Warnings and caution ...................2 2. Product Overview....................4 3. How to use ......................5 4. -
Page 3: Product Overview
2. Product Overview Description Description HANDSET UP BUTTON(△) / MONITOR DOWN BUTTON(▽) MONITOR BUTTON POWER SWITCH INTERPHONE BUTTON EXTERNAL CONNECTION DOOR RELEASE BUTTON TERMINAL RINGTONES VOLUME MENU BUTTON SELECT BUTTON HANDSET MONITOR: The image of visitor is shown. MONITOR BUTTON(ENTRANCE) : Check the situation of entrance. INTERPHONE BUTTON : Call the interphone. -
Page 4: How To Use
3. How to use Call from a visitor When the visitor calls from the entrance(door camera), the calling sound rings and the image of the visitor is shown on the screen. By picking up the handset, you can talk with the visitor. If you press door release button, door will be released.(Door release works only while talking and it is possible only when the door camera is interlocked with door release function.) 3-way communication is possible when another user picks up the handset of... - Page 5 Adjust the volume When you press volume key repeatedly on stand-by status, you can hear each level of ringtone and volume level will be pop up on the screen. Ringtone of additional interphone is same with volume level of video door phone. Caution When the call volume switch is clicked for call volume adjustment, call sound will be heard from the handset 1 time for a user to check the sound.
-
Page 6: Settings
4. Settings You can adjust DOOR VIDEO SET, UTILITY and check INFORMATION(model name &version) with (UP) ‚ / (DOWN) button after pressing Menu button on the right of the product in video talk mode or stand-by mode. •Products settings need the following 4 buttons on the right of product. * Start Menu / Exit : MENU button * Select and in-put : SELECT button * Move up / Move right :... - Page 7 To complete the set, press SELECT button. (2) SCREEN MODE : to set for screen ratio ZOOM: Zoon in(expansion) image maintaining actual ratio(4:3) is shown. (full of the screen) 4:3: Image of 4:3 ratio without expansion is shown.(This is actual ratio for camera) WIDE: Full of the screen.
-
Page 8: Installation
5. Installation 1. Installation Method of camera monitor Note ① Avoid the range of direct sunlight ② Recommended height is pertinent from 1450 ~ 1500mm ③ Avoid the installation near magnetic activity, humid temperatures and gas 2. Installation Method of camera Note ①... -
Page 9: Wiring
6. Wiring The wiring of this equipment is as follows. Camera connector polarity 1. RED : VOICE 2. BLUE : GND 3. YELLOW : POWER(+12V) 4. WHITE : VIDEO Wiring precautions Each device should be connected by separated cables. If you use UTP CABLE[CAT.5] for CAMERA1and CAMERA2, 2 lines of UTP cable are required. - Page 10 DOOR Camera Wiring CAM1 CAM2 • If you use UTP CABLE[CAT.5], connect the rest 4 lines to GND after connecting 4 lines between monitor and camera. INTERPHONE Wiring • If you use UTP CABLE[CAT.5], connect the rest 4 lines to GND after connecting 4 lines between monitor and interphone.
-
Page 11: Package Contents
7. Package Contents Manual Body of CDV-70K Bracket for wall mount M 3 X 6(1EA) 4P Connector(2EA) T4 X 18(4EA) Screw for body Screw for wall mount Monitor(CDV-70K) Wall bracket for monitor User Manual Mounting Screw (SCREW GH1T 4X18 ZnY) – 4EA Monitor fixing screw (SCREW PHM 3X6 ZnY) –... -
Page 12: Caution In Use
1. Turn on the power switch. 2. Please contact your local agent for product maintenance when you have a problem in use of CDV-70K 3. For your safety, power switch with a safety device must be used in your building. - Page 13 513-11, Sangdaewon-dong, Jungwon-gu, Seongnam-si, Gyeonggi-do, Korea Int’l Business Dept. Tel. : +82-31-7393-540~550 Fax. : +82-31-745-2133 • Web site : www.commax.com • PM0270K00010 Printed In Korea / 2013.01.104 •...


Need help?
Do you have a question about the CDV-70K and is the answer not in the manual?
Questions and answers