
Related Manuals for Beltone ALLY


Summary of Contents for Beltone ALLY
- Page 1 Instructions for use Digital Receiver In-the-Ear (RIE) Hearing Instruments Legend and Ally...
-
Page 2: Statement
FCC ID: X26BRIE, IC: 6941C-BRIE, Type Designation: BRIE FCC ID: X26VE312, IC: 6941C-VE312, Type Designation: VE312 FCC ID: X26MRIE, IC: 6941C-MRIE, Type Designator MRIE This device operates in the frequency range of 2.4 GHz - 2.48 GHz. This device includes an RF transmitter that operates in the range of 2.4 GHz - 2.48 GHz. -
Page 3: Intended Use
Note: This equipment has been tested and found to comply with the limits for a Class B digital device, pursuant to part 15 of the FCC Rules and ICES-003 of the IC rules. These limits are designed to provide reasonable protection against harmful interference in a residential installation. This equipment generates, uses and can radiate radio frequency energy and, if not installed and used in accordance with the instruc- tions, may cause harmful interference to radio communications. -
Page 4: Specifi Cation Of Restrictions
93/42/EEC for medical devices (MDD) and essential requirements and other relevant provisions of Direc- tive 1999/5/EC (R&TTE). • The declaration of conformity may be consulted at www.beltone-hearing.com • In US: FCC CFR 47 Part 15, subpart C. • Other identifi ed applicable international regulatory requirements in countries outside EU and US. Please refer to local country requirements for these areas. - Page 5 Digital Receiver In-the-Ear (RIE) wireless hearing Instruments models (type BRIE) are available in the following variants: LND1764-DRW, LND964-DRW, LND664-DRW Digital Receiver In-the-Ear (RIE) wireless hearing instrument models (type VE312) are available in the following variants: LND1763-DRW, LND963-DRW, LND663-DRW Digital Receiver In-the-Ear (RIE) wireless hearing instrument models (type MRIE) are available in the following variants: AY364-DRW.
-
Page 6: A New Beltone Hearing Instrument
A new Beltone hearing instrument Congratulations on your choice of a Beltone hearing instrument! This is an important step towards clearer hearing and better understanding. We have used all of our experi- ence with hearing instruments to help you communicate, lead an enjoyable social life and listen to the world around you. -
Page 7: This Booklet & Your Instrument
This booklet & your instrument In this booklet you will fi nd instructions for inserting and controlling your new hearing instrument. You will fi nd explanations on controlling your instrument, on daily handling and on its use. Furthermore, you can read what to do if things do not live up to your expectations. -
Page 8: Table Of Contents
Intended use: ............3 Listening to radio or tv ........33 ® Specifi cation of restrictions: ........ 4 Using Beltone Hearing Instruments with iPhone A new Beltone hearing instrument ....... 6 iPad ® , and iPod touch ® This booklet & your instrument ......7 (Beltone Legend) .......... - Page 9 The scientifi c concepts that form the basis for the device ..........42 TSG warning to hearing healthcare professionals ............44 General precautions .......... 45 Hearing instrument expectations ....... 46 General warnings ..........47 Warning to hearing aid dispensers (US Only) ... 49 Important notice for prospective hearing aid users (US Only)..........
-
Page 10: Warning To Hearing Care Professional
Warning to hearing care professional A hearing care professional should advise a prospective user to consult promptly with a licensed physi- cian (preferably an ear specialist) before setting the instrument if the hearing care professional determines through inquiry, actual observation, or review of any other avail able information concerning the prospective user that the prospective user has any of the following conditions: visible congenital or traumatic deformity of the ear;... -
Page 12: Your Hearing Instrument
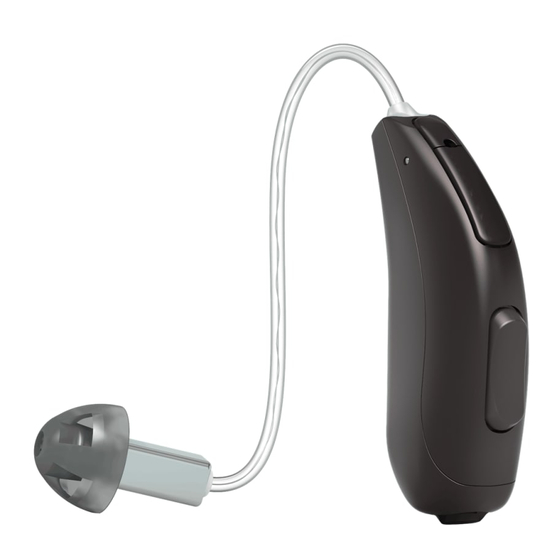
Your Hearing Instrument (Please see page 61-62 for your selected model) Receiver tube 2a. Receiver Open Dome 2b. Receiver “Tulip” Dome 2c. Receiver Power Dome 2d. Receiver Sports lock Battery compartment Receiver Multi-function button... - Page 13 64-DRW Available Receiver Tube Models LP Receiver MP Receiver HP Receiver UP Receiver...
- Page 14 Your Hearing Instrument (Please see page 61-62 for your selected model) Receiver tube 63-DRW device 2a. Receiver Open Dome 2b. Receiver “Tulip” Dome 2c. Receiver Power Dome 2d. RIE mold Sports lock Battery compartment Receiver Push button...
-
Page 15: On/Off Function
On/Off function Your hearing instrument is equipped with an on/off switch integrated into the battery compartment. When the battery compartment is fully closed, the in- strument is turned on. To turn the instrument off, grasp the battery compartment door with your fi ngernail and gently pull downwards. -
Page 16: Changing Batteries
Low battery indicator (when paired with Direct Line accessories) Active usage of Beltone Direct Line accessories (for example: Remote Control, TV Link, and Phone Link) requires more battery power from the hearing instrument than when these are working on their own. When the battery in the hearing instrument has depleted to a level at which use of the TV Link, and Phone Link or Personal Audio Link cannot be supported, the hearing instrument will play two sets of descending tones. - Page 17 Replacing the battery Open the battery compartment completely by using your fi ngernail. After removing the old battery (if pre- sent), insert the new one with the positive (+) side in the correct position. Please make sure that you have the correct size battery for your hearing instrument.
-
Page 18: Battery Warning Information
Battery warning information Batteries contain dangerous substances and should be disposed of carefully in the interest of your safety and for the environment. • Keep batteries away from pets, children and mentally challenged persons. • DO NOT place batteries in your mouth. Consult a physician immediately if a battery has been swallowed, as they can be harmful to your health. -
Page 19: Inserting And Removing The Device
Inserting and removing the device Inserting custom RIE and UP molds: 1. Hold the RIE mold between your thumb and index fi nger and position its sound outlet in your ear canal. 2. Slide the RIE mold all the way into your ear with a gentle, twisting movement. 3. -
Page 20: Inserting Receiver Domes
Inserting receiver domes: 1. Hang the instrument over the top of the ear. 2. Grasp the receiver tube where it bends and place the receiver dome in your ear canal. The receiver dome should be placed far enough into the ear so that the receiver tube lies fl ush with your head. 3. - Page 21 Removing: 1. Grasp the receiver tube where it bends, or pull-out cord when using an RIE or UP mold, and pull the receiver dome out of your ear canal. 2. Lift the hearing instrument of your ear. Note: You should never attempt to bend or modify the shape of the hearing instrument, RIE molds, or receiver tubing yourself.
-
Page 22: Push Button And Multi-Function Button
Push button and Multi-Function button If you have a hearing aid with a push button or multi-function button, this will allow you to use up to four dif- ferent listening programs, each of them suitable for certain situations. Your instrument has a fully automatic volume control. Therefore, it should not be necessary to control the volume manually. - Page 23 Long press down (3 seconds) Activates streaming* *Wireless streaming only applicable when using Beltone Direct Line accessories. Note: If you have two hearing instruments with the Ear to Ear Synchronization function enabled and you have the Multifunction Button set for volume control functionality, volume adjustments to one instrument will au- tomatically repeat in the second instrument.
- Page 24 When using the push button or multi-function button to switch programs, each press will move the instru- ment to the next program. For example, if it was in programme 1 it will switch to program 2, if it was in pro- gramme 2 it will switch to program 3, etc.
- Page 25 Let your hearing care practitioner fi ll out the following table: Program number Type of program Intended for Note: If you have two hearing instruments with the Ear to Ear Synchronization function enabled, program changes to one instrument will automatically repeat in the second instrument. When a programme change is made in one instrument, you will hear the same amount of confi...
-
Page 26: Telephone Use
Telephone use Your hearing instrument allows you to use the telephone as you ordinarily do. Hold the phone up to your ear as you normally would. It is possible you will hear clearer if you hold the phone towards the top of your ear (closer to where the microphones are located). - Page 27 Placement of AutoPhone magnets Place AutoPhone magnet on your telephone receiver to allow operation of the AutoPhone function. In order to place the magnet properly: 1. Clean the telephone receiver thoroughly. 2. Hold the telephone vertically, in a position similar to when making a telephone call.
- Page 28 1. High distortion during dialing or phoning may mean that the magnet is not in the optimal position relative to the telephone receiver. To avoid the issue, please move the magnet to another place on the telephone receiver. 2. Only use magnets supplied by Beltone.
-
Page 29: Telecoil-Program (64-Drw Only)
Telecoil-program (64-DRW Only) Your hearing instrument has a built-in function, enabling in many cases an improved use of the telephone and better hearing in churches or halls where an induction loop system is installed. In order to activate this function, the telecoil program has to be selected. In this program you will hear the tele-loop transmitted sounds through the telecoil and the environmental sounds through the hearing aid microphone. -
Page 30: Using The Telephone With Telecoil Programme
Using the telephone with telecoil program • Switch your instrument to the telecoil program. • Hold your telephone handset behind your ear, close to the hear ing instru- ment (2-3 cm) and slightly tilt the receiver outwards. • Listen to the dail tone and move the handset a little to fi nd the position that gives the best reception. -
Page 31: Audio Input (64-Drw Only)
Audio input (64-DRW Only) Your hearing instrument is equipped with a direct audio input fa cility. Direct audio input allows direct con- nection of sound sources, such as a radio, television or even school equipment, to your hearing instrument. Often, this will improve sound quality. •... -
Page 32: Hearing Through An Induction Loop
Hearing through an induction loop Many public places, including churches, theatres and cinemas, have induction loops systems. In these particular rooms, they transmit, inductively, the sound of the presenter or show. At home, radio or television can be connected to an induction loop system. Sound quality through induction loop is often better because noises from the environment are not transmitted. -
Page 33: Listening To Radio Or Tv
Made for iPhone instrument and allows for direct communication and control with an iPhone, iPad, or iPod touch. For assistance in pairing and using these products with your Beltone Legend wireless device, please contact your hearing care professional. -
Page 34: Using Beltone Hearing Instruments With Smart Phone Apps
• The app must only be used with Beltone devices for which it is intended, and Beltone takes no responsi- bility if the app is used with other devices. -
Page 35: Flight Mode
Flight mode When boarding a fl ight or entering an area where RF transmitters are prohibited, wireless functionality must be deactivated as it is not allowed to radiate radio signals during fl ights or in otherwise restricted areas. Fol- low these steps to enter and leave fl ight mode: Note that this operation is the same for both hearing instruments with and without a push button. -
Page 36: Daily Maintenance
Daily maintenance Keep your hearing instrument clean and dry. Wipe the case with a soft cloth or tissue after use to remove grease or moisture. You should avoid exposing your instrument directly to moisture such as rain or water from the shower. If your instrument does get wet or if it has been exposed to high humidity or perspiration, it should be left to dry out overnight with the battery out and the battery compartment open. -
Page 37: The Receiver Tube
The receiver tube ”LP” ”MP” The receiver tube comes in four different types; “LP” (Low Power), “MP” (Medium Power), “HP” (High Power) or “UP” (Ultra Power). Please see illustrations. Depending on your hearing loss you have either been fi tted with the “LP”, “MP”, “HP”... -
Page 38: Cleaning The Rie Or Up Mold
Cleaning the RIE or UP mold We recommend that you use a damp cloth to clean the RIE mold after every time you use it. It is important to keep it clean from wax so that you will not have wax or bacteria building up on the mold. If you no longer can clean the RIE mold using a damp cloth we recommend you to contact your hearing care professional for them to clean it. -
Page 39: Tinnitus Sound Generator (Tsg) Module
Beltone Hearing Intruments – with Tinnitus Sound Generator (TSG) Description of the device The Tinnitus Sound Generator (TSG) Module is a software tool that generates sounds to be used in tinnitus management programmes to relieve suffering from tinnitus. Explanation of how the device functions The TSG module is a frequency and amplitude shaped white-noise generator. -
Page 40: The Scientifi C Concepts That Form The Basis For The Device
synchronization is enabled your hearing healthcare professional can also enable environmental monitoring synchronization so that the TSG noise level is automatically adjusted simultaneously in both hearing aids dependent on the background sound level. Additionally if the hearing aid has a volume control then the background noise level monitored by the hearing aid and the volume control can be used simultaneously to adjust the generated noise level in both hearing aids. - Page 41 Technical specifi cations Audio signal technology Digital Available sounds – Tinnitus Sound Generator White noise signal which can be shaped with the following confi gurations: The white noise signal can be modulated in amplitude with an attenuation depth of up to 14dB. High-pass fi...
-
Page 42: Using Tsg With Smart Phone Apps
Prescription use of this device The TSG module should be used as prescribed by your doctor, audiologist or hearing healthcare profes- sional. In order to avoid permanent hearing damages, the maximum daily usage depends on the level of the generated sound. Should you develop any side effects from using the sound generator, such as dizziness, nausea, headaches, perceived decrease in auditory function or increase in tinnitus perception, you should discontinue use of sound generator and seek medical evaluation. - Page 43 VOLUME CONTROL The sound generator is set to a specifi c loudness level by the hearing healthcare professional. When switch- ing the sound generator on, the volume will have this optimal setting. Therefore, it might not be necessary to control the volume (loudness) manually. However, the volume control provides the ability to adjust the volume, or amount of stimulus, to the liking of the user.
- Page 44 Warning to hearing healthcare professionals A hearing healthcare professional should advise a prospective sound generator user to consult promptly with a licensed physician (preferably an ear specialist) before getting a sound generator if the hearing healthcare professional determines through inquiry, actual observation, or review of any other available information concerning the prospective user that the prospective user has any of the following conditions: Visible congenital or traumatic deformity of the ear.
- Page 45 Important notice for prospective sound generator users A tinnitus masker is an electronic device intended to generate noise of suffi cient intensity and bandwidth to mask internal noises. It is also used as an aid in hearing external noises and speech. Good health practice requires that a person with a tinnitus condition have a medical evaluation by a licensed physician (preferably a physician who specializes in diseases of the ear) before using a sound generator.
-
Page 46: General Precautions
• When using wireless functionality and the devices are affected by electromagnetic interference, move away from the source of interference. Beltone wireless devices operate in the frequency range of 2.4 GHz - 2.48 GHz. Beltone wireless devices include a RF transmitter that operates in the range of 2.4 GHz - 2.48 GHz. -
Page 47: General Warnings
General warnings Hearing instruments can be dangerous if improperly used. • The instrument contains small parts that could be swallowed by children. Please be mindful not to leave children unsupervised with this hearing instrument. • Turn off your wireless functionality by using fl ight mode in areas where radio frequency emissions are prohibited. - Page 48 • Do not allow others to use your hearing instrument. This may cause damage of the hearing instruments or to the hearing to the other individual. • Instrument usage by children or mentally challenged persons should be supervised at all times to ensure their safety.
-
Page 49: Warning To Hearing Aid Dispensers (Us Only)
Warning to hearing aid dispensers (US Only) A hearing aid dispenser should advise a prospective hearing aid user to consult promptly with a licensed physician (preferably an ear specialist) before dispensing a hearing aid if the hearing aid dispenser deter- mines through inquiry, actual observation, or review of any other available information concerning the pro- spective user, that the prospective user has any of the following conditions: (i) Visible congenital or traumatic deformity of the ear. -
Page 50: Important Notice For Prospective Hearing Aid Users (Us Only)
Important notice for prospective hearing aid users (US Only) Good health practice requires that a person with a hearing loss have a medical evaluation by a licensed physician (preferably a physician who specializes in diseases of the ear) before purchasing a hearing aid. Licensed physicians who specialize in diseases of the ear are often referred to as otolaryngologists, otolo- gists or otorhinolaryngologists. -
Page 51: Children With Hearing Loss (Us Only)
Children with hearing loss (US Only) In addition to seeing a physician for a medical evaluation, a child with a hearing loss should be directed to an audiologist for evaluation and rehabilitation since hearing loss may cause problems in language develop- ment and the educational and social growth of a child. - Page 52 3. Have a conversation with a single person Use your instrument in conversation with one person, a family member or a friend. Move to a quiet spot. Explain that you are now wear ing a hearing instrument. Ask the other person to talk normally. Look at your conversation partner.
- Page 53 7. Use your telephone Often, you can hear the telephone clearly with your hearing instrument in a microphone program. Hold the telephone handset 1 inch (2-3cm) from your ear and tilt the receiver outwards a little. Your hearing instrument meets strict international regulations. Therefore, it should be possible to use a mo- bile phone in most cases.
-
Page 54: Troubleshooting Guide
TROUBLESHOOTING GUIDE SYMPTOM CAUSE Device is dead Not turned on Dead battery Battery improperly inserted Broken receiver or receiver tube Blocked wax guard fi lter Not loud enough Receiver dome not inserted properly Blocked wax guard fi lter Change in hearing Excessive ear wax Hearing instrument settings not optimal... - Page 55 POSSIBLE REMEDY Turn on Replace battery Insert battery properly Consult your hearing care professional Consult your hearing professional or if you have been in structed about how to change the receiver dome and/or wax guard fi lter Reinsert carefully Consult your hearing professional or if you have been in structed about how to change the receiver dome and/or wax guard fi...
- Page 56 TROUBLESHOOTING GUIDE SYMPTOM CAUSE Whistles Receiver tube and receiver dome are not inserted properly in the ear Hearing instrument settings not optimal Not clear, distorted Weak battery Poorly fi tting receiver tube Hearing instrument damaged Hearing instrument settings not optimal...
- Page 57 POSSIBLE REMEDY Reinsert carefully Consult your hearing care professional Replace battery Consult your hearing care professional Consult your hearing care professional Consult your hearing care professional...
-
Page 58: Technical Data
Technical Data Hearing instrument maximum output Model Hearing instrument Hearing Instrument max output max output (IEC 60118-7 (IEC 118-0 OES) and ANSI S3.22-2009) LNDx64-DRW UP 137 dB SPL 129 dB SPL LNDx64-DRW HP 131 dB SPL 122 dB SPL LNDx64-DRW MP 125 dB SPL 116 dB SPL LNDx64-DRW LP... -
Page 59: Temperature Test, Transport And Storage Information
Temperature test, transport and storage information Beltone Hearing Instruments are subjected to various tests in temperature and damp heating cycling between -25°C and +70°C according to internal and industry standards. ° ° ° During transport or storage, the temperature should not exceed the limit values of -20... -
Page 60: International Warranty, Service And Repairs
In its service policy, Beltone pledges to secure functionality at least equivalent to the original hearing instru- ment. As a signatory to the United Nations Global Compact initiative, Beltone is committed to doing this in line with environmentally-friendly best practices. Hearing instruments therefore, at Beltone’s discretion, may be replaced by new products or products manufactured from new or serviceable used parts, or repaired using new or refurbished replacement parts. -
Page 61: Your Selected Model
Your selected model Your hearing care professional may place a check mark in the below table to identify the model you have received. Beltone Legend Type Battery Receiver tube type size and length/size LND1764-DRW UP LND1764-DRW HP LND1764-DRW MP LND1764-DRW LP... - Page 62 Beltone Legend/ Type Battery Receiver tube type Beltone Ally size and length/size LND963-DRW UP LND963-DRW HP LND963-DRW MP LND963-DRW LP LND663-DRW UP LND663-DRW HP LND663-DRW MP LND663-DRW LP AY364-DRW UP AY364-DRW HP AY364-DRW MP AY364-DRW LP...
- Page 63 Left serial number: Right serial number: Hearing care professional Battery size: Your hearing aid has Tinnitus Breaker Pro...
- Page 64 Be aware of information marked with the warning symbol WARNING points out a situation that could lead to serious injuries, CAUTION indicates a situation that could lead to minor and moderate injuries. Equipment includes RF transmitter. Advice and tips on how to handle your hearing instrument better.
- Page 65 Beltone Legend is compatible with iPhone 6, iPhone 6 Plus, iPhone 5s, iPhone 5c, iPhone 5, iPad Air 2, iPad Air, iPad (4th generation), iPad mini 3, iPad mini 2, iPad mini with Retina display, iPad mini and iPod touch (5th generation) using iOS 7.X or later. Apple, the Apple logo, iPhone, iPad and iPod touch are trade- marks of Apple Inc., registered in the U.S.
- Page 66 LND63 DRW and LND64 DRW (LP) Technical Specifi cations ANSI S3.22-2009 Full-On Gain 52 dB (50 db SPL input) 43 dB Maximum Output Max. 113 dB SPL (90 dB SPL input)HFA 108 dB SPL Total Harmonic Distortion 500 Hz 0.3% 1600 Hz 0.7% Equivalent input Noise...
- Page 67 Full-On and Reference Test Gain Maximum Output (OSPL 90) Full-on gain 2cc Coupler 2cc Coupler Pi = 50dB SPL Standard Open Reference test gain Pi = 60dB SPL Frequency (Hz) Frequency (Hz) Input/Output Response 2cc coupler @ 2kHz 2cc Coupler Input (dB SPL)
- Page 68 LND63 DRW and LND64 DRW (MP) Technical Specifi cations ANSI S3.22-2009 Full-On Gain 58 dB (50 db SPL input) 51 dB Maximum Output Max. 116 dB SPL (90 dB SPL input)HFA 114 dB SPL Total Harmonic Distortion 500 Hz 0.5% 1600 Hz 1.2% Equivalent input Noise...
- Page 69 Full-On and Reference Test Gain Maximum Output (OSPL 90) Full-on gain 2cc Coupler 2cc Coupler Pi = 50dB SPL Reference test gain Pi = 60dB SPL Frequency (Hz) Frequency (Hz) Input/Output Response 2cc coupler @ 2kHz 2cc Coupler Input (dB SPL)
- Page 70 LND63 DRW and LND64 DRW (HP/UP) Technical Specifi cations ANSI S3.22-2009 Full-On Gain 65/75 dB (50 db SPL input) 56/64 dB Maximum Output Max. 122/129 dB SPL (90 dB SPL input)HFA 118/124 dB SPL Total Harmonic Distortion 500 Hz 0.6/1.3% 1600 Hz 0.7/0.1% Equivalent input Noise...
- Page 71 Full-On and Reference Test Gain Maximum Output (OSPL 90) Full-on gain 2cc Coupler 2cc Coupler Pi = 50dB SPL Reference test gain Pi = 60dB SPL Frequency (Hz) Frequency (Hz) Input/Output Response 2cc coupler @ 2kHz 2cc Coupler Input (dB SPL)
- Page 72 AY64 DRW (UP) Technical Specifi cations ANSI S3.22-2009 Full-On Gain 65/75 dB (50 db SPL input) 56/64 dB Maximum Output Max. 122/129 dB SPL (90 dB SPL input)HFA 118/124 dB SPL Total Harmonic Distortion 500 Hz 0.6/1.3% 1600 Hz 0.7/0.1% Equivalent input Noise 23/23 dB SPL Frequency Range...
- Page 73 Full-On and Reference Test Gain Maximum Output (OSPL 90) Full-on gain 2cc Coupler 2cc Coupler Pi = 50dB SPL Reference test gain Pi = 60dB SPL Frequency (Hz) Frequency (Hz) Input/Output Response 2cc coupler @ 2kHz 2cc Coupler Input (dB SPL)
- Page 76 Beltone 8001 E. Bloomington Freeway Bloomington, MN 55420-1036 1-800-BELTONE www.beltone.com Beltone Canada 301 Supertest Road Toronto, Ontario M3J 2M4 Canada 400348011 Rev.A 1-800-387-3744 © Beltone 2015 www.beltone.ca...
Need help?
Do you have a question about the ALLY and is the answer not in the manual?
Questions and answers