Table of Contents
Advertisement
Advertisement
Table of Contents

Related Manuals for Husqvarna Viking H Class E10


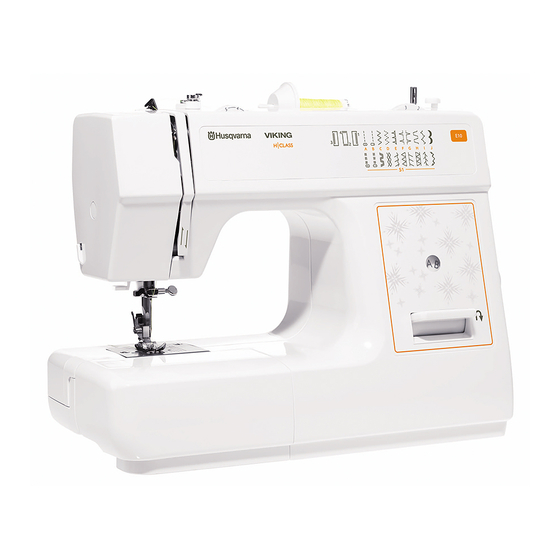
Summary of Contents for Husqvarna Viking H Class E10
- Page 1 USER’S GUIDE...
-
Page 2: Important Safety Instructions
This household sewing machine is designed to comply with IEC/EN 60335-2-28 and UL1594. IMPORTANT SAFETY INSTRUCTIONS When using an electrical appliance, basic safety precautions should always be followed, including the following: Read all instructions before using this household sewing machine. Keep the instructions in a suitable place close to the machine. - Page 3 needle to break. • Do not use bent needles. causing it to break. • Wear safety glasses. ment in the needle area, such as threading needle, changing needle, threading bobbin, or changing presser foot, etc. • Never drop or insert any object into any opening. •...
- Page 4 For Europe only: The noise level under normal operating conditions is less than 75dB(A). The machine must only be used with foot control of type KD-2902/ FC-2902A/FC-2902D manufactured by ZHEJIANG FOUNDER MOTOR CORPORATION LTD. For outside Europe: This sewing machine is not intended for use by persons (including children) with reduced physical, sensory or mental capabilities, or lack of experience and knowledge, unless they have been given supervi- sion or instruction concerning use of the sewing machine by a person...
- Page 5 Congratulations! As the owner of a new sewing machine, you will enjoy precision quality stitching on all types of fabrics, from multiple layers of denim to delicate silks. Your sewing machine offers the ultimate in simplicity and ease of operation. For your safety and to fully enjoy the many advantages and ease of operation of your sewing machine, we recommend that you read all the important safeguards and use and care instructions in this instruction book.
-
Page 6: Table Of Contents
LIST OF CONTENTS PRINCIPAL PARTS OF THE MACHINE ................5 ACCESSORIES........................7 FITTING THE SNAP-IN ACCESSORY BOX ................8 CONNECTING THE MACHINE TO POWER SOURCE ............9 Foot control...........................9 Sewing light ..........................9 CHANGING THE BULB ......................10 TWO-STEP PRESSER FOOT LEVER/ADJUST PRESSER FOOT PRESSURE ....11 ATTACHING THE PRESSER FOOT SHANK/ANKLE ............12 WINDING THE BOBBIN .....................13 INSERTING THE BOBBIN ....................14... -
Page 7: Principal Parts Of The Machine
PRINCIPAL PARTS OF THE MACHINE Thread tension dial Presser foot pressure Thread take-up lever Thread cutting Built-in needle threader Presser foot Needle plate Accessories box Bobbin stop 10. Stitch length dial 11. Stitch display 12. Reverse sewing lever... - Page 8 13. Spool pin 14. Bobbin winder 15. Hole for second spool pin 16. Hand wheel 17. Stitch selector dial 18. Power switch 19. Main plug socket 20. Bobbin thread guide 21. Upper thread guide 22. Handle 23. Presser foot lever...
-
Page 9: Accessories
ACCESSORIES All purpose foot 11. Seam guide Zipper foot 12. Bobbins (3x) Satin stitch foot 13. Darning plate Blind hem foot 14. Felt pad Buttonhole foot L-screwdriver Seam ripper/ brush Second spool pin Spool holders (2x) 10. Pack of needles... -
Page 10: Fitting The Snap-In Accessory Box
FITTING THE SNAP-IN ACCESSORY BOX Keep the snap-in accessory box horizontal, and push it in the direction of the arrow. (1) To open, lift up at the point of the arrow. (2) Note: Your H|CLASS™ E10 sewing machine is adjusted to provide the best stitch result at normal room temperature. -
Page 11: Connecting The Machine To Power Source
CONNECTING THE MACHINE TO POWER SOURCE Connect the machine to a power source as illustrated. A polarized plug must be used with the appropriate polarized outlet. (2) Attention: Unplug power cord when machine is not in use. Foot control Foot control regulates the sewing speed. -
Page 12: Changing The Bulb
CHANGING THE BULB Attention:Disconnect the machine from the power supply by removing the plug from the main socket! Replace bulb with same type rated 10 watts (110-120V) or 15 watts (220-240V). Loosen screw (A) as illustrated. (1) Remove the cover (B). Replace the cover and tighten screw. -
Page 13: Two-Step Presser Foot Lever/Adjust Presser Foot Pressure
TWO-STEP PRESSER FOOT LEVER When sewing several layers or thick fabrics, the presser foot can be raised to extra high for easy positioning of the work. (A) ADJUST PRESSER FOOT PRESSURE The presser foot pressure of the machine has been pre-set and usually requires no Loosen Tighten presser readjustment for most fabrics (light-or-heavy... -
Page 14: Attaching The Presser Foot Shank/Ankle
ATTACHING THE PRESSER FOOT SHANK/ ANKLE Attaching the presser foot holder Raise the presser foot bar (a). (1) Attach the presser foot shank/ankle (b) as illustrated. Attaching the presser foot Lower the presser foot shank/ankle (b) until the cut-out (c) is directly above the pin on the foot (d). -
Page 15: Winding The Bobbin
WINDING THE BOBBIN Place thread and spool holder onto spool pin (1). For smaller spools of thread place spool holder with small side next to spool (2). Wind thread clockwise around bobbin winder tension discs (3). Thread bobbin as illustrated and place on spindle (4). -
Page 16: Inserting The Bobbin
INSERTING THE BOBBIN When inserting or removing the bobbin, the foot and needle must be fully raised. Open the hinged cover. Hold the bobbin case with one hand. Insert the bobbin so that the thread runs in a clockwise direction (arrow). Put the thread under the tension spring. -
Page 17: Inserting The Needle
INSERTING THE NEEDLE Change the needle regularly, especially if it is showing signs of wear and causing problems. Insert the needle following the illustrated instructions. A. Loosen the needle clamp screw and tighten again after inserting the new needle. (1) should be towards the back. -
Page 18: Threading The Upper Thread
THREADING THE UPPER THREAD Threading is simple but it is important to thread correctly to prevent sewing problems could result. Start by raising the needle to its highest point (1), and also raise the presser foot to release the tension discs. -
Page 19: Built-In Needle Threader
BUILT-IN NEEDLE THREADER The needle must be in the up position to use the built-in needle threader. We also recommend lowering the presser foot. 1a. Use the handle to pull the needle threader down, catching the thread under the guide. 1b. -
Page 20: Thread Tension / Bringing Up The Bobbin Thread
THREAD TENSION / BRINGING UP THE BOBBIN THREAD Basic thread tension setting: “4” To increase the tension, turn the dial to the next number up. To reduce the tension, turn the dial to the next number down. Note: The weight and irregular surface of specialty threads, like metallics, can cause increased tension on the thread. -
Page 21: Reverse Sewing/Removing The Fabric/Cutting The Thread
REVERSE SEWING At the end of a seam, press down the reverse sewing lever. Sew a few reverse stitches to “the tie off” the thread ends. Release the lever and the machine will sew forwards again. (1/A) REMOVING THE FABRIC Turn the handwheel toward you to bring the thread take up lever to its highest position, raise the presser foot and remove fabric to... -
Page 22: Matching Needle / Fabric / Thread
MATCHING NEEDLE / FABRIC / THREAD NEEDLE, FABRIC, THREAD SELECTION GUIDE NEEDLE SIZE FABRICS THREAD 9-11(65-75) Lightweight fabrics-thin cottons, voile, Light-duty thread in cotton, nylon or silk , muslin, interlocks, cotton knits, polyester. tricots, jerseys, crepes, woven polyester, shirt & blouse fabrics. 12(80) Medium weight fabrics-cotton, satin, Most threads sold are medium size and... -
Page 23: Straight Stitching
STRAIGHT STITCHING Straight stitching center needle position Turn the stitch selector dial so that the “A” appears in the stitch display window. Stitch length dial Snap on the standard presser foot. Adjust the stitch length by turning the stitch length dial to the desired stitch length. 2.5 is standard stitch length. -
Page 24: Zigzag Stitching
ZIGZAG STITCHING Turn the stitch selector dial so that the stitch display shows “C”-zig-zag. Turning the stitch selector dial will increase or decrease the zig zag width. Snap on the standard foot. Function of stitch length dial while zigzaging The density of zigzag stitches increase as the setting of stitch length dial approaches Stitch length dial “0”. -
Page 25: How To Sew Buttonholes
HOW TO SEW BUTTONHOLES Preparation Stitch length dial Select buttonhole with the stitch Selection dial. Snap on The buttonhole foot. Adjust the stitch length dial between “0.5” - “1”. The density of the stitch depends on thickness of the fabric. Note: Always test sew a buttonhole. - Page 26 Tips Slightly reduce upper thread tension to produce a satin stitch on top. stretchy fabrics. It is best to sew a cord for a buttonhole on a stretch or knit fabrics. The buttonhole colomns should sew over the cord. (5)
-
Page 27: Blind Hem
BLIND HEM For hems, curtains, trousers, skirts, Stitch length dial etc. Select Blind hem for stretch fabrics. Select Blind hem for woven fabrics. Snap on Blind hem foot. (1) Stitch length 1.5-2.5 Note: It takes practice to sew blind hems. Fold the fabric as illustrated with the wrong side up. -
Page 28: Zippers And Piping
ZIPPERS AND PIPING Set the machine as illustrated. (1) Stitch length dial The zipper foot can be snapped onto the right or left, depending on which side of the foot you are going to place against the zipper or piping. (2) To sew past the zipper pull, lower the needle into the fabric, raise the presser foot and push the zipper pull... -
Page 29: 3-Step Zig-Zag
3-STEP ZIG-ZAG Sewing on lace and elastic, darning, Stitch length dial Set the machine as illustrated. (1) Patching: Place the patch in position and stitch around edges. The stitch length can be shortened to produce very close stitches. (A) When mending tears, it is advisable to use a piece of backing fabric to reinforce. -
Page 30: Stitch Selection
STITCH SELECTION Triple straight stitch: (1) Stitch length dial For reinforced seams. Turn the stitch length dial to “S1”. The machine sews two stitches forwards and one stitch backwards. This gives triple reinforcement. Triple zig-zag: (2) Stitch length dial For hardwearing seams, hems and decorative seams. -
Page 31: Maintenance
MAINTENANCE Attention: Disconnect the machine from the electricity supply by removing the plug from the main socket. When cleaning the machine, it must always be disconnected from the electricity supply. Remove the stitch plate Turn the handwheel until the needle is fully raised. -
Page 32: Trouble Shooting Guide
TROUBLE SHOOTING GUIDE Problem Cause Correction Upper thread 1. The machine is not threaded correctly. 1. Rethread the machine. breaks 2. The thread tension is too tight. 2. Reduce the thread tension. (lower number) 3. The thread is too thick for the needle. 3. - Page 33 Problem Cause Correction The machine 1. The machine must be lubricated. 1. Lubricate as described. is noisy 2. Lint or oil have collected on the hook or 2. Clean the hook and feed dog as needle bar. described. 3. Poor quality oil has been used. 3.
- Page 35 We reserve the right to change the machine equipment and the assortment of Intellectual Property VIKING, KEEPING THE WORLD SEWING & design and H|CLASS, are trademarks of KSIN Luxembourg II, S.ar.l. HUSQVARNA and the “crowned H-mark” are trademarks of Husqvarna AB. All trademarks are used under license by VSM Group AB. Please note that on disposal, this product must be safely recycled in accordance with relevant National legislation relating to electrical/electronic products.
- Page 36 www.husqvarnaviking.com...
Need help?
Do you have a question about the H Class E10 and is the answer not in the manual?
Questions and answers