Table of Contents
Advertisement
Advertisement
Table of Contents

Related Manuals for Husqvarna Viking Huskylock 936


Summary of Contents for Husqvarna Viking Huskylock 936
- Page 1 User's Guide K E E P I N G T H E W O R L D S E W I N G ™...
-
Page 2: Important Safety Instructions
This householdsewing machine is designed to comply with IEC/EN 60335-2-28 and UL 1594 IMPORTANT SAFETY INSTRUCTIONS When using an electrical appliance, basic safety precautions should always be followed, including the following: Read all instructions before using this household sewing machine. DANGER - To reduce the risk of electric shock: •... -
Page 3: Table Of Contents
Table of contents SUMMARY ....................1 1 - 1. Name of parts ..................1 1 - 2. Accessories .....................2 1 - 3. Preparation ....................3~4 1 - 4. Sewing speed ..................5 1 - 5. Telescopic thread stand ................5 1 - 6. Replacing the needle ................6 1 - 7. - Page 4 SEWING ....................25 4 - 1. Four thread overlock stitch with 2 needles ..........25 Before sewing ..................25 Insert the fabric ..................25 Start sewing and chain off ...............25~26 Cording thread / Decorative thread ............27 Serging curves ..................28 4 - 2. Three thread overlock ................29~30 4 - 3.
-
Page 5: Summary
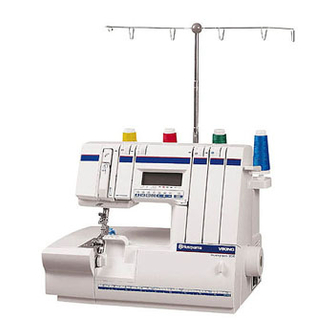
1. SUMMARY 1-1. Name of parts 1. Presser foot pressure adjustment dial 2. Spool pin 3. Thread take-up lever cover 4. Thread guides 5. Telescopic thread stand 6. Thread tension dials 7. Presser foot lift lever 8. Thread cutter 9. Thread guides A for decorative thread / Needle plate cording thread 10. -
Page 6: Accessories
1-2. Accessories Screw driver Oiler Allen wrench (1.5mm) Tweezers Cleaning brush Spool holder Light bulb changer Presser foot (C) for Cover stitch Needle plate (C) Needle threader for Cover stitch and double chain stitch Multipurpose foot Vinyl cover Net for thread spools Cutter cover (C) for Cover stitch and double... -
Page 7: Preparation
1-3. Preparation Handwheel Always turn handwheel toward you. Change the presser foot Turn the main power switch off. (See page 4) 1. Raise presser foot. 2. Raise needle to its highest position by turning Attach Remove the handwheel toward you. 3. - Page 8 Accessory box ➀ Lift the accessory box slightly and slide it in ➁ the direction of the arrow The accessory box consists of two parts. It holds the foot control and other accessories. To slide the box back on, reverse the steps from above.
-
Page 9: Sewing Speed
1-4. Sewing speed The harder you press the foot control, the faster the machine will sew. You can choose between three sewing speeds, (slow, medium, fast) with the speed selector. When you turn on the machine, the medium Indicator speed mode is selected. Indicated symbol and maximum speed modes are as follows: Speed selector... -
Page 10: Replacing The Needle
1-6. Replacing the needle Turn the main power switch off. 1. Turn the handwheel toward you (counterclockwise) by hand until the needle is in its highest position. 2. Insert the needle into the opposite side needle hole of Needle threader. 3. -
Page 11: Changing Threads
1-7. Changing threads Cut the thread Tie the thread The machine comes threaded with overlock thread. To change thread follow the easy threading as explained on page 16~18 or to tie 1. Cut the thread in use near the thread spool (in front of the telescopic thread stand). -
Page 12: Stitch Fi Nger Lever
1-8. Stitch fi nger lever (Convert from overlock stitch to rolled edge) Raise the needle to its highest position by turn- Stitch fi nger lever ing the handwheel toward you. Overlock Push the stitch fi nger lever to align it with “N” on the needle plate. -
Page 13: Sewing Advisor Display Guide
2. SEWING ADVISOR DISPLAY GUIDE 2-1. Selection buttons The buttons below can either be pressed one step at a time or held until the desired setting is obtained. : Auto button Press for Auto Mode. Standard settings are displayed. : Memory button Press to retrieve stored settings or store new setting preference in memory. -
Page 14: Sewing Advisor Display Function
2-2. Sewing Advisor display function Mode and stitch number : Mode and pre-set stitch are displayed. Memory number : In Memory Mode, stored memory number is displayed. Fabric : Fabric type is displayed. Stitch : Stitch description is displayed. Stitch length : The recommended stitch length is displayed. -
Page 15: Choice Of Language
2-3. Choice of language You can select the following languages : American English, British English, French, Italian, German, Swedish, Norwegian, Danish, Finnish, Dutch, Spanish, Czech, Polish, and Russian. Select the language as follows: 1. Turn on the machine while pressing the auto button and cursor button simultane- ously. -
Page 16: Manual Mode
Example: If you press the stitch selection button 3 times, the following will be displayed: (2) Selection of fabric Select the fabric type with the fabric selection button The recommended setting then appears on the Sewing Advisor. The message “Not advised” appears when the setting is not recommended. See “2-8. -
Page 17: Memory Mode
2-6. Memory Mode After making new settings in Manual Mode, you can store your settings or retrieve them in this mode. (1) Store new setting in memory After changing the settings in Manual Mode, press memory button and then memory number blinks. - Page 18 (2) Retrieve from memory When turning the machine on, the recommended standard settings are displayed. Press memory button . Now “ Memory” appears with the last setting you made before turn- ing off the machine. Select the memory you want to use by pressing plus or minus button (3) Delete from memory Press the memory button .
-
Page 19: Stitch Table
2-7. Stitch table The following 16 stitches are programmed in the Husqvarna Viking® Huskylock 936 Stitch Display text 4thread overlock 4-thread overlock 3thread wide o/l 3-thread wide overlock 3thread narrow o/l 3-thread narrow overlock 3thread fl atlock 3-thread fl atlock... -
Page 20: Threading
3. THREADING (For four thread overlock stitch) Thread the machine in the following order: Spun thread Decorative thread Upper looper ( A ) Lower looper ( B ) Needles ( C,D ) 3-1. Upper looper threading ( A ) 1. Set the upper looper to the highest position by turning the handwheel toward you. -
Page 21: Lower Looper Threading (B)
3-2. Lower looper threading ( B ) Spun thread Decorative thread 1. Raise the presser foot. 2. Open front cover. ➀ 3. Pull thread from spool through guide of the ➁ thread stand and then through guide Note: Make sure the thread snaps into the slot ➁... -
Page 22: Needle Threading (C) (D)
3-3. Needle threading ( C ) ( D ) 1. Raise the presser foot. 2. Raise the needle to its highest position by turning the handwheel toward you. ➀ 3. Pull thread from spool through guide Note: Make sure the thread snaps into the slot ➁... -
Page 23: Preparations And Control
3-4. Preparations and control Check that thread has not slipped off the guides nor has broken. Make sure the upper cutter moves correctly against the lower cutter by slowly turning the handwheel toward you. Check that there are no pieces of fabric or thread between the cutters. -
Page 24: Thread Tension
3-7. Thread tension Start from normal position. Change and thereaf- ter check one dial at a time until you obtain the desired result. Turn the dial to a higher number to increase tension. Turn the dial to a lower number to decrease tension. ➀... - Page 25 Unbalanced lower thread is wrapped around and over the top side Increase the thread tension of the lower looper ④ (dial ) or reduce the thread tension of the up- ➂ per looper thread (dial Lower looper Wrong side thread Left needle thread Right needle...
-
Page 26: Adjusting The Stitch Width / Cutting Width
3-8. Adjusting the stitch width / cutting width The distance between the needle and the outer edge of the fabric is called stitch width / cutting width. • The cutting width can be set between 5-7mm depending on the type of fabric. •... -
Page 27: Stitch Length
Model 936 features automatic Stitch length and Differential feed. You can override the automatic settings as follows: 3-9. Stitch length Normal stitch length is 2.5 mm. You may change the stitch length between 0.8 (for rolled edge) and 5 mm, using the Sewing Advisor’s manual function. Change the stitch length as follows: 1. - Page 28 First sew a few test stitches on a piece of fabric you are going to use, referring to the chart below. Speed Stitch length ✕ Diff = Stitch length Diff Min-5.0 5.1-Max 0.8-4 Min. 0.5-Max. 2.5 Low-High Low-Med 4.5-5 Min. 0.6-Max. 2.0 Low-High Low-Med Fabric...
-
Page 29: Sewing
4. SEWING 4-1. Four thread overlock stitch with 2 needles Before sewing Once you have fi nished threading, place the four threads under and behind the presser foot. Turn the handwheel toward you 2-3 turns so that the stitches are formed on the stitch fi nger. Warning: Keep fi... - Page 30 Chain off When you reach the end of fabric, chain off for several inches. Note: Do not pull the threads out roughly, be- cause the needle might bend or break. • Cut off the thread chain using the thread cut- ter on the left of the machine.
-
Page 31: Cording Thread / Decorative Thread
Cording thread / Decorative thread Cording thread / decorative thread can be used to strengthen and stabilize stitches when seam- ing stretch fabrics and for decorative effects. Listed below are two ways of using corded thread: • Thread cord through the loop at the extreme left of the telescopic stand and through the guide on the left of the machine. -
Page 32: Serging Curves
Serging curves For inside curves, guide the fabric lightly and place the fabric under the right front of the presser foot. Applying pressure to the fabric with your left hand at the same time, apply a little pressure in the opposite direction with your right hand to hold it against the cutter as shown. -
Page 33: Three Thread Overlock
4-2. Three thread overlock To sew three thread overlock, simply remove Left needle one needle. 1. Remove the right needle for wide three thread ➀ Use dial for the tension of the left needle thread, stitch width / cutting width is normally 5.5 mm. - Page 34 3-thread stitch Correct tension The needle thread lies fl at and straight, to the left, and locks with the upper looper thread on Wrong side the top and the lower looper thread on the bot- tom side of the fabric. Right side Unbalanced lower looper thread is wrapped around and over the top side...
-
Page 35: Two Thread Overlock
4-3. Two thread overlock 1. Open the front cover. 2. Use one needle thread (left or right needle) 2-thread converter and lower looper thread. 3. Turn the handwheel toward you to move the upper looper to the right side of the needle. 4. -
Page 36: Stitch Selection Table Two-Thread Sewing
4-4. Stitch selection table two-thread sewing Thread Material Left Right Upper Lower Stitch Cutting Stitch Tension Needle Needle Looper Looper Length Width Finger Stitches Tension Tension Tension Tension Dial Light 2-thread Medium Overlock (Narrow) Heavy Light 2-thread Overlock Medium (Wide) Heavy Light 2-thread... -
Page 37: Rolled Edge
4-5. Rolled edge Three thread rolled edge 3-thread narrow edge 3-thread narrow edge The fabric is overlocked with upper and The fabric is rolled by adjusting. The thread tension and is overlocked with lower looper thread. upper looper thread. The two edges described above are suitable for light weight fabrics. 1. -
Page 38: Tables For 2/3 Thread Rolled Edge
Table for three thread rolled edge and narrow edge Narrow edge Rolled edge Cutting width Stitch length Differential feed ratio Thread tension Right needle thread (2) Upper looper thread (3) Lower looper thread (4) Adjust thread tension according to type of fabric and thread. Two thread rolled edge 1. -
Page 39: Flatlock
4-6. Flatlock There are two ways to sew a fl atlock stitch, with wrong sides folded together to create a decora- tive look and with right sides folded together to create ladder stitch as used for lingerie. 1. Fold the material with wrong sides together. Right side of fabric Then raise the presser foot, set the material so that it is under the needle, and then lower... -
Page 40: Pin Tuck
4-7. Pin tuck Pin tucks are stitched along a folded edge. To avoid cutting the fabric, use the multipurpose foot. Pin tucks are suitable for children’s clothes and lady’s blouses. 1. Use the left needle for wide tucks, the right needle for narrow. -
Page 41: Five Thread Overlock Stitch And Double Chain Stitch
4-8. Five thread over lock stitch and Double chain stitch Double chain stitch looper threading (E) 1. Raise the presser foot. 2. Open front cover. ➀ 3. Pull thread from spool through guide of the ➁ thread stand and then through guide Note: Make sure the thread snaps into the slot ➁... - Page 42 5-thread overlock Double chain stitch —38—...
- Page 43 Note: Insert SCHMETZ needle(s) into the Five thread overlock Double chain stitch needle clamp in the position(s) advised by the Sewing Advisor. # 80 Five thread overlock (oneword) Needle position A · · · #90 Needle position C · · · #80 Double chain stitch Needle position A ·...
-
Page 44: Cover Stitch
4-9. Cover stitch Set up for Cover stitch and Chainstitch When sewing cover stitches or double chain stitches, change the following parts: 1. Cutter cover ( C ) 2. Needle plate ( C ) 3. Needle (SCHMETZ #90) 4. Presser foot ( C ) Change the parts in the following order. - Page 45 4. Remove the rear needle(s) from the needle clamp. 5. Set the stitch fi nger lever to “R”. (See Page 8) and remove the presser foot ( S ). 6. Remove the standard needle plate ( S ). (Re- move one screw.) Screw 7.
- Page 46 To change from Cover or Double chain stitch sewing to standard sewing, reverse the order of set up for Cover stitches. However, always remove the needle plate ( C ) before moving the lever from “C” to “S”. The order is given below: To ensure safety, turn off the power switch.
- Page 47 7. Remove the needle plate ( C ). 8. Put on the standard needle plate ( S ). 9. Raise the cutter. 10. Replace the needles according to desired stitch. 11. Snap on the standard presser foot ( S ). 12.
- Page 48 Cover stitch looper threading (B) 1. Raise the presser foot. 2. Open front cover. ➀ 3. Pull thread from spool through guide of the ➁ thread stand and then through guide Note: Make sure the thread snaps into the slot ➁...
- Page 49 Cover stitch wide Cover stitch narrow —45—...
- Page 50 Triple cover stitch —46—...
- Page 51 Triple coverstitch Correct tension The picture shows the correct tension of 3 needle threads and chainstitch looper thread. When needle thread is too loose ➀ ➁ ➂ Increase thread tension dial ), or decrease the chainstitch looper thread tension ④ dial When chainstitch looper thread is too loose Increase the chainstitch looper thread tension...
-
Page 52: Cover Stitch
Cover stitch wide and Cover stitch narrow. The picture shows the correct tension of both Needle threads and the chainstitch looper thread. Wrong side Right side The right needle thread is too loose Increase the thread tension of the right needle ➂... -
Page 53: Maintenance
5. MAINTENANCE 5-1. Changing the light bulb Warning: Let the light bulb cool down before replacing it to avoid burning your fi ngers. Note: The maximum power of the light bulb is 12V, 5W. Unplug the machine. 1. Lay machine on its back. 2. -
Page 54: Cleaning After Sewing
5-2. Cleaning after sewing Unplug the machine. 1. Open the front cover (page 3) and free arm cover (page 8). 2. Remove all the lint with the brush from the accessory box. 5-3. Storage 1. When the machine is not in use, disconnect it from the power supply. -
Page 55: Stitch Table
—51—... - Page 56 —52—...
- Page 57 —53—...
- Page 58 —54—...
-
Page 59: Table Of Sewing Materials, Needles And Threads
7. TABLE OF SEWING MATERIALS, NEEDLES AND THREADS Thin materials Medium materials Thick materials (chino, gabardine, etc.) (thick denim) (crepe, georgette) HA*1 Needle (SCHMETZ 130/705H) #80 ~ #90 (For home-use sewing machine) Polyester (spun fi lament) Twisted thread Twisted thread Twisted thread Thread #60/2~#100/3... -
Page 60: Trouble Shooting
8. TROUBLE SHOOTING Under normal conditions, if you carefully follow instruction for operating, no diffi cult or special ad- justment is necessary for this machine. Following cases are not failure of machine. Check your machine before you call service. REFERENCE PROBLEM CAUSE CORRECTION... -
Page 61: Specifications
9. SPECIFICATIONS Number of threads 5 Threads (4.3.2 Threads) Number of needles 3 Needles (2 Needles, 1 Needle) Needles Standard SCHMETZ 130/705H No.80-90 2 mm (6 mm : Triple and Wide cover stitch) Width between two needles (3 mm : Narrow cover stitch) Overlock width Standard 5.5 mm (Range 5.0-7.0 mm) Stitch length... -
Page 62: Optional Accessories
10. OPTIONAL ACCESSORIES 10-1. Presser feet-optional accessories Accessory feet and waste tray available. See your local dealer for these accessories. Pearl foot (Option) (Part number : 2141002-501) (Part number, for USA only : 141 000598) Pearl guide 1. Change stitch width to 7. 2. - Page 63 Elastic foot (Option) (Part number : 2141002-407) (Part number, for USA only : 141 000595) This foot guides your elastic and stretches the elastic with the tension control screw on the foot while sewing. 1. Replace regular foot with elastic foot. 2.
- Page 64 Piping Foot (Option) (Part number : 2141002-408 [Large] 2141012-408 [Small]) (Part number, for USA only : 5.5mm-141 000596 3.0mm-141 000597) Your Huskylock has two optional piping feet. One for standard size piping and wider grooved foot for large decorator piping. The sewing technique for both is the same.
- Page 65 Clear Foot (Option) (Part number : 2154002-701) (Part number, for USA only : 411 000098) Clear foot is optionally designed for cover stitch. It can be used like presser foot (C). (Page 40) As it is transparent the stitches under foot are easily visible.
- Page 66 Cording and Piping (Cording) (Option) Stitch selection (Included in optional Huskylock 936 Cover Stitch Kit, Part number: 412 6716-01) Cording 1. Press the stitch selection button until “Auto N” “Cover stitch narrow” appears. (Illus. A) 2. Press the fabric selection button until appro- priate fabric type appears.
- Page 67 Stitch selection Cording and Piping (Piping) (Option) (Included in optional Huskylock 936 Cover Stitch Kit, Part number: 412 6716-01) Piping 1. Press the stitch selection button until “Auto L” “Chainstitch” appears. (Illus. A) 2. Press the fabric selection button until appro- priate fabric type appears.
- Page 68 Bias Tape Binding Foot (Option) Stitch selection (Included in optional Huskylock 936 Cover Stitch Kit, Part number: 412 6716-01) Bias Tape Folder Foot 1. Press the stitch selection button until “Auto M” “Cover stitch wide” appears. (Illus. A) 2. Press the fabric selection button until appro- priate fabric type appears.
- Page 69 Stitch selection Hemming Foot (Option) (Included in optional Huskylock 936 Cover Stitch Kit, Part number: 412 6716-01) Hemming Foot 1. Press the stitch selection button until “Auto M” “Cover stitch wide” appears. (Illus. A) 2. Press the fabric selection button until appro- priate fabric type appears.
- Page 70 Bias Tape Binding Foot (Option) Stitch selection (Included in optional Huskylock 936 Cover Stitch Kit, Part number: 412 6716-01) Bias Tape Binding Foot 1. Press the stitch selection button until “Auto M” “Cover stitch wide” appears. (Illus. A) 2. Press the fabric selection button until appro- priate fabric type appears.
-
Page 71: Waste Tray
10-2. Waste tray 1. Place waste tray at the edge of table so the net bag hangs tray as shown. 2. Set Huskylock onto waste tray as shown, so trim falls into net bag. Be careful not to extend machine off edge of table. Table Waste tray —67—... -
Page 72: Note
11. NOTE Memory No. Date Note —68—... - Page 73 Date Note Memory No. —69—...
- Page 74 Date Note Memory No. —70—...
- Page 75 Memory No. Date Note —71—...
-
Page 76: Index
12. INDEX Accessories 2 Oiling Optional ....58~66 Optional Accessories ......58~66 Accessory Box ........4 Pearl Foot (Optional) ......58 Automatic Mode ........9~12 Pin Tucks Bias Tape Feet (Optional) ....64, 66 Piping Feet (Optional) ......60, 62~63 Chaining off 26 Power Switch ........ -
Page 77: Intellectual Property
Intellectual property HUSQVARNA, VIKING, the "Crowned H-mark", KEEPING THE WORLD SEWING & Design, HUSKYLOCK and SEWING ADVISOR are registered trademarks or trademarks of VSM Group AB or its licensor. - Page 78 VSM Group AB • SE-561 84 Huskvarna, Sweden www.husqvarnaviking.com...
Need help?
Do you have a question about the Huskylock 936 and is the answer not in the manual?
Questions and answers
I cannot get the right needle to stay in even though I tightened the screw as much as possible.
To fix the right needle not staying in the Husqvarna Viking Huskylock 936, follow these steps:
1. Turn off the machine – Switch off the main power for safety.
2. Raise the needle bar – Turn the handwheel until the needle bar is at its highest position.
3. Insert the needle correctly – Ensure the flat side of the needle faces away from you and push it into the needle hole as far as it will go.
4. Tighten the needle set screw – Use an Allen wrench to securely tighten the needle set screw.
5. Loosen the adjacent needle screw if needed – If the needle does not go all the way up, slightly loosen the screw of the adjacent needle.
6. Check for a bent or blunt needle – Replace the needle if it is damaged.
Following these steps should help secure the right needle properly.
This answer is automatically generated