
Related Manuals for Sanyo W64SA


Summary of Contents for Sanyo W64SA
- Page 1 Basic Manual Contents/ Before Use Phone Call Inputting Text Address Book/ Pair Function Mail Camera EZweb EZ Navi Remote Ctrl Lock W64SA by SANYO Other Features/ Troubleshooting Index...
- Page 2 Preface Thank you for choosing W64SA. Before using your W64SA, be sure to read the W64SA "Basic Manual (PDF manual)" to ensure proper use of W64SA. This PDF manual and printed manuals (Japanese) should be retained for future reference. Contact the au shop or the au Customer Service Center for replacements if you lose either of Japanese manuals.
-
Page 3: Manners For Using Cellphones
Manners for Using Cellphones Cellphones always generate weak electric waves while its power ■ is ON. Please be considerate of others and use the cellphone properly. ■ In some places, the use of Consider where to use your ● ● cellphone and be careful of cellphones is prohibited. -
Page 4: Basic Of Cellphone
Basic of Cellphone What You Can Do with W64SA Mail EZweb ® You can send mails to other You can download Chaku-Uta ® cellphones or personal computers. Chaku-Uta-Full , and wallpapers, etc. Page 55 → Page 40 → EZ Navi... -
Page 5: Manner Mode And Answer Memo
Manner Mode and Answer Memo Manner Mode Answer Memo ■ ■ With Manner Mode, you can The caller can leave a mute the ringer so as not to message when you cannot bother the people around you. answer the phone. Press for more than one second Press... -
Page 6: Use Of Your W64Sa While Driving Is Prohibited By Law
Use of Your W64SA While Driving is Prohibited By Law Do not use your cellphone while driving a motor vehicle, ■ motorcycle or motorbike, or when riding a bicycle, as it can result in an accident. The use of a cellphone when... -
Page 7: Beware Of Junk Mails And One-Ring Calls
Page 24 → Making Key Operation Invalid Making Key Operation Invalid ■ Prevent unintended operation while carrying W64SA closed in the bag. Press for more than one second while the standby screen is displayed. Release the lock Open your W64SA and press for more than one second while the standby screen is displayed. -
Page 8: Disaster Message Board Service
Disaster Message Board Service In the event of a large-scale disaster, you can register your safety information through EZweb. The registered safety information can be referred to from anywhere in Japan through EZweb or Internet. In the event of a large-scale disaster, you can register ◆... -
Page 9: Table Of Contents
Manner Mode and Answer Memo ............ 3 Cellphone Check the Power, Reception and Battery! ........3 Use of Your W64SA While Driving is Prohibited By Law ....4 Beware of Junk Mails and One-ring Calls! ........5 Making Key Operation Invalid ............5 Disaster Message Board Service ............. - Page 10 What You Can Do with EZ Navi ............. 62 EZ Navi Initializing au Media Tuner ............. 65 Watching TV (1Seg) ............... 66 Ending TV (1Seg)................67 In Case You Lose Your W64SA ............. 68 Remote Ctrl Lock Other Features Troubleshooting Index...
-
Page 11: Before Use
Before Use Confirming the Package Contents The W64SA phone and accessories are included in the package. W64SA Phone Battery Pack Desktop Holder Stereo Earphones KYOCERA Round-type USB Cable (Sample) Earphone Jack Conversion (Sample) Adapter 01 MDR- E0921 by Sony Basic Manual (Japanese) -
Page 12: Name Of Parts
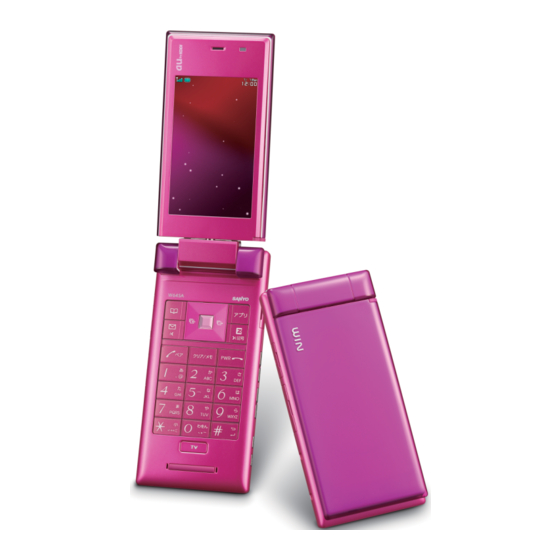
Name of Parts The illustration used in this Manual are from the W64SA Pink ( Bottle model and may differ from the actual phone you have ) purchased. Incoming Illuminator Earpiece Optical Sensor Display Illuminator2 Illuminator1 Infrared Port Built-in Antenna... -
Page 13: Charging The Battery Pack
Charging the Battery Pack The battery pack is not fully charged at the time of purchase. Charge the battery pack before using your W64SA for the first time. How to Charge the Battery Pack ■ Connect the Common AC Adapter 01 02 to Desktop /... -
Page 14: Setting To Front Style Or Recording Oneself Style
Setting to Front Style or Recording Oneself Style W64SA allows you to use in Front Style or Recording Oneself Style other than usual open style. Open the display to an Rotate the display 180 degrees clockwise. angle of about 120 degrees. -
Page 15: Turning The Power On/Off
Turning the Power ON/OFF Press for more than one second. <Standby Screen> Check the radio wave reception. Out of Very Strong Medium Weak service weak area Check the battery level. High Medium Zero Charging When " " appears, you cannot make or receive calls. When "... -
Page 16: Basic Usage
asic Usage Items in the Underpart of the Display and the ■ Operation Use the assigned key to operate the item indicated in the underpart of the display. The displayed items may differ depending on the screen. For the case illustrated on the MailHis... - Page 17 How to Use the Keys ■ Center Key Cursor Key Access Main Menu/Define Move cursor the item u: Display information on standby screen or increase Press and hold: Enable or volume disable key operation during l: Access Incoming History the phone closed d:...
-
Page 18: Using The Main Menu
Difference in the Display Based on Phone Color ■ The W64SA's display design and items shown in the main menu at the time of purchase differ depending on the color of your phone. Information This manual uses the display from the "Pink Bottle"... - Page 19 LISMO Player PC Site Viewer You can do some You can play back You can use your ® shopping using EZ Chaku-Uta-Full W64SA to view FeliCa(e-money) music and tunes websites made for function. accessed via viewing on PCs. LISMO Port.
-
Page 20: Icons
Icons Display < > Description Description ™ microSD Memory Card inserted Unread mail exists During a call Key operation invalid Running au Media Tuner Manner Mode ON ® Running EZ apps (BREW Answer Memo ON Using EZweb Initializing E-mail and EZweb Settings Application to the EZweb service is required in advance to use the E-mail and EZweb services. -
Page 21: Confirming Your Phone Number And E-Mail Address
Press (OK). ただいま初期設定を行ってい ます。 しばらくお待ちください。 (30秒∼3分程度かかります) Wait for a while until the screen on the right Welcome to EZweb. Your e−mail address is: appears. △△△△△△△△△△△△△△△@ezweb.n e.jp −Hint− If you want to change your e−mail address, push OK and enter a new e−mail address at e−mail menu −> e−mail setting −> others. Press (OK). Information Initialization can also be performed by pressing while the •... -
Page 22: Changing Your E-Mail Address
Changing Your E-mail Address E-mail Address Example: △△△ @ezweb.ne.jp Customizable Part Domain Press while the standby screen is displayed. to select "E-mail Setup" and press (Select). to select "Other" and その他の設定 1 Eメールアト゛レスの変更 2 メールフィルター press (Select). 3 au one メールへ自動保存 (通信料有料) 4 自動転送先 5 Eメールヘッタ゛情報表示(通 信料有料) 6 その他の設定の確認... - Page 23 Enter your Security Code Eメールアト゛レスを変更します。 以下のご注意を確認した 上でアト゛レスの変更を行って and press (OK). Use ください。 ※入力前の注意※ to select " (Send)" and 送信 1.Eメールアト゛レス変更直後はし ばらくの間メールが受信でき press (Select). ないことがあります。 2.わかりやすいアト゛レス(名 Security Code is a 4-digit number you have filled in the application form at the time of purchase. If you enter a wrong Security Code 3 times in a row within the same day, you will not be allowed to perform setup operations until the following day.
-
Page 24: Phone Call
Phone Call Making a Call Use the keys to enter the receiver's phone number, then press To make a call to a regular telephone, enter the phone number starting with the area code. How to make a call: Adding "184" before the phone Your phone number is not displayed on number the receiver's display. -
Page 25: Answering A Call
001 KOKUSAI MOBILE TALK ■ Application required. For inquiries, contact KDDI Customer Service Center at 0077-7160 (Toll-free; open 9:00 to 20:00 every day including weekends and national holidays). 123-XXXX ー ー ー ー KDDI Country code Area code Phone number International (USA) access code... -
Page 26: Calling Back (Outgoing History/Incoming History)
Icon as Countermeasure for One-ring Calls ■ On the W64SA, One-ring Calls (the ring time is 3 seconds or less) are displayed as in Incoming History. Be careful when you call back to an unfamiliar number. -
Page 27: Adjusting The Other Party's Voice Volume
Adjusting the Other Party's Voice Volume to adjust volume during a call. Press to increase the volume. Press to decrease the volume. The voice volume can be adjusted to any one of 5 levels or "LOUD". Setting Answer Memo Press for more than one second while the standby screen is displayed. -
Page 28: Playing Back Messages On Answer Memo
Playing Back Messages on Answer Memo When a message is recorded on Answer Memo: (Answer Memo) and the number of messages appears. to select " " and press (Select). Icons : Unchecked Answer Memo message : Protected Answer Memo message to select the recorded message to play back and press... -
Page 29: Changing Ringer Type And Volume
Changing Ringer Type and Volume Press while the standby screen is displayed. to select "Function" and press (Select). to select "Sound/Vib/Lamp" and press (Select). to select "Incoming Setup" and press (Select). to select "Incoming Call" and press (Select). to select " "... - Page 30 to select a melody and press (Set). to select " " and press (Select). to adjust the volume and press (Set). Press to increase the volume. Press to decrease the volume. The ringer volume can be adjusted in 5 levels. Set the volume to "OFF"...
-
Page 31: Setting Manner Mode
Setting Manner Mode The vibrator of the W64SA notifies you of the incoming call. Press for more than one second while the standby screen is displayed. " " and " " appear on the standby screen. Answer Memo is turned ON at the same time and "... -
Page 32: Inputting Text
Inputting Text Switching Input Mode On the character input screen, press (Char. Type) to 漢字 display the input mode selection screen. to select an input mode and press (OK). Entering Single-byte Alphanumeric Characters You can use the key to enter characters. The characters shown in the following table appear each time the indicated key is pressed. -
Page 33: Entering E-Mail Address
Consecutively Entering Characters Assigned ■ to the Same Key After entering the first character, press and the next key. Example Entering "ab" : Press once. Press Press twice. Erasing Characters ■ Press to erase a character. Press for more than one second to erase all characters after the cursor ( ). -
Page 34: Entering Pictograph
to select ".ne.jp" and press (Select). Entering Pictograph Press (Char. Type) on the character input screen. to select " " and press (OK). Press (Category) or to switch between the pictograph lists by category. to select a pictograph to enter and press (Select). -
Page 35: Address Book
Address Book Registering Data in Address Book You can register data up to 1000 in the address book. Press for more than one second while the standby screen is displayed. to select " " (Name) and press (Select). Enter a name and press (OK). - Page 36 Enter a phone number and press (OK). to select a type of phone number and press (Select). Enter the area code when registering a regular telephone number. When you do not enter an E-mail address, go to step 8. to select " "...
-
Page 37: Making A Call From Address Book
Making a Call from Address Book Press while the standby screen is displayed. to select the person to call. Press (Detail) to display the detail screen where you can confirm registered contents such as phone numbers and E-mail addresses. Press A call is made to the selected phone number. -
Page 38: Editing Address Book Data
Editing Address Book Data Example: To change a phone number Press while the standby screen is displayed, and use to select the data to edit. Press (Detail) and (Edit). to select " " (Phone No.), and press (Select). Edit data and press (OK). -
Page 39: Registering Data From Outgoing/Incoming History
Registering Data from Outgoing/Incoming History Press while the standby screen is displayed. The Outgoing History screen appears. Press to display the Incoming History screen while the standby screen is displayed. to select the phone number to register and press (SubMenu). to select "Reg to Adrs Book"... -
Page 40: Pair Function
Pair Function You can register frequent contacts (up to 5 entries) as Pair Partners to make phone calls or to send mails. Registering Data as Pair Partner Press while the standby screen is displayed. to select a tab of the number to register. -
Page 41: Making A Call To The Pair Partner
Making a Call to the Pair Partner Press while the standby screen is displayed. to select the person to call. to select "Call" and press (Select). Sending a Mail to the Pair Partner ■ to select "E-mail" or "C-mail" in step 2 and press (Select). -
Page 42: E-Mail
Mail E-mail EZweb subscription required Application to the EZweb service is required to use E-mail. Contact au shops or the au Customer Service Center if you did not apply to the service at the time of purchase. Perform the EZweb initialization before using this service. If you have not performed initialization yet, see page E-mail is a service for sending/receiving mails to/from E-mail compatible cellphones and personal computers via Internet E-mail addresses. -
Page 43: Creating And Sending E-Mail
Creating and Sending E-mail Press while the standby screen is displayed. to select "Create New" and press (Select). to select " " (Address) and press (Select). to select "Quote Adrs Book" and press (OK). You can also select the address from "Quote History", or enter the address directly from "Address Input". - Page 44 to select a desired E-mail address and press (Select). to select " " (Subject) and press (Select). Enter the subject and press (OK). to select " " (Text) and press (Select). Enter the text and press (OK). Press (Send). After your E-mail is sent, the screen shown on the right appears.
-
Page 45: Reading Received E-Mail
Reading Received E-mail When you receive an E-mail: (E-mail) and the number of messages appears. to select " " and press (Select). to select the folder in which the new E-mail is stored and press (Select). Icons Unread mail : Read mail :... - Page 46 Viewing Received Photos ■ Perform steps 1 to 3 on page 43 to display Attached the received E-mail. data to select " " and press (Select). The Attachment List is displayed. to select the attached data and press (Receive). Press (Play).
-
Page 47: Replying To Received E-Mail
Replying to Received E-mail Perform steps 1 to 3 on page 43 to display the received mail. Press (Reply). "Re:" is attached to the beginning of the subject and the text of the original E-mail is quoted. For the subsequent procedure, see steps 7 and later in "Creating and Sending E-mail"... -
Page 48: Blocking Junk Mails
Blocking Junk Mails To block junk mails, it is recommended to set (Mail Filter). メールフィルター By selecting " (supportive settings)", you can set サポート設定 メールフィ (Mail Filter) easily by answering the Inquiry on the screen. ルター Setting (Mail Filter) ■ メールフィルター... -
Page 49: C-Mail
C-mail C-mail is a service that uses phone number to exchange mails with other au mobile phones that support C-mail. You can send and receive up to 50 two-byte (or 100 one-byte) characters via an C-mail. Phone numbers are used for sending/receiving C-mail. - Page 50 to select " " (Address) and press (Edit). to select "Quote Adrs Book" and press (OK). You can also select the phone number from "Quote History", or enter the phone number directly from "Phone No. Input". to search the address book and press (Detail).
-
Page 51: Reading Received C-Mail
Reading Received C-mail When you receive C-mail: (C-mail) and the number of messages appears. to select " " and press (Select). to select the folder in which the new C-mail is stored and press (Select). Icons Unread mail : Read mail :... -
Page 52: What You Can Do With Camera
Camera What You Can Do with Camera The W64SA has a built-in CMOS camera function with 1.99-megapixel camera that allows you to shoot photos or movies. The camera has built- in auto focus function. The auto focus function works when you press the shutter key. - Page 53 Open your feet to the breadth of your shoulders and maintain your back and sides firm. To Prevent Jiggling Hold W64SA firmly with both hands. Do not move your W64SA after • pressing the shutter key until you hear the shutter sound and the preview screen appears.
-
Page 54: Shooting Photo
Shooting Photo Press while the standby screen is displayed. to select "Camera" and press (Select). to select "Photo (W.paper Mode)" and press (Select). The view seen through the lens appears. The view seen through the lens also appears by pressing for more than one second while the standby screen is displayed. -
Page 55: Viewing Photos
Title of Photo You Shot ■ Photo Size Title of a photo Where to save year + month + day_hour W.paper (Normal)/W.paper "Photo Folder" of W64SA (Wide)/Wallpaper (HD) + minute serial number "DSC Folder" in microSD™ 0.3M/1M/2M SA3E + serial number... -
Page 56: Attaching Photo To E-Mail Message
to select an image and press (Select). Attaching Photo to E-mail Message Press (E-mail) on the preview screen( P52). to select "E-mail" and press (OK). The Create Mail screen appears with the image attached. For the subsequent procedure, see steps 2 to 8 of "Creating and Sending E-mail"... -
Page 57: Ezweb
EZweb subscription required EZweb Application to the EZweb service is required to use the service. Contact au shops or the au Customer Service Center if you did not apply to the service at the time of purchase. Perform the EZweb initialization before using this service. If you have not performed initialization yet, see page EZweb EZweb is a service that provides you with information to enjoy the... -
Page 58: Displaying Au One Top
Displaying au one Top Press while the standby screen is displayed. Use to select "au one Top" and press (Select). It may take some time to display the top menu. キーワード検索機能 (Keyword search function) Provides a search engine for information available by the keyword entry. (Mail) メール... -
Page 59: Bookmarking Frequently-Accessed Site
Information The layout and contents of the screens in this manual are examples and are subject to change. • Bookmarking Frequently-Accessed Site Display the site to bookmark and press (Browser Menu). to select "New bookmark" and press (OK). Press (Reg). Some sites cannot be bookmarked. -
Page 60: Accessing Bookmarked Site
Accessing Bookmarked Site Press while the standby screen is displayed. to select "Bookmark(s)" and press (Select). to select a site and press (Connect). Viewing Charge Approximate charges for your calls and transmission can be viewed on EZweb. Press while the standby 確認する... -
Page 61: Chaku-Uta-Full
® ® Downloading Chaku-Uta /Chaku-Uta-Full Perform step 1 on page 56. カテゴリ検索 Image to select " (Search カテゴリ検索 EZサービスで探す ┗auケータイならではの便利で 新サービス紹介 by category)" and press (OK). ┗「au one メール」でメールや思 音楽・着信 着うたフル・ビデオクリップ 着うた 着信メロディ・カラオケ・ボイス 着ムービー・着Flash 待ちうた ケータイコンテンツ 待受・画像・キャラクター ゲーム to select " 着うた... -
Page 62: What You Can Do With Ez News Flash/Au One Gadget
EZweb subscription required EZ News Flash/au one Gadget EZ News Flash/au one Gadget shows a permanent ticker of the latest news on the standby screen. If you select that ticker, you can view more detailed information and run a gadget that performs specific set actions. EZ News Flash/au one Gadget can be easily set after initializing the EZweb settings ( P18) for immediate use. -
Page 63: Setting Ez News Flash
Setting EZ News Flash EZ News Flash can be used after performing the basic setting procedure (free of charge). Set EZ News Flash after "Initializing E-mail and EZweb Settings" ( P18). Press while the standby screen is displayed. Select ticker and press (OK). -
Page 64: What You Can Do With Ez Navi
EZweb subscription required EZ Navi What You Can Do with EZ Navi EZ Navi offers convenient location information services (GPS). select "EZnavi". <Standby Screen> <EZ Service menu> <EZnavi Screen> "Passenger Seat Navi (EZ )" for Person on Passenger Seat 助手席ナビ "Passenger Seat Navi (EZ )"... - Page 65 Z06A-No. 2137 Directions Home or to a Shelter During a Disaster: "Evacuate Navi" The area map data that is included in your W64SA can be used to find out the directions to the nearest shelter or to your home (Evacuate Area Map)* You can also download a variety of content from the "Evacuate Navi"...
- Page 66 If the battery level changes to " " during use of TV (1Seg), a message • is displayed and TV ends automatically. The amount of time that the W64SA can be left in continuous operation is • as follows. TV (1Seg) Speaker output DBEX ON: Approx.
-
Page 67: Initializing Au Media Tuner
Initializing au Media Tuner When you first use TV (1Seg), perform the following procedure to initialize the communication and channel settings. Press (Disclaimer) screen appears. 免責事項 to confirm 免責事項 (Disclaimer). to select "OK" and press (Select)). 選択 The initial setting screen appears. Follow the on-screen instructions for each setting, and the screen to set channels appears. -
Page 68: Watching Tv (1Seg)
Watching TV (1Seg) Press Once the television operation screen appears and a data broadcast is acquired, the data for that broadcast will be displayed in the bottom of the screen. Acquisition of data broadcast (Vol/Ch) JFリーグサッカー/NANOテレビ TV Operation Data Broadcast display Operation display If you press... -
Page 69: Ending Tv (1Seg)
Switching channels ■ You can switch channels by pressing . You can also select TV (1Seg) and EZ Channel Plus/EZ Channel programs in the same way. TV (1Seg) EZ Channel Plus/EZ Channel Switch channels in order 12ch Program 1 Program 2 Program 16 ・... -
Page 70: In Case You Lose Your W64Sa
Remote Ctrl Lock In Case You Lose Your W64SA The Remote Ctrl Lock function enables you to turn on Auto Lock, FeliCa Lock and AddressBookLock through remote operation so that no one else can use your W64SA. Setting Remote Ctrl Lock Activation Conditions ■... - Page 71 * MyKDDI has been renewed as "au Customer Support" since the spring of 2008. The procedure remains the same. Information Remote Ctrl Lock cannot be activated if your W64SA is not powered on or • in an area with bad reception, or Emission OFF is set to "ON".
-
Page 72: Calorie Counter
Music data downloaded from LISMO Port or purchased at mora for LISMO can be transferred to your W64SA. You can also edit the address book or schedule in your W64SA, or keep and manage the photo or movie data in your PC, which were shot with your W64SA. - Page 73 More detailed information is available at the following locations. ・ From W64SA : Press for more than one second. (SANYO Keitai Planet, in Japanese only) From PC http://www.kyocera.co.jp (Kyocera website, in Japanese only)
- Page 74 Index ........Read ........Reply ....View Received Photos ....... Accessories ....E-mail Address ......Address Book ........Change ........Edit ........Confirm ......Make a Call ........Enter ........Register ......Evacuate Navi Register Data from Outgoing ® ...... EZ apps (BREW ....
- Page 75 ..Remote Ctrl Lock Setting Ringer ..Change Type and Volume Mail ........C-mail ........E-mail ............Mail Filter Security Code ..........Main Menu Security Lock Service ........Making an International Call Security Navi ......Making Key Operation Set Language .........
- Page 76 For inquiries, call: au Customer Service Center (General Information) From EZweb: How to access au one Top auお客さまサポート (au Customer Support) お問い合わせ (Inquiry) *Menu is subject to change without prior notice. For general information and charges From regular phones: 0077-7-111 (Toll free) From au cellphones: area code not required...