Table of Contents
Advertisement
Quick Links
Advertisement
Table of Contents
Troubleshooting

Related Manuals for Snooper syrius s600 plus


Summary of Contents for Snooper syrius s600 plus
- Page 1 Developed by Mapping by...
- Page 2 Please note that Enigma™ updates are subject to a subscription charge. Please refer to the subscription and download section of this manual for further details or visit www.snooperneo.co.uk. Drive Safely with Snooper! The Syrius Plus’s camera location technology has been designed and manufactured to help enhance road safety and is in no way a licence to speed nor has it been designed as a substitute for concentration.
-
Page 3: Table Of Contents
Contents Page Page Components 38 Show POI Features 39 Auto Scale Registering your Syrius Plus Camera Alert Quick Start Guide to Navigation 40 Display Cameras Start Up – Installing the SD Card Alert Sound System Requirements and Downloading Mute 10 Downloading the Enigma™ Camera Database Auto Mute 11 Installing your Syrius Plus 41 School... -
Page 4: Components
Components Included The following components come as standard with your Syrius Plus:- 1 x Syrius Plus Navigation system 1 x SD Card with UK & Ireland mapping or Western Europe (EuroPlus Version) 1 x Windscreen suction cup bracket 1 x 12v DC to 5v DC Coiled power lead with cigarette lighter socket adaptor 1 x USB Data Cable 1 x 240V AC to 5V DC mains power adaptor 1 x Download Software Disc (also includes electronic versions of the User Manual and Printable Registration Forms) -
Page 5: Features
Features LCD Screen Power LED Microphone Battery Status LED (for use with Bluetooth function) On/Off Button Manual Store SD Card Slot Battery Charger Socket USB Cable Socket Audio Out Socket Mic In Socket (for use with Battery ON/OFF switch Bluetooth function) Return to contents... -
Page 6: Registering Your Syrius Plus
Registering your Syrius Plus IMPORTANT! PLEASE READ BEFORE USING YOUR SYRIUS PLUS. To enable your Syrius Plus to locate Fixed Speed Cameras and Accident Black spots you will have to register and download the Enigma™ Camera Database. There are four ways to register your unit: Register Online Go to the official website www.snooperneo.co.uk and register your unit online. -
Page 7: Quick Start Guide To Navigation
Quick Start Guide to Navigation 1. Take your Syrius Plus outside so that the GPS receiver can locate your position. This may take between 15 - 50 minutes the first time. When satellite lock is achieved, the screen will display your current position on its map in a ‘3D’... - Page 8 Tip: The default route options are set to Quickest Route. To change the route options refer to section 6 in this user manual. 4. Press and the Syrius Plus will calculate the fastest route from your current position to your destination. This should only take a few seconds and a progress bar is shown on the screen.
-
Page 9: Start Up - Installing The Sd Card
Start Up – Installing the SD Card Before using your Syrius Plus, you will need to install the SD Card included with the device. The SD Card comes complete with a digital map of the UK and Ireland or Western Europe depending on the model purchased and is also where the Enigma™... -
Page 10: Downloading The Enigma™ Camera Database
Downloading the Enigma™ Camera Database Please Note: You must register your Syrius Plus before you can perform a download. Performing a download is simple. 1. Connect the AC Power adapter provided to a mains plug socket and attach the other end to the Syrius Plus in the socket marked DC 5V. -
Page 11: Installing Your Syrius Plus
Installing your Syrius The Syrius Plus comes with a windscreen bracket so that the unit can be mounted onto your vehicles windscreen. When installing your Syrius Plus please ensure that: The unit, with its built in GPS antenna has a clear view of the sky* It is located in a position where you can easily view the LCD display without having to take your eyes too far from the road ahead and that you can reach the controls safely. -
Page 12: Power Connection & Charging
Power Connection & Charging Powering and charging your Syrius Plus from the cigarette lighter socket The Syrius Plus comes with a power cable designed to plug into your vehicles cigarette lighter socket. This lead will power the device but will also charge the Syrius Plus’s internal battery. 1. -
Page 13: Charging The Internal Battery
CAUTION: THERE IS A RISK OF EXPLOSION IF THE BATTERY IS REPLACED WITH AN UNAPPROVED TYPE. USING THE WRONG TYPE OF BATTERY MAY DAMAGE YOUR UNIT AND INVALIDATE YOUR WARRANTY. ONLY SNOOPER AUTHORISED PERSONNEL SHOULD REPLACE THE BATTERY. PLEASE DISPOSE OF USED BATTERIES ACCORDING TO LOCAL WASTE MANAGEMENT RULES AND REGULATIONS. FURTHER INFORMATION CAN BE FOUND LATER IN THIS USER MANUAL. -
Page 14: Operating Instructions
Operating Instructions 1. Starting Up Once you have synchronised the SD Card and performed a download as necessary it is time to perform the first Start Up. First make sure your vehicle is parked in as open a space as possible, clear of tall trees and buildings so that the built in GPS antenna has a clear view of the sky above. -
Page 15: Brightness
To modify the information shown: Access the Menu by simply touching the Syrius Plus in the centre of the screen. Press the ‘Configure’ button. Press the icon where you will see the list of options below. Select the option you wish to change on the left. To change a setting, simply press on the tick box to indicate which option you would like to choose. -
Page 16: Planning A Route
The Syrius Plus volume can be adjusted using this function within the ‘Configure’ menu. To adjust the volume: Press the centre of the screen to access the ‘Menu’. Press ‘Configure’. Press the ‘Volume Control’ icon. To increase the volume press the icon. - Page 17 The Syrius will display a screen showing the postcode and the street name. If you know the house/property number of your destination, press the ‘House No.’ button to enter it. Once you have entered the house number press the ‘Ok’ button. Alternatively, if you do not have a house or building number, you can navigate to a point where two roads meet instead.
- Page 18 Press the ‘Calculate’ button. Once the calculation is complete you can either press ‘Go’ to start navigation, ‘Simulation’ to see the actual route that will be taken, ‘Route Option’ to change the parameters of the route or ‘Guide’ which will list the turn by turn instructions of the journey.
-
Page 19: Office
You can navigate easily and quickly from a previous journey or destination to your office or place of work, by personalising your Syrius Plus so that a route can be calculated by pressing just a few buttons. 3.4.1 Setting the ‘Office’ Destination Press the centre of the display to enter the ‘Navigate to’ menu. -
Page 20: Multi-Route
Once a route has been calculated, the ‘Recent Route’ icon is replaced with a ‘Clear Route’ icon. To cancel a route that you ha ve calculated: Press the centre of the screen to enter the ‘Navigate to’ menu. Press the ‘Clear Route’ icon. The route will then automatically be deleted. - Page 21 If you are happy with the start position, you can now begin to enter the data of your first destination. Press ‘Add’ – you are provided with several options to find your destination stage: > Find address by City > Find address by post code >...
-
Page 22: Find By Favourites
Once you have pressed ‘Go’ the Syrius Plus will now display your current map position along with a small summary screen located in the bottom left hand corner. The following information is displayed on the summary screen: Stage 1/4 - indicates this is the first destination of the journey Distance to first destination Estimated time of arrival to first destination. -
Page 23: Recent Destinations
The Syrius Plus is capable of storing the last 32 routes that have been calculated, so that if you wish to return to an address you do not have to re-input the details again. To calculate a route using the ‘Recent Destination’ function: Press the centre of the screen to enter the ‘Navigate to’... - Page 24 Press ‘Category’ and enter the category type using the keyboard displayed. If you do not know which category to type you can press the down arrow to the right of the lower window and all the category types will be displayed in alphabetical order. Use the arrows to the right of the display to scroll up and down through the category options.
- Page 25 A list of POI’s within the specified radius and category will be displayed. Use the arrows to the right hand side of the screen to scroll up and down through the options. When you find the POI that you are looking for, select it with your finger To start the journey press ‘Calculate’...
-
Page 26: Find By Map'
Once all fields have been completed you can view the new position by pressing ‘Map’ at the bottom of the screen. Press ‘Set’ Select the maximum radius you wish the unit to search for (the default setting is 30 miles) and then press ‘OK’ Press ‘Category’... -
Page 27: Re-Route
To see a larger section of the map press the button to zoom out. If you would like to see the map in more detail, use the button to zoom in. By pressing and moving your finger on the screen you can move the map around until you find your desired location. When you can see the required destination, simply press on the road of the map you would like to navigate to and the road name selected will be displayed at the bottom of the screen. - Page 28 Once you have found the road that you wish to avoid, select it with your finger. Once the calculation is complete you can either press ‘Go’ to start navigation, ‘Simulation’ to see the actual route that will be taken, ‘Route Option’ to change the parameters of the route or ‘Guide’ which will list the turn by turn instructions of the journey.
-
Page 29: Route Description
3.13 After a route has been calculated and the journey has commenced, you can access the summary display again by using this function. To view the summary screen: Press the centre of the screen to enter the ‘Navigate to’ menu. Press the black arrow once. - Page 30 4.1.1 Add a favourite destination Press the centre of the screen to access the ‘Navigate to’ menu. Press ‘My Favourite’ at the top of the display. Press the ‘Favourites’ icon. Press ‘Add’. You can now search for the destination using the following options displayed: Find address by City Find address by post code...
-
Page 31: User Points
This function can be used to delete any or all of the recent destinations that are stored on the Syrius Plus. The Syrius Plus can store up to a maximum of 40 recent destinations. 4.2.1 To delete individually stored recent destinations Press the centre of the screen to access the ‘Navigate to’... -
Page 32: User Points
4.3.1 Editing user points Once a user point has been stored onto the Syrius Plus the location requires editing so that the correct alert will be given when you approach the user stored coordinate. To edit the user point: Press the centre of the display to enter the ‘Navigate to’ menu. Press ‘My Favourite’... - Page 33 4.3.3 Delete individually stored user points Press the centre of the display to enter the ‘Navigate to’ menu. Press ‘My Favourite’ at the top of the display. Press the ‘User Point’ icon Select the user point you wish to delete. You can scroll through the list of user points by using the up, down arrows located on the right hand side of the display.
-
Page 34: Office
Once you have entered your ‘Home’ location details you also have the facility to name your destination. Press ‘Name’ and a keyboard will be displayed with the road name of the destination you selected. Press the ‘Arrow’ key to erase this data then input the new name using the keyboard. Press ‘Save’... -
Page 35: Configure Menu
4.5.2 To delete the office location Press the centre of the screen to access the ‘Navigate to’ menu. Press ‘My Favourite’ at the top of the display. Press the ‘Office’ icon. Press the ‘Delete’ button – an information box will be displayed with ‘Delete home?’ and the options of ‘OK’ and ‘Cancel’. Press the ‘OK’... -
Page 36: Brightness
The Syrius Plus enables you to adjust the brightness of the display and save two brightness settings: one for driving during the day and one for driving at night. To adjust the brightness setting: Press the centre of the display to enter the ‘Navigate to’ menu. Press the ‘Configure’... - Page 37 Your Syrius Plus comes with a choice of voice prompts and alerts in several languages. Changing the language also changes the language of the menu items as well on the unit. To use this facility: Press the centre of the screen to enter the ‘Navigate to’ menu. Press ‘Configure’.
-
Page 38: Show Poi
5.4.2 This option allows you to change the information displayed in the bottom left hand side of the navigation screen between the vehicle speed and the current time. You can also specify if you want to display a twelve or twenty-four hour clock and whether to display ‘am’... -
Page 39: Auto Scale
The screen will now show a list of POI’s stored on your unit with a ‘tick’ box to the left of each type of POI. Simply press the tick box to select or deselect the POI. A red tick in the box indicates that the POI will appear on your map, an un-ticked box will remove the POI from the map view. - Page 40 This function allows you to personalise the camera alert settings that you will receive during operation. To alter the camera alert settings: Press the centre of the screen to enter the ‘Navigate to’ menu. Press the ‘Configure’ button. Press the ‘Camera alert’ icon. A list of options is displayed on the left hand side of the screen.
-
Page 41: Auto Mute
Auto Mute Yes: The unit will provide an audible alert at your set audible level but will then reduce this alert to a lower level after a few seconds when you are approaching a safety camera. No: Syrius will continue to emit a tone at a constant audio level until the camera has been passed. To make your selection, touch the relevant tick box with your finger. - Page 42 5.8.1 You can choose between the following options: Yes: The unit emits a confirmation tone each time the screen is touched. No: This will turn off the confirmation beep when the screen is touched. To make your selection, touch the relevant tick box with your finger. 5.8.2 If you deviate from the calculated route, the Syrius Plus will automatically recalculate a route without any user intervention.
- Page 43 5.10 This function allows you to choose between the alternative colour schemes that are available for the maps used in your Syrius Plus system (several of which are most suitable for use at night). To access this facility: Press the centre of the screen to enter the ‘Navigate to’ menu. Press the ‘Configure’...
-
Page 44: Bluetooth
5.12 The Syrius Plus comes with the facility to wirelessly connect to other Bluetooth enabled devices such as mobile phones. 5.12.1 Activating Bluetooth on the Syrius Plus Press the centre of the display to enter the ‘Navigate to’ menu. Press ‘Configure’. Press the black arrow once. -
Page 45: Route Option
5.13 This option allows you to view the hardware and software version numbers of your unit. To view this information: Press the centre of the screen to enter the ‘Navigate to’ menu. Press the ‘Configure’ button. Press the black arrow once. -
Page 46: Avoid Motorway
6.1.3 If you want to calculate a route avoiding any type of Toll Roads, select this feature before calculating your route. Press again to deselect. 6.1.4 If you would like to take a more leisurely journey with the chance of a more pi cturesque view then select the ‘Avoid Motorway’... - Page 47 6.2.2 If you wish to avoid several roads from the selected route calculated by the Syrius Plus, then this function allows you to re-calculate a route over a user defined distance, ranging from 1 mile up to a maximum of 100 miles. To use this function: Press the ‘Avoid by range’...
-
Page 48: Summary Screen
If you would like to calculate a route to a destination but want to go via a specific location along the way you can use this function. Simply input the details of your final destination as usual but press the ‘Route Option’ button in the summary screen and then select the ‘Navigate Via Location’... -
Page 49: Quick Access Menu
6.5.1 Press the ‘Simulation’ button and your Syrius Plus will take you through the calculated journey step by step with full on screen and voice instructions. Please Note: If at any time you wish to cancel the simulation press the return arrow located in the bottom right hand corner of the display. -
Page 50: Scroll Map
Scroll Map By pressing this icon you can manipulate the map by touching and moving your finger on the screen. Day or Night Settings Bright colours are normally used for the mapping display so that you can see the map more clearly, even in bright sunlight. -
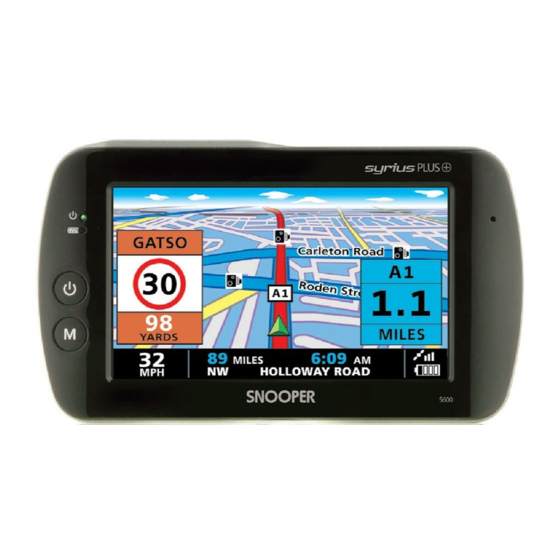
Page 51: Understanding The Mapping Screen
8.0 Understanding the Mapping Screen The red line indicates Distance to next junction or the route you will be instruction taking Whilst navigating a calculated route the Syrius Plus display will Next motorway exit or show an orange information box. road you are due to This box will tell you the next travel on... -
Page 52: Speed Camera Alert Patterns
9.0 Speed Camera Alert Patterns To enable your Syrius to alert you to Fixed Speed Cameras and Accident Black spots you will have to register and download the Enigma™ Camera Database. 9.1 Fixed Speed Safety Cameras As you approach a fixed speed safety camera the unit will begin to provide both a voice alert stating the type of camera you are approaching and the fixed speed limit for that camera and a visual alert displaying the same information. -
Page 53: Troubleshooting - Saving User Points
User Points are displayed on the map as Green Camera icons For the Syrius Plus to alert you to a user point correctly the user point will need to be edited with the correct information such as the user point type and speed. (the direction is saved automatically). -
Page 54: Troubleshooting Syrius Downloads
If you are still unable to perform a download after following all of this checklist then please send an email to Support@ snooper.eu stating the nature of your difficulty. To expedite your enquiry please supply as much detail as possible including your contact details, Syrius Plus serial number, PC operating system, error codes and any other relevant information. - Page 55 4. Is the USB cable supplied with the Syrius Plus connected correctly? Please make sure the USB lead has a secure connection to the PC and is fully plugged in. Ensure the smaller connector is plugged into the USB socket on the underside of the unit. Only plug the USB lead into the Syrius Plus once you see the ‘Safety Information Screen’...
- Page 56 3. ERROR MESSAGE - ‘There was a problem connecting to the Performance Products server…’ If you get an error message as described above this normally means that there is something blocking communication between the software, most typically a firewall, and the Enigma™ server. Windows XP is supplied with a built in ‘Internet Connection Firewall’.
-
Page 57: Specification
Do not drop, throw or try to bend your product. Do not paint your product. Do not attempt to disassemble of modify your product. Only Snooper authorised personnel should perform service. Do not place your product in the area above your cars airbag. - Page 58 If the plug will not fit into the outlet, have a proper outlet installed by a qualified technician. Only use Snooper approved chargers intended for use with your Syrius Plus. Other charges may not be designed to the same safety or performance standards.
-
Page 59: Accessories
ACCESSORIES & PRICE LIST The following accessories are available from your local Snooper dealer. For further details please contact our sales department on 0870 787 0700 (Option 2). Replacement ‘UK & Ireland’ SD Card £99.99 European Mapping SD Card £149.99 Remote GPS external active patch (25 x 25) antenna (5m) £34.99...
Need help?
Do you have a question about the syrius s600 plus and is the answer not in the manual?
Questions and answers