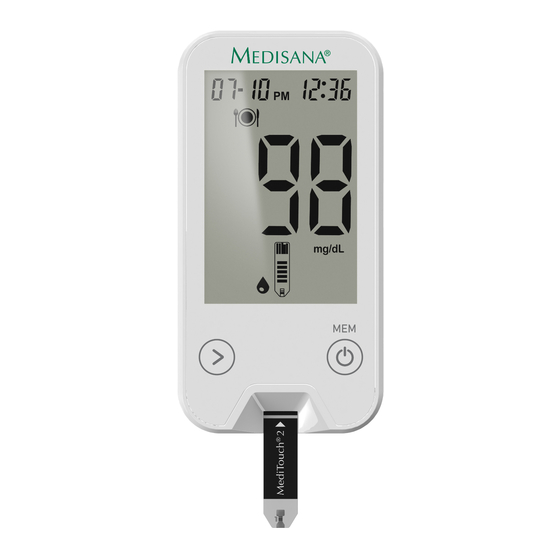
Medisana MediTouch 2 Quick Reference Manual
Blood glucose monitor for self-testing
Hide thumbs
Also See for MediTouch 2:
- Instruction manual (56 pages) ,
- Instruction manual (50 pages) ,
- Instruction manual (56 pages)
Summary of Contents for Medisana MediTouch 2
-
Page 1: Blood Glucose Monitor
Blood glucose monitor for self-testing ® MediTouch 2 Quick Reference Guide Art. 79034 EXACT 0483 MDD 93/42/EWG... - Page 2 WARNING ® Before using the MediTouch 2 blood glucose monitor from MEDISANA for the first time, read the instruction manual carefully. The quick reference guide is only intended for use once you are already completely familiar with how to use the monitor and with all its features and accessories.
-
Page 3: Table Of Contents
Contents 1 Inserting batteries ................2 Setting the time and date (initial settings) ........3 Performing a test with control solution ..........4 Inserting the lancet in the lancing device ......... 5 Performing a blood glucose test ............6 Discarding used lancets .............. -
Page 4: Inserting Batteries
1 Inserting batteries 1. Open the battery com- 3. Close the lid of the 2. Insert two batteries as partment on the back battery compartment. shown. The device will side of the device by It will "snap" into its place. emit a short beep after sliding the lid in the correct insertion. -
Page 5: Setting The Time And Date (Initial Settings)
2 Setting the time and date (initial setting) The correct setting of time and date is especially important, if you intend to use the memory function of the device. mmol/L > > 1. After insertion of the batteries 3. Repeat step 2, to enter the 4. -
Page 6: Performing A Test With Control Solution
3 Performing a test with control solution You need the device, a test strip and the control solution. mmol/L mmol/L mmol/L > > > > 1. Insert a test strip into the 2. Press the - button, until 3. Place the device on a flat and monitor in the direction the symbol (control solution... - Page 7 3 Performing a test with control solution mmol/L mmol/L 5.4 - 7.2 mmol/L > > Sample illustration for a target range on the test strips container mmol/L 8. When a sufficient amount of 5. Press the container so that a 10.
-
Page 8: Inserting The Lancet In The Lancing Device
4 Inserting the lancet in the lancing device 1. Wash your hands with soap 3. Replace the protective and warm water. Rinse and cap on the lancing de- dry thoroughly. If needed, vice and tighten by you can also rub the area 2. - Page 9 4 Inserting the lancet in the lancing device Markings for lancing depths 4. Set the appropriate lancing 5. Set the lancing device by 6. The lancing device is ready depth, as described in the extending it until it clicks to use. Do not lance your instruction manual.
-
Page 10: Performing A Blood Glucose Test
5 Performing a blood glucose test mmol/L mmol/L > > mmol/L 1. Insert a test strip into the monitor in the 3. When the blood drop 4. Place the lancing de- direction of the arrow. The symbol symbol flashes in vice on a finger tip appears automatically. - Page 11 5 Performing a blood glucose test mmol/L > mmol/L 5. Place the drop onto the blood sample area 6. When a sufficient amount of blood has been on the end of the test strip. Pay attention, absorbed by the reaction cell you will hear a that not any blood gets on the top of the beep and in the display "...
-
Page 12: Discarding Used Lancets
6 Discarding used lancets 1. Open the lancing device by 2. Take out the used lancet 3. Move the sliding switch, loca- twisting the protective cap in (without touching it directly) ted on the other side of the a clockwise direction and and stick it into its protective trigger button, which ejects then remove it. -
Page 13: Accessing And Deleting Test Results
7 Accessing and deleting test results 3. To delete a test result, simulta- > neously press and hold for 3 seconds. “dEL” appears > 1. Press to display the 30- 2. Press to access the in the display. day-average of the values display mode for single 4. -
Page 14: Data Transfer To Personal Computer Via Usb
8 Data transfer to personal computer via USB > > > 1. Connect the monitor to your 2. The transfer of your 3. After successful transfer, personal computer with the measured values to the "OK" appears in the display ® USB-cable. -
Page 15: Error Display
9 Error display mmol/L Cause Damp / used Low batteries Memory Error System error test strip Remedy Replace with a Replace with First replace the First replace the new test strip. new batteries. batteries. If error batteries. If error 005 appears again, 001 appears again, get in touch with get in touch with... - Page 16 9 Error display mmol/L mmol/L mmol/L mmol/L Test result is higher than Test result is lower than Test result is higher than 33.3 mmol/L 1.1 mmol/L 14.0 mmol/L Repeat the test. If the result Repeat the test. If the result Repeat the test.
- Page 17 9 Error display mmol/L "Ht" / "Lt" appears. Ambient temperature is Blood sample or control solution quantity too high or too low, not within the required is not enough. range of 10°C - 40°C (50°F - 104°F). The user is warned about a potentially Repeat the test with a new test strip and incorrect test result if the test proceeds.
- Page 18 For service, accessories and spare parts please refer to the contact on the separate leaflet.
- Page 20 MEDISANA AG Jagenbergstraße 19 41468 NEUSS Germany eMail: info@medisana.de Internet: www.medisana.de 79034GBsh V1.4 09/2013...


