Table of Contents
Advertisement
Advertisement
Table of Contents

Related Manuals for Bush DVD9791BUK


Summary of Contents for Bush DVD9791BUK
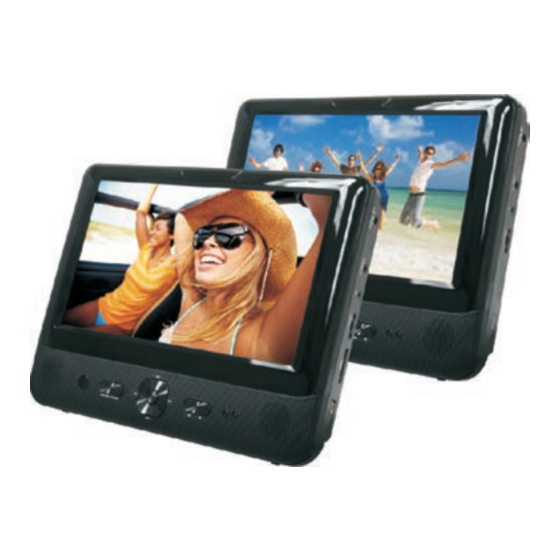
- Page 1 DVD9791BUK...
-
Page 2: Table Of Contents
Table Of Contents Safety Precaution Package Main Features Overview of Unit A/B System Connection The Remote Control unit A The Remote Control unit B Basic operation System Setup SD/MMC/USB Main Menu Specification Troubleshooting... -
Page 3: Safety Precaution
Safety Precaution Warning: To reduce the risk of fire or electric shock, do not expose this apparatus to rain or moisture. 1) Please read the instruction manual carefully and follow all the requirements of safe operation to operate the device. 2) Do not use this unit near water. -
Page 4: Package
Package 9'' LCD DVD Players Remote Control With Battery Audio/Video Cable Audio/Video Output Cable AC/DC Power Adapter Cigarette Lighter Adapter User Manual Earphone Straps Main Features High brightness color 9" LCD screen Compatible with disc of DVD, MP3, XVID , CD, JPEG, etc. Built-in stereo speaker Support PAL or NTSC system Support speed forward/backward, repeat function... -
Page 5: Overview Of Unit A/B
Overview of Unit A/B Overview of Unit A A UNIT 5 6 78 9. DC IN 9-12V 1. Open knob 10. AV OUT 2. Power ON/OFF switch 11. Earphone jack 3. SETUP button 12. Volume knob 4. MUTE button ( )/ ( )/ ( )/ 13. - Page 6 Overview of Unit B B UNIT 5 6 78 1. Open knob 9. DC IN 9-12V 2. Power ON/OFF switch 10. AV IN/OUT 3. SETUP button 11. Earphone jack 4. MODE button 12. Volume knob ( )/ ( )/ ( )/ 13.
-
Page 7: System Connection
System Connection Powering and installation Plug one end of the AC/DC power adaptor into the DC IN 9-12V jack on the right of the unit, then plug the other end into the AC power receptacle. Please refer to the following illustration. Unit A AV OUT Unit B... -
Page 8: Connecting To Unit A/B
Connecting To Unit A/B 1. Connect unit A and unit B with AV cable. 2. Connect the unit to power by AC/DC adapter or cigarette light adapter. 3. Turn on these two units, insert a disc into the disc compartment of the main unit A, press the IN/OUT key on remote control B to change Unit B to A V IN mode, then you can see the same image on both units. -
Page 9: In Car Installation
In Car Installation 1. Fit the straps to the DVD Player / Monitor as required. Please install the units with strap A (long) and strap B (short) together. Turn the player around so the backs are facing you. Strap A through the unit from right clip first, then across the loop in Strap B, last Strap A through the unit left clip. - Page 10 NOTE: Be sure to complete the installation then use DVD9791BUK in the car. For DVD9791BUK installation is recommended that the DVD Player is on the LEFT headrest, to ensure a neat cable run to the monitor, as shown below:...
- Page 11 Connecting With External Speaker The unit can be connected with external speaker. Please see the following illustration. AV IN/OUT AV CABLE Not supplied VIDEO IN AUDIO IN AMPLIFIER Left front Center speaker Right front speaker speaker SUBWOOFER Left rear speaker Right rear speaker Note: There is no 5.1 channel in the unit, however, after connecting to APM it is...
-
Page 12: The Remote Control Unit A
The Remote Control of Unit A 1. Number button 2. TITLE (To display title information) 3. AUDIO (To select audio language) 4. SETUP (To go to or exit setup menu) Previous/Next button (To go to previous/ next chapter or scene during playing) Fast forward/ backward button (To scan... -
Page 13: The Remote Control Unit B
The Remote Control of Unit B 1. Number button 2. TITLE (To display title information) 3. AUDIO (To select audio language) 4. SETUP (To go to or exit setup menu) Previous/Next button (To go to previous/ next chapter or scene during playing) Fast forward/ backward button (To scan... -
Page 14: The Use Of Remote Control
The Use of Remote Control Please put the battery into the remote control as per illustration below . CR2025 CR2025 When using remote control, make sure the infrared window is pointed to infrared receiving window of the unit. The distance between the unit and remote control must be within 3 metres. -
Page 15: Basic Operation
Basic Operation Note: XVID is only available for UNIT B, not available for UNIT A. XVID Playing disc of DVD, XVID, CD, MP3. 1. In the Source Mode, you can press " ", " ", to select and "ENTER" key to enter the source you want. -
Page 16: Fast Forward And Fast Backward
Fast Forward And Fast Backward XVID When playing disc of DVD, XVID, CD, the unit can search forward or backward. 1. Press " ", the unit will search forward. Press it repeatedly ,the unit will play at 2, 4, 8, 16, 32 times of speed. 2. -
Page 17: Repeat Playing Of Favorite Scene
Repeat Playing Of Favorite Scene XVID When playing disc of DVD, XVID, CD, MP3, user can repeatedly play a specific section. During playback, press "A-B" button at a point A, then press this button again in point B, the unit will automatically repeat playing the part between A-B. - Page 18 Zoom in/out 100% When playing disc of JPEG user can zoom in or zoom out the image. During playback, press Zoom button, the image 125% will be enlarged; press it again the image will be enlarged again; press it fifth time, the image will zoom out, press it repeatedly and the image will return to normal status.
-
Page 19: System Setup
Playing JPEG File 1. Place a JPEG disc into the tray, the unit will start reading and play. 2. Press " " to select a JPEG file and press "ENTER" button to confirm. Note: you can press "MENU" to return to the folder list. Press " "... -
Page 20: General Setup Page
General Setup Page TV display: General Setup Enter this option, user can set screen display format (Nomal/PS, Nomal/LB, Wide) TV Display Wide Normal/PS The default is "Wide". Angle Mark Normal/LB Wide Note: OSD Lang Screen Saver The function depends on the display ratio with which the DVD disc is recorded. -
Page 21: Video Setup Page
Video Setup Page Video Setup TV Type: Enter this option to select TV type TV Type Quality NTSC (PAL, NTSC) Panel Quality The default is PAL. Note: Only unit B has the "Quality" item, unit A does not have. :Move :Return :Entry Video Setup... - Page 22 Preference Setup Audio Subtitle Subtitle Select your preferred language to show the Disc Menu subtitles on the screen. Parental English Default The default is OFF. :Move :Return :Entry Preference Setup Disc Menu Audio This function allows you to choose the menu Subtitle language stored on the disc.
-
Page 23: Sd/Mmc/Usb Main Menu
SD/MMC/USB Main Menu P21-P25 is only available for UNIT B, not available for UNIT A. After Enter the SD/MMC or USB, the system will show Main Menu which includes 4 Function ICONS. You can select them by " " press "ENTER" key to confirm. Browser Mode Detail explanation please refer to P22 Photo Mode... -
Page 24: Browser Mode
Browser Mode In the Browser Mode, the system will show the list of file and folder. " ", " ", "ENTER" key: select and play " " : Enter the folder 00 00 03 43 001/008 " " : Quit the folder \Ctyy\ Note : if you want to return .. - Page 25 When playing JPEG : 1. To rotate the picture counter-clockwise, press " "; Press " " to rotate the picture clockwise. 2. Press OSD button when viewing pictures, you can select different refresh mode as follows: from top to bottom from bottom to top from left side to right side from right side to left side...
-
Page 26: Music Mode
Music Mode In the Music Mode, the system will show the list of music file, like MP3 and so on. Press " ", " ", "ENTER", select and play. 128Kbps Press " " to fastward/ backward MP3 during playing. TRACK01 Press "... - Page 27 CD Ripping CD RIP During playing the CD/HDCD disc, Options Track you can enter CD Ripping function. Speed Normal Track 01 03:36 Track 02 03:36 Bitrate 128kbps By pressing subtitle button, DVD Track 03 03:36 Create Id3 Track 04 03:36 player will be able to change the Device USB 1...
-
Page 28: Specification
Specification Compatible disc: DVD/XVID/CD/MP3 Signal system: PAL/NTSC Panel size: 9 inch Picture resolutio: 640x234 (RGB) or 640x220(RGB) Frequency response: 20 Hz to 20 kHz Video output: 1 Vp-p/75Ohm, unbalanced Audio output: 1.4Vrms/10kOhm Audio S/N: Better than 80dB Dynamic range: Better than 85dB Laser: Semiconductor Laser, Wave Length: 650nm/795nm Power source: DC 9-12V Power consumption: 10 W... - Page 29 Rechargeable Battery Use The unit utilizes long-life Li polymer battery for portable power supply. The battery has no Memory Effect and thus can be recharged safely regardless of whether the battery is fully or partially discharged. It is enough to recharge no longer than 4H each time.
-
Page 30: Troubleshooting
Troubleshooting PROBLEM SOLUTION Make sure the machine is connected properly. No sound or Make sure all cables are securely inserted into distorted sound the appropriate jacks. You can't advance through the opening credits Can't advance and warning information that appears at the through a movie beginning of movies because the disc is programmed to prohibit that action. - Page 31 We trust you are completely satisfied with this product from Argos Ltd, however please feel free to contact us if you experience any difficulties, or if you would like to express your views regarding our products. Please write to: Customer Services Argos Ltd 489-499 Avebury Boulevard Saxon Gate West...
Need help?
Do you have a question about the DVD9791BUK and is the answer not in the manual?
Questions and answers