Dell 2400MP User Manual
Hide thumbs
Also See for 2400MP:
- Owner's manual (1198 pages) ,
- Reference manual (4 pages) ,
- Setup manual (2 pages)

Related Manuals for Dell 2400MP


Summary of Contents for Dell 2400MP
- Page 1 Dell™ 2400MP Projector User's Guide w w w . d e l l . c o m | s u p p o r t . d e l l . c o m...
- Page 2 © 2007-2008 Dell Inc. All rights reserved. Reproduction in any manner whatsoever without the written permission of Dell Inc. is strictly forbidden. Trademarks used in this text: Dell and the DELL logo are trademarks of Dell ® Inc.; DLP and DLP logo are trademarks of Texas Instruments;...
-
Page 3: Table Of Contents
Contents Your Dell Projector ....About Your Projector .... - Page 4 ..... Contacting Dell .....
-
Page 5: Your Dell Projector
Your Dell Projector Your projector comes with all the items shown below. Ensure that you have all the items, and contact Dell if anything is missing. Package Contents 1.8m power cord (3.0m in Americas) 1.8m VGA cable (D-sub to D-sub) 1.8m USB cable... - Page 6 (continued) Package Contents 1.8m RCA to Audio cable 1.8m mini pin to mini pin cable Batteries (2) Remote control Documentation Carrying case Your Dell Projector...
-
Page 7: About Your Projector
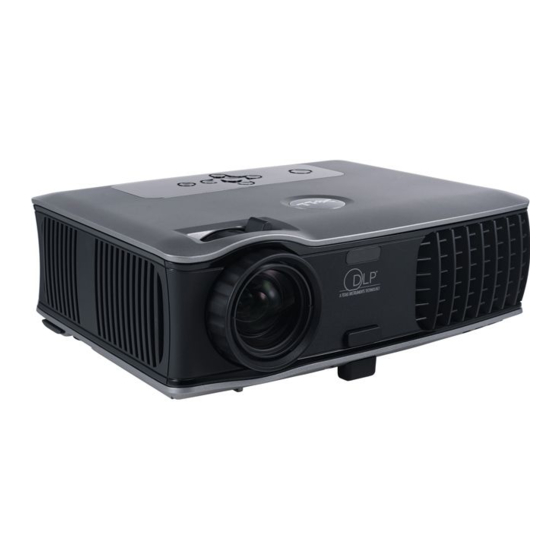
About Your Projector Control panel Elevator button Remote control receiver Lens Focus ring Zoom tab Your Dell Projector... -
Page 8: Connecting Your Projector
Connecting Your Projector IR receiver VGA in (D-sub) connector VGA out (monitor loop-through) USB remote connector Audio output connector RS232 connector Power cord connector Audio input connector Composite video connector S-video connector Kensington lock hole Connecting Your Projector... -
Page 9: Connecting To A Computer
Connecting to a Computer Power cord D-sub to D-sub cable USB to USB cable Connecting Your Projector... -
Page 10: Connecting To A Dvd Player
Connecting to a DVD Player Connecting a DVD Player with an S-video Cable Power cord S-video cable Connecting Your Projector... -
Page 11: Connecting A Dvd Player With A Composite Cable
Connecting a DVD Player with a Composite Cable Power cord Composite video cable Connecting Your Projector... -
Page 12: Connecting A Dvd Player With A Component Cable
Connecting a DVD Player with a Component Cable Power cord D-sub to YPbPr cable Connecting Your Projector... -
Page 13: Professional Installation Options
Professional Installation Options: Connecting a Computer with a RS232 cable Power cord RS232 cable Connecting Your Projector... -
Page 14: Using Your Projector
"Connecting Your Projector" on page 8. Press the power button (see "Using the Control Panel" on page 18 to locate the power button). The Dell logo displays for 30 seconds. Turn on your source (computer, DVD player, etc.). The projector automatically detects your source. -
Page 15: Adjusting The Projected Image
NOTE: If you press the power button while the projector is running, the "Power Off the Lamp?" message appears on the screen. To clear the message, press any button on the control panel or ignore the message; the message disappears after 5 seconds. -
Page 16: Adjusting The Projector Zoom And Focus
Adjusting the Projector Zoom and Focus CAUTION: To avoid damaging the projector, ensure that the zoom lens and elevator foot are fully retracted before moving the projector or placing the projector in its carrying case. Rotate the zoom tab to zoom in and out. Rotate the focus ring until the image is clear. -
Page 17: Adjusting Projection Image Size
Adjusting Projection Image Size Using Your Projector... -
Page 18: Using The Control Panel
Max. 29.5" 83.7" 135.3" 189.5" 241.1" 295.3" Screen (75.0 cm) (212.5 cm) (343.8 cm) (481.3 cm) (612.5 cm) (750.0 cm) (Diagonal) Min. 24.6" 69.7" 112.8" 157.0" 201.0" 246.1" (62.5 cm) (177.1 cm) (286.5 cm) (401.0 cm) (510.4 cm) (625.0 cm) Max. - Page 19 The display automatically shuts down. Turn the display on again after the projector cools down. If the problem persists, contact Dell. • A blinking orange TEMP light indicates that a projector fan has failed and the projector automatically shuts down.
-
Page 20: Using The Remote Control
Using the Remote Control Power Turn the projector on and off. For more information, see "Turning Your Projector On" on page 14 and "Turning Your Projector Off" on page 14. Press to adjust the OSD setting. Down button Press to select OSD items. Mute Press to mute or un-mute the projector speaker. -
Page 21: Using The On-Screen Display
Video mode The Dell 2400MP Micro-projector has preset configurations that are optimized for displaying data (PC Graphics) or video (movies, games, etc.). Press Video Mode button to toggle between PC mode, Movie mode, Game Mode, sRGB, or CUSTOM mode (for user to setup and save preferred settings). -
Page 22: Main Menu
control to make adjustments to a setting. To go back to Main Menu, go to BACK tab and press Enter button on the control panel or the remote control. To exit the OSD, go to Exit tab and press Enter button on the control panel or the remote control. - Page 23 V. K —Adjust image EYSTONE distortion caused by tilting the projector. —Auto EYSTONE adjust the image distortion by tilting the projector. —Select how the image appears: ROJECTOR • Front Projection-Desktop (the default). • Front Projection-Ceiling Mount — The projector turns the image upside down for ceiling-mounted projection.
-
Page 24: Picture (In Pc Mode)
PICTURE (in PC Mode) —Use RIGHTNESS adjust the brightness of the image. —Use ONTRAST to control the degree of difference between the brightest and darkest parts of the picture. Adjusting the contrast changes the amount of black and white in the image. —Adjust the color temperature. -
Page 25: Display (In Pc Mode)
—Adjust a video source from black and white to fully saturated color. ATURATION Press to decrease the amount of color in the image and to increase the amount of color in the image. to decrease the sharpness and to increase the —Press HARPNESS sharpness. -
Page 26: Display (In Video Mode)
—Synchronize the phase of the display signal with the graphic card. If you RACKING experience an unstable or flickering image, use Tracking to correct it. This is a fine adjustment. DISPLAY (in Video Mode) —Select a mode IDEO to optimize the display on how the projector is being used: PC, MOVIE, sRGB (provides more accurate... -
Page 27: Language
—Select ON to use the projector at a lower power level (230 Watts), which may provide longer lamp life, quieter operation, and dimmer luminance output on the screen. Select OFF to operate at normal power level (260 Watts). —After you install a new lamp, select Yes to reset the lamp timer. ESET LANGUAGE Using Your Projector... -
Page 28: Preferences
"My Customized logo". This screen will replace all the original screens which contains Dell logo. User can recover the default screen by selecting "Dell Logo" on the pop-up screen. —Select ON to enable Menu Lock for hiding the OSD menu. Select OFF to disable the Menu Lock. - Page 29 using the Password menu. This password security feature will be activated on the next time you turn on the projector. If you enable this feature, you will be asked to enter the projector's password after you turn on the projector: 1st time password input request: Go to Preferences menu, press Enter and then select Password to ENABLE the password setting.
- Page 30 If you have entered incorrect password, you will be given another 2 chances. After the three invalid attempts, the projector will automatically turn off. NOTE: If you forget your password, contact your dealer or qualified service personnel. To cancel the password function, select OFF and enter the password to disable the function.
-
Page 31: Troubleshooting Your Projector
• Ensure that the lens cap is removed and the screen projector is turned on. • Ensure the external graphics port is enabled. If you are using a Dell portable computer, press (Fn+F8). For other computers, see your respective documentation. - Page 32 Press the Resync button on the remote Partial, scrolling, or incorrectly displayed image control or the control panel. If you are using a Dell portable computer, set the resolution of the computer to XGA (1024 x 768): Right-lick the unused portion of your Windows desktop, click Properties and then select Settings tab.
- Page 33 Dell. TEMP light is solid orange The lamp has overheated. The display and Power light is solid blue automatically shuts down. Turn the display on again after the projector cools down. If the problem persists, contact Dell. Troubleshooting Your Projector...
- Page 34 The lamp driver has overheated. The display are solid orange automatically shuts down. Turn the display on again after the projector cools down. If the problem persists, contact Dell. TEMP light is blinking A projector fan has failed and the projector orange will automatically shut down.
-
Page 35: Changing The Lamp
Replace the lamp when the message "Lamp is approaching the end of its useful life in full power operation. Replacement suggested! www.dell.com/lamps" appears on the screen. If this problem persists after replacing the lamp, contact Dell. For more information, see "Contacting Dell". - Page 36 LAMP(S) INSIDE THIS PRODUCT CONTAIN MERCURY AND MUST BE RECYCLED OR DISPOSED OF ACCORDING TO LOCAL, STATE OR FEDERAL LAWS. FOR MORE INFORMATION, GO TO WWW.DELL.COM/HG OR CONTACT THE ELECTRONIC INDUSTRIES ALLIANCE AT WWW.EIAE.ORG. FOR LAMP SPECIFIC DISPOSAL INFORMATION CHECK WWW.LAMPRECYCLE.ORG.
-
Page 37: Specifications
Specifications Light Valve Single-chip 0.7" XGA LVDS (low-voltage differential signaling) technology Brightness 3000 ANSI Lumens (Max.) Contrast Ratio 2100:1 Typical (Full On/Full Off) Uniformity 80% Typical (Japan Standard - JBMA) Number of Pixels 1024 x 768 (XGA) Displayable Color 16.7M colors Color Wheel Speed 100~127.5Hz (2X) Projection Lens... - Page 38 The lamp life specified for Dell's projectors refers to the typical time under non-stressful operating conditions for more than 50% of a sampling population to reduce to approximately 50% of the lamp's rated brightness level.
- Page 39 Control command Syntax (From PC to Projector) [H][AC][SoP][CRC][ID][SoM][COMMAND] • Example: Power ON Command (Send low byte firstly) --> 0xBE, 0xEF, 0x10, 0x05, 0x00, 0xC6, 0xFF, 0x11, 0x11, 0x01, 0x00, 0x01 • Control Commands List Go to support.dell.com to view the latest RS232 code. Specifications...
-
Page 40: Compatibility Modes
Compatibility Modes (ANALOG) Mode Resolution V. Frequency (Hz) H. Frequency (KHz) 640X350 31.5 640X350 37.9 640X400 37.9 640X480 31.5 640X480 37.9 640X480 37.5 640X480 43.3 720X400 31.5 720X400 37.9 SVGA 800X600 35.2 SVGA 800X600 37.9 SVGA 800X600 48.1 SVGA 800X600 46.9 SVGA 800X600... - Page 41 MAC 19* 1024X768 60.24 *MAC 1152X870 75.06 68.68 MAC G4 640X480 31.35 IMAC DV 1024X768 *Compressed computer image. Specifications...
-
Page 42: Contacting Dell
NOTE: If you do not have an active Internet connection, you can find contact information on your purchase invoice, packing slip, bill, or Dell product catalog. Dell provides several online and telephone-based support and service options. Availability varies by country and product, and some services may not be available in your area. -
Page 43: Appendix: Glossary
Appendix: Glossary ANSI L —A standard for measuring light output, used for comparing UMENS projectors. —The most popular aspect ratio is 4:3 (4 by 3). Early television and SPECT ATIO computer video formats are in a 4:3 aspect ratio, which means that the width of the image is 4/3 times the height. - Page 44 Contrast Ratio— Range of light and dark values in a picture, or the ratio between their maximum and minimum values. There are two methods used by the projection industry to measure the ratio: Full On/Off — measures the ratio of the light output of an all white image (full on) and the light output of an all black (full off) image.
- Page 45 Maximum Distance— The distance from a screen the projector can be to cast an image that is useable (bright enough) in a fully darkened room. Maximum Image Size— The largest image a projector can throw in a darkened room. This is usually limited by focal range of the optics. Metal Halide Lamp—...
- Page 46 Zoom Lens— Lens with a variable focal length that allows operator to move the view in or out making the image smaller or larger. Zoom Lens Ratio— Is the ratio between the smallest and largest image a lens can projector from a fixed distance. For example, a 1.4:1 zoom lens ratio means that a 10 foot image without zoom would be a 14 foot image with full zoom.
- Page 47 Zoom tab 16 USB remote connector 8 VGA in (D-sub) connector 8 VGA out (monitor loop-through) 8 Changing the Lamp 35 Contact Dell 5 Connecting a Computer with a Contacting Dell 42 RS232 cable 13 Control Panel 18 Connecting the Projector...
- Page 48 Uniformity 37 V. Frequency 37 Phone numbers 42 Video Compatibility 37 Powering On/Off the Projector Weight 38 Powering Off the Projector 14 Support Powering On the Projector 14 Contacting Dell 42 Remote Control 20 Telephone numbers 42 Troubleshooting 31 Index...
- Page 49 Contact Dell 31 Index...