Advertisement
Installation & Operating Manual
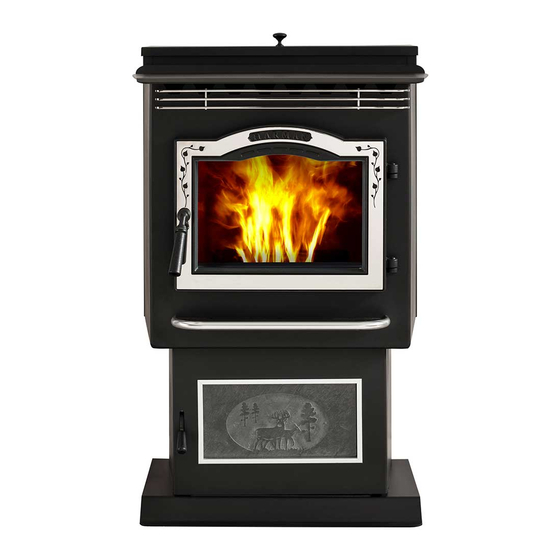
P61 Pellet Stove Owners Manual
"Ce manuel est disponible en Français sur demande"
SAFETY NOTICE
PlEASE rEAd ThIS ENTIrE MANuAl bEFOrE YOu INSTAll ANd uSE YOur NEw rOOM hEATEr. FAIlurE
TO FOllOw INSTruCTIONS MAY rESulT IN PrOPErTY dAMAgE, bOdIlY INjurY, Or EvEN dEATh.
FOr uSE IN ThE u.S. ANd CANAdA. SuITAblE FOr INSTAllATION IN MObIlE hOMES
IF ThIS hArMAN STOvE IS NOT PrOPErlY INSTAllEd, A hOuSE FIrE MAY rESulT. FOr YOur SAFETY, FOllOw
INSTAllATION dIrECTIONS.
CONTACT lOCAl buIldINg Or FIrE OFFICIAlS AbOuT rESTrICTIONS ANd INSTAllATION INSPECTION
rEQuIrEMENTS IN YOur ArEA.
CONTACT YOur lOCAl AuThOrITY (SuCh AS MuNICIPAl buIldINg dEPArTMENT, FIrE dEPArTMENT, FIrE
PrEvENTION burEAu, ETC.) TO dETErMINE ThE NEEd FOr A PErMIT.
CETTE guIdE d'uTIlISATION EST dISPONIblE EN FrANCAIS. ChEz vOTrE CONCESSIONNAIrE dE hArMAN
hOME hEATINg.
SAvE ThESE INSTruCTIONS.
Item# 3-90-05810
r10
Advertisement
Table of Contents

Related Manuals for Harman P61


Summary of Contents for Harman P61
-
Page 1: Safety Notice
TO FOllOw INSTruCTIONS MAY rESulT IN PrOPErTY dAMAgE, bOdIlY INjurY, Or EvEN dEATh. FOr uSE IN ThE u.S. ANd CANAdA. SuITAblE FOr INSTAllATION IN MObIlE hOMES IF ThIS hArMAN STOvE IS NOT PrOPErlY INSTAllEd, A hOuSE FIrE MAY rESulT. FOr YOur SAFETY, FOllOw INSTAllATION dIrECTIONS. - Page 2 Fig. 1...
-
Page 3: Table Of Contents
Please read this entire manual before you install and use your new room heater. Failure to follow instructions may result in property damage, bodily injury, or even death. SuITAblE FOr MObIlE hOME INSTAllATIONS. SAVE THESE INSTRUCTIONS harman home heating 352 Mountain House Road Halifax, PA 17032... -
Page 4: Assembly & Installation
Assembly and Installation unpacking The P61 is bolted to the skid to prevent movement during shipping. To free the stove from the skid you must remove the hold-down bolts in the rear of the pedestal base. removing or Installing rear cover panels... -
Page 5: Mobile Home Installation
Clothing and other flammable materials should not be 18" placed on or near this unit. Installation and repair of this Harman Stove should be done by a qualified service person. The appliance should be inspected before use and at least annually by a qualified service person. -
Page 6: Venting
venting requirements for Terminating the venting J. The clearance to a non-mechanical air supply inlet to the building or the combustion air inlet to any other wArNINg: Venting terminals must not be recessed appliance must be a minimum of 48”. into a wall or siding. -
Page 7: Outside Air
= Negative static pressure For this reason and the fact that the P61 operates with a positive vent pressure we specify that the joints also be sealed with high temp silicone. - Page 8 venting #1 Preferred method This method provides excellent venting for normal operation and allows the stove to be installed closest to the wall. Two inches from the wall is safe; however, four inches allows better access to remove the rear panel. The vertical portion of the vent should be three to five feet high.
- Page 9 venting #4 Installing into an existing chimney This method provides excellent venting for normal operation. This method also provides natural draft in the event of a power failure. If the chimney condition is questionable you may want to install a liner as in method #7.
- Page 10 venting #6 Installing into an existing fireplace chimney This method provides excellent venting for normal operation. This method also provides natural draft in the event of a power failure. Some places in the US and Canada it is required that the vent pipe extend all the way to the top of the chimney.
- Page 11 venting #8 Installing through the ceiling vent Through the ceiling vent, follow the vent manufacturers recommendations when using wall and ceiling pass throughs. Minimum flue vent configuration It is recommended that outside air be installed with this venting configuration. (See Page 9 for corner installation clearances) Fig.
-
Page 12: Operation
MANuAl STArT uP Operation Starting First Fire Be sure the power cord is plugged into a 120 volt receptacle. This can be verified by the red power light on the control panel. be sure there is no fuel or other combustibles in the ash pan prior to lighting. - Page 13 MANuAl IgNITION/OPErATION when to use "Stove Temp Mode" In "Stove Temp Mode" the Stove Temp Dial determines the temperature of the stove. Heat output and fuel consumption will remain constant. This makes it possible to tell how long a hopper full of pellets will last. Fig.
-
Page 14: Esp Control
ESP CONTrOl Feed adjuster Power Light Sets the maximum feed Indicates power to the rate control. Test Status Light Runs all motors at full Will be lit in either stove speed for two minutes or room temp mode when to check operation. After pointer is not within off two minutes the stove position band except after... - Page 15 NOTE: Distances of more than 25 feet from the unit or in another room are not recommended. The room sensor is essential for the P61's excellent efficiency. NOTE: It is recommended that the room sensor be installed, even if only installed on the rear of...
-
Page 16: Maintenance
Maintenance removing Ashes: When approximately 1 ton of pellets has been burned, it will be necessary to empty the ash pan. Ashes should be placed in a metal container with a tight fitting lid. The closed container of ashes should be placed on a noncombustible floor or on the ground, well away from all combustible materials, pending final disposal. - Page 17 Maintenance 7. Open the burn pot slide as shown, clean with vacuum and close. 8. Clean the heat exchanger with the scraper as shown in Fig. 25. 9. Brush or scrape the inside of the stove to remove fly ash. 10.
-
Page 18: Trouble Shooting
3% or more. The P61 is capable of burning all 3 categories of pellets due to a patented feeder and burn pot system. It should be noted, however, that higher ash content will require more frequent ash removal and may provide less BTU's per lb. -
Page 19: Specifications
Specifications 23.5" 9" 5.250" weight 249 lbs. blower 135 cfm Feed rate .75 to 7.5 lbs. per hr. hopper Capacity 72 lbs. Fuel wood Pellets Flue Size 3 inch Outside Air Size 2 3/8 in. Inside diameter On-board Fuse 6 amp... -
Page 20: Wiring Diagram
wiring diagram... - Page 21 door Options Door Frame Ash Lip Trim Ash Door Tile Frame Brushed Stainless Cutout Tile Plate Optional Trim decorative Tile The door trim kit includes the door frame, the ash lip Decorative tile is available in several designs. The tile trim, and the ash door tile frame.
-
Page 22: Options
OPTIONS Side heat Shields hopper Extension Side heat shields are available to reduce the clearance The hopper extension allows you to put more pellet to combustible materials. fuel in the hopper and extends the burn time on one load of pellets. The hopper extension adds 60 pounds to the existing 72 pound hopper capacity, allowing you to load 132 pounds of pellets at one time. -
Page 23: Warranty
MERCHANTABILITY, OR WARRANTY OF FITNESS FOR A PARTICULAR PURPOSE. No employee, agent, dealer, or other person is authorized to give any warranty on behalf of Harman Home Heating. This warranty does not apply if the product has been altered in any way after leaving the factory. Harman Home Heating and its agents assume no liability for “resultant damages of any kind”...
Need help?
Do you have a question about the P61 and is the answer not in the manual?
Questions and answers