Leica Digilux 2 Field Manual
Hide thumbs
Also See for Digilux 2:
- Instructions manual (94 pages) ,
- User manual (40 pages) ,
- Brochure & specs (8 pages)
Table of Contents
Advertisement
Quick Links
Advertisement
Table of Contents

Related Manuals for Leica Digilux 2


Summary of Contents for Leica Digilux 2
- Page 1 Center for Digital Imaging Leica Digilux 2 Field Guide A practical guide to the Leica DIGILUX 2 camera. • How your camera works • Configuring your computer • Digital imaging basics • Printing your images • Working with raw files...
- Page 2 We have created this guide as a tool to assist people with the learning curve associated with making the transition to digital imaging. While the book is primarily focused on the Leica Digilux 2, many of the computer and third-party components are useful for any digital workflow. If you would like to reproduce this book in whole or in part for classroom use, contact Scott Geffert at Center for Digital Imaging Inc., P.O.
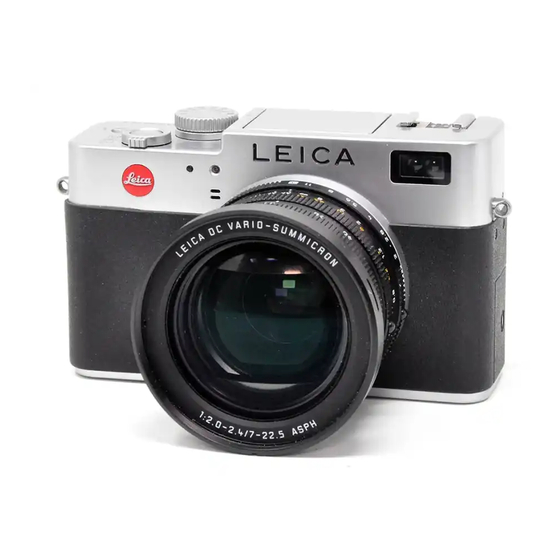
- Page 3 The Digilux 2 gives the photogra- pher the ability to explore the powerful mix of tradi- tional photographic techniques and digital imaging.
-
Page 4: Table Of Contents
Chapter Two Creative Techniques Configuring Your Computer Night / Low Light Photography ......34 The Digilux 2 and your Macintosh™ ....11 Sports Photography ........36 Connecting the camera for direct downloading ..11 Portraiture Tips ........... 37 Disconnecting the camera after direct Studio Lighting .......... -
Page 5: Chapter One
Chapter One Getting to Know Your Digilux 2 Camera... -
Page 6: How Your Camera Works
While ultimate image quality. of the Digilux 2 camera, it is best to understand the un- digital cameras are generally compared by how many derlying process of how the camera creates, interprets pixels are on the sensor, very few digital photographers When capturing images in the raw file format, sensor... -
Page 7: Raw Data Format
Camera capture parameters Keep in mind that when shooting in JPEG file format The Digilux 2 has a wide array of capture parameters. all of the digital controls of your camera permanently We have broken these down into two categories: alter the captured image data. -
Page 8: Capture And Playback/Review
AF mode provides rapid focussing from 60cm to infinity. to use, and the Digilux 2 will find the correct shutter constantly measured until the moment your shutter is The AF-Macro setting provides auto focus across the speed based on the metering mode selected. -
Page 9: Manual Settings Manual Focus
fi nding the optimum exposure setting. If you photograph an 18% grey card and fi ll Manual focus is one of the joys of using the Digilux 2 the frame, adjust the aperture or shutter speed (or camera. -
Page 10: Chapter Two Configuring Your Computer
Chapter Two Configuring Your Computer... -
Page 11: The Digilux 2 And Your Macintosh
When working with the Macintosh™ computer and the the camera to expose the USB port, Digilux 2 less is more! This means that as long as your and insert the cable to your camera, are using the latest version of the MAC OS (currently and an available USB port on your version 10.3) you do not need to install any driver... -
Page 12: Disconnecting The Camera After Direct Downloading
To properly remove the device from the desktop you second opportunity to delete the original images from Digilux 2 images, any raw files will be skipped and will may click on the “NO NAME” drive icon, and drag it the camera card. Choose Delete Originals. -
Page 13: Working With Raw Images
Downloading raw files to your computer: When set to raw file format mode, your Digilux 2 captures a raw file as well as a JPEG file with the same name and a different extension. This is useful because iPhoto™... -
Page 14: Chapter Three Digital Imaging Basics
Chapter Three Digital Imaging Basics... -
Page 15: Bit Depth
Describes how many individual tones may be stored in a digital image file. In the case of the Digilux 2 the 12 bit capture depth yields 4096 individual tones per color channel. Bit depth has a direct impact on the usable... -
Page 16: Exposure
Exposure Once you understand how the camera’s built in meter operates, you may easily understand why automatic Exposure in digital photography is elusive for many metering has it’s limitations in scenes where tones users. Often times an image will look different across are predominantly light or dark. -
Page 17: Icc Color Calibration
Apple®’s ColorSync™ technology which is ICC based. As we stated earlier, when you are working with the Digilux 2 in JPEG mode your files are automatically delivered in the sRGB color space which has become The ICC workflow model a widely adopted baseline description of color in the computer industry. -
Page 18: Calibrating Your Display
110-to 127 and a neutral color balance (near direct sunlight. level applications, the fact is that the Digilux 2 camera equal RGB values). -
Page 19: Editing Suggestions (Adobe® Photoshop™ Cs)
Editing suggestions (Adobe® Photoshop™ CS) After the Levels adjustments, the Curves dialog is used to fine tune the tonal balance of the image. In this particular example, the camera was aimed towards the sun on a hazy day. The cameras meter bi- ased exposure to the sky causing the intended subject In the curves dialog you may identify and alter specific to become underexposed. -
Page 20: Archival Printing Using An Epson® 2200 Printer
Epson® 2200 Ink Jet Printer. This printer utilizes high longevity pigment based inks, and is perfectly suited for the Digilux 2 camera user. The instructions are based on Adobe® Photoshop™ CS and the Apple® Power Macintosh™ computer running under Mac OS X (version 10.3.3) - Page 21 Experiment with several types of paper and settle on two types to keep your output predict- able. The Digilux 2 is capable of producing excellent image The wide tonal range of the Epson® 2200 quality when combined with a high quality printer like printer combined with the high resolving power the Epson®...
-
Page 22: Chapter Four Working With Raw Image Files
Chapter Four Working with Raw Image Files... -
Page 23: Software Tools For Editing Your Raw Images
The four options are: Once you have installed Adobe® Camera Raw™ soft- There are two ways to open and edit your Digilux 2 raw ware, you may double click on a raw file, or drag it over sRGB IEC61966-1 (2.2 Gamma) files. - Page 24 Bit Depth Enter a desired color temperature look, or drag the Shadows slider to interactively control the color and tint. While some image editing software tools offer the ability to This slider adjusts the value of the exported black force a selected point to become neutral, the Adobe® point.
- Page 25 As the cameras sensor captures images through a Set Camera Default- This option saves all current pa- matrix of color filters, the resulting gray scale layers of rameters as a camera default. As images from the same the image contain missing information. When sharpen- camera type are opened, you could select Camera ing is applied, this missing information is enhanced.
-
Page 26: Editing Images Using Silverfast Dc
The easiest way to open an image from the light table to edit your raw image files, Leica has bundled a view of your image folder. Unlike Apple®’s iPhoto™ or view is to double click on an image. - Page 27 When you capture, create, or scan an image into a Example Silverfast Editing Session Image auto-adjustment computer, you are directly involved with tonal deci- sions, and your adjustments may make or break an Open an image in Silverfast There are several methods image with equal ease.
- Page 28 Manually editing an image in SilverFast™ DCSE Mid tone Balance adjustment Between the black and white triangles on the icon, you will see an eyedropper tool. This tool allows you to pick a neutral point in the image. Click once on the eyedropper, then click any area of the image that you wish to be neutral of color.
- Page 29 Level adjustments Curve adjustments Global color correction If the automatic adjustment resulted in an overly dark The Curve adjustment dialog alters tones that fall Using the Global Color Correction tool, you may alter image, you may click on the left (black) triangle and between the darkest and lightest points of the im- the overall color balance of an image using an interac- drag it to the left until you reach the desired shadow...
- Page 30 Selective color correction Picture Settings Often times, you will want to alter the relationships Silverfast™ DCSE incorporates multiple methods to between colors, or the balance of specific colors in accomplish the same tasks. For example, we have an image. Selective Color Correction is the tool in identified several ways to perform color adjustments Silverfast™...
- Page 31 Advanced Picture Settings Luminance Smoothing example: In certain circumstances where the subject matter contains high frequency repetitive patterns such as 0 (None) hair, text, window screens, and textiles undesirable artifacts may occur. These artifacts are often referred to as color moire patterns. A lower setting (0) applies no smoothing, and will show the most color artifacts.
- Page 32 Sharpening and Scaling in Silverfast Note: Scaling for output Preset sharpening settings may be selected or custom settings may be previewed and applied. If uncertain, check Auto Sharpen. Descreening is useful when copying half toned artwork. Customizing sharpening settings Under the Output Resolution popup menu, you will be presented with a list of preset output resolutions.
-
Page 33: Chapter Five Creative Techniques
Chapter Five Creative Techniques... -
Page 34: Night/Low Light Photography
Many digital cameras perform poorly in low light situ- night shots push a digital camera (as well as traditional ations. The Digilux 2 performs quite well in low light, film) to the limit. If you open a Jpeg file of a night shot and opens up a wide range of creative opportunities. - Page 35 Basic Night Shots Advanced Night/Low Light Shots With the previous steps as a starting point, you may wish to set the camera to Manual mode to dramatically alter the scene. •Switch the shutter speed dial to 2+ and set the aper- ture to Automatic •Set the White Balance to Daylight •Using the selector dial for shutter speeds, take a se-...
-
Page 36: Sports Photography
•To explore motion blur effects, set the shutter speed between 1/30thsec. To 1/8th sec. leaving the Aperture At first glance, the Digilux 2 does not appear to be a When shooting fast moving subjects, it is easier to pho- ring on “A”... -
Page 37: Portraiture Tips
Composition tips: Leica Digilux 2. •If possible situate yourself in an area that is shaded Outdoor Portraits from direct sun to reduce the effects of flare, and try not to have your subject in the open sunlight. -
Page 38: Studio Lighting
+-. If unsure of your flash equipment consult your manufacturer before connecting a sync cable directly to your Digilux 2. Using a radio remote to trigger your •To fine tune the exposure, choose the image histogram lighting will prevent the possibility of damaging your from the display menu. -
Page 39: Backlighting
The problem stems from a general over-reliance on automatic focus and exposure systems on today’s cameras. The manual controls of the Digilux 2 allow you to take a new approach to backlit photography. In this section we will give you some pointers on backlit photography using both automatic and manual expo- sure modes. - Page 40 Once you start to think in terms of how the metering process works you quickly realize why Leica included three metering modes and two auto focus modes in the design of the camera. Average metering mode looks at the entire scene to...
-
Page 41: Backlighting In Manual Mode
To evaluate exposure in the various modes, you may Using the Aperture and Shutter Speed controls and Evaluate the image and the effect of the flash fill. You position your camera, frame your subject and press the the image preview histogram display, find an exposure will notice that the foreground will have considerably shutter halfway to hold the setting when the desired point where the histogram is balanced between dark... -
Page 42: Chapter Six
Chapter Six Common Photographic Problems... -
Page 43: Common Photographic Problems
There are Note: When switching settings to compensate to spe- After spending many hours with the Digilux 2, I have several ways to compensate for this effect. cific situations it is a good practice to reset the camera collected a gallery of failed images. - Page 44 Flash (Direct, -1 EV) ASA 100 ASA 100 “When I first heard of the Digilux 2 camera, I expected the camera to be decent, but I was pleasantly surprised by the flexibility of the camera’s built-in controls and excellent image quality.
- Page 45 About the Author Scott Geffert is the president and co-founder of Center for Digital Imaging Inc. a New York City based technology consulting firm specializing in digital photography and imaging workflow. A graduate of Rochester Institute of Technology, Scott has been involved with Photography since 1976, and the Apple®...
Need help?
Do you have a question about the Digilux 2 and is the answer not in the manual?
Questions and answers