Table of Contents
Advertisement
Quick Links
Advertisement
Table of Contents

Related Manuals for Leica M10-R


Summary of Contents for Leica M10-R
- Page 1 LEICA M10-R Instruction manual...
-
Page 2: Foreword
Before using your camera for the first time, please check that the We wish you a great deal of fun and success taking photographs accessories supplied are complete. with your new Leica M10-R. Please read this manual thoroughly to familiarize yourself with the full scope of functions your camera has – Leica M10-R to offer. -
Page 3: Replacement Parts/Accessories
Please read the chapters “Legal information”, “Safety remarks”, and “General information” before using your camera Please contact Leica Customer Care or visit the Leica Camera AG for the first time. Knowledge of the content will prevent website for information on the extensive range of Leica replace-... -
Page 4: Legal Information
LEGAL INFORMATION IMPORTANT NOTES REGARDING THE USE OF GPS Legal restrictions on use LEGAL INFORMATION • The use of GPS and associated technologies may be restricted in some countries or regions. • Compliance with copyright laws is mandatory. The recording and •... - Page 5 REGULATORY INFORMATION • Perfect signal reception from GPS satellites may be impossible in the following locations or under the circumstances listed below. You will find the manufacturing date of your camera on the stickers Geolocation may then be impossible or erratic at best. in the Warranty Card and/or on the packaging.
- Page 6 Customers can download a copy of the original DoC to our Radio Equipment your local authority. products from our DoC server: www.cert.leica-camera.com In case of further questions, please contact: Leica Camera AG, Am Leitz- This service is free of charge. Any standard or rechargeable Park 5, 35578 Wetzlar, Germany...
- Page 7 • Appropriate measures must be taken to ensure security and aircraft. protect against disruptions to the systems in place where • Please read the important notes on specific functions of Leica devices or computer systems are in use that require more FOTOS on p. 120.
-
Page 8: Safety Remarks
SAFETY REMARKS • Take care not to soil or scratch the sensor for lens detection in the bayonet. You must similarly prevent direct contact of the bayonet with grains of sand or similar particles, as these could GENERAL INFORMATION cause irreparable damage. This component must only be cleaned with a dry cloth (in system cameras). - Page 9 Leaked fluid can catch fire! • Improper use of the batteries or the use of unapproved battery • The use of other chargers not approved by Leica Camera AG can types may result in an explosion! cause damage to the batteries –...
- Page 10 • Do not drop or bend memory cards as this will cause damage and result in the loss of stored data. • The use of incompatible flash units with your Leica M10-R may • Do not touch the connections on the reverse of the memory card result in irreparable damage to the camera and/or the flash unit.
-
Page 12: General Information
• Condensation may form on the LCD panel if the camera is Please contact your dealer, the Leica representative in your exposed to great temperature fluctuations. Wipe the screen region or Leica Camera AG if the problem persists. - Page 13 • The range of available SD/SDHC/SDXC cards on the market is the operating times get significantly shorter. too extensive for Leica Camera AG to test for compatibility and • The replaceable battery supplies power to a backup battery, quality. Generally, any type of memory card may be used without which is permanently installed in the camera.
- Page 14 Visit the download section or the "Customer Area" for information • Please note that Leica Camera AG does NOT accept liability for about how to register or how to get firmware updates for your direct or consequential damage due to the manipulation or Leica M10-R.
-
Page 15: Warranty
In addition to your statutory warranty rights regarding your dealer, you will receive an additional Leica Camera AG product warranty valid from the date of purchase at an authorized Leica retailer. Previously, the product warranty was included with the product in the packaging. -
Page 16: Table Of Contents
CHANGING THE LENS ..................35 CAMERA BASIC SETTINGS ............56 LENS DETECTION ....................38 MENU LANGUAGE ..................56 USING A LEICA M LENS WITH 6-BIT ENCODING ............38 DATE/TIME ....................56 USING A LEICA M LENS WITHOUT 6-BIT ENCODING ..........38... - Page 17 RANGEFINDER ......................59 AUTOMATIC CONTROL/FIXED SETTINGS ............74 LCD PANEL ......................59 MANUAL SETTING VIA METERING ..............75 LEICA VISOFLEX (EVF) ................59 DIRECT SETTING OF THE COLOR TEMPERATURE ..........76 BRIGHTNESS ..................... 59 EXPOSURE....................76 LCD PANEL/EVF USE ..................60 EXPOSURE METERING METHODS ..............
- Page 18 TAGGING/RATING OF RECORDINGS ............106 INDEX ....................136 DELETING RECORDINGS ................107 TECHNICAL DATA .................142 DELETING INDIVIDUAL RECORDINGS ............108 LEICA CUSTOMER CARE ..............146 DELETING ALL RECORDINGS ................. 109 DELETING UNRATED RECORDINGS ............... 110 LEICA AKADEMIE .................146 PREVIEW OF LATEST RECORDING ............111 OTHER FUNCTIONS ..............112...
- Page 19 Definition of the various categories of information found in this manual Note Additional information Important Failure to observe the instructions may result in damage to the camera, the accessories or the pictures Attention Non-compliance may result in personal injury...
-
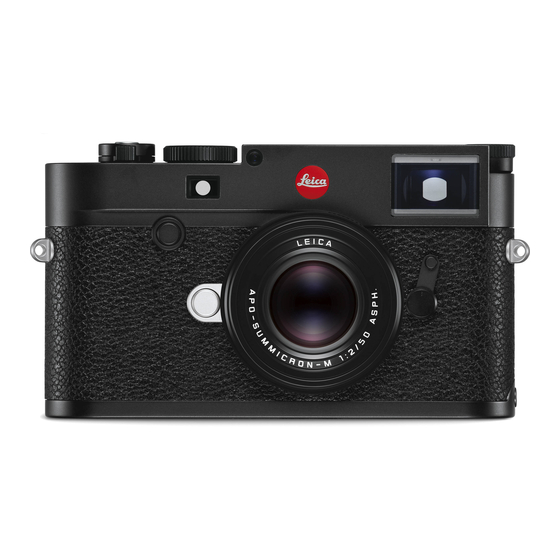
Page 20: Part Designations
PART DESIGNATIONS LEICA M10-R * Leica M lenses with viewfinder attachment cover the brightness sensor. Please read the sections “Displays (viewfinder)” and “Leica M lenses” for more information about how to work with these and other lenses. - Page 21 Battery compartment Strap lugs Accessory shoe Rangefinder window Brightness sensor Self-timer LED Viewfinder window Focus button Lens release button Leica M bayonet 6-bit encoding (sensor for lens detection) Image field selector Viewfinder eyepiece Thumbwheel Brightness sensor for LCD panel button ...
- Page 22 LENS Lens hood Aperture setting ring with scale Index for exposure values Focus ring Focus tab Fixed ring Alignment point for focus setting Depth of field scale Alignment button for lens replacement 6-bit encoding * Not included in the delivery package. Representative image. Technical features may vary depending on model.
-
Page 24: Displays
DISPLAYS Digital display VIEWFINDER – Displays the automatically calculated shutter speed in aperture priority mode or the countdown of longer shutter speeds in 1 s increments. – Warning that the metering or setting ranges are overshot or undershot using aperture priority mode –... -
Page 25: Lcd Panel
LCD PANEL IN REVIEW MODE All displays/values refer to the actual settings WHEN TAKING A PICTURE All displays/values refer to the actual settings In Live View mode When using the rangefinder... - Page 26 Exposure metering method (only visible for enlarged sections) Picture mode ( File number of the picture shown Drive Mode Drive Mode WLAN/Leica FOTOS Flash sync point Lens information Battery capacity Histogram Clipping identification of underexposed (blue), or overexposed subject sections (red)
- Page 27 CHARGE STATUS INDICATOR ON THE LCD PANEL The battery charge status is displayed in the status pane and in the header line. Display Charge status approx. 80 - 100% approx. 65 - 80% approx. 45 - 65% approx. 25 - 45% approx.
-
Page 28: Preparation
PREPARATION PREPARING THE CHARGER Use the mains cable with the matching regional plug to connect ATTACHING THE CARRY STRAP the charger to mains electricity. Note Attention • The charger will automatically adapt to local mains voltage. • Once you have attached the carry strap, please make sure that the clips are mounted correctly to prevent the camera from falling. -
Page 29: Charging The Battery
CHARGING THE BATTERY CHARGE STATUS INDICATORS ON THE CHARGER The camera is powered by a lithium-ion battery. INSERTING THE BATTERY IN THE CHARGER The status LED indicates a correct charging process. Display Charge status Charge time* battery is charging flashes green CHARGE approx. -
Page 30: Inserting/Removing The Battery
INSERTING/REMOVING THE BATTERY INSERTION ▸ Ensure that the camera is switched OFF (see p. 42) ▸ Open the bottom cover and close it again afterwards (see p. 32) Important • Removing the battery while the camera is switched on may result in the loss of custom settings or damage to the memory card. -
Page 31: Inserting/Removing The Memory Card
INSERTING/REMOVING THE MEMORY CARD The memory card slot is located directly next to the battery compartment. The camera will save exposures to an SD (Secure Digital), SDHC ▸ Ensure that the camera is switched OFF (see p. 42) (High Capacity) or SDXC (eXtended Capacity) memory card. ▸... - Page 32 OPEN/CLOSE THE BOTTOM COVER CLOSE OPEN ▸ Insert the bottom cover ▸ Turn the locking toggle in clockwise direction ▸ Click down the locking toggle ▸ Click up the locking toggle ▸ Check that the bottom cover was inserted and closed correctly ▸...
-
Page 33: Lens
It can therefore not be ruled out that a LEICA M LENSES specific camera/lens combination may result in systematic Most Leica M lenses can be used with any lens equipment (with or deviations. without 6-bit encoding in the bayonet). Your camera will also –... -
Page 34: Lenses With Limited Compatibility
LIVE VIEW MODE – When using Heavy lenses attached to a tripod-mounted camera, e.g. Noctilux 50 f/0.95 or Leica R lenses with an adapter: make – Super-Angulon-M 21 f/4 sure that the tilt of the tripod head cannot move inadvertently –... -
Page 35: Changing The Lens
CHANGING THE LENS DETACHING LEICA M LENSES ATTACHING ▸ Ensure that the camera is switched OFF ▸ Hold the lens on the fixed ring ▸ Press and hold the release button on the camera housing ▸ Turn the lens counter-clockwise until the alignment button is ▸... - Page 36 OTHER LENSES DETACHING THE ADAPTER (e.g. Leica R lenses) Other lenses can be used by inserting an adapter for M bayonets (e.g. Leica R-Adapter M). ATTACHING THE ADAPTER ▸ Ensure that the camera is switched OFF ▸ Detaching the lens ▸ Press and hold the release button on the camera housing ▸...
- Page 37 ATTACHING THE LENS TO THE ADAPTER DETACHING THE LENS FROM THE ADAPTER ▸ Ensure that the camera is switched OFF ▸ Ensure that the camera is switched OFF ▸ Hold the lens on the fixed ring ▸ Hold the lens on the fixed ring ▸...
-
Page 38: Lens Detection
The camera will automatically set the correct lens type when a The 6-bit encoding in the bayonet of current model Leica M lenses Leica M lens with 6-bit encoding is used. No manual setting will be allows the camera to detect the lens type. -
Page 39: Using A Leica R Lens
The lens type must also be entered manually when attaching a side of the depth of field scale. Leica R lens via the Leica R adapter. The camera will automatically • The list also includes lenses that used to be available without... -
Page 40: Diopter Adjustment
• Please note the information provided on the Leica homepage for the selection on an appropriate correction lens. • Please note that the viewfinder of the Leica M10-R is set to -0.5 diopter as standard. If you wear eye glasses with 1 diopter,... -
Page 42: Camera Operation
CAMERA OPERATION SWITCHING THE CAMERA OFF CONTROL ELEMENTS MAIN SWITCH The main switch switches the camera on and off. SWITCHING THE CAMERA ON Note • The function (see p. 57) deactivates the Auto Power Saving Auto Power Saving camera automatically if no operation occurs within a preset time. -
Page 43: Shutter Button
SHUTTER BUTTON 2. Press down fully – Shutter release • The data is then transferred to the memory card. – Starting a preselected self-timer delay – Starting a picture series or interval shooting Notes • Press down the shutter button in a smooth motion until you hear the click of the shutter to prevent camera shake. -
Page 44: Shutter Speed Setting Dial
SHUTTER SPEED SETTING DIAL ISO SETTING WHEEL The shutter speed setting dial has no stop, which means it can be turned in either direction from any position. It will click at each engraved position and for intermediate values. Intermediate positions outside the click positions must not be used. Please read the section “Exposure”... -
Page 45: Thumbwheel
THUMBWHEEL DIRECTIONAL PAD/CENTER BUTTON – Menu navigation DIRECTIONAL PAD – Exposure compensation value selection – Enlarging/reducing viewed pictures – Menu navigation – Setting selected menu items/functions – Setting selected menu items/functions – Scrolling through the picture memory – Scrolling through the picture memory FOCUS BUTTON CENTER BUTTON –... -
Page 46: Button/Play Button/Menu Button
LV BUTTON/PLAY BUTTON/MENU BUTTON LCD PANEL – Display of most important current settings LV BUTTON – Quick access to some menus – Activating/deactivating the Live View mode – Touch control PLAY BUTTON – Activation and deactivation of the (continuous) review mode –... - Page 47 TOUCH CONTROL* in Picture mode (LV mode) in review mode tap briefly Shifting the metering field Select the recording Hide/show info displays double tap Focus aid activation Enlarging/reducing viewed pictures swipe Shifts the enlarged image section Scrolling through the picture memory Shifts the enlarged image section horizontal swipe (full length)
-
Page 48: Menu Control
MENU CONTROL MENU SECTIONS Menu sections: MAIN MENU MAIN MENU FAVORITES FAVORITES FAVORITES MENU MAIN MENU MAIN MENU The favorites menu offers quick access to the most frequently used – contains all menu items menu items. It can contain up to 15 menu items. These can be assigned individually (see p. 54). -
Page 49: Main Menu
MAIN MENU SUBMENU The main menu offers access to all settings. Most of these are There are various types of submenus available. The following pages organized in submenus. describe their operation. Current menu item Menu sections: Submenu item MAIN MENU MAIN MENU FAVORITES FAVORITES... -
Page 50: Menu Navigation
MENU NAVIGATION SCREEN BY SCREEN NAVIGATION Scrolling forward DISPLAY “HOME” SCREEN ▸ Press the button (INITIAL MENU CONTROL SCREEN) MENU • Screen 1 of the main menu will be displayed again after if there are no menu items assigned to the favorites menu: Screen 4. -
Page 51: Submenu
SUBMENU CONFIRM SELECTION ▸ Press the center button KEYBOARD/NUMBER PAD • The screen image changes back to the active menu item. The set function variant is shown on the right in the relevant menu line. Note • No confirmation is needed for the selection of . -
Page 52: Scale Menu
SELECTING A BUTTON (ICON/FUNCTION BUTTON) SCALE MENU Using button control ▸ Press the directional pad left or right as needed • The currently active button will be highlighted. ▸ Turn the thumbwheel • The currently active button will be highlighted. •... -
Page 53: Date/Time Menu
DATE/TIME MENU COMBI MENU The setting of the individual menu items is done via a setting bar in To move to the next settings field the lower display area. ▸ Press the directional pad left/right To access individual menu items ▸... -
Page 54: Quick Access
QUICK ACCESS MANAGING THE FAVORITES MENU ▸ Select in the main menu Customize Control Customize Control FAVORITES MENU ▸ Select Edit Favorites Edit Favorites ▸ Select the desired menu item Assign your most frequently used menu items to a favorites menu (up to 15 items) for quick and easy access. -
Page 55: Via The Status Screen
VIA THE STATUS SCREEN DIRECT ACCESS Assign a menu function to the thumbwheel for extra quick operation: . The setting has no impact Exp. Compensation Exp. Compensation LV Zoom LV Zoom on the function if focus assist tools are in use. ▸... -
Page 56: Camera Basic Settings
CAMERA BASIC SETTINGS DATE/TIME For details on how to navigate in the menus and for inputs see DATE chapter "Menu control" (see p. 48). You can choose one of 3 options. • The two menu items appear automati- Language Language Date & Time Date &... -
Page 57: Time Zone
Notes and on again. • is available only with an attached Leica Visoflex Auto GPS Time Auto GPS Time (optional accessory) with activated GPS function. The menu item will otherwise be grayed out and unavailable for settings. -
Page 58: Status Led
STATUS LED DISPLAY/VIEWFINDER SETTINGS The status LED indicates a variety of camera processes when the The camera comes equipped with a 3” liquid crystal color panel, device is in its factory settings (incl. when processes like Save, which is protected by a glass cover made of extremely hard and Zoom in/Zoom out and Delete are applied to a recording). -
Page 59: Brightness
BRIGHTNESS LEICA VISOFLEX (EVF) An electronic viewfinder (EVF) can be attached to the Leica M10-R RANGEFINDER via its accessory shoe. Leica Visoflex is an optional extra and The brightness sensor automatically adjusts rangefinder bright- offers the following functions: ness. – Swivel function for easy photography with various angles –... -
Page 60: Lcd Panel/Evf Use
LCD PANEL/EVF USE LIVE VIEW MODE (RECORDING MODE) Factory setting: The electric viewfinder can take on a variety screen of functions. Auto Auto Specifies the display to be used in Live View mode. The displays appearing on screen and in the electronic viewfinder are identical. -
Page 62: Basic Picture Settings
BASIC PICTURE SETTINGS JPG SETTINGS The functions and settings described in this section apply for pictures in format only. FILE FORMAT RESOLUTION Choose the JPG format or the standardized raw data format (= Digital Negative). These can be used individually or format setting offers 3 image resolution (number of pixels) simultaneously. -
Page 63: Image Properties
IMAGE PROPERTIES COLOR SATURATION The saturation factor in color images determines, whether colors in One of the many advantages of digital photography is that it is very the picture appear "pale" and pastel-like or "vivid" and colorful. easy to change important image properties. While lighting conditions and weather (e.g. -
Page 64: Picture Mode
As a rule, the functions and settings described in the following Continuous Low Speed Continuous Low Speed – refer to the recording of individual pictures. The Leica M10-R offers Continuous High Speed Continuous High Speed a number of other picture modes in addition to single frame shots. -
Page 65: Image Types
The bright-line rangefinder of this camera is not just a very high-quality, large, brilliant and bright viewfinder – it also doubles as a highly precise, lens-coupled metering device. All Leica M lenses with focal lengths between 16 and 135 mm are coupled automatically when they are attached to a camera. - Page 66 28 mm + 90 mm The relevant bright-line frame will light up in the combinations 35 mm + 135 mm, 50 mm + 75 mm or 28 mm + 90 mm when 1/8000 12500 999-9000 lenses with a focal length of 28 (Elmarit as of serial number 2 411 001), 35, 50, 75, 90 and 135 mm are used. 35 mm + 135 mm 1/8000 12500...
-
Page 67: Live View Mode
LIVE VIEW MODE SHOW ALTERNATIVE IMAGE RANGES/FOCAL LENGTHS Additional bright-line frames may be displayed depending on the The Live View mode allows viewing the image object on the LCD attached lens. These allow a simulation of the relevant focal panel while the picture is taken. The image is show exactly as it is lengths. -
Page 68: Focusing
FOCUSING SPLIT IMAGE METHOD For an architectural photograph, you might aim the metering field Various assist functions are provided for focusing, depending on of the rangefinder at e.g. the vertical edge or any other clearly whether you use the camera's rangefinder or Live View mode. defined vertical line and keep turning the focus ring on the lens until the edge contour or the line is visible at the outer edges of the VIA RANGEFINDER... -
Page 69: In Live View Mode
IN LIVE VIEW MODE ▸ Select in the main menu Capture Assistants Capture Assistants (WITH ASSIST FUNCTIONS) ▸ Select Focus Peaking Focus Peaking ▸ Select the desired setting You can set the image sharpness in Live View mode via the screen Blue Blue Green... -
Page 70: Enlargement
ENLARGEMENT ACCESSING ASSIST FUNCTIONS In the image at the bottom left, the position and zoom level of the 1/8000 12500 displayed cropped section is shown. The cropped section displayed can also be unenlarged. The most recently used zoom level is used each time assist functions are accessed. - Page 71 VIA THE FOCUS RING VIA THE THUMBWHEEL Assist functions can also be accessed automatically during The assist functions can additionally be accessed via the focusing. thumbwheel. ▸ Select in the main menu ▸ Select in the main menu Capture Assistants Capture Assistants Customize Control Customize Control...
-
Page 72: Iso Sensitivity
ISO SENSITIVITY FIXED ISO VALUES The ISO setting covers a range between ISO 100 and ISO 50000, VALUES ENGRAVED ON THE ISO SETTING WHEEL allowing you to adapt to the relevant situation as required. There is more leeway for the use of preferred shutter speed and ▸... -
Page 73: Automatic Setting
AUTOMATIC SETTING LIMITING ISO VALUES All values from ISO 125 are available. The camera automatically adjusts the sensitivity to ambient Factory setting: 1600 1600 brightness and/or to the configured shutter speed/aperture ▸ Select in the main menu settings combination. In conjunction with aperture priority mode, ISO Setup ISO Setup ▸... -
Page 74: White Balance
WHITE BALANCE AUTOMATIC CONTROL/FIXED SETTINGS – : for automatic control, which delivers neutral results in Auto Auto In digital photography, White Balance ensures neutral color most situations rendering in any light. White Balance relies on the setting made in –... -
Page 75: Manual Setting Via Metering
MANUAL SETTING VIA METERING Moving the metering field Gray Card Gray Card ▸ Press the directional pad left or right as needed This metering variant captures only the color hue metered within Taking measurements the metering field and calculates the mean gray value from it. ▸... -
Page 76: Direct Setting Of The Color Temperature
DIRECT SETTING OF THE COLOR TEMPERATURE EXPOSURE Values between 2000 and 13100 K (Kelvin) can be set directly. The readiness of the exposure meter is signaled by continuously lit That gives you a very wide range, which covers virtually all color displays in the viewfinder or on the LCD panel: temperatures occurring in real life and within which you can adapt –... -
Page 77: Exposure Modes
EXPOSURE MODES WHEN USING THE RANGEFINDER Mostly center-weighted metering. The camera offers two exposure modes: aperture priority mode or The light reflected by the light-colored shutter blades is captured manual setting. Choose one of the two options depending on and measured by a photodiode. When the measuring range of the image object, situation or individual preference. -
Page 78: Aperture Priority - A
APERTURE PRIORITY - A Notes • The resulting shutter speed is displayed in half increments for Aperture priority mode sets the exposure automatically according more transparency. to the manually selected aperture. This mode is suitable for • The remaining exposure time after shutter release is counted pictures in which the depth of field is a critical compositional down in seconds in the viewfinder for shutter speeds greater element. -
Page 79: Manual Exposure Setting - M
MANUAL EXPOSURE SETTING – M DISPLAY IN THE VIEWFINDER underexposure by at least one aperture stop The following manual settings for shutter speed and aperture are a good choice: underexposure by a 1/2 aperture stop – to create a special image mood that can only be achieved with a correct exposure very specific type of exposure overexposure by a 1⁄2 aperture stop... -
Page 80: Long-Term Exposure ( )
FIXED SHUTTER SPEEDS LONG-TERM EXPOSURE ( This function can also be used to permanently set shutter speeds longer than 8 s. B FUNCTION In setting , the shutter remains open as long as the shutter button is held down (up to max. 16 min depending on ISO setting). T FUNCTION When the function is selected in conjunction with the self-timer... -
Page 81: Exposure Control
EXPOSURE CONTROL Notes • In each of these cases, the exposure meter remains deactivated; after shutter release, however, the digital number display in the EXPOSURE PREVIEW viewfinder counts the elapsed exposure time in seconds. You can now assess the effect of the relevant exposure setting on •... -
Page 82: Metering Memory Lock
METERING MEMORY LOCK Notes • A metering memory lock doesn’t make much sense in conjunc- We often want to arrange important subject elements outside the tion with multi-field metering, because a targeted capture of an center of the picture for reasons of picture composition and these individual object element will not be possible. -
Page 83: Exposure Compensation
EXPOSURE COMPENSATION Using thumbwheel control ▸ Select in the main menu Exposure meters are calibrated for a medium gray scale value, Customize Control Customize Control which matches a standard, i.e. average image object. Should the ▸ Select Customize Wheel Customize Wheel measured image detail not fulfill that requirement, then the a ▸... -
Page 84: Picture Recording Modes
PICTURE RECORDING MODES Notes • We recommend deactivating the preview mode ( Auto Review Auto Review when using this function. SERIAL EXPOSURES • The specified picture sequence stated in the technical The camera is set to single shot exposures ( ) by default. -
Page 85: Interval Shooting
INTERVAL SHOOTING Notes • Interval shooting over an extended period of time in a cold This camera allows you to capture motion sequences over location or in a place with high temperature and humidity may extended periods of time automatically using the interval shooting result in malfunctions. -
Page 86: Exposure Bracketing
EXPOSURE BRACKETING You can select the desired number of frames (3 or 5). The exposure difference, which can be set via , can be up to F-Stops F-Stops Many attractive objects are rich in contrast, which means they 3 EV. have very bright and very dark areas. The image effect can be ▸... -
Page 87: Self-Timer
SELF-TIMER Notes • Appears on the LCD panel if the bracketing function is The self-timer function allows taking pictures with a preset time activated. delay. We recommend that the camera is placed on a tripod. • The picture sequence: underexposure/correct exposure/ ▸... -
Page 88: Info Displays
INFO DISPLAYS Showing/hiding information temporarily Depending on the initial situation, the display toggles to the other INFO DISPLAYS IN PICTURE MODE setting when the shutter button is held at the first pressure point. ▸ Tap and hold the shutter button In Live View mode, the LCD panel can be used for displaying a range of settings. -
Page 89: Auxiliary Displays
AUXILIARY DISPLAYS SETTING LIMIT VALUES You can set a threshold value for these displays, i.e. define a value at what degree of overexposure they will appear, so that you can CLIPPING adjust these displays to specific conditions or in line with your own The Clipping display marks bright or dark areas in the image composition ideas. -
Page 90: Level Gauge
LEVEL GAUGE In the screen image, the horizon is denoted by a long line across the center of the image on its transverse axis. The integrated sensors of the camera show its orientation. These – in zero position = green indicators ensure exact camera orientation along the longitudinal –... -
Page 91: Grid
GRID HISTOGRAM The grids divide the image frame into multiple fields. They facilitate Histogram represents the brightness distribution in the picture. The picture composition and an exact camera orientation. The grid line horizontal axis shows the graduated values from black (left) distribution can be adjusted to fit the object. -
Page 92: Flash Photography
TTL flash metering, is available only for Leica system flash units like the SF 40. Other flash units, which only have a positive center contact, can be safely fired via the Leica M10-R, but cannot be controlled via the camera. Correct function cannot be guaranteed when using any other flash unit. -
Page 93: Flash Exposure Metering (Ttl Metering)
ATTACHING THE FLASH UNIT FLASH EXPOSURE METERING (TTL METERING) In conjunction with system-compatible flash units (see p. 92), ▸ Switch off the camera and flash unit the camera offers a fully automated flash mode, which is also ▸ Slide the foot of the flash unit all the way into the accessory available in the auto modes aperture priority and manual setting. -
Page 94: Hss (High Speed Sync.)
Operating mode A fully automated, camera-controlled HSS flash mode for all Automatic camera control shutter speeds and all exposure modes is available in the Leica M10-R for use with system-compatible flash units (see p. 92). It SF 40, SF 60: is activated by the camera automatically if the selected or Automatic camera control, no flash exposure compen- calculated shutter speed is faster than the sync speed (1⁄180 s). -
Page 95: Flash Control
FLASH CONTROL A flash is usually fired at the start of exposure ( ), right Start of Exp. Start of Exp. after the first shutter curtain has completely opened the image The settings and functions described in the following sections only window. -
Page 96: Flash Range
FLASH RANGE FLASH EXPOSURE COMPENSATION The usable flash range depends on the aperture and sensitivity This function can be used to selectively reduce or enhance flash values set manually or calculated by the camera. It is important to exposure regardless of ambient light, e.g. to brighten the face of a ensure that the subject is within the relevant flash range for person in the foreground when taking a picture outdoors in the sufficient illumination. - Page 97 • It is imperative to take note of the shortest flash sync speed, overruled when a relevantly equipped flash unit is attached, e.g. as it determines whether a "normal" flash or an HSS flash is a Leica SF 60 and a compensation value is entered on that flash fired. unit.
-
Page 98: Flash Exposure Displays In The Viewfinder
FLASH EXPOSURE DISPLAYS IN THE VIEWFINDER (with system-compatible flash units) The flash icon in the viewfinder display of the Leica M10-R gives feedback on and indicates various operating states. • The flash unit cannot fire does not appear • A correct operating mode must be... -
Page 100: Review Mode
REVIEW MODE CONTROL ELEMENTS IN REVIEW MODE There are two completely independent review functions available: – short-term rendering directly after exposure (Preview) 1/8000 12500 – normal Review mode, in which the stored recordings can be 999-9000 viewed and managed for any length of time Notes •... -
Page 101: Initiate/Exit Review Mode
INITIATE/EXIT REVIEW MODE SELECTING/SCROLLING THROUGH RECORDINGS The recordings are visually arranged in a horizontal reel. When the ▸ Press the button PLAY end of an image series is reached, the display automatically jumps • The last picture taken appears on the LCD panel. back to the first image in the series. -
Page 102: Info Displays In Review Mode
INFO DISPLAYS IN REVIEW MODE Using touch control With the factory settings in place, recorded pictures will be displayed without the information in the header and footer lines for an unobstructed view of the image. 1/8000 12500 999-9000 ▸ Briefly tap the LCD panel INFO 22:45 22.02.2012... -
Page 103: Cropped Section Zoom
CROPPED SECTION ZOOM You can zoom in to any section of an image for closer inspection. You have a four-level zoom factor available via the thumbwheel, while magnification is stepless if you use touch control. Using touch control ▸ Swiping will allow you to move the position of an enlarged cropped section •... -
Page 104: Displaying Multiple Recordings At Once
DISPLAYING MULTIPLE RECORDINGS AT ONCE Using button control ▸ Turn the thumbwheel The camera offers an overview function in which several thumbnail (to the right: increase magnification, to the left: decrease images can be viewed on one screen, which makes it easier to find magnification) a specific image. - Page 105 DISPLAYING RECORDINGS IN BLOCKS OF 20 Using button control In this view, you can browse through the blocks easily. ▸ Turn the thumbwheel to the left • 12 thumbnails are shown at the same time. Another turn on 936-954 the thumbwheel increases the number of pictures to 20. ▸...
-
Page 106: Tagging/Rating Of Recordings
RETURNING TO FULL SCREEN VIEW TAGGING/RATING OF RECORDINGS Using touch control Recordings can be tagged as favorites to find them quicker or to ▸ Two-finger spread simplify the later deletion of multiple recordings. Notes ▸ Briefly touch the image • Other recordings can be selected while the review menu is active. -
Page 107: Deleting Recordings
REMOVING INDIVIDUAL TAGS DELETING RECORDINGS ▸ Press the directional pad down There are several methods available to delete recordings: • The tag disappears. – deleting individual recordings – deleting all recordings without a tag/ranking – deleting all recordings ▸ Press the button MENU Important... -
Page 108: Deleting Individual Recordings
DELETING INDIVIDUAL RECORDINGS To cancel deletion and return to the normal review mode ▸ Press the button ▸ Press the button PLAY MENU Note • The “Scroll” and “Magnify” functions continue to be available when the “Delete” screen is active. ▸... -
Page 109: Deleting All Recordings
DELETING ALL RECORDINGS • The prompt appears. Really delete all? Really delete all? ▸ Press the button MENU ▸ Select Note ▸ Select in the Review menu Delete Multi Delete Multi • The LED will flash during the delete process. The process may take a few seconds. -
Page 110: Deleting Unrated Recordings
DELETING UNRATED RECORDINGS • The prompt appears. Really delete all unrated? Really delete all unrated? ▸ Press the button MENU ▸ Select • The LED will flash during the delete process. The process may ▸ Select in the Review menu Delete Multi Delete Multi take a few seconds. -
Page 111: Preview Of Latest Recording
PREVIEW OF LATEST RECORDING Recordings can be displayed automatically directly after they are taken to e.g. check the success of the recording quickly and easily. A duration for the automatic display can be configured. ▸ Select in the main menu Auto Review Auto Review ▸... -
Page 112: Other Functions
OTHER FUNCTIONS SAVING CURRENT SETTINGS AS A USER PROFILE CREATING PROFILES USER PROFILES Saving settings/Creating a profile This camera allows the permanent storage of any menu settings, to ▸ Create custom settings for the desired functions via menu e.g. access them quickly and easily for recurring conditions/image control objects. - Page 113 APPLY/ACTIVATE PROFILES EXPORTING/IMPORTING PROFILES TO/FROM THE MEMORY CARD Factory setting: Standard Profile Standard Profile ▸ Select in the main menu ▸ Select in the main menu User Profiles User Profiles User Profiles User Profiles ▸ Select in the submenu ▸ Select Export to Card Export to Card...
-
Page 114: Data Management
DATA MANAGEMENT Notes • When using memory cards that were not formatted with this camera, the file numbering will begin with 0001 again. Should DATA STRUCTURE ON THE MEMORY CARD the memory card already contain a file with a higher number, then numbering will be continued from that number. -
Page 115: Edit File Names
EDIT FILE NAMES CREATING A NEW FOLDER ▸ Select in the main menu ▸ Select in the main menu Image Numbering Image Numbering Image Numbering Image Numbering ▸ Select ▸ Select Change Filename Change Filename New Folder New Folder • A keyboard submenu is displayed. •... -
Page 116: Adding Copyright Information
This function is available only with You can enter up to 20 characters of information under 2 headings Leica Visoflex attached. The camera will then continuously receive per picture. the current GPS data (latitude and longitude, elevation above sea ▸... -
Page 117: Formatting A Memory Card
• A memory card should be formatted again in the camera if it was formatted in another device, e.g. a computer. • Contact your retailer or Leica Customer Care for assistance if the memory card cannot be formatted/overwritten (see p. 146). -
Page 118: Data Transfer
DATA TRANSFER RESETTING THE CAMERA TO FACTORY SETTINGS Data can be conveniently transferred to mobile devices via Leica This function allows you to reset all your custom menu settings FOTOS (see p. 120). Alternatively, a card reader can be used for back to the factory settings. -
Page 119: Firmware Updates
Camera Firmware Camera Firmware Leica will notify you of any new updates, once you have registered • This menu item is available only if a current firmware file is your camera. stored on the inserted memory card. -
Page 120: Leica Fotos
The camera can be controlled remotely using a smartphone/tablet FIRST-TIME CONNECTION TO A MOBILE DEVICE PC. This will require an installation of the Leica FOTOS app on the The connection is established via WLAN. A pairing of the camera mobile device. -
Page 121: Shutting Down The Connection
ON THE MOBILE DEVICE Notes • Should there be more than one known device in the vicinity of ▸ Launch the Leica FOTOS app the camera, then it will automatically connect to the first device ▸ Select the camera model responding. -
Page 122: Care/Storage
CARE/STORAGE • Empty you camera bag completely if it ever gets wet during use. Your equipment might otherwise be subjected to moisture and We recommend the following if the camera will not be used for an tanning residue released by the moist leather. extended period of time: •... - Page 123 RECHARGEABLE BATTERY • Lens caps also protect the lens against accidental fingerprint smudges and rain. • Lithium-ion rechargeable batteries should only be stored • All mechanical bearings and sliding surfaces on your lens are partially charged, i.e. not fully depleted or fully charged. The lubricated.
-
Page 124: Sensor
SENSOR SENSOR CLEANING You can send your camera to the Leica Customer Care department DUST DETECTION for sensor cleaning (see p. 146). This service is not part of the warranty offering and will therefore incur charges. Use the Any dust or dirt particles stuck to the glass cover of the sensor... - Page 125 ▸ Select in the main menu. Important Sensor Cleaning Sensor Cleaning ▸ Select • Any inspection or cleaning of the sensor should be done in an Open Shutter Open Shutter environment that is as much as possible dust-free to prevent •...
-
Page 126: Faq
Problem possible cause to be verified Troubleshooting suggestions Battery issues Battery is depleted too quickly Battery too cold Warm the battery (e.g. in pants pocket) and only insert directly before use Battery too hot Allow battery to cool down LCD panel or EVF set too bright Reduce brightness Power save mode deactivated Activate... - Page 127 The LCD panel is to dark or too bright/not clear The brightness setting is incorrect Adjust the display brightness Viewing angle is too small View it at a perpendicular angle Brightness sensor blocked Make sure that the brightness sensor is not blocked ...
- Page 128 Change the setting Lens Detection Lens Detection The attached lens is not encoded Contact Leica Customer Care Pictures/recordings are damaged or missing The memory card was removed while the readiness Never remove the memory card while the readiness indicator was flashing indicator is flashing.
- Page 129 The most recent recording is not displayed on the Preview is deactivated Activate Auto Review Auto Review LCD panel Picture quality The picture is too bright Light sensor was covered while picture was taken Make sure that the light sensor is not obstructed Image noise Long exposure times (>1 s) Activate the noise suppression function for long-term...
- Page 130 Smartphones/WLAN WLAN connection gets interrupted Camera deactivates when it overheats (safety feature) Allow camera to cool down Cannot pair with a mobile device The camera was already paired with the mobile device Delete the camera registration from the Bluetooth settings in the mobile device and repeat pairing process Mobile device connection/image transfer not The mobile device is too far away...
-
Page 132: Menu Overview
MENU OVERVIEW Factory settings Available for Main menu 1. Submenu Page FAVORITES FAVORITES FAVORITES FAVORITES Menu page 1 Lens Detection Lens Detection Drive Mode Drive Mode Interval Interval Exposure Bracketing Exposure Bracketing Exp. Metering Exp. - Page 133 Factory settings Available for Page FAVORITES FAVORITES FAVORITES FAVORITES Menu page 2 JPG Settings JPG Settings JPG Resolution JPG Resolution Contrast Contrast Sharpness Sharpness Saturation Saturation Monochrome Monochrome Auto Review Auto Review ...
- Page 134 Display Brightness Display Brightness EVF Brightness EVF Brightness Menu page 3 Auto Power Saving Auto Power Saving Leica FOTOS Leica FOTOS Date & Time Date & Time Auto GPS Time Auto GPS Time ...
- Page 135 Dust Detection Dust Detection Camera Information Camera Information Camera Firmware Camera Firmware Regulatory Information Regulatory Information Copyright Information Copyright Information This menu item is only available if the Leica Visoflex viewfinder is attached (available as an accessory).
-
Page 136: Index
Color Saturation ................. 63 Color Temperature ..............76 A (Aperture priority) ..............78 Connection, mobile devices ............. 120 Accessory ..................3 Contact. Leica ................. 146 Adapter ..................36 Contrast, Image Properties ............63 AE-L ................... 82 Copyright ................. 116 Akademie, Leica ............... 146 Customer service .............. - Page 137 Exposure metering, flash ............93 Folder structure ............... 114 Exposure, metering methods ............76 Format ..................62 Exposure, modes ............... 77 Formatting, memory card ............117 Exposure preview ............... 81 Exposure simulation ..............81 Exposure time, max..............80 General information ..............12 GPS ..................
- Page 138 Navigation, menu ............... 50 Leica Academy................. 146 Noise reduction ................. 80 Leica Customer Care..............146 Notes, legal .................. 4 Leica FOTOS ................ 7, 120 Number pad ................51 Lens ................9, 33, 122 Level Gauge ................90 Light balance ................79 Operating mode, exposure ............
- Page 139 Sensor cleaning ............... 124 Serial exposures ................ 84 Quick access ................54 Service ..................146 Settings, store................112 Sharpness, Image Properties ............63 Rangefinder ................. 65, 77 Shutter button................43 Rating, recording ..............106 Shutter release ................43 Raw data.................. 118 Shutter speed/aperture combination .........
- Page 140 Troubleshooting ............... 126 TTL metering ................ 92, 93 Update, firmware ............... 14, 119 User-defined operation ............... 54 User profiles ................112 Viewfinder.................. 24 Warranty ..................15 White Balance ................74 Wi-Fi/WLAN ................7...
-
Page 142: Technical Data
DNG™: 14 bit Leica M-lenses, Leica R-lenses via adapter JPG: 8 bit Operating conditions Operating conditions Color space Color space 0 to +40 °C sRGB Interfaces Interfaces ISO accessory shoe with additional control contacts for Leica flash units and Leica Visoflex viewfinder (optional accessory) - Page 143 Parallax compensation linear flash mode with all shutter speeds below 1⁄180s available (with The horizontal and vertical difference between viewfinder and lens is HSS-compatible Leica system flash units) compensated automatically in line with the relevant focus setting. Shutter button Shutter button Congruence of viewfinder and actual image.
- Page 144 3 or 5 exposures, up to ±3 EV, in 1⁄3 EV increments WLAN WLAN ISO sensitivity range ISO sensitivity range WLAN function for connecting to the Leica FOTOS app. The Leica app : ISO 100 to ISO 50000 ISO Auto ISO Auto is available from the Apple App Store™ or the Google Play Store™.
- Page 145 Only with Leica Visoflex viewfinder attached (optional accessory) Optional, not available everywhere due to country-specific legislation. Data is written to Exif header of the picture files Menu languages Menu languages English, German, French, Italian, Spanish, Russian, Japanese, Simplified Chinese, Traditional Chinese, Korean, Portuguese POWER SUPPLY ...
-
Page 146: Leica Customer Care
LEICA CUSTOMER CARE Please contact the Customer Care department of Leica Camera AG for the maintenance of your Leica equipment and for help and advice regarding Leica products and how to order them. You can also contact the Customer Care department or the repair service provided by your regional Leica subsidiary for repairs or warranty claims.
Need help?
Do you have a question about the M10-R and is the answer not in the manual?
Questions and answers