Advertisement
Table of Contents
- 1 Thank You
- 2 Table of Contents
- 3 Guardian 921 Specifications
- 4 Before Beginning
- 5 Power Supply Installation
- 6 Motherboard Installation
- 7 LED, Power and Reset Installation
- 8 USB & Audio Installation
- 9 5.25" Screwless Drive Bay Installation
- 10 Hard Drive Installation
- 11 Front 12CM Fan Installation
- 12 Support and Service
- Download this manual
Advertisement
Table of Contents

Related Manuals for NZXT GUARDIAN 921


Summary of Contents for NZXT GUARDIAN 921
- Page 1 GUARDIAN 921 User’s manual...
-
Page 3: Thank You
With every product, we are still breaking more boundaries and limits. Once again, thank you and all NZXT fans for the support and we hope to bring more amazing products in the coming years. -
Page 4: Table Of Contents
Table of Contents Thank you..................1 Guardian 921 Specifications ............3 Before Beginning................4 Power Supply Installation ............... 4 Motherboard Installation ..............4 LED, Power and Reset Installation ..........5 USB & Audio Installation ..............5 ... -
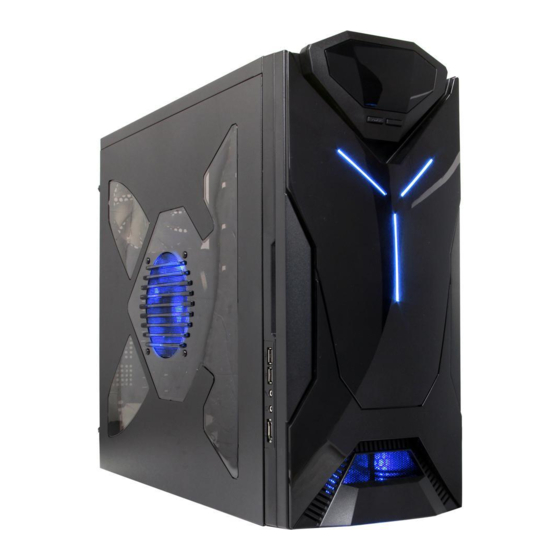
Page 5: Guardian 921 Specifications
Spacious interior and solid construction: Built from solid .8mm and 1.0mm steel, the Guardian 921 gives the user ample space for large high end video cards and space for up to four internal hard drives. -
Page 6: Before Beginning
Please refer to your motherboard manual for related mounting instructions and troubleshooting. Motherboard Installation The Guardian 921 supports the following motherboard: ATX, BABY AT, MINI ATX, and MICRO ATX. The Index for the standoff holes are as follows. (Imprinted on the motherboard tray are serial... -
Page 7: Led, Power And Reset Installation
The HDD LED located on the front panel should flash red when there is activity in the hard drive. (Red/White, +/-) 4. The NZXT Guardian 921 has a separate four pin molex connector to light the front LEDs, simply connect it to your power supply. - Page 8 Front Audio Ground AGND L-OUT Front Left Channel Audio Signal Line out_L R-OUT Front Right Channel Audio Signal Line out_R BLINE Line L-RET Rear Left Channel Audio Signal out_L BLINE Line R-RET Rear Right Channel Audio Signal out_R NZXT. 6...
-
Page 9: 5.25" Screwless Drive Bay Installation
ASUS© Motherboard Pin Assignment 5.25” Screwless Drive Bay Installation 1. The NZXT Guardian 921 comes with a lock on screw less drive cage design so you can easily pull out and replace drives. For the 5.25” devices, match the screw hole of your drive with the drive bay holder and make sure the device is where you want it. -
Page 10: Hard Drive Installation
Hard Drive Sliding into Place 2. Slide the device in place and secure. Front 12CM Fan Installation The Guardian 921 allows one 120mm to be installed at the front of the case, in order to install the fan, please follow these instructions. NZXT. 8... - Page 11 ( Figure 1 & 2 ) 4. After removing the cage, install the 120mm. Figure 1. Two screws to the left of the Hard drive cage Figure 2. Two screws located at the bottom of the case NZXT. 9...
-
Page 12: Support And Service
You may inquire about replacement parts at rma@nzxt.com. Thank you again for purchasing an NZXT case. If you have any more comments or questions. Please visit our website or send us an email.
Need help?
Do you have a question about the GUARDIAN 921 and is the answer not in the manual?
Questions and answers