Advertisement
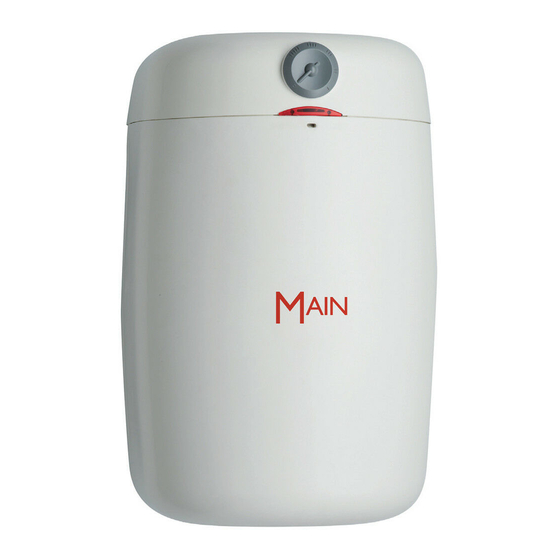
Elson 10/15L Unvented
Water Heater
Installation and User Instructions
Model: EUV10, EUV15.
Please read and understand these instructions before starting work.
Please leave this leaflet with the user following installation
WARNING
This water heater must only be installed
by qualified persons.
PACK CONTENTS
Heater, pressure relief valve, fixing screws
and plugs, installation and user instructions.
36006229 Issue 5
1
Advertisement
Table of Contents

Summary of Contents for Elson EUV10
- Page 1 Elson 10/15L Unvented Water Heater Installation and User Instructions Model: EUV10, EUV15. Please read and understand these instructions before starting work. Please leave this leaflet with the user following installation WARNING This water heater must only be installed by qualified persons.
-
Page 2: Table Of Contents
CONTENTS SECTION PAGE INTRODUCTION TECHNICAL SPECIFICATION INSTALLATION COMMISSIONING EXPLANATION TO USER MAINTENANCE FAULT FINDING SPARE PARTS GUARANTEE 10.0 ENVIRONMENTAL INFORMATION 11.0 SPARE PARTS ENQUIRIES 1.0 INTRODUCTION Thank you for purchasing our 10/15 litre unvented water heater. The water heater has been manufactured to the highest standards and has been designed to meet all the latest relevant safety specifications. -
Page 3: Technical Specification
2.0 TECHNICAL SPECIFICATIONS Electrical rating ..........220-240V~ 50Hz 2kW Temperature range ........12 to 72°C Capacities ............10 or 15 litres Weight (empty) ..........10 litre - 6.5kg ..........15 litre - 7.5kg Weight (full) ........... 10 litre - 16.5kg ........... -
Page 4: Installation
3.0 INSTALLATION Warning: This appliance must be earthed. It is suitable for a.c. supply only. Electrical installation must be carried out by a competent electrician and be in accordance with the latest IEE wiring regulation. 3.1 LOCATION 3.1.1 National Wiring rules may contain restrictions concerning the installation of these units in bathrooms. - Page 5 IMPORTANT INSTALLATION POINTS 3.3.1 This unvented water heater MUST be fitted with the Pressure Relief Valve supplied. FAILURE TO PROVIDE ADEQUATE PRESSURE RELIEF WILL INVALIDATE ANY GUARANTEE AND LEAD TO A DANGEROUS INSTALLATION. 3.3.2 Expansion can take place within the cold water supply PROVIDED THAT BOTH: (a) Backflow in the main is not prevented by any stop valve with loose jumper, check valve, pressure reducing valve or similar AND;...
- Page 6 FIGURE 02: For inlet pressures up to 0.41MPa (4.1 bar) Pressure relief valve FIGURE 03: For inlet pressures up to 0.41 MPa (4.1 bar) where expansion in mains supply is not possible. Expansion vessel Check valve Pressure relief valve FIGURE 04: For inlet pressures above 0.41 MPa (4.1 bar) Expansion vessel Pressure...
- Page 7 3.4 DISCHARGE 3.4.1 The discharge outlet from the Pressure (expansion) Relief Valve must be connected to a discharge pipe. It is recommended that a tundish be installed in the discharge pipe to give a visible indication that the valves are operating. 3.4.2 The discharge pipe must fall continuously from the valve outlets and be unobstructed and in a frost-free environment.
-
Page 8: Commissioning
3.5 ELECTRICAL WARNING: This appliance must be earthed. It is suitable for a.c. supply only. Disconnect the electrical supply before removing the terminal cover. Installation must be in accordance with the current I.E.E. Wiring Regulations. 3.5.1 The unit is supplied fitted with a 0.75m 3 core 1mm flexible cable. - Page 9 4.1.5 Allow unit to fill and leave hot tap running for a short while to purge any air and flush out the pipework. Close the hot tap and check the system for leaks. 4.1.6 Manually test the operation of the Pressure (expansion) Relief Valve. Ensure water flows freely from the valve and through the discharge pipes.
-
Page 10: Explanation To User
5.0 EXPLANATION TO USER Following Installation and Commissioning of the water heater, the operation should be fully explained to the user. 5.1 HOT WATER 5.1.1 Indicate the location of the water heater and identify the outlets to which it is connected. 5.1.2 Explain that the temperature is set upon installation and confirm the temperature which the water is set at. -
Page 11: Maintenance
6.0 MAINTENANCE Warning: disconnect from all electrical supplies before beginning any work on the unit. Water contained within the unit may be very hot! Maintenance should be carried out by a competent person and any replacement parts should be authorised Supplier spare parts. It is recommended that maintenance is carried out regularly and should include the checks detailed in the sections below. - Page 12 COLD WATER INLET HOT WATER OUTLET (BLUE) (RED) EARTH POINT FIXING FIGURE 06: CORRECT ORIENTATION OF ELEMENT PLATE (VIEWED FROM TOP WITH COVER REMOVED) 6.1.12 Re-commission the unit following the INSTALLATION and COMMISSIONING instructions. The Pressure (expansion) Relief Valve should be regularly checked.
-
Page 13: Fault Finding
7.0 FAULT FINDING Disconnect the electrical supply before removing the terminal cover. It is recommended that any service operations on the heater are carried out by a competent person. FAULT POSSIBLE CAUSES ACTION Water not heating 1. Electrical supply fault Check electrical supply 2. -
Page 14: Spare Parts
8.0 SPARE PARTS The following list of spare parts is available for your water heater. Please refer to the Rating Label on the top of your heater before ordering to ensure the correct spare part is obtained. Do not replace with parts not recommended by the manufacturer - this will invalidate your guarantee and may render the installation dangerous. -
Page 15: Guarantee
9.0 GUARANTEE This water heater is guaranteed as a replacement product only for a period of one year from the date of purchase provided: The unit has been installed in accordance with these instructions. The unit has not been tampered with and has been regularly maintained as detailed in these instructions. -
Page 16: Spare Parts Enquiries
Unit 3A, 780 South Street Whiteinch, Glasgow, G14 OSY Tel: 0141 434 1530 The policy of Elson is one of continuous product development and as such, we reserve the right to change specification without notice. Fifers Lane, After Sales Service...


Need help?
Do you have a question about the EUV10 and is the answer not in the manual?
Questions and answers