Table of Contents
Troubleshooting

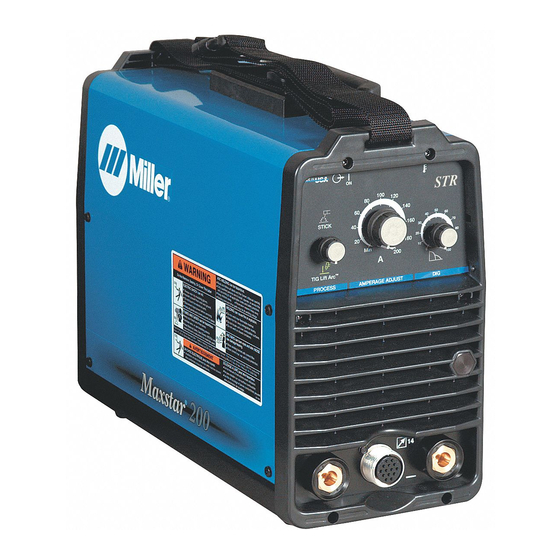
Related Manuals for Miller Electric Maxstar 200 STR


Summary of Contents for Miller Electric Maxstar 200 STR
- Page 1 Maxstar 200 STR Visit our website at www.MillerWelds.com OM-2233 2007−04 Processes TIG (GTAW) Welding Stick (SMAW) Welding Description 115/230/400/460 Volt Models W/AutolineR Arc Welding Power Source And Non-CE Models 203 409Q...
- Page 2 ISO 9001:2000 Quality System Standard. particular model are also provided. Miller Electric manufactures a full line of welders and welding related equipment. For information on other quality Miller products, contact your local Miller distributor to receive the latest full line catalog or individual specification sheets.
-
Page 3: Table Of Contents
TABLE OF CONTENTS SECTION 1 − SAFETY PRECAUTIONS - READ BEFORE USING 1-1. Symbol Usage ............... . 1-2. - Page 4 TABLE OF CONTENTS SECTION 10 − STICK WELDING (SMAW) GUIDELINES 10-1. Stick Welding Procedure ............. . . 10-2.
- Page 5 European Community (CE) Products NOTE This information is provided for units with CE certification (see rating label on unit). Manufacturer: Miller Electric Mg. Co. 1635 W. Spencer St. Appleton, WI 54914 USA Phone: (920) 734-9821 European Contact Signature: Maxstar Declares that the product:...
- Page 6 Notes...
-
Page 7: Section 1 − Safety Precautions - Read Before Using
DC constant voltage (wire) welder, 2) a DC manual (stick) welder, or 3) an AC welder with reduced open-circuit volt- age. In most situations, use of a DC, constant voltage wire welder is recommended. And, do not work alone! D Disconnect input power or stop engine before installing or servicing this equipment. - Page 8 D Do not use welder to thaw frozen pipes. D Remove stick electrode from holder or cut off welding wire at contact tip when not in use.
-
Page 9: Additional Symbols For Installation, Operation, And Maintenance
1-3. Additional Symbols For Installation, Operation, And Maintenance FIRE OR EXPLOSION hazard. D Do not install or place unit on, over, or near combustible surfaces. D Do not install unit near flammables. D Do not overload building wiring − be sure power supply system is properly sized, rated, and protected to handle this unit. -
Page 10: Principal Safety Standards
1-5. Principal Safety Standards Safety in Welding, Cutting, and Allied Processes, ANSI Standard Z49.1, from Global Engineering Documents (phone: 1-877-413-5184, website: www.global.ihs.com). Recommended Safe Practices for the Preparation for Welding and Cut- ting of Containers and Piping, American Welding Society Standard F4.1 from Global... -
Page 11: Section 2 − Consignes De Sécurité − À Lire Avant Utilisation
SECTION 2 − CONSIGNES DE SÉCURITÉ − LIRE AVANT UTILISATION Y Avertissement : se protéger et protéger les autres contre le risque de blessure — lire et respecter ces consignes. 2-1. Symboles utilisés Symbole graphique d’avertissement ! Attention ! Cette pro- cédure comporte des risques possibles ! Les dangers éven- tuels sont représentés par les symboles graphiques joints. - Page 12 LES RAYONS D’ARC peuvent entraî- ner des brûlures aux yeux et à la peau. Le rayonnement de l’arc du procédé de soudage génère des rayons visibles et invisibles intenses (ultraviolets et infrarouges) susceptibles de provo- quer des brûlures dans les yeux et sur la peau. Des étincelles sont projetées pendant le soudage.
-
Page 13: Proposition Californienne 65 Avertissements
2-3. Dangers supplémentaires en relation avec l’installation, le fonctionnement et la maintenance Risque D’INCENDIE OU D’EXPLO- SION. D Ne pas placer l’appareil sur, au-dessus ou à proximité de surfaces inflammables. D Ne pas installer l’appareil à proximité de produits inflammables. D Ne pas surcharger l’installation électrique −... -
Page 14: Principales Normes De Sécurité
2-5. Principales normes de sécurité Safety in Welding, Cutting, and Allied Processes, ANSI Standard Z49.1, de Global Engineering Documents (téléphone : 1-877-413-5184, site In- ternet : www.global.ihs.com). Recommended Safe Practices for the Preparation for Welding and Cut- ting of Containers and Piping, American Welding Society Standard AWS F4.1 de Global Engineering Documents (téléphone : 1-877-413-5184, site Internet : www.global.ihs.com). -
Page 15: Section 3 − Definitions (Ce Models)
SECTION 3 − DEFINITIONS (CE Models) 3-1. Warning Label Definitions Warning! Watch Out! There are possible hazards as shown by the symbols. Electric shock from welding electrode or wiring can kill. 1.1 Wear dry insulating gloves. Do not touch electrode with bare hand. Do not wear wet or damaged gloves. - Page 16 = <60 3-2. WEEE Label (For Products Sold Within The EU) OM-2233 Page 10 > 60 s S-179 309-A Warning! Watch Out! There are possible hazards as shown by the symbols. Electric shock from wiring can kill. Disconnect input plug or power before working on machine.
-
Page 17: Manufacturer's Rating Label
3-3. Manufacturer’s Rating Label 1A 10V 1A 20V 50/60 Hz 50/60 Hz 50/60 Hz 50/60 Hz 50/60 Hz 3-4. Symbols And Definitions Amperes Volts Percent Protective Earth (Ground) Duty Cycle Primary Voltage Rated No Load Voltage (Average) Output EN 60974−1 200A 18V =115V 100%... -
Page 18: Section 4 − Installation
SECTION 4 − INSTALLATION 4-1. Specifications Input Power Input Power Rated Output Rated Output Three-Phase 150 A @ 26 VDC, 60% Duty Cycle Stick Process Three-Phase 175 A @ 17 VDC, 60% Duty Cycle TIG Process Three-Phase 200 A @ 28 VDC, Stick Process 30% Duty Cycle Three-Phase... -
Page 19: Volt-Ampere Curves
4-2. Volt-Ampere Curves Stick Max TIG Max Stick/TIG Min DIG Max O th e r In p u t V o lt a g e s Stick Max TIG Max Stick/TIG Min *Amperage setting must be reduced to obtain currents less than highlighted data* point. 1 1 5 V A C I n p u t Amp eres DIG Max... -
Page 20: Duty Cycle And Overheating
4-3. Duty Cycle And Overheating 90 A @ 100% Duty Cycle For 115 Volt Single-Phase Stick Process 125 A @ 100% Duty Cycle For 115 Volt Single-Phase TIG Process 150 A @ 60% Duty Cycle For Stick Process (Other Voltages) 175 A @ 60% Duty Cycle For TIG Process (Other Voltages) Overheating OM-2233 Page 14... -
Page 21: Selecting A Location
4-4. Selecting A Location Dimensions And Weight 34.7 lb (15.7 kg) - without power cord 37.3 lb (16.9 kg) - with power cord 7-9/16 in (192 mm) Location And Airflow 18 in (460 mm) 17-1/4 in (438 mm) 13-3/8 in (333 mm) 18 in (460 mm) -
Page 22: Weld Output Terminals And Selecting Cable Sizes
4-5. Weld Output Terminals And Selecting Cable Sizes* Weld Output Terminals Y Turn off power before Welding connecting to weld out- Amperes*** put terminals. Y Do not use worn, dam- aged, undersized, or poorly spliced cables. − Output Receptacles This chart is a general guideline and may not suit all applications. If cable overheats, use next size larger cable. **Weld cable size (AWG) is based on either a 4 volts or less drop or a current density of at least 300 circular mils per ampere. -
Page 23: Tig Lift-Arc Dcen (Direct Current Electrode Negative) Connections
4-7. TIG Lift-Arc DCEN (Direct Current Electrode Negative) Connections Y Turn off power before mak- ing connections. Positive (+) Weld Output Terminal Connect work lead to positive weld output terminal. Negative (−) Weld Output Terminal Connect TIG torch to negative weld output terminal. -
Page 24: Stick Dcep Connections And Electrical Service
4-8. Stick DCEP (Direct Current Electrode Positive) Connections 4-9. Electrical Service Guide NOTE Actual input voltage cannot exceed - 10% of minimum or +10% of maximum input voltages indicated in table. Input Voltage Input Amperes At Rated Output Max Recommended Standard Fuse Rating In Amperes Normal Operating Min Input Conductor Size In AWG Max Recommended Input Conductor Length In Feet (Meters) -
Page 25: Connecting Three-Phase Input Power
4-10. Connecting Input Power A. Connecting Three-Phase Input Power = GND/PE Earth Ground Tools Needed: Y Installation must meet all National and Local Codes − have only quali- fied persons make this installation. Y Disconnect and lockout/tagout in- put power before connecting input conductors from unit. -
Page 26: Connecting Single-Phase Input Power
B. Connecting Single-Phase Input Power Tools Needed: OM-2233 Page 20 =GND/PE Earth Ground Y Installation must meet all National and Local Codes − have only quali- fied persons make this installation. Y Disconnect and lockout/tagout in- put power before connecting input conductors from unit. -
Page 27: Process Control
SECTION 5 − OPERATION 5-1. Controls A. Non CE Units NOTE: Green on nameplate indicates a TIG function, Gray indicates a Stick function. Process Controls See Section 5-2. Amperage Control See Section 5-5. DIG Control See Section 5-6. High Temperature Shutdown Light See Section 4-3. - Page 28 B. For CE Units NOTE: Green on nameplate indicates a TIG function, Gray indicates a Stick function. Process Controls See Section 5-2. Amperage Control See Section 5-5. OM-2233 Page 22 DIG Control See Section 5-6. High Temperature Shutdown Light See Section 4-3. Power On/Troubleshooting Help Aids Light See Section 6-3.
-
Page 29: Process Control
5-2. Process Control 5-3. Lift-Arc Start Procedure Lift-Arc Start Method “Touch” Do NOT Strike Like A Match! CE Model 1 − 2 Seconds Process Control Rotate knob up to select the Stick process. Rotate knob down to se- lect the TIG Lift Arc process. Stick (SMAW) - This is a DCEP (di- rect current electrode positive) pro- cess. -
Page 30: Stick Start Procedure − Scratch Start Technique
5-4. Stick Start Procedure − Scratch Start Technique 5-5. Amperage Control 5-6. DIG Control OM-2233 Page 24 With Stick selected, start arc as follows: Drag electrode across workpiece like strik- ing a match; lift electrode slightly after touch- ing work. If arc goes out electrode was lifted to high. -
Page 31: Section 6 − Maintenance And Troubleshooting
SECTION 6 − MAINTENANCE AND TROUBLESHOOTING 6-1. Routine Maintenance 3 Months Replace unreadable labels. 3 Months Repair Or Replace Cracked Cables And Cords 6 Months Y Do not remove case when 6-2. Blowing Out Inside Of Unit Y Disconnect power before maintaining. Maintain more often during severe conditions. -
Page 32: Troubleshooting Help Aids
6-3. Troubleshooting Help Aids All directions are in reference to the front of the unit. All circuitry referred to is located inside the unit. Output LED High Temperature LED The Output LED turns on when power is turned on. The LED is also used to indicate several machine malfunctions. -
Page 33: Troubleshooting
6-4. Troubleshooting Trouble No weld output; unit completely Place line disconnect switch in On position (see Section 4-10). inoperative. Check and replace line fuse(s), if necessary, or reset circuit breaker (see Section 4-10). Check for proper input power connections (see Section 4-10). No weld output;... -
Page 34: Section 7 − Electrical Diagrams
SECTION 7 − ELECTRICAL DIAGRAMS Figure 7-1. Circuit Diagram 202 314-B OM-2233 Page 28... -
Page 35: Selecting And Preparing A Tungsten For Dc Or Ac Welding With Inverter Machines
SECTION 8 − SELECTING AND PREPARING A TUNGSTEN FOR DC OR AC WELDING WITH INVERTER MACHINES Y Whenever possible and practical, use DC weld output instead of AC weld output. 8-1. Selecting Tungsten Electrode ( Electrode Diameter 2% Ceria (Orange Band), 1.5% Lanthanum (Gray Band), Or 2% Thorium (Red Band) Alloy Tungstens .010”... -
Page 36: Section 9 − Guidelines For Tig Welding (Gtaw)
SECTION 9 − GUIDELINES FOR (GTAW) TIG WELDING 9-1. Positioning The Torch 10−15 10−25 3/16 in Bottom View Of Gas Cup Om-2233 Page 30 1/16 in gtaw 7/2006 Y Grinding the tungsten elec- trode produces dust and fly- ing sparks which can cause injury and start fires. -
Page 37: Torch Movement During Welding
9-2. Torch Movement During Welding Tungsten Without Filler Rod Welding direction Form pool Tungsten With Filler Rod Welding direction Form pool 9-3. Positioning Torch Tungsten For Various Weld Joints Butt Weld And Stringer Bead Lap Joint 20-40 Tilt torch Tilt torch Remove rod Move torch to front of pool. -
Page 38: Section 10 − Stick Welding (Smaw) Guidelines
SECTION 10 − STICK WELDING (SMAW) GUIDELINES 10-1. Stick Welding Procedure Tools Needed: OM-2233 Page 32 Y Weld current starts when electrode touches work- piece. Y Weld current can damage electronic parts in vehicles. Disconnect both battery cables before welding on a vehicle. -
Page 39: Electrode And Amperage Selection Chart
10-2. Electrode and Amperage Selection Chart 3/32 6010 5/32 & 3/16 6011 7/32 1/16 5/64 3/32 6013 5/32 3/16 7/32 3/32 5/32 7014 3/16 7/32 3/32 5/32 7018 3/16 7/32 3/32 5/32 7024 3/16 7/32 3/32 Ni-Cl 5/32 3/16 3/32 308L 5/32 10-3. -
Page 40: Positioning Electrode Holder
10-5. Positioning Electrode Holder End View of Work Angle End View of Work Angle 10-6. Poor Weld Bead Characteristics 10-7. Good Weld Bead Characteristics OM-2233 Page 34 10 -30 Side View of Electrode Angle GROOVE WELDS 10 -30 Side View of Electrode Angle FILLET WELDS S-0060 Large Spatter Deposits... -
Page 41: Conditions That Affect Weld Bead Shape
10-8. Conditions That Affect Weld Bead Shape NOTE Weld bead shape is affected by electrode angle, arc length, travel speed, and thickness of base metal. Angle Too Small Too Short Slow 10-9. Electrode Movement During Welding NOTE Normally, a single stringer bead is satisfactory for most narrow groove weld joints; however, for wide groove weld joints or bridging across gaps, a weave bead or multiple stringer beads work better. -
Page 42: Butt Joints
10-10. Butt Joints 10-11. Lap Joint Or Less Single-Layer Fillet Weld 10-12. Tee Joint OM-2233 Page 36 1/16 in (1.6 mm) Or Less Multi-Layer Fillet Weld Or Less Tack Welds Prevent edges of joint from drawing together ahead of electrode by tack welding the materials in position be- fore final weld. -
Page 43: Weld Test
10-13. Weld Test 2 To 3 in (51-76 mm) 1/4 in (6.4 mm) 10-14. Troubleshooting − Porosity Possible Causes Arc length too long. Damp electrode. Workpiece dirty. 10-15. Troubleshooting − Excessive Spatter Possible Causes Amperage too high for electrode. Arc length too long or voltage too high. 2 To 3 in (51-76 mm) Porosity −... -
Page 44: Troubleshooting − Incomplete Fusion
10-16. Troubleshooting − Incomplete Fusion Possible Causes Insufficient heat input. Improper welding technique. Workpiece dirty. 10-17. Troubleshooting − Lack Of Penetration Lack of Penetration Good Penetration Possible Causes Improper joint preparation. Improper weld technique. Insufficient heat input. 10-18. Troubleshooting − Excessive Penetration Excessive Penetration Good Penetration Possible Causes... -
Page 45: Troubleshooting − Burn-Through
10-19. Troubleshooting − Burn-Through Possible Causes Excessive heat input. 10-20. Troubleshooting − Waviness Of Bead Possible Causes Unsteady hand. Use two hands. Practice technique. 10-21. Troubleshooting − Distortion Base metal moves in the direction of the weld bead. Possible Causes Excessive heat input. -
Page 46: Section 11 − Parts List
SECTION 11 − PARTS LIST Hardware is common and not available unless listed. Figure 11-1. Main Assembly 803 107-E OM-2233 Page 40... - Page 47 Item Dia. Part Mkgs....Fig11-2 ..... Fig11-3 .
- Page 48 Hardware is common and not available unless listed. Item Dia. Part Mkgs....194242 ..... 195647 .
- Page 49 Hardware is common and not available unless listed. Item Dia. Part Mkgs....194242 ..... 206053 .
- Page 50 Figure 11-4. Magnetics Assembly w/Components Item Dia. Part Mkgs. Figure 11-4. Magnetics Assembly w/Components (Figure 11-1 Item 3) ....195649 ..
- Page 51 Item Dia. Part Mkgs. Figure 11-4. Magnetics Assembly w/Components (Figure 11-1 Item 3) (Continued) ....213208 ....057357 .
- Page 52 Item Dia. Part Mkgs. Figure 11-5. Windtunnel w/Components (Figure 11-1 Item 4) ....195645 ..... . 198634 .
- Page 53 Figure 11-6. Heat Sink, Secondary Assembly Item Dia. Part Mkgs. Figure 11-6. Heat Sink, Secondary Assembly (Figure 11-5 Item 7) ....210783 ..
- Page 54 Hardware is common and not available unless listed. Item Dia. Part Mkgs. Figure 11-7. Base Assembly (Figure 11-1 Item 5) ....195644 ..
- Page 55 Warranty Questions? LIMITED WARRANTY − Subject to the terms and conditions Call below, Miller Electric Mfg. Co., Appleton, Wisconsin, warrants to 1-800-4-A-MILLER its original retail purchaser that new Miller equipment sold after the effective date of this limited warranty is free of defects in for your local material and workmanship at the time it is shipped by Miller.
-
Page 56: Owner's Record
File a claim for loss or damage during shipment. For assistance in filing or settling claims, contact your distributor and/or equipment manufacturer’s Transportation Department. 2007 Miller Electric Mfg. Co. 2007−01 Miller Electric Mfg. Co. An Illinois Tool Works Company 1635 West Spencer Street Appleton, WI 54914 USA International Headquarters−USA...
Need help?
Do you have a question about the Maxstar 200 STR and is the answer not in the manual?
Questions and answers