
Related Manuals for Miller Electric SuitCase X-TREME 12VS


Summary of Contents for Miller Electric SuitCase X-TREME 12VS
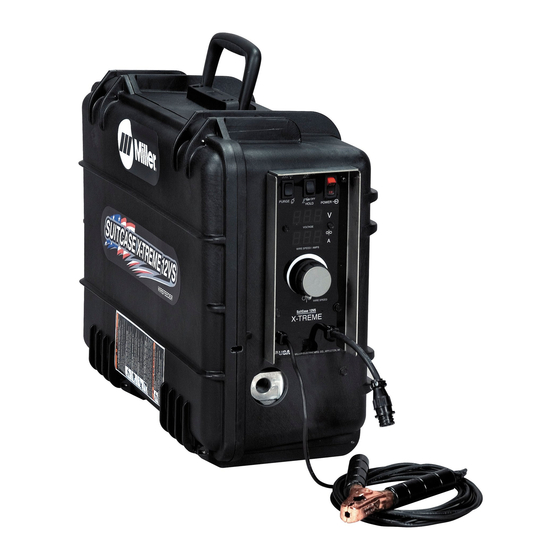
- Page 1 X-TREME 12VS Visit our website at www.MillerWelds.com SuitCase OM-1500-19 219 185P 2007−09 Processes MIG (GMAW) Welding Flux Cored (FCAW) Welding Description Wire Feeder File: MIG (GMAW)
- Page 2 ISO 9001:2000 Quality System Standard. particular model are also provided. Miller Electric manufactures a full line of welders and welding related equipment. For information on other quality Miller products, contact your local Miller distributor to receive the latest full line catalog or individual specification sheets.
-
Page 3: Table Of Contents
TABLE OF CONTENTS SECTION 1 − SAFETY PRECAUTIONS - READ BEFORE USING 1-1. Symbol Usage ............... . 1-2. - Page 4 Declaration of Conformity for European Community (CE) Products This information is provided for units with CE certification (see rating label on unit). Manufacturer: Miller Electric Mg. Co. 1635 W. Spencer St. Appleton, WI 54914 USA Phone: (920) 734-9821 European Contact Signature:...
-
Page 5: Section 1 − Safety Precautions - Read Before Using
DC constant voltage (wire) welder, 2) a DC manual (stick) welder, or 3) an AC welder with reduced open-circuit volt- age. In most situations, use of a DC, constant voltage wire welder is recommended. And, do not work alone! D Disconnect input power or stop engine before installing or servicing this equipment. -
Page 6: Noise Can Damage Hearing
OM-1500-19 Page 2 D Do not use welder to thaw frozen pipes. D Remove stick electrode from holder or cut off welding wire at contact tip when not in use. -
Page 7: Additional Symbols For Installation, Operation, And Maintenance
1-3. Additional Symbols For Installation, Operation, And Maintenance FIRE OR EXPLOSION hazard. D Do not install or place unit on, over, or near combustible surfaces. D Do not install unit near flammables. D Do not overload building wiring − be sure power supply system is properly sized, rated, and protected to handle this unit. -
Page 8: California Proposition 65 Warnings
1-4. California Proposition 65 Warnings Welding or cutting equipment produces fumes or gases which contain chemicals known to the State of California to cause birth defects and, in some cases, cancer. (California Health & Safety Code Section 25249.5 et seq.) Battery posts, terminals and related accessories contain lead and lead compounds, chemicals known to the State of California to cause cancer and birth defects or other... -
Page 9: Section 2 − Consignes De Sécurité − Lire Avant Utilisation
SECTION 2 − CONSIGNES DE SÉCURITÉ − LIRE AVANT UTILISATION Se protéger et protéger les autres contre le risque de blessure — lire et respecter ces consignes. 2-1. Symboles utilisés DANGER! − Indique une situation dangereuse qui si on l’évite pas peut donner la mort ou des blessures graves. Les dangers possibles sont montrés par les symboles joints ou sont expliqués dans le texte. - Page 10 Il reste une TENSION DC NON NÉGLIGEABLE dans les sources de soudage onduleur quand on a coupé l’alimentation. D Arrêter les convertisseurs, débrancher le courant électrique et décharger les condensateurs d’alimentation selon les instructions indiquées dans la partie Entretien avant de toucher les pièces. DES PIÈCES CHAUDES peuvent provoquer des brûlures graves.
-
Page 11: Dangers Supplémentaires En Relation Avec L'installation, Le Fonctionnement Et La Maintenance
ACCUMULATIONS risquent de provoquer des blessures ou même la mort. D Fermer l’alimentation du gaz protecteur en cas de non-utilisation. D Veiller toujours à bien aérer les espaces confi- nés ou se servir d’un respirateur d’adduction d’air homologué. LES CHAMPS MAGNETIQUES peuv- ent affecter des implants médicaux. -
Page 12: Proposition Californienne 65 Avertissements
LES FILS DE SOUDAGE peuvent provoquer des blessures. D Ne pas appuyer sur la gâchette avant d’en avoir reçu l’instruction. D Ne pas diriger le pistolet vers soi, d’autres per- sonnes ou toute pièce mécanique en enga- geant le fil de soudage. DES ORGANES MOBILES peuvent provoquer des blessures. -
Page 13: Principales Normes De Sécurité
2-5. Principales normes de sécurité Safety in Welding, Cutting, and Allied Processes, ANSI Standard Z49.1, de Global Engineering Documents (téléphone : 1-877-413-5184, site Internet : www.global.ihs.com). Recommended Safe Practices for the Preparation for Welding and Cut- ting of Containers and Piping, American Welding Society Standard AWS F4.1 de Global Engineering Documents (téléphone : 1-877-413-5184, site Internet : www.global.ihs.com). - Page 14 OM-1500-19 Page 10...
-
Page 15: Section 3 − Definitions
SECTION 3 − DEFINITIONS 3-1. Warning Label Definitions S-178 936 Warning! Watch Out! There are possible hazards as shown by the symbols. Drive rolls can injure fingers Welding wire and drive parts are at welding voltage during operation − keep hands and metal objects clear. -
Page 16: Manufacturer's Rating Label For Ce Products
3-2. Manufacturer’s Rating Label For CE Products 10.0 3-3. WEEE Label (For Products Sold Within The EU) OM-1500-19 Page 12 S/N: IP 23 Ref. 181 678 / 804 005-A Do not discard product (where ap- plicable) with general waste. Reuse or recycle Waste Electrical and Electronic Equipment (WEEE) by disposing at a designated collec- tion facility. -
Page 17: Symbols And Definitions
3-4. Symbols And Definitions Some symbols are found only on CE products. Output Duty Cycle Input Constant Current Trigger Hold Off Read Instructions Primary Current Notes Input Wire Feed Cold Jog (Inch) To- wards Workpiece Circuit Breaker Trigger Hold On Conventional Load Primary Voltage Amperes... -
Page 18: Section 4 − Installation
SECTION 4 − INSTALLATION 4-1. Specifications Welding Type of Wire Feed Power Input Speed Source Power Range Type Constant 50 − 780 ipm Voltage (CV) Open-Circuit/ (1.3 − 19.8 Arc Voltage, Or Constant mpm) 14 − 110 Current (CC) Depending On DC Power Volts DC Arc Voltage... -
Page 19: Equipment Connection Diagram
4-3. Equipment Connection Diagram Notes Turn Off wire feeder and welding power source. Stop engine generator. Use only with CC/CV DC Power Sources. Constant Current (CC) or Constant Voltage (CV) Welding Power Supply Weld Cable To Feeder Ground Cable To Workpiece Weld cable and ground cable con- nections to power source (DCEN/ DCEP) are dependant on wire type. -
Page 20: Installing And Aligning Wire Guide And Drive Rolls
4-4. Installing And Aligning Wire Guide And Drive Rolls Installing Wire Guide And Drive Rolls Aligning Wire Guide And Drive Rolls Correct Tools Needed: 3/16 in OM-1500-19 Page 16 Incorrect Installing Wire Guide And Drive Rolls: Drive Roll Nut Drive Roll Carrier Turn nut one click until lobes of nut line up with lobes of drive roll carrier. -
Page 21: Connecting Welding Gun And Voltage Sensing Clamp
4-5. Connecting Welding Gun And Voltage Sensing Clamp Internal Side View 4-6. Connecting Shielding Gas Tools Needed: 5/8 in Rear View Turn Off wire feeder and welding power source. Stop engine on welding generator. Gun Securing Knob Gun Block Gun Outlet Wire Guide Loosen knob, insert gun end into block. -
Page 22: Connecting Weld Cable
4-7. Connecting Weld Cable From Wire Feeder 4-8. Weld Cable Sizes Weld Output Terminals Turn off power before connecting to weld out- put terminals. Do not use worn, dam- aged, undersized, or poorly spliced cables. Welding Amperes This chart is a general guideline and may not suit all applications. If cable overheats, use next size larger cable. **Weld cable size (AWG) is based on either a 4 volts or less drop or a current density of at least 300 circular mils per ampere. -
Page 23: Installing And Threading Welding Wire
4-9. Installing And Threading Welding Wire Pull and hold wire; cut off end. Tighten Clockwise WOOD Hold wire tightly to keep it from unraveling. 6 in (150 mm) Installing Wire And Adjusting Hub Tension: Retaining Nut Hub Tension Adjustment Knob Remove retaining ring, and install spool so hub pin fits spool hole. -
Page 24: Display Board (Pc20) Dip Switch Settings
4-10. Display Board (PC20) DIP Switch Settings DIP Switch Factory Settings Indicates Switch does not Affect This Function DIP switch is located behind front panel as shown. OM-1500-19 Page 20 Ref. 804 006-A DIP Switch Settings: Display Hold ON Displays will hold their last value for five seconds after the trigger is re- leased. -
Page 25: Section 5 − Operation
SECTION 5 − OPERATION 5-1. Controls With Meters Internal Side View Front Panel Internal Control Panel Power Control Switch Trigger Hold Switch Trigger hold allows operator to weld without holding gun trigger. To use trigger hold function, place trigger hold switch in the ON position. The operator must hold the trigger for a mini- mum of 2 seconds, but no longer than 6 sec- onds before releasing it. -
Page 26: Controls Without Meters
5-2. Controls Without Meters Internal Side View OM-1500-19 Page 22 Front Panel Internal Control Panel Power Control Switch Jog/Purge Switch Pressing the Jog switch allows the operator to jog wire without energizing the contactor or gas valve. Pressing the Purge switch allows the opera- tor to purge gas lines before welding and to preset gas flow rate at the flowmeter. -
Page 27: Gun Consumables Information
5-3. Gun Consumables Information 200 007-B Notes OM-1500-19 Page 23... -
Page 28: Wire Speed Control Settings
5-4. Wire Speed Control Settings Ref. 222 307A Notes OM-1500-19 Page 24... -
Page 29: Section 6 − Maintenance & Troubleshooting
SECTION 6 − MAINTENANCE & TROUBLESHOOTING 6-1. Routine Maintenance 6-2. Overload Protection And Thermostat Protection Internal Side View Disconnect power before maintaining. 3 Months Replace Damaged Or Unreadable Labels 6 Months Clean Drive Rolls Maintain more often during severe conditions. Replace Damaged Gas Hose Repair Or Replace... -
Page 30: Troubleshooting
6-3. Troubleshooting Trouble Wire does not feed; open-circuit voltage Check circuit breaker CB1. Reset CB1. available. Unit overheated. Allow unit to cool. Check sensing lead connection. Check gun trigger plug connection. Check gun trigger. See gun Owner’s Manual. Have Factory Authorized Service Agent check Control board PC1. Wire feeds erratically. -
Page 31: Diagnostics
Trouble Information on display board is not accu- Have Factory Authorized Service Agent check Control board PC1. Information on display board is not accu rate. Check transducer HD1 and connections, and replace if necessary. Display on display board does not light. Have Factory Authorized Service Agent check Control board PC1. Replace display board. - Page 32 Notes OM-1500-19 Page 28...
-
Page 33: Section 7 − Electrical Diagram
SECTION 7 − ELECTRICAL DIAGRAM 218 763-E Figure 7-1. Circuit Diagram For Wire Feeder OM-1500-19 Page 29... -
Page 34: Section 8 − Parts List
SECTION 8 − PARTS LIST 19 20 25 1 (Fig 8-2) 2 (Fig 8-3) OM-1500-19 Page 30 Figure 8-1. Complete Assembly 63 69 Ref. 804 007-K... - Page 35 Item Diagram Part marking ....Fig 8-2 ....Fig 8-3 .
- Page 36 Item Diagram Part marking ....207 679 ... 226 819 ....222 067 .
- Page 37 Hardware is common and not available unless listed. Figure 8-2. Front Panel Assembly without Meters Item Dia. Part Mkgs Figure 8-2. Front Panel Assembly without Meters (Figure 8-1 Item 1) ... . . 171 007 Knob, Pointer 1.670 Dia X .250 Id W/Set ScrewSplstc .
- Page 38 Hardware is common and not available unless listed. Figure 8-3. Front Panel Assembly with Meters Item Dia. Part Mkgs Figure 8-3. Front Panel Assembly with Meters (Figure 8-1 Item 2) ... . . 179 851 Knob, Pointer 1.670 Dia X .250 Id Push On W/Spring .
- Page 39 Table 8-1. Drive Roll & Wire Guide Kits (2 Drive Roll) Base selection of drive rolls upon the following recommended usages: 1. V-Grooved rolls for hard wire. 2. U-Grooved rolls for soft and soft shelled cored wires. 3. U-Cogged rolls for extremely soft shelled wires (usually hard surfacing types). 4.
- Page 40 Notes Start Your Professional Over 80,000 trained 400 Trade Square East, Troy, Ohio 45373 Welding Career Now! since 1930! 1-800-332-9448 www.welding.org...
- Page 41 Notes SOCKET/WRENCH SELECTION TABLE (U.S. STANDARD) Specifications Socket or Wrench Size Bolt Decimal Bolt Diameter Equivalent 1/4 in .250 in 3/8 in 5/16 in .3125 in 1/2 in 3/8 in .375 in 9/16 in 7/16 in .4375 in 5/8 in 1/2 in .500 in 3/4 in...
- Page 42 Notes MATERIAL THICKNESS GAUGE...
- Page 43 Warranty Questions? LIMITED WARRANTY − Subject to the terms and conditions Call below, Miller Electric Mfg. Co., Appleton, Wisconsin, warrants to 1-800-4-A-MILLER its original retail purchaser that new Miller equipment sold after the effective date of this limited warranty is free of defects in for your local material and workmanship at the time it is shipped by Miller.
-
Page 44: Owner's Record
File a claim for loss or damage during shipment. For assistance in filing or settling claims, contact your distributor and/or equipment manufacturer’s Transportation Department. 2007 Miller Electric Mfg. Co. 2007−01 Miller Electric Mfg. Co. An Illinois Tool Works Company 1635 West Spencer Street Appleton, WI 54914 USA International Headquarters−USA...
Need help?
Do you have a question about the SuitCase X-TREME 12VS and is the answer not in the manual?
Questions and answers