Table of Contents
Advertisement
Quick Links
Advertisement
Table of Contents
Troubleshooting

Related Manuals for Selco Genesis 1700 AC/DC


Summary of Contents for Selco Genesis 1700 AC/DC
- Page 1 MANUALE DI RIPARAZIONE REPAIR MANUAL Genesis 1700 AC/DC Genesis 2200 AC/DC...
- Page 2 Per ogni dubbio o problema circa l’utilizzo della macchina, anche se qui non descritto, consultare personale qualificato. La SELCO s.r.l. si riserva il diritto di apportare modifiche in qualsiasi momento e senza alcun preavviso. Quanto esposto è di vitale importanza e pertanto necessario affinchè le garanzie possano operare.
-
Page 3: Table Of Contents
ENGLISH INDEX 1 WARNING ............114 9.1) Instruments for basic diagnosis ....140 1.1 Work environment ........114 9.2) Repair tools ..........140 1.2 User's and other persons' protection.....114 9.3) Conventions..........140 1.3 Protection against fumes and gases ....115 9.4) Static load ...........141 1.4 Fire/explosion prevention ......115 10) DESCRIPTION OF THE BLOCK DIAGRAM ..142 1.5 Prevention when using gas cylinders ....115 10.1) Input filter ..........143... -
Page 4: Warning
USE AND ROUTINE MAINTENANCE OF POWER SOURCES AND ACCESSORIES, TECHNICAL DATES Use and routine maintenance (excerpt from the "Instructions for use" manual provided with each power source). 1 WARNING Clothes must cover the whole body and must be: - intact and in good conditions Before performing any operation on the machine, - fireproof make sure that you have thoroughly read and... -
Page 5: Protection Against Fumes And Gases
1.5 Prevention when using gas cylinders Before leaving work, make the area safe, in order to avoid accidental damage to people or property. • Inert gas cylinders contain pressurized gas and can explode if 1.3 Protection against fumes and gases the minimum safe conditions for transport, storage and use are not ensured. -
Page 6: Electromagnetic Fields & Interferences
1.7 Electromagnetic fields & In this case it is the responsibility of the installer or user of the interferences equipment to ensure, by consultation with the distribution network operator if necessary, that the equipment may be con- nected. In case of interference, it may be necessary to take further pre- •... -
Page 7: Installation
2 INSTALLATION Installation should be performed only by expert personnel authorised by the manufacturer. In order to protect users, the equipment must be During installation, ensure that the power source correctly earthed. The power supply voltage is pro- is disconnected from the mains. vided with an earth lead (yellow - green), which must be connected to a plug provided with earth contact. -
Page 8: System Presentation
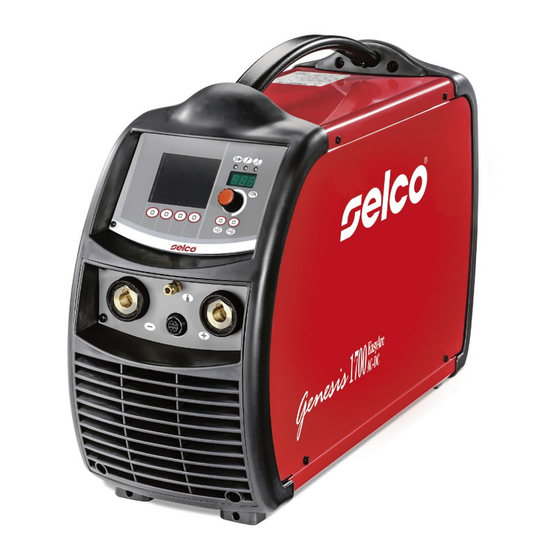
3.1 General readings, while welding, and encoding of the alarms. The Genesis 1700 AC/DC - Genesis 2200 AC/DC are constant LCD display current inverter power sources developed for electrode (MMA), Allows the general welding machine parameters to be TIG DC (direct current) and TIG AC (alternating current) welding. -
Page 9: Main Screen
6 RI Robot interface Allows the selection of the welding process Software versions 8 ON System operation time 9 WELDING System welding time TIG DC At this stage the gas test is also carried out to check the proper connection to the gas supply system. TIG AC 3.4 Main Screen Allows the selection of the welding method... -
Page 10: Set Up
Allows access to the higher set-up levels: USER: user SERV: service Permits set up and adjustment of a series of additional param- SELCO: Selco eters for improved and more accurate control of the welding Info system. Allows the display of a set of information related to the The parameters present at set up are organised in relation to the system. - Page 11 List of set up parameters (TIG) Allows a smooth step to be obtained between the peak Save and quit current and the basic current, having a more or less soft Allows you to save the changes and exit the set up. welding arc.
-
Page 12: Programs Screen
6 Description of the selected program Allows access to the higher set-up levels: Program storage USER: user SERV: service SELCO: Selco Info Allows the display of a set of information related to the system. Alarm queue Allows the intervention of an alarm to be indicated and provides the most important indications for the solution of any problem encountered. - Page 13 Enter the “program storage” menu by pressing button Program retrieval for at least 1 second. Retrieve the 1st program available by pressing button Select the required program (or the empty memory) by rotating the encoder. Program stored Memory empty Cancel the operation by pressing button (2) Save all the current settings on the selected program by pressing button (3) Select the required program by pressing button (4)
-
Page 14: Interface Personalisation
3.7 Interface personalisation 3.9 External controls management Allows the parameters to be customized on the main menu. Allows the setting of the welding parameters management method by the external devices (RC, torch…). Allows the selection of the required graphic interface: XE (Easy Mode) XA (Advanced Mode) XP (Professional Mode) -
Page 15: Fp279 Front Control Panel
3.2 FP279 front control panel 3.3 Main Screen Allows the control of the system and of the welding process, showing the main settings. Measurements During the welding operation, the real current and volt- age measurements are shown on the LCD display. Power supply Indicates that the equipment is connected to the mains 1a Welding current... -
Page 16: Set Up
Current pulsation CONSTANT current PULSED current Fast Pulse Current pulsation CONSTANT current PULSED current AC/DC mix 3.4 Set up VRD Voltage Reduction Device Shows that the no-load voltage of the equip- ment is controlled. Permits set up and adjustment of a series of additional param- Allows the selection of the welding process eters for improved and more accurate control of the welding system. - Page 17 On first pressing the torch button, the pre-gas starts, the arc SERV: service strikes and the initial current will be used when welding. SELCO: Selco On first releasing it, the raising ramp of the welding current Lock/unlock “I1” occurs. If the welder now presses and releases the Allows the locking of the panel controls and the inser- button quickly, “I2”...
- Page 18 Basic current Parameter setting: percentage (%). Permits adjustment of the basic current in pulsed and Minimum 15%, Maximum 65%, Default 35% fast pulse modes. (TIG AC) Fuzzy logic Parameter set in Amps (A). Allows regulation of the power delivered by the system Minimum 3A-1%, Maximum Weld current-100%, during the arc striking phase by selecting the electrode Default 50%...
-
Page 19: Programs Screen
XP (Professional Mode) Allows access to the higher set-up levels: USER: user SERV: service SELCO: Selco Lock/unlock Allows the locking of the panel controls and the inser- tion of a protection code (consult the “Lock/unlock” Allows the storage and management of 64 welding pro- section). -
Page 20: Interface Personalisation
Save all the current settings on the selected program by Only the memories location occupied by a program pressing button (3) are retrieved, while the empty ones are automatically skipped. Program cancellation Introduce a description of the program. - Select the required letter by rotating the encoder. - Store the selected letter by pressing the encoder. -
Page 21: Interface Personalisation
Store the selected parameter in the 7 segment display by pressing button (2) Save and exit the current screen by pressing button (4) Default I1 3.7 Interface personalisation Allows the parameters to be customized on the main menu. Allows the selection of the required graphic interface: Activate the regulation of the selected parameter by pressing the XE (Easy Mode) encoder button. -
Page 22: External Controls Management
3.9 External controls management Allows the setting of the welding parameters management method by the external devices (RC, torch…). Enter the “Guard limits” screen by pressing the encoder button. Select the required parameter by pressing button (1) Select the method of setting the guard limits by pressing button Enter set-up by pressing the encoder key for at least 5 seconds. -
Page 23: Alarms Screen
3.11 Alarms screen Communication alarm (AC/DC) Allows the intervention of an alarm to be indicated and provides the most important indications for the solution of any problem Undervoltage alarm encountered. E39, E40 System power supply alarm Coolant shortage alarm General alarm Alarm icon Guard limits code Alarm code... -
Page 24: Rear Panel
3.12 Rear panel 4.1 General Operation of the remote control is activated when connected to the Selco power sources. This connection can be made also with the system power on. With the RC control connected, the power source control panel stays enabled to perform any modification. -
Page 25: Rc 200 Remote Control
4.5 RC 200 remote control 5 MAINTENANCE Routine maintenance must be carried out on the system according to the manufacturer’s instruc- tions. Any maintenance operation must be performed by qualified personnel only. When the equipment is working, all the access and operating The RC 200 is a remote control unit designed to manage the doors and covers must be closed and locked. - Page 26 Cause Line fuse blown. Cause Humidity in the welding gas. Solution Replace the faulty component. Solution Always use quality materials and products. Ensure the gas supply system is always in perfect Cause Faulty on/off switch. condition. Solution Replace the faulty component. Contact the nearest service centre to have the sys- Cause Incorrect welding parameters.
- Page 27 Porosity Cause Grease, varnish, rust or dirt on the workpieces to be welded. Solution Clean the workpieces carefully before welding. Cause Grease, varnish, rust or dirt on the filler material. Solution Always use quality materials and products. Keep the filler metal always in perfect condition. Cause Humidity in the filler metal.
-
Page 28: Purspose Of The Manual
In order to avoid serious injury to persons or damage to things, this manual must be used only by qualified technicians. Selco S.r.l. accepts no liability for any injury to persons or dam- age to things that may occur during performance of repairs, even after reading or practical application of this manual. -
Page 29: Warnings, Precautions And
8) WARNINGS, PRECAUTIONS AND CAUTION GENERAL NOTICES FOR PERFORMING REPAIRS Repairs must be performed by qualified personnel only. MOVING PARTS Before performing the repair, you should read and assimilate the Keep your hands well away from the fan when the machine contents of this manual, in particular the safety precautions. -
Page 30: Instruments And Conventions For
9) INSTRUMENTS AND CONVENTIONS FOR 9.3) Conventions PERFORMING DIAGNOSIS AND REPAIR By convention, when a measurement has to be taken between two points, for example a b, the arrow point indicates 9.1) Instruments for basic diagnosis where to apply the red tip of the multimeter (a),while the black tip is applied at the other end (b). -
Page 31: Static Load
9.4) Static load Use of grid load can speed up fault tracing and machine test- ing. Just remember that a fixed power resistor applied to machine's output is somewhat equivalent to a welding arc, but only inside of a narrow output voltage range, whose center value can be determined by the formula: STICK WELDING: V OUT = 20 + 0.04 x I OUT... -
Page 32: Description Of The Block Diagram
10) DESCRIPTION OF THE BLOCK DIAGRAM Genesis 1700 AC/DC and 2200 AC/DC - Block diagram a) Master switch b) Varistor c) Input filter d) PFC inductance e) PFC rectifier (Power Factor Corrector) f) DC LINK g) ZVS (Zero Voltage Switching) inverter... -
Page 33: Input Filter
10.1) Filtro d’ingresso When accessing parts inside the machine, The single-phase power supply voltage 230Vac – 50/60Hz is fed remember that opening the circuit-breaker does to the input filter board 15.14.443. not prevent the danger of electric shocks. Varistors are placed between input phase. They are component Therefore: that when on their leads an higher thereshold voltage is applied, IT IS ADVISABLE TO PULL OUT THE POWER PLUG. -
Page 34: Pfc Rectifier
10.2) PFC rectifier The stage rectifier has the task to carry out to the first power con- version and particularly carries out with AC/DC commutation. Stage PFC (Power factor Corrector) allows to rectifier the sinu- soidal input voltage and supply on output a constant dc link. All this absorbing a sinusoidal current that allows to reach a power factor P .F. -
Page 35: Inverter Stage
The inverter provided by Selco for the Genesis 1700AC/DC and Genesis 2200AC/DC machines is a resonant inverter of the Zero Voltage Switching type. Therefore, the switchings of... -
Page 36: Output Stage
10.4) Output stage Output current and voltage on secondary stage are rectifier from full diodes bridge that finally convert into AC/DC charateristic. Up to here the output power is available for welding process and through it, is keep constant, releated to set current value. The power source is AC/DC type and this include a power switch module that invert current sense in both direction. -
Page 37: Switching Power Supply
10.5) Switching power supply Pcb 15.14.42901 and 15.14.439 are assembled power supply card that realized isolated and multi voltage DC supply. Are generated +24Vdc, +15Vdc, +12Vdc, -15Vdc. The common input power supply is keep from 375Vdc bus. -
Page 38: Wu Cooling Group
10.6) WU cooling group Genesis 1700AC/DC and Genesis 2200AC/DC source could be connected to water unit group named WU1000. This allows the use of liquid torch and achieve the best perform- ance from Selco unit. -
Page 39: Start-Up Indication
11) START-UP INDICATION 11.1) External diagnostic indications 1° EDITION (FP216) 2° EDITION (FP279) Power supply Indicates that the equipment is connected to the mains and is on. General alarm Indicates the possible intervention of protection devices such as the temperature protection (consult the “Alarm codes” section). Power on Indicates the presence of voltage on the equipment outlet connections. - Page 40 LCD display Allows the general welding machine parameters to be displayed during start-up, settings, current and voltage readings, while weld- ing, and encoding of the alarms. Allows all the operations to be displayed instantaneously. Processes/functions Let you select the various system functions (welding process, welding mode, current pulse, graphic mode, etc.). Main adjustment handle Allows the welding current to be continuously adjusted.
-
Page 41: Mechanical Inidication
11.2) Mechanical inidication 11.2.1 Panels identification Front view Back view Panels are keeped considering back view. Left side Right side... -
Page 42: Opening Instruction
Left panel view Right panel view 11.2.2 Opening instruction Unscrew Unscrew Once panel removed disconnect ground wire. Disconnect ground wire... -
Page 43: Elements Location And Description Section
11.3) Elements location and description section 11.3.1 Left view 15.18.034 Front panel (15.14.439 & 15.14.517 FP279 15.14.435 15.14.430 15.14.415 15.14.419 15.14.42901) 15.14.431 15.14.343 FP216 Superposition Pcb HP Pcb Digital Pcb Analog Pcb Power supply Pcb Bus Pcb 15.14.444 11.19.013 05.04.235 05.18.005 15.14.423 15.14.422 15.14.443... -
Page 44: Right View
11.3.2 Right view 15.14.434 15.14.461 AC module Secondary 05.03.002 05.02.034 AC comand Pcb Fitting module AC 15.18.036 rectifier HF transformer Power transformer connector Pcb G 1700 AC/DC used 2 diodes G 2200 AC/DC used 4 diodes (diode cod. 14.05.104) -
Page 45: Description, Testing And Replacement Of The Electronic Boards
12) DESCRIPTION, TESTING AND REPLACEMENT OF THE ELECTRONIC BOARDS The normal working conditions of the boards making up the generator are illustrated in the following sections and the standard values are given for the electrical parameters found at the main points of the boards themselves. All the measurements indicated can be made with a digital multimeter. -
Page 46: Input Filter Pcb Ref. 15.14.443
12.1) Input filter pcb ref. 15.14.443 BOARD FUNCTION: the pc board is connected to the input phase AC . As first stage there is a pre-charge through 15ohm resistances that keeps the input power supply from main switch. Initially RL1-2 are contact open ,later via CN1 a signal activate the two relè... - Page 47 Connectors Pcb Logic flow-chart for pre-loading relay Measurement Functional Part Generator/ Component Point Value Type of Notes Mode Measure Power supply 230Vac+15% Filtered power 230Vac+15% supply Input phases CN2/1 CN2/3 230Vac+15% detection Pre-loading relay CN1/1 CN1/2 +24Vdc comand Pre-charge R1 e R2 R1/1 R2/2 30ohm...
- Page 48 SWITCH TEST Functional Part Generator/ Component Point Value Type of Notes Mode Measure Power supply 230Vac+15% Power supply 230Vac+15% Measurement sugge- after switch sted on input filter card.
- Page 49 ATTENTION Switch replacement must be done with unplugged machine. Risk of electric shock due to voltage presence also with main switch in OFF position. 1) Unscrew knob Screw 2) Unscrew two switch screw Switch screws 3) Replace switch dismantling input and output wires (ref. to electric diagram)
-
Page 50: Power Inverter-Pfc Pcb Ref. 15.18.035 (Schede 15.14.422 E 15.14.423)
12.2) Power inverter-pfc pcb ref. 15.18.035 (schede 15.14.422 e 15.14.423) BOARD FUNCTION: this card contains all the power components necessary for complete inverter and PFC group. All the components, three Isotop for PFC stage and one module IMS(Insulated Metal Substrate) for inverter stage ensure total ground isolation with coolers and reduced EMI disturbances. - Page 51 PFC'S POWER COMPONENTS...
- Page 52 PFC STAGE LEDS INDICATIONS PFC's POWER COMPONENTS...
- Page 53 Functional Part Generator/Mode Component Point Value Type of Notes Measure PFC rectifier +0.36Vdc (Power Factor +1.8kohm Corrector) +0.36Vdc +1.8kohm +0.4Vdc Open circuit PFC snubber 94ohm diodes and IGBT 94ohm 94ohm 94ohm PFC comands L1=ON* * L1 and L2 L2=ON* are fast blin- king.
- Page 54 INVERTER STAGE Inverter IMS power module...
- Page 55 Inverter power module G1 = 1 C1 = 2 E1 = 3 21= E2 20= C2 19= G2 G3 = 7 C3 = 8 E3 = 9 15 = E4 14 = C4 13 = G4 Power module equivalent drawing:...
- Page 56 E3 C3 G3 E4 C4 G4 Functional Part Generator/ Component Point Value Type of Notes Mode Measure IGBT Inverter +0.38Vdc * Measure should be +885ohm easier if done on card 15.14.423. +0.36Vdc +885ohm +0.38Vdc +885ohm +0.36Vdc +885ohm...
- Page 57 DRIVER Pcb 15.14.423 Functional Part Generator/ Component Point Value Type of Notes Mode Measure IGBT Inverter +0.38Vdc 885ohm +0.38Vdc 885ohm +0.38Vdc 885ohm +0.38Vdc 885ohm Inverter port ON/MMA L1=ON* * When inverter L2=ON* is active. L3=ON* L4=ON*...
- Page 58 PHOTOS SEQUENCES FOR INVERTER KIT DISMANTLING 1) Remove right/left side panels Remove screws Remove screws 2) Dismantling handle Screws 3) Remove plastic frame, then unscrew two screws Screws...
- Page 59 4) Remove frontal mask and screws 6) Remove bottom panel Screws frontal mask 7) Disconnect flat cables from 15.14.415-15.14.419 to 15.14.422-15.14.423 screws 5) Will be easier and faster remove the front panel Flat 8) Disconnect CN6 CAN BUS cable Ground to bus card connection 15.14.431...
- Page 60 9) Disconnect primary inverter cable to M1 11) Disconnect PFC inductance from RV1 and RV2 PFC inductance 10) Disconnect primary inverter cable to M2 12) Unscrew two fixing with heatsink Screws for pcb fixing...
- Page 61 13) Remove 12 screws from isotop components 12 fixing screws 14) Remove 4 screws that fix inverter module 4 screws for inverter module...
- Page 62 15) Remove pcb PFC's POWER COMPONENTS NTC1 Unscrew, torque screw at 2,2N/mt...
- Page 63 16) New power group replacement - Clean heatsink from thermic grease using alcool. - Spread on module surface thermic component (Selco code 16.03.102). - Positioning new pcb. - Pass input inductance cable through SHL1 and fix to RV1. - Connect the other from inductance to RV2.
- Page 64 DIODES AND PFC IGBT ORIENTATION Landmark for assembling...
-
Page 65: Genesis 1700-2200 Ac/Dc Secondary Power Module And Diodes
Not use mechanical abrasives tools for the removal and cleaning of the heatsink. NOTE: two different model (Genesis 1700-2200 AC/DC) use same power module AC. Otherwise the secondary rectifier use in case of Genesis 1700 AC/DC two diodes and four diodes for Genesis 2200 AC/DC. K1 (D1 E D2) - Page 66 8.2kohm* 47kohm** **CN1 connected on board 15.14.461 +0.38Vdc *CN1 connected on board 15.14.461 8.2kohm* 47kohm** **CN1 connected on board 15.14.461 Secondary diode D1 e D2 +0.2Vdc D3 e D4 +0.2Vdc E1=C2 Genesis 1700 AC/DC Genesis 2200 AC/DC Landmark for assembling...
-
Page 67: Thermic Caps Inverter Side
12.4) Thermic caps inverter side NTC1 CN11... - Page 68 Bus 15.14.431 back side J13/8 J13/7 J13/1 J13/2 Functional Part Generator/ Component Point Value Type of Notes Mode Measure Thermic T3 J3/2 J3/8 0ohm J13 connector remo- ved from 15.14.431 bus board. NTC1 J3/1 J3/7 10kohm@25°C J13 connector remo- ved from 15.14.431 bus board.
-
Page 69: Thermic Caps Secondary Side
12.5) Thermic caps secondary side 15.14.434... - Page 70 Thermics T1 and T2 are series connected: Functional Part Generator/ Component Point Value Type of Notes Mode Measure T1 and T2 CN3/1 CN2/4 0Vdc 0ohm...
-
Page 71: Switching Power Supply Pcb Ref. 15.18.034 (15.14.42901+15.14.439)
12.6) Switching power supply pcb ref. 15.18.034 (15.14.42901+15.14.439) BOARD FUNCTION: from power PFC regulator stage keeps the V/Bus and generate all the necessary auxiliary power supply. Controlled from digital card 15.14.415 ,permit to activate with relative electronic switch the input relè, the fan the gas valve . Powering also R.F. - Page 72 Functional Part Generator/ Component Point Value Type of Notes Mode Measure Mosfet 10kohm +0.45Vdc 10kohm +0.45Vdc +0.45Vdc Diode +0.25Vdc +0.25Vdc +0.25Vdc +0.25Vdc DC LINK CN2/5 CN2/1 +375Vdc Fan command L3=ON When fan is active ELV1 command L2=ON ON when gas valve is active +15Vdc power supply L4=ON...
- Page 73 POWER SUPPLY CARD 15.14.439 Functional Part Generator/ Component Point Value Type of Notes Mode Measure +15Vdc secondary side L1 = ON -15Vdc secondary side L2 = ON -15Vdc primary side L3 = ON +15Vdc primary side L4 = ON...
- Page 74 15.14.439 15.14.42901...
- Page 75 Gas valve flow chart signal Pipe...
- Page 76 Functional Part Generator/ Component Point Value Type of Notes Mode Measure ELV command +2Vdc* *Torch button switch TIG DC +24Vdc** **Torch switch pres- sed. Active for few second if machine is not loaded. Note: ** Torch button pressed. Active for few second if machine is not loaded. GAS VALVE DISMONTLING &...
-
Page 77: Digital Card Pcb Ref. 15.14.415
NOTE: pay attention before replacing card to the software release installed: is recommended to consult menu set-up SERV pwd 358 parameter 501 for information before dismantling. If generator is at first edition (FP 15.22.216) please consult Selco service (service@selcoweld.com). - Page 78 Functional Part Generator/ Component Point Value Type of Notes Mode Measure Machine identification L6 = ON* *This diodes is blinking. Correct L7 = ON** comunication DSP-uC ** This diodes is blinking slowly. Machine identification L8 = ON* *This diodes is blinking.
- Page 79 CN6 15.14.415 CN3 15.14.431 FLAT A FLAT B Inverter commands Boost commands...
- Page 80 By pass relais flow chart Gas valve ELVI Fan M1 and M2 command signal...
- Page 81 HF command signal AC command signal Torch switch buttons signals...
-
Page 82: Analog Signal Pcb Ref. 15.14.419
12.8) Analog signal pcb ref. 15.14.419 BOARD FUNCTION: analog card, the main purpose is to manage all the input and output reading (volt and ampere) in order to isolate and derate the different signal, permitting the management of these signals for the other control unit. Receive Vbus, input voltage, thermic and ntc sensor, output current, output voltage. - Page 83 Input voltage after EMC filter CN1/1 CN1/3 230Vac DC LINK CN2/1 CN2/3 +375Vdc Ref. power supply DC Bus voltage Flat with +15Vdc power supply from input filter card...
-
Page 84: Superimposition Pcb Ref. 15.14.435
12.9) Superimposition pcb ref. 15.14.435 BOARD FUNCTION: receive from digital card the information relative to superimposition driver. The superimposition effect permit to manage the AC switching around the 0 crossing point, against the stopping effect. Trough short volt impulse permit the helping ignition in the sense the arc is moving. In case of DC unit the use of above card permit an double effect on output voltage, useful for strong and sure ARC ignition. - Page 85 Functional Part Generator/Mode Component Point Value Type of Notes Measure Diode +0.45Vdc +0.45Vdc +0.45Vdc +0.45Vdc +0.45Vdc +0.45Vdc +0.45Vdc +0.45Vdc IGBT +0.5Vdc 2.2kohm +0.5Vdc 2.2kohm Diode IGBT +0.5Vdc +0.5Vdc Mosfet +0.55Vdc 100kohm Note: * MF1...
-
Page 86: H.f. Generator Pcb Ref. 15.14.430
12.10) H.F. Generator pcb ref. 15.14.430 BOARD FUNCTION: supply of H.F. for TIG arc ignition. The H.F. is capacitive discharging type. The pc board is powered with 24vdc from auxiliary supply card 15.18.033. LOCATION: 2nd rack system position, between the ac-dc & superimposition card and digital card. The pcb on rack have fix posi- tion, not possible wrong slot placing. - Page 87 Notes: * HF command signal HF WAVEFORM WARNING Use a probe with a minimum attenuation of x100 Red faston White faston...
- Page 88 HF pulse in TIG AC HF pulse in TIG DC...
-
Page 89: Output Module Ac-Dc Driver Pcb Ref. 15.14.434
12.11) Output module AC-DC driver pcb ref. 15.14.434 BOARD FUNCTION: this card realize the final gate’s signal for both power switch of ac-dc module. This card is informed about which bridge switch-on from digital card. Internal circuit in order to clamp overvoltage during ac-dc switching. Receive also the secondary thermostat and NTC ,and transmit the thermal status via bus board to the analogic card then to the digital control card. - Page 90 Functional Part Generator/ Component Point Value Type of Notes Mode Measure Secondary side thermal T2/1 T2/2 0Vdc protection NTC2 NTC2/1 NTC2/2 12kohm* *@T=25°C Mosfet MF1 +0.7Vdc Transistor TR1 e TR4 +0.6Vdc +0.6Vdc TR1 e TR4 +0.6Vdc +0.6Vdc L2=ON This LED is ON L3=OFF - Sitck DC+ - TIG DC...
-
Page 91: Control Panel Pcb Ref. 15.14.343 & 15.14.342
12.12) Control panel pcb ref. 15.14.343 & 15.14.342 BOARD FUNCTION: passive remote control, could be consider as the extension of digital card microprocessor. Show the different parameter and internal set-up menu. The front panel include: Dynamic LCD display, Status Led, Seven segments display, Push button and rotary encoder , four push button used for different enable/disabled function based on display’s contest. -
Page 92: Control Panel Lcd 3.5" Pcb Ref. 15.14.517 (Spare Order Ref. 15.22.273)
12.13) Control panel LCD 3.5” pcb ref. 15.14.517 (spare order ref. 15.22.279) BOARD FUNCTION: passive remote control, could be consider as the extension of digital card microprocessor. Show the different parameter and internal set-up menu. The front panel include: Dynamic LCD display, Status Led, Seven segments display, Push button and rotary encoder , four push button used for different enable/disabled function based on display’s contest, two button for store and recall programs. - Page 93 Functional Part Generator/ Component Point Value Type of Notes Mode Measure Power supply L1=ON Green Alarms L2=OFF Yellow L2=ON in alarm state Output power enable L3=ON MMA or TIG with open circuit voltage with trigger press limitation +5Vdc voltage supply L4=ON +3.3Vdc voltage supply L5=ON...
-
Page 94: Bus Pcb Ref. 15.14.431
12.14) Bus pcb ref. 15.14.431 BOARD FUNCTION: the board contains the bus connectors for the rack’s pcb, realizing intercommunication between them and bringing the various signals through dedicated connectors to external /internal device. Contains a memory circuit for diagnostics and system configuration. - Page 95 HALL PROBE Allows to supply a current signal proportional to the output current. This signal arrive to card 15.14.419 the derate and convert in voltage signal thanks to I/V converter. HALL probe Twisted winding for power supply and Iout signal Output current value could be measured between CN10/7 CN10/3 (CN10 Pcb 15.14.431) using below conversion for- mule:...
- Page 96 For easy measurement is suggest to adapt thin wires placed on connector side and connected to DC digital multimeter. Pay particular attention in order to avoid accidentaly short-circuit between therminals leads. ATTENTION: AVOID TO SHORT CIRCUIT DURING MEASUREMENT. PAY ATTENTION TO NOT DAMAGE CONNECTORS CN10. Pin 10 Pin 9 Pin 8...
- Page 97 SWITCH TORCH AND OUTPUT CONNECTOR CHECK Output connector and switch torch button could be placed on CN7 bus card side. CN7/5 CN7/8 CN7/4 CN7/1 ATTENTION: AVOID TO SHORT CIRCUIT DURING MEASUREMENT. PAY ATTENTION TO NOT DAMAGE CONNECTORS CN7.
- Page 98 Functional Part Generator/ Component Point Value Type of Notes Mode Measure +15Vdc CAN BUS CN7/1 CN7/5 +15Vdc power supply Torch switch ON/TIG CN7/6 CN7/5 +5Vdc* *Torch switch released. +0Vdc** **Torch switch pressed. UP torch switch ON/TIG CN7/2 CN7/5 +5Vdc* * UP torch switch released.
-
Page 99: Output Filter Pcb Ref. 15.14.444
12.15) Output filter pcb ref. 15.14.444 BOARD FUNCTION: filtering and bypassing for: output studs,input remote amphenol. Source for the voltage feedback via analogic board. Source for dummy load resistor and remote control. LOCATION: assembled on front plastic profile. DISMANTLING NOTE: the pcb is fixed on plastic profile with two screws; connector CN1-2-3 and winding to be removed. The replacement will be easier if front command display and plastic frontal mask will be removed. - Page 100 Functional Part Generator/ Component Point Value Type of Notes Mode Measure Output voltage (measu- ON/MMA CN10 CN1/10 CN1/3 +80Vdc red in open circuit volta- ge MMA) +15Vdc CAN BUS CN4/1 CN4/5 +15Vdc power supply Torch switch ON/TIG CN4/6 CN4/5 +5Vdc* *Torch switch released.
- Page 101 FAN REPLACEMENT 3) Unscrew fan 1) Dismontling rear back panel Screws Screws Screws 4) Remove and replace fan 2) Disconnect connector CN14 or CN15 from bus 15.14.431 15.14.431 Connectors for fan power supply...
-
Page 102: Calibrations
13) CALIBRATIONS Calibrations procedure Following description is for calibration procedure, for offset signal and gain signal. The offset calibration (set.up 704) should be performed in case of complete or partial sw reflashing , or in case the measurement in no load circuit are different from “0”. The calibration is not required in case of pcb replacement (boards are just Factory cali- brated) or first customers setting. -
Page 103: Alarms Troubleshooting
14) ALARMS TROUBLESHOOTING Alarms Description Possible cause Checks Temperature alarm 1 NTC primary side alarm. - If the alarm is tripped for a temperature rise due to extra duty cycle working time at high currents, wait for the coo- ling of the generator. With the generator turned on, the fans work to speed up the cooling of the generator. - Page 104 Control software release sting stored program. (par.501 pwd 358 set.up serv) contact service Selco. - Repair pcb 15.14.415. Communication alarm 15.14.415 internal failure. Control software release (μP-DSP) Wrong software download. (par.501 pwd 358 set.up serv), update software, reset, 15.14.415 repair.
- Page 105 Coolant shortage alarm Lack coolant liquid WU. - Fill liquid on WU. Perform check as per WU repair manual. General alarm The machine status is not reco- - Check pcb status, in case gnize. of pcb replacement consult Service Selco.
-
Page 106: Guard Limits Code
14.1) Guard limits code This section shown possible alarm screen due to "guard-limits" selection, parameters 802-803-804. Cause and troubleshooting is intrin- sic to the alarm description. Exceeding warning alarm a visual screen message appear. Exceeding alarm threshold cause visual message and complete block of welding process. In end out time filter avoid wrong signal due to start and stop welding process. -
Page 107: Advanced Set-Up (Cod. 358 Menu' Serv)
15) ADVANCED SET-UP (cod. 358 menu' Serv) 15.1) List of set up parameters (MMA) (Hot start) Slope-up Minimum 0.01s, Maximum 2.00s, Default 0.08s (Hot start) Slope-down Minimum 0.01s, Maximum 2.00s, Default 0.80s (MMA) AC wave form Allows the selection of the required AC wave form. Default (MMA) AC frequency Allows regulation of the polarity inversion frequency in TIG AC welding. -
Page 108: List Of Set Up Parameters (Tig)
15.2) List of set up parameters (TIG) Short circuit current (lift start) Parameter setting: Amperes (A). Minimum 3A, Maximum Imax, Default 30A Start current (HF start) Parameter setting: Amperes (A). Minimum 3A, Maximum Imax, Default TIG DC 100A, Default TIG AC 30A Arc detachment voltage Allows you to set the voltage value at which the electric arc switch-off is forced. -
Page 109: Info" Screen
Offset calibration Lets you calibrate the system. Do not perform calibration in MMA mode. Short circuit the system’s connectors. Press the encoder knob to perform calibration. Repeat the calibration process if you update the software (DSP). Repeat the calibration process if you change the control card (DSP). Read filter (guard thresholds) Lets you filter current and voltage readings. -
Page 110: Technical Specifications
16) TECHNICAL SPECIFICATIONS GENESIS 1700 AC/DC GENESIS 2200 AC/DC Power supply voltage U1 (50/60Hz) 1x230V/115V ±15% 1x230V/115V ±15% Zmax (@PCC) 349mΩ 275mΩ Slow blow line fuse 16A/25A 20A/30A Communication bus DIGITAL DIGITAL Maximum input power (kVA) 5 kVA 6.4 kVA... - Page 111 17) TARGA DATI, RATING PLATE Prodotto europeo European product Erzeugt in Europa Produit d’Europe Producto Europeo Non collocare l'apparecchiatura elettrica tra i normali rifiuti! Ne pas éliminer les équipements électriques avec les déchets ménagers ! In osservanza alla Direttiva Europea 2002/96/EC sui Rifiuti di Apparecchiature En application de la Directive Européenne 2002/96/EC relative aux déchets Elettriche ed Elettroniche e alla sua implementazione in accordo con le leggi d'équipements Electriques et Electroniques et de son implémentation...
- Page 112 18) SIGNIFICATO TARGA DATI DEL GENERATORE, MEANING OF POWER SOURCE RATING PLATE ITALIANO ENGLISH Marchio di fabbricazione Trademark Nome ed indirizzo del costruttore Name and address of manufacturer Modello dell’apparecchiatura Machine model N° di serie Serial no. Simbolo del tipo di saldatrice Welding unit symbol Riferimento alle norme di costruzione Reference to construction standards...
- Page 113 19) SCHEMI ELETTRICI E DI COLLEGAMENTO, WIRING DIAGRAMS AND CONNECTION GENESIS 1700 AC/DC (FP279)
- Page 114 GENESIS 2200 AC/DC (FP279)
- Page 115 GENESIS 1700 AC/DC (FP216)
- Page 116 GENESIS 2200 AC/DC (FP216)
- Page 117 Filo N°/ Descrizione Description n° Wire Fase U Phase U Fase V Phase V +15Vdc sonda HALL +15Vdc HALL sensor -15Vdc sonda HALL -15Vdc HALL sensor Iout sonda HALL Iout HALL sensor GND_sec GND_sec Vout+ Vout+ NTC1/1 NTC1/1 NTC1/2 NTC1/2 Termico T3/1 Thermal Protection T3/1 Termico T3/2...
- Page 118 20) CONNETTORI, CONNECTORS GENESIS 1700 AC/DC (FP279) GENESIS 2200 AC/DC (FP279)
- Page 119 GENESIS 1700 AC/DC (FP216) GENESIS 2200 AC/DC (FP216)
- Page 120 21) LISTA RICAMBI, SPARE PARTS LIST GENESIS 1700 AC/DC (FP279) 55.08.013 55.08.014 GENESIS 2200 AC/DC (FP279)
- Page 122 GENESIS 1700 AC/DC (FP216) 55.08.022 55.08.023 GENESIS 2200 AC/DC (FP216)
Need help?
Do you have a question about the Genesis 1700 AC/DC and is the answer not in the manual?
Questions and answers