Table of Contents
Advertisement
INSTRUCTION MANUAL
IMPORTANT INFORMATION
GB
sure you understand them before using this unit. Retain these instructions for future
reference.
MANUEL D'INSTRUCTIONS
RENSEIGNEMENTS IMPORTANTS:
FR
atentivement les instructions et assurez- -vous de les avoir comprises. Conservez
les instructions pour référence ultérieure.
BETRIEBSANWEISUNG
WICHTIGE INFORMATION:
DE
Geräts aufmerksam durch. Verwenden Sie es erst, wenn Sie sicher sind, daß Sie
alle Anweisungen verstanden haben und gut aufbewahren.
MANUAL DE INSTRUCCIONES
INFORMACIÓN IMPORTANTE:
ES
asegúrese de entenderlas antes de utilizar esta aparato. Conserve las instruc-
ciones para la referencia en el futuro.
LIBRETTO D'ISTRUZIONI
INFORMAZIONI IMPORTANTI
IT
istruzioni e prendere dimestichezza con il prodotto prima di usario. Mantenga
queste istruzioni per riferimento futuro.
HANDLEIDING
BELANGRIJKE IMPORTANTS:
NL
zeker van dat uze begrijpt alvorens de blower te gebrulken en bewaar ze voor
toekomstige raadpleging.
: Please read these instructions carefully and make
Avant d'utiliser cet appareil, veuillez lire
Lesen Sie diese Hinweise zur Handhabung des
Lea atentamente las instrucciones y
: Siete pregati di leggere attentamente questo
Lees deze instructies zorgvuldig en wees er
545186718
Rev. 2 4/15/09 BRW
Advertisement
Table of Contents

Related Manuals for McCulloch MAC GBV 345


Summary of Contents for McCulloch MAC GBV 345
- Page 1 Mantenga queste istruzioni per riferimento futuro. HANDLEIDING BELANGRIJKE IMPORTANTS: zeker van dat uze begrijpt alvorens de blower te gebrulken en bewaar ze voor toekomstige raadpleging. : Please read these instructions carefully and make Avant d’utiliser cet appareil, veuillez lire...
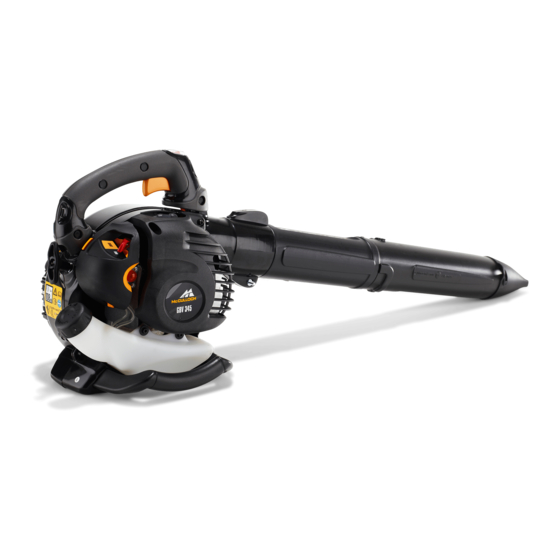
- Page 2 Use your unit as a blower for: Sweeping debris or grass clippings from driveways, sidewalks, patios, etc. Blowing grass clippings, straw, or leaves into piles, around joints, or between bricks.
- Page 3 Keep children, bystanders, and animals away from work area a minimum of 15 meters when starting or operating unit. Do not point blower nozzle in the direction of people or pets. HANDLE FUEL WITH CAUTION Eliminate all sources of sparks or flame...
- Page 4 A standard screwdriver is required for as- sembly. BLOWER ASSEMBLY BLOWER TUBE ASSEMBLY 1. Align the rib on the upper blower tube with the groove in the blower outlet; slide the tube into place. NOTE: The tube clamp bolt must be loose enough to allow blower tube to be inserted in blower outlet.
- Page 5 Blower Outlet Groove 2. Secure the tube by turning the bolt clock- wise. 3. Align the slots on the lower blower tube with the tabs on the upper blower tube. Upper Blower Tube Lower Blower Tube Tube clamp bolt and nut Slot 4.
- Page 6 2. Remove the vacuum tubes by turning the tubes clockwise. 3. Close the vacuum inlet cover and make sure it is latched closed. 4. Reinstall the blower tubes (see BLOWER TUBE ASSEMBLY). SHOULDER STRAP ADJUSTMENT 1. Hold the unit as shown with the muffler side facing away from your body and clothes.
- Page 7 2-cycle air-cooled engine oil. We recommend McCulloch brand oil mixed at a ratio of 40:1 (2.5%). A 40:1 ratio is obtained by mixing 5 liters of unleaded petrol with 0,125 liter of oil.
- Page 8 WARNING: When starting engine, hold the unit as illustrated. Do not set unit on any surface except a clean, hard area when starting engine or while engine is running. De- bris such as gravel, sand, dust, grass, etc. could be picked up by the air intake and thrown out through the discharge opening, damaging the unit or property, or causing seri- ous injury to bystanders or the operator.
- Page 9 MAINTENANCE WARNING: Avoid touching muffler unless engine and muffler are cold. A hot muffler can cause serious burns. WARNING: Disconnect the spark plug before performing maintenance except for carburetor adjustments. CHECK FOR LOOSE FASTENERS AND PARTS S Muffler S Spark Plug Boot S Air Filter S Housing Screws CHECK FOR DAMAGED OR...
- Page 10 Muffler Cover Spark Arresting Screen Screws Replace the spark arresting screen every 50 hours of operation or if any damage or breaks in the screen are noted. NOTE: Do not attempt to clean the spark arresting screen. 1. Remove 3 screws from muffler cover. Remove muffler cover.
- Page 11 TROUBLESHOOTING TABLE WARNING: Always stop unit and disconnect spark plug before performing any of the recommended remedies below other than remedies that require operation of the unit. TROUBLE CAUSE 1.Engine flooded. Engine will not 2.Fuel tank empty. start. 3.Spark plug not firing. 4.Fuel not reaching carburetor.
-
Page 12: Technical Data
We, Husqvarna AB, SE- -561 82 Huskvarna, Sweden, Tel: +46- -36- -146000, as authorised representative in the Community, declare that the leaf blower model McCulloch Mac GBV 345 from serial numbers 2009- -031N00001 and onwards (the year is clearly stated on the rating plate, followed by the serial number), comply with the requirements of the COUNCIL’S...
Need help?
Do you have a question about the MAC GBV 345 and is the answer not in the manual?
Questions and answers